Preparing Walls For Painting Strip Coverings, What Pros Say
Are you looking to give your walls a fresh, new look by applying a fresh coat of paint? One crucial step in achieving flawless results is preparing your walls by stripping the existing coverings. In this guide, we will walk you through every essential step to make sure your walls are in perfect condition before you start painting.
Preparing walls for painting strip coverings:
To prepare walls for painting, start by removing existing wallpaper or other coverings. Repair any damages such as cracks, holes, or dents using patching compound or spackle. Clean the walls with a sponge and mild soapy water, removing any remaining adhesive residue with wallpaper adhesive remover or fine-grit sandpaper. Prime the walls with a suitable primer, mask off adjacent surfaces with painter’s tape, and then proceed with painting.

Ready to give your walls a fresh coat of paint? Don’t skip the crucial step of properly preparing the surface!
In this section, we’ll guide you through the process of stripping old coverings, repairing imperfections, and creating a smooth canvas for a professional finish. Read on to learn all the tricks and transform your space in no time!
Contents
- 1 Ready Your Walls for Painting: Removing Coverings
- 2 Steps to Prepare a Stripped Wall for a Paint Job
- 3 Expert Wall Preparation Techniques Used by Painters
- 4 Getting Walls Paint-Ready after Wallpaper Removal
- 5 Protective Wall Coverings to Use Prior to Painting
- 6 Essential Wall Preparation Steps Before Painting
- 6.1 • The Importance of Wall Preparation
- 6.2 • Tools and Materials Needed
- 6.3 • Step 1: Clear the Room and Protect Your Floors
- 6.4 • Step 2: Remove Loose Debris and Dust
- 6.5 • Step 3: Clean the Walls
- 6.6 • Step 4: Patch and Repair Imperfections
- 6.7 • Step 5: Sand the Walls
- 6.8 • Step 6: Apply a Primer
- 6.9 • The Final Verdict
- 7 Importance of Sanding Walls Prior to Painting
Ready Your Walls for Painting: Removing Coverings
• Step 1: Remove Existing Wall Coverings
Before you begin the process of painting your walls, it is essential to remove any existing wallpaper, borders, or other coverings.
Not only will this make the process easier, but it will also ensure that the paint adheres properly to the walls and provides a clean, professional finish.
To remove wallpaper, you can either use a wallpaper steamer or a wallpaper stripping solution. Both methods are quite effective; however, a steamer might be a better option if you’re dealing with older adhesives.
• Step 2: Repair any Damages
After removing wall coverings, inspect the walls for any damages, such as cracks, holes, or dents. If you find any damages, it is crucial to repair them before painting to achieve a smooth, even finish.
Small cracks and holes can be easily repaired with patching compound or spackle. Apply the compound using a putty knife and allow it to dry completely before moving on to the next step.
For larger holes or damage, it may be necessary to cut out the damaged area and install a patch of the same material before filling any gaps with the compound. Always be sure to follow the manufacturer’s instructions for best results.
• Step 3: Clean the Walls
Once the repairs are complete, it’s time to clean the walls. This step is crucial to ensure that the new paint adheres properly and appears smooth and even.
Use a clean sponge and mild, soapy water to wipe down the walls, removing any dust, dirt, or debris that may have accumulated during the removal and repair process.
If there is any remaining wallpaper adhesive residue on the walls, use a wallpaper adhesive remover to eliminate it. You can also use fine-grit sandpaper to gently sand the walls, which will help remove any remaining residue and create a slightly rough surface for the paint to adhere to.
• Step 4: Prime the Walls
Priming is an essential step in preparing walls for painting, as it ensures proper paint adhesion, coverage, and durability. Use a quality primer specifically designed for interior walls, following the manufacturer’s instructions for application.
When choosing a primer, consider the type of paint you plan to use and the color you’ve selected. For example, if you’re using latex-based paint, select a latex-based primer. Additionally, if you’re painting a dark color, choose a tinted primer to help achieve better coverage with fewer coats of paint.
• Step 5: Mask Off Adjacent Surfaces
To ensure clean edges and protect neighboring surfaces, use painter’s tape to mask off baseboards, crown molding, door and window frames, and any other areas that should remain paint-free. Press the tape firmly against the surface to create a secure seal and prevent paint from seeping underneath.
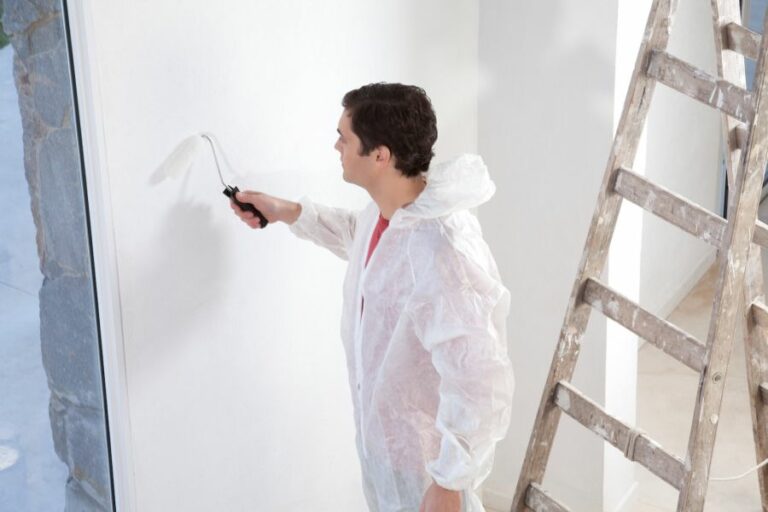
• Step 6: Cut in and Paint
Now that your walls are adequately prepared, it’s time to begin the painting process. Start by “cutting in” the edges and corners of the walls using a smaller, angled brush.
This technique involves painting a narrow strip along the edges and corners, ensuring a clean finish that the roller may not be able to reach.
Once the edges and corners have been cut in, use a paint roller to apply the paint to the walls in smooth, even strokes.
Depending on the paint’s color and type, it may be necessary to apply multiple coats to achieve full coverage. Be sure to allow each coat of paint to dry thoroughly before applying additional coats.
• Conclusion
By following these steps for preparing walls for painting, you’ll ensure a beautiful, long-lasting finish that transforms your space.
The key is to take the time needed to properly remove wall coverings, repair any damages, clean the walls, and prime the surface. With proper preparation, your walls will be ready for a fresh new coat of paint that lasts for years to come.
Steps to Prepare a Stripped Wall for a Paint Job
• Introduction
Painting a stripped wall can be a daunting task, but with the right preparation and tools, you can achieve professional-looking results. This step-by-step guide will walk you through the process of preparing a stripped wall for painting, ensuring a smooth, long-lasting finish.
• Removing Residual Wallpaper and Adhesive
– Materials and Tools
- Putty knife
- Warm water
- Sponge or cloth
- Bucket
– Procedure
- Gather materials and tools: Gather the necessary materials and tools to help you effectively remove any residual wallpaper and adhesive from the wall.
- Moisten the wall: Dampen the wall by applying warm water using a sponge or cloth. This will help to soften and loosen any residual adhesive.
- Scrape off remaining wallpaper and adhesive: Use a putty knife to carefully scrape off any remaining wallpaper and adhesive residue. Be sure to work in small sections to avoid damaging the wall surface.
- Clean and rinse: Once all the wallpaper and adhesive have been removed, clean the wall surface with a damp cloth to remove any remaining residue. Rinse with clean water to ensure a clean surface for painting. Allow the wall to dry completely before proceeding to the next step.
• Repairing Wall Surface Imperfections
– Materials and Tools
- Joint compound
- Putty knife
- Sandpaper (120-150 grit)
- Dust mask
- Protective eyewear
- Drop cloth
– Procedure
- Identify imperfections: Inspect the stripped wall for any imperfections, such as holes, dents, or cracks, that may need to be repaired before painting.
- Apply joint compound: Fill in any imperfections using a putty knife and joint compound. Spread a thin layer of the compound over the area, applying additional layers if needed until the surface is smooth and even. Allow the joint compound to dry according to the manufacturer’s instructions.
- Sand the surface: Once the joint compound is dry, sand the area using 120-150 grit sandpaper. Make sure to wear a dust mask and protective eyewear to protect yourself from dust particles. Sand the surface until it is smooth and blends seamlessly with the surrounding wall.
- Clean up: Remove all dust and debris from the wall surface by wiping it down with a damp cloth. Ensure the wall is completely dry before moving on to priming.
• Priming the Wall
– Materials and Tools
- Primer
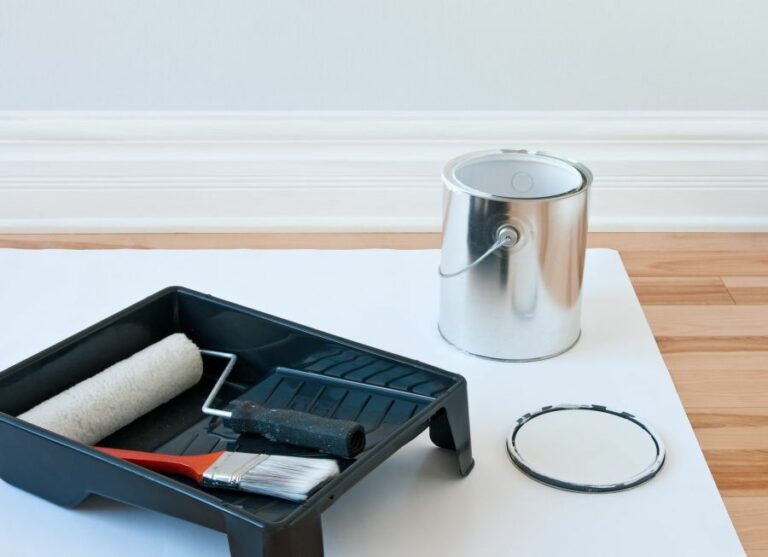
- Paintbrushes and/or paint roller
- Roller extension pole
- Paint tray
- Drop cloth
- Painter’s tape
– Procedure
- Gather materials and tools: Assemble all the necessary materials and tools to effectively prime your stripped wall.
- Protect surrounding areas: Lay down a drop cloth to protect your flooring, and use painter’s tape to mask off any edges, trim, or fixtures that you want to keep paint-free.
- Pour primer into paint tray: Pour your chosen primer into a paint tray, adequately saturating your paintbrush or roller.
- Apply primer to the wall: Apply a coat of primer to the wall, either using a paintbrush for edges and corners or a paint roller for larger areas. Be sure to use a roller extension pole for hard-to-reach areas.
- Allow the primer to dry: Allow the primer to dry according to the manufacturer’s instructions before moving on to painting. A properly primed wall will ensure a smooth and even finish.
• Final Thoughts
Properly preparing a stripped wall for painting is a crucial step in achieving a professional-looking result. By carefully removing residual wallpaper and adhesive, repairing any surface imperfections, and applying a quality primer, you can ensure a lasting, flawless finish.
Following this comprehensive guide will help you achieve the desired look in your space, setting the foundation for a successful painting job.
Step | Description |
|---|---|
1 | Remove any remaining wallpaper, adhesive, or debris from the wall. |
2 | Fill any holes, cracks, or imperfections with a suitable filler or joint compound. Let it dry according to the manufacturer’s instructions. |
3 | Lightly sand the wall with fine-grit sandpaper to remove any remaining residue and to create a smooth surface. |
4 | Wipe down the wall with a damp cloth to remove any dust or debris created during sanding. |
5 | Apply a coat of primer to the wall, allowing it to dry according to the manufacturer’s instructions. This will help to create an even surface for painting and improve paint adhesion. |
6 | Begin painting the wall with your desired color using a brush or roller. Apply multiple coats if necessary, allowing each coat to dry before applying the next one. |
Expert Wall Preparation Techniques Used by Painters
Preparing walls for painting is a crucial step that ensures the durability and attractiveness of the paint job. Professional painters ensure that the walls are clean, even, and well-prepared to achieve the best possible results.
• Assessing the Wall Condition
The first step in wall preparation is to assess the condition of the walls. Professional painters look for any damage, like cracks, holes, water damage, or mold. If required, they tackle these issues before initiating the painting process.
They fill the cracks with a joint compound, and if there is extensive damage, they might suggest replacing a section of the drywall or applying a plaster coat.
• Cleaning the Walls
Ensuring the walls are clean is vital for the paint to adhere properly. Professional painters start by removing dirt, dust, grease, and other types of grime using a warm water and soap solution.
They might also use a degreasing agent if there is any heavy grease present on the walls. In the case of mold, they use a bleach and water solution to kill the mold spores and prevent further growth.
It is essential to pay attention to any loose paint and remove it using a scraper before beginning the cleaning process. Once the walls have been cleaned and treated for mold, professional painters let them dry thoroughly before proceeding to the next step.
• Sanding the Walls
To create an even and smooth surface, professional painters sand the walls. They use sandpaper, usually in the range of 120 to 150 grit, and sand the entire wall surface.
Sanding helps remove any imperfections, rough spots, and uneven areas, ensuring the paint will adhere uniformly.
During the sanding process, professionals also focus on areas where the joint compound has been applied to mend cracks or fill holes.
They sand these areas to ensure that they are flush with the rest of the wall surface. After sanding, use a cloth or vacuum to remove any dust from the walls.
• Applying Primer
Priming is a fundamental part of the wall preparation process. Professional painters apply a coat of primer to seal the surface and create a consistent base for the paint to adhere to. Priming also helps in bringing out the true color of the paint and enhances its durability.
There are different types of primers available, and professional painters choose the suitable one depending on the wall surface and the type of paint being used. Some of the common types of primers include oil-based, latex-based, and shellac-based primers.
Pro Tip: If you’re painting over a dark color or the wall has significant stains, consider using a high-hide or stain-blocking primer to ensure even and uniform coverage of the topcoat.
• Taping and Protecting Adjacent Areas
Before starting the painting process, professional painters take measures to protect adjacent areas from paint splatters and drips.
They use painter’s tape to mask off baseboards, trim, windows, and other surfaces that are not to be painted. The tape should be applied carefully, ensuring a firm seal along the edges to prevent paint from seeping underneath.
In addition to taping, drop cloths, plastic sheets, or masking paper are placed on the floor and other surfaces, like furniture, to protect them from paint drips and splatters.
• Preparing the Paint
Once the walls are prepped and the adjacent areas are protected, professional painters prepare the paint. They begin by stirring the paint well to ensure uniformity in color and consistency.
If more than one can of paint is being used, professionals often mix the cans to maintain color consistency throughout the project.
Recommendation: If you’re using paint that has been stored for a while, consider straining it through a paint strainer to remove any solid particles or lumps before application.
Following these essential steps, professionals can now proceed with applying the paint, confident in the knowledge that the well-prepared wall surface will result in a flawless and long-lasting paint job.
Following these steps in your DIY painting projects can significantly enhance the final outcome and give you a professional-quality result.
Getting Walls Paint-Ready after Wallpaper Removal
• Step 1: Assess the Wall Condition
Before starting the preparation process, it’s essential to assess your walls’ condition to determine which steps are necessary for the best results.
Look for any remaining wallpaper residue, adhesive, damaged drywall, or mold and mildew. Identifying these issues will guide you through the proper treatment and preparation process.
• Step 2: Remove Wallpaper Residue
To ensure your walls are ready for a fresh coat of paint, make sure to remove any remaining wallpaper residue.
You can do this using a wallpaper scraper or a putty knife to gently scrape away any remaining debris. Be careful not to damage the wall while removing the residue.
For stubborn wallpaper remnants, a wallpaper steamer or a homemade solution of warm water and vinegar (1:1) may help.
Use a spray bottle or sponge to apply the solution to the wall and allow it to penetrate before scraping off the residue. Patience is key during this step, as rushing may lead to damage.
• Step 3: Clean the Walls
Thoroughly clean the walls using a solution of warm water and mild soap. This will help remove any remaining glue or adhesive from the wallpaper, which could potentially cause the paint to peel or bubble later on.
Use a sponge or cloth and avoid soaking the walls. Be sure to rinse the walls with clean water to remove any leftover soap residue.
It is important to allow the walls to dry completely before proceeding to the next steps. This may take anywhere from a few hours to a full day, depending on the room’s humidity and ventilation.
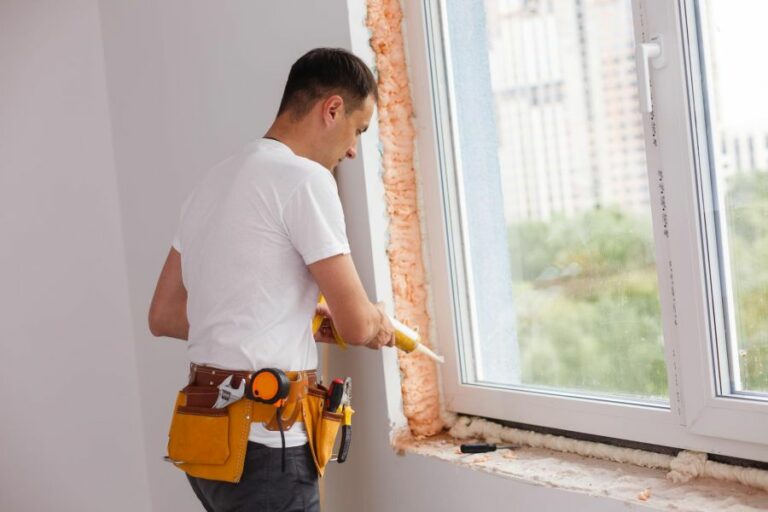
• Step 4: Repair Damaged Drywall
Inspect your walls for any dents, nail holes, or other forms of damage caused during the wallpaper removal process. Repairing these imperfections is critical, as they will show through the new paint job if not addressed.
To fix small holes or dents, use a spackling compound and a putty knife to fill the gaps. For larger damages, use a patch kit available at your local hardware store. Follow the manufacturer’s instructions for the best results.
Once the repair materials have dried according to the instructions, sand the repaired areas with fine-grit sandpaper to create a smooth surface. Wipe the area clean with a damp cloth to remove any dust.
• Step 5: Seal the Walls
For optimal paint adhesion, apply a primer sealer to the entire wall surface. This will not only provide a clean, even foundation for the paint but will also prevent any remaining wallpaper adhesive from causing problems during the painting process.
Look for a high-quality primer that is specifically designed for painting over wallpaper adhesive, such as Zinsser Gardz. Apply the primer using a brush or roller and allow it to dry according to the product’s instructions.
• Step 6: Sand the Walls
After the primer has dried, lightly sand the walls with fine-grit sandpaper for a smooth, even surface. This step ensures the paint adheres and looks flawless upon completion.
Remember to clean the walls of any dust generated from the sanding process by wiping them with a damp cloth or sponge. Allow the walls to dry before moving on to the next step.
• Step 7: Apply the Paint
Now that your walls are primed and ready, it’s time to apply the paint. Use high-quality paint recommended by the professionals and follow the manufacturer’s instructions for the best results.
To achieve a professional-looking finish, apply the paint using a brush for edges and corners and a roller for larger, flat areas.
• Step 8: Final Inspection & Cleanup
Once the paint has dried, inspect your walls for any imperfections. If necessary, apply additional coats of paint or touch-up areas where needed. Finally, clean your tools and dispose of any paint and debris according to local regulations.
In conclusion, by following these steps, you can successfully prepare your walls for painting after removing wallpaper. The key is attention to detail during the preparation process, which will result in a professional, long-lasting paint job.
Step | Instructions |
|---|---|
1 | Remove all wallpaper residue and adhesive using a scraper or a damp sponge. |
2 | Clean the walls thoroughly using a solution of warm water and mild detergent. |
3 | Dry the walls completely and ensure there’s no remaining moisture. |
4 | Inspect the walls for any flaws, such as cracks, holes, or damaged areas. |
5 | Repair any flaws by applying joint compound, sanding, and repeating as necessary. |
6 | Prime the walls using a high-quality primer, which will help seal any remaining adhesive and provide a good base for the paint. |
7 | After the primer dries completely, lightly sand the surface to ensure a smooth finish. |
8 | Remove any dust with a tack cloth or damp sponge, and let the walls dry completely. |
9 | Apply the paint using a high-quality paintbrush or roller, following the manufacturer’s instructions for coverage and drying time. |
Protective Wall Coverings to Use Prior to Painting
Painting walls can be an effective way to give your living space a fresh new look. However, the key to a flawless finish is proper preparation.
• Cleaning the Walls
Before you start any prep work, it is essential to clean your walls thoroughly. Dirt, grease, and oil can cause paint to adhere poorly to the wall surface.
- Wipe Down Walls: Start by wiping down the walls with a duster or a soft, damp cloth to remove surface dust and dirt.
- Clean Greasy Spots: For more stubborn stains, mix a solution of warm water and mild soap and apply it with a sponge or cloth. Be particularly diligent in addressing greasy spots, such as those found in kitchens.
- Rinse and Dry: After cleaning, rinse the walls with clean water and allow them to dry completely.
• Repairing Damaged Surfaces
A smooth and even wall surface is crucial to achieving a professional-looking paint job. To repair any damage on your walls:
- Fill Small Cracks and Holes: Use a pre-mixed filler or a drywall compound and a putty knife to fill in small cracks and holes. Allow the filler to dry, as per the manufacturer’s instructions.
- Sand the Surface: Once the filler is dry, sand the surface with medium to fine-grit sandpaper to ensure the filled areas are flush with the wall.
- Repair Larger Damage: For more significant damage, such as water stains or larger holes, you may need to cut out and replace a section of the drywall. Consult a professional contractor if you are not comfortable performing this task yourself.
• Choosing the Right Primer
Primer is an essential preparation step that ensures proper paint adhesion and coverage. Choosing the right primer is vital and depends on the type of wall surface and paint you’re using. The main types of primers are:
- Latex Primer: This water-based primer works well with most surfaces, including drywall, masonry, and wood. Latex primers are compatible with both latex and oil-based paints.
- Oil-Based Primer: Suitable for wooden surfaces, oil-based primers work well to prevent tannin and knot bleeding. While these primers take longer to dry, they provide excellent adhesion and stain-blocking capabilities.
- Shellac-Based Primer: Designed for use on severe stains, shellac-based primers are effective for sealing water, smoke, and nicotine stains and providing a smooth base for paint.
• Applying Primer
Once you have chosen the appropriate primer type, follow these steps to apply it:
- Cover the Floors and Furniture: Start by protecting your floors and furniture with drop cloths or plastic sheeting to prevent paint splatters.
- Tape Off Edges: Apply painter’s tape to the edges of electrical sockets, light switches, baseboards, and any other areas where you don’t want primer or paint to touch.
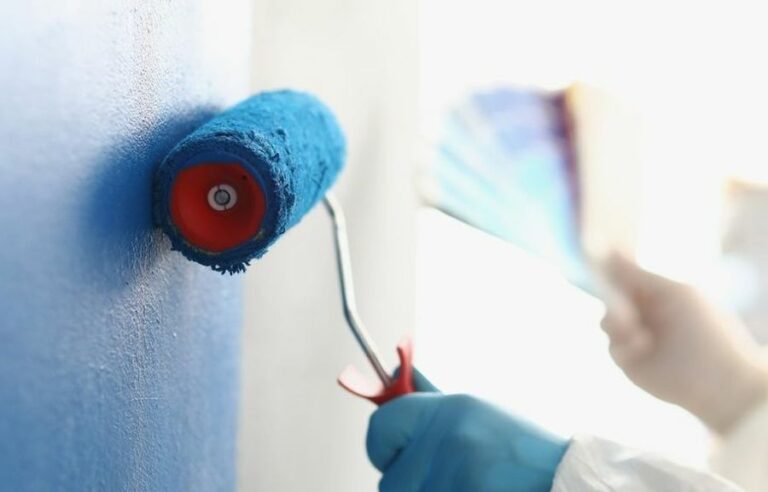
- Cut in Edges: Using a paintbrush, cut in the primer around the edges of the wall, ensuring a consistent layer is applied.
- Roll the Primer on the Walls: Use a paint roller to apply the primer to the rest of the wall, working in a “W” pattern for even coverage.
- Let it Dry: Allow the primer to dry for the recommended time stated on the manufacturer’s label.
• Preparing the Room for Painting
After your primer is completely dry, prepare the room for painting:
- Inspect the Walls: Check the walls for any imperfections, such as drips, debris, or uneven areas that may have been missed during the initial preparations. If needed, lightly sand those areas and reapply the primer before painting.
- Reapply Painter’s Tape: Inspect the painter’s tape applied earlier and make sure it is still firmly in place. Replace as needed.
- Ventilate the Room: Proper ventilation is crucial when painting. Open windows and doors to ensure a well-ventilated space as you paint.
With these preparation steps complete, you are now ready to achieve a professional-looking paint job. By thoroughly cleaning, repairing, priming, and covering your walls before painting, you will significantly improve the paint’s adherence and overall durability.
For further guidance, the Environmental Protection Agency provides additional safety and health information regarding paint and primer, particularly for homes built before 1978.
Material | Description |
|---|---|
Painter’s tape | Used to cover edges and trim to prevent paint from bleeding onto adjacent surfaces. |
Drop cloths | Placed on the floor and furniture to protect them from paint spills and splatters. |
Plastic sheeting | Can be used to cover large areas such as windows, doors, and built-in furniture, providing additional protection from paint. |
Primer | Applied to the wall surface to create a smooth, uniform base for the paint and to improve adherence. |
Essential Wall Preparation Steps Before Painting
Prepping walls before painting is often overlooked, but it is an essential aspect of achieving professional-looking results.
• The Importance of Wall Preparation
Paint serves not only to enhance the appearance of walls but also to protect them from daily wear and tear. By prepping your walls before applying paint, you are:
- Ensuring better adhesion of paint, which reduces the likelihood of peeling or chipping over time.
- Concealing blemishes, stains, and other imperfections that might otherwise be visible through the paint.
- Providing a smoother surface on which to apply paint, resulting in a more polished, professional-looking appearance.
• Tools and Materials Needed
Before starting the wall preparation process, gather the necessary tools and materials:
- Drop cloths or plastic sheeting
- Painter’s tape
- A vacuum with a brush attachment
- A mild cleaning solution (for example, a mix of water and mild dish detergent)
- A sponge or cleaning cloth
- Spackling compound or patching material
- A putty knife
- Sandpaper (120 to 150 grit)
- A sanding pole (optional)
- A paintable primer
• Step 1: Clear the Room and Protect Your Floors
Remove all furniture and decor from the room. This will give you easy access to the walls and prevent accidents. Lay down drop cloths or plastic sheeting to protect your floors from debris and potential spills.
• Step 2: Remove Loose Debris and Dust
Before washing the walls, use a vacuum with a brush attachment to remove any loose debris and dust. This will make the cleaning process more effective and prevent dust from becoming lodged in the paint later on.
• Step 3: Clean the Walls
Using a sponge or cloth dampened with a mild cleaning solution, gently wash the entire surface of the walls. This will remove any remaining dirt, dust, or grease that could interfere with paint adhesion.
Be sure to rinse the sponge or cloth frequently so as not to redistribute dirt. Allow the walls to dry completely before moving on to the next step.
• Step 4: Patch and Repair Imperfections
Perform a visual inspection of your walls, paying close attention to any holes, cracks, or dents. Fill these imperfections with a spackling compound or appropriate patching material.
Use a putty knife to apply the compound, pressing firmly to ensure proper adhesion and a smooth surface. Allow the compound to dry as directed by the manufacturer’s instructions.
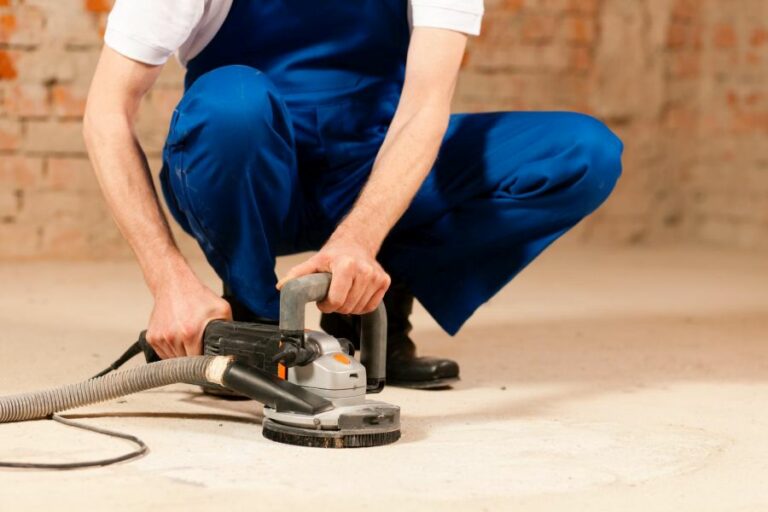
• Step 5: Sand the Walls
Once the patching material has dried, sand the entire wall surface with 120 to 150-grit sandpaper. This will create a uniform surface and help the paint adhere better.
Be sure to focus on the areas where you applied the spackling compound, ensuring that they are smooth and level with the rest of the wall. If you are working on a large wall or room, consider using a sanding pole to cover more surface area and save time.
After sanding, use a vacuum with a brush attachment or a damp cloth to remove any dust generated during the sanding process.
• Step 6: Apply a Primer
Applying a primer serves two purposes: it seals the wall, providing a smooth surface for the paint to adhere to, and it helps to hide any remaining imperfections.
Choose a paintable primer that is compatible with your chosen paint. Follow the manufacturer’s instructions for application and drying time.
• The Final Verdict
Proper wall preparation is crucial for achieving a professional-looking paint job. By following the steps outlined in this article, you will set yourself up for a successful painting project that will stand the test of time.
While it may be tempting to skip the preparation process and begin painting right away, taking the time to prepare your walls will result in a more polished and durable final product.
| Do you need to prep the walls before painting? | |
|---|---|
| Answer | Yes, prepping walls before painting is essential for a smooth and long-lasting finish. It involves cleaning, repairing, and priming the surface. |
| Cleaning | Remove dirt, dust, grease, and other contaminants from the wall using mild detergent and water. Allow the wall to dry completely before proceeding. |
| Repairing | Fill any cracks, holes, or imperfections with a suitable filler or patching compound. Sand the area smooth and wipe away any dust. |
| Priming | Apply a coat of primer to the wall, particularly on areas with repairs or stains. This will ensure better adhesion and coverage of paint. |
Importance of Sanding Walls Prior to Painting
The question of whether sanding walls before painting is necessary comes up quite often. As a professional painter with years of experience, I am well-qualified to weigh in and offer valuable advice on the subject.
The simple answer is: it depends. The necessity of sanding walls before painting is highly dependent on the condition of the walls, the desired finish, and the type of paint being used. Let’s delve deeper into these factors and discuss them in detail.
• Condition of the Walls
One of the main reasons to sand walls before painting is to address any imperfections on the wall’s surface. Flaws such as scratches, dents, bumps, or old chipped paint can affect the final appearance of the paint job.
If you want a smooth and even finish, sanding is crucial for a number of reasons:
– Removing Old Paint
If you’re working with walls that have previously been painted, especially with textured or glossy paint, sanding is essential. The process helps you to remove any leftover paint, giving your new paint a more uniform and smoother finish.
Removal of OId Paint (ehow.com)
– Smoothing Out Wall Repairs
Sanding plays an integral role in smoothing out any wall repairs, such as patching or filling holes and cracks. When done properly, the wall’s surface appears seamless and even, which ensures that the new paint adheres evenly.
– Promoting Paint Adhesion
Sanding creates a slightly rough surface that significantly improves paint adhesion. This helps to prevent peeling, bubbling, or other issues that may arise in a poorly-adhered paint job.
Recommendation: If your walls are in poor condition, sanding is a vital step that should not be skipped in the painting process.
• Desired Finish
The finish you want to achieve plays a significant role in determining the necessity of sanding. If you aim for a perfectly even, smooth, and professional-looking paint job, sanding is crucial. Skipping this step may result in a subpar outcome, with visible imperfections on the wall’s surface.
However, if you are going for a more textured or rustic look, sanding may not be necessary. Some people even prefer minor imperfections for an authentic, worn appearance.
Recommendation: Sand your walls if you are striving for a flawless finish. You can skip sanding if minor imperfections fit within your desired aesthetic.
• Type of Paint Being Used
The kind of paint you choose can also impact the necessity of sanding. Oil-based paints, for example, tend to adhere well to rough and imperfect surfaces and may not require sanding.
Water-based paints, on the other hand, are more susceptible to peeling and other issues when applied to less-than-perfect surfaces.
Recommendation: If you are using water-based paints, sanding is highly recommended. For oil-based paints, the decision to sand depends on the condition of the walls and your desired finish.
• In Conclusion
Ultimately, the decision to sand walls before painting depends on the condition of the walls, your desired finish, and the type of paint being used. Sanding is an essential step if you want a smooth, even finish and are using water-based paints, or if the walls have imperfections that need to be addressed.
To achieve an ideal outcome, it is crucial to spend time on thorough surface preparation, including sanding, before diving into painting. The extra time and effort invested will pay off in the form of a professional-looking, long-lasting paint job.