Achieve Durable Paint Jobs With Surface Prep
If you’ve ever experienced the frustration of a paint job that doesn’t seem to last, you’re not alone. But we’ve got the solution for you – proper surface preparation. Get ready to achieve durable, long-lasting paint jobs that will stand the test of time. With our expert advice and easy-to-follow tips, you’ll save time and effort in the long run and have confidence knowing that your newly painted surfaces will remain vibrant and fresh for years.
Achieve durable paint jobs with surface prep:
To achieve a durable paint job, follow these surface preparation steps: thoroughly inspect and address surface defects, clean and remove dust and dirt, repair surface imperfections and sand for optimum paint adhesion, apply primer, and use high-quality paints and coatings. Proper surface preparation ensures a long-lasting, flawless finish.

Unlock the secrets to long-lasting, flawless paint jobs with the power of proper surface preparation. Discover essential techniques, tips, and best practices that help your paintwork endure the test of time. Read on and elevate your painting skills to a whole new level.
Contents
- 1 Achieve Durable Paint Jobs with Surface Prep: A Comprehensive Guide
- 1.1 • Thorough Inspection: The First Step in Surface Prep
- 1.2 • Cleaning: Ensuring a Dust-Free and Dirt-Free Surface
- 1.3 • Repairing Surface Imperfections: Creating a Smooth and Even Canvas
- 1.4 • Sanding: Promoting Optimum Paint Adhesion
- 1.5 • Priming: The Key to Achieving Long-Lasting Paint Jobs
- 1.6 • Choose High-Quality Paints and Coatings
- 2 Enhancing Paint Durability on Surfaces: Key Tips
- 3 Effective Surface Preparation Techniques for Painting
- 4 The Importance of Surface Prep Before Applying Paint
- 5 Expert Tips on Wall Preparation by Professional Painters
Achieve Durable Paint Jobs with Surface Prep: A Comprehensive Guide
A durable paint job is the result of careful planning, meticulous surface preparation, and the use of high-quality materials.
• Thorough Inspection: The First Step in Surface Prep
Before commencing any surface preparation, it is essential to conduct a thorough inspection of the surface to identify any potential issues that may affect the durability of your paint job. Some common surface defects that require attention include:
- Rust
- Peeling paint
- Cracks and gaps
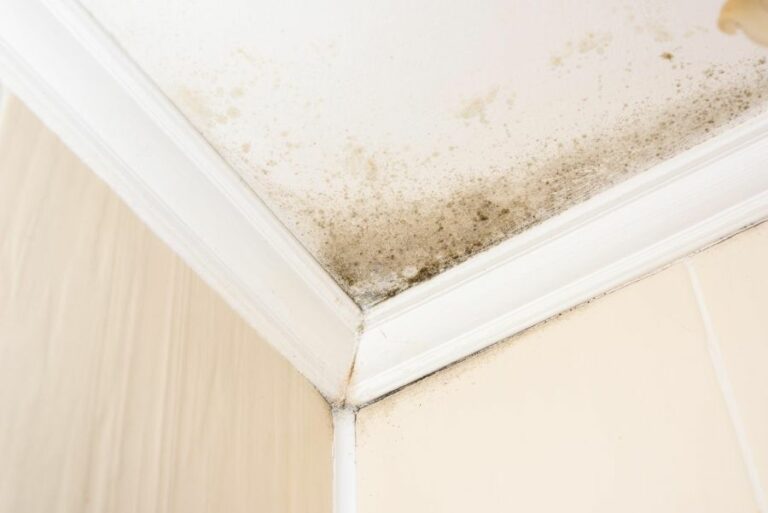
- Mold and mildew
- Water stains
- Grease and oil residues
Once you have identified any problematic areas, they need to be addressed using the appropriate methods. For instance, rust can be removed using a wire brush, while mold and mildew should be treated with a bleach solution or specialized cleaning product.
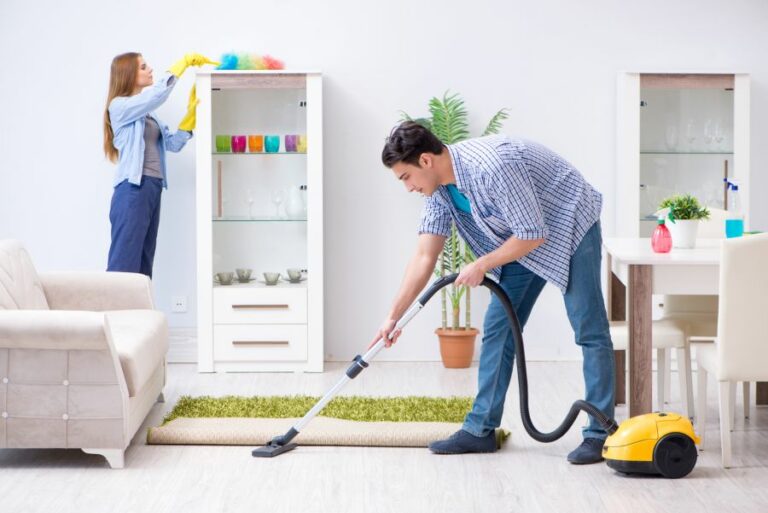
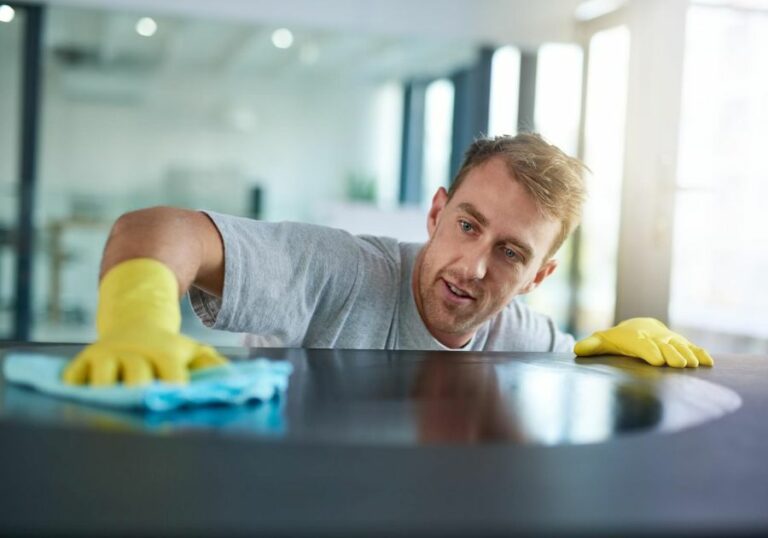
• Cleaning: Ensuring a Dust-Free and Dirt-Free Surface
Properly cleaning the surface is a critical component of effective surface preparation. Dirt, dust, and grease can significantly reduce paint adhesion, thereby weakening the overall durability of your paint job. A clean surface guarantees optimum paint adhesion, ensuring a longer-lasting finish.
To clean your surface effectively, follow these recommended steps:
- Remove any loose dirt and debris using a broom or vacuum cleaner.
- If the surface is particularly dirty or greasy, apply a detergent solution and scrub the area with a stiff-bristled brush. Rinse the surface thoroughly with clean water afterward.
- Allow the surface to dry completely before proceeding to the next stage of surface preparation.
As a general rule, cleaning with a pressure washer can also be an effective method to remove dirt and grime, particularly on exterior surfaces such as decks and siding. However, care must be taken not to damage the surface with overly high-pressure settings.
• Repairing Surface Imperfections: Creating a Smooth and Even Canvas
Repairing surface imperfections is a vital step in surface preparation, as flaws such as cracks and gaps can compromise the integrity of your paint job. An even and smooth surface ensures excellent paint adhesion and a flawless finish.
For repairing imperfections, follow these recommendations:
- For small cracks and gaps, use a putty knife to apply a flexible filler, such as caulk or acrylic filler. Allow the filler to dry, then gently sand the area until smooth and flush with the surrounding surface.
- For larger cracks and holes, use a two-part filler, such as epoxy or polyester filler, for a strong and durable repair. Once the filler has dried, sand it down to achieve a smooth surface.
- If dealing with severely damaged surfaces, consider installing a new layer of sheetrock or plasterboard, as this will provide the most durable and long-lasting solution.
Always follow the manufacturer’s instructions when using fillers and repair materials.
• Sanding: Promoting Optimum Paint Adhesion
Sanding is an essential aspect of surface preparation, serving to remove any loose, flaky paint and create a roughened surface that promotes enhanced paint adhesion. A well-sanded surface will result in a more durable and longer-lasting paint finish.
For effective sanding, consider the following guidelines:
- Use fine-grit sandpaper (180 to 220 grit) for interior surfaces and medium-grit sandpaper (80 to 120 grit) for exterior surfaces.
- If your surface is large, consider using a power sander to expedite the process.
- Always wear protective gear, such as goggles and a dust mask, to protect yourself from dust particles and debris.
After sanding, it is crucial to clean the surface once again to remove any residual dust particles.
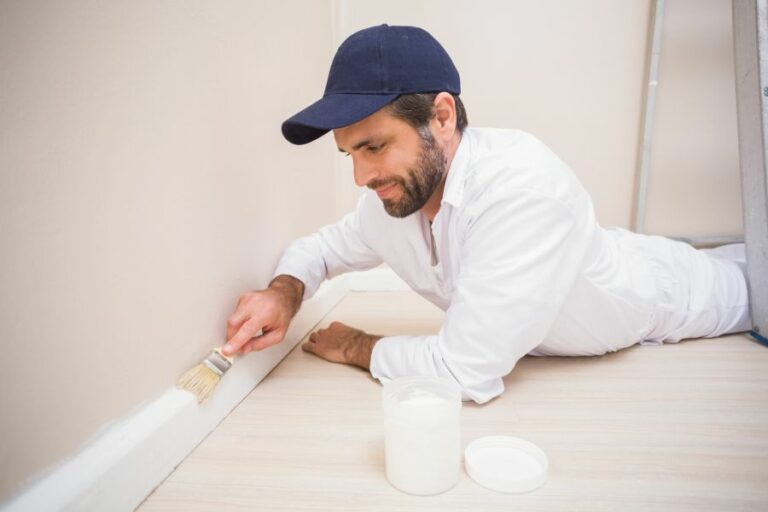
• Priming: The Key to Achieving Long-Lasting Paint Jobs
Applying a high-quality primer to the surface contributes significantly to the durability of your paint job. A primer serves as a bridge between the surface and the topcoat, effectively sealing porous materials, enhancing paint adhesion, and providing a robust base for the final paint finish.
For best results, apply a primer that is specifically formulated for your surface material and allow it to dry completely before applying your topcoat.
• Choose High-Quality Paints and Coatings
Even with flawless surface preparation, a paint job’s durability can be compromised if inferior paints and coatings are used. High-quality paints provide better coverage, are more fade-resistant, and generally last longer than their cheaper counterparts.
Additionally, consider using a topcoat or clear sealant to provide an extra layer of protection against wear and tear, particularly on exterior surfaces.
In conclusion, surface preparation is the cornerstone of achieving durable, long-lasting paint jobs. By following these expert recommendations, you can ensure the longevity of your painted surfaces while avoiding potential problems such as peeling, flaking, or chipping.
Enhancing Paint Durability on Surfaces: Key Tips
Painted surfaces are prone to wear and tear, especially in high-traffic areas or spaces exposed to harsh elements. In order to make a painted surface more durable and long-lasting, there are key steps to take in the process of preparation, painting, and maintenance.
By following these expert recommendations, you can extend the life of your paint job and keep your painted surfaces looking their best for years to come.
• Proper Surface Preparation
– Cleaning the Surface
Before applying any paint, it’s essential to clean the surface thoroughly. Dirt, dust, and debris can affect the paint’s adhesion and contribute to peeling or chipping over time. Use a mild detergent solution and a scrub brush to clean the surface, allowing it to dry completely before proceeding to the next step.
– Sanding the Surface
Sanding is an essential step in ensuring that the new paint adheres properly to the surface. Using fine-grit sandpaper, lightly sand the surface to remove any loose or chipping paint and create a smooth, even base for the new paint application.
Make sure to remove any dust or debris with a damp cloth before applying primer or paint.
– Priming the Surface
Applying a high-quality primer is crucial for improving paint adhesion and creating a durable, long-lasting finish. Primers serve as a barrier between the surface and the paint, preventing any moisture or contaminants from interfering with the paint’s performance.
The type of primer used depends on the type of paint being applied and the surface being painted. Consult your local paint store or get recommendations from reliable sources to choose the right primer for your project.
• Choosing the Right Paint
– Opt for High-Quality Paint
Not all paints are created equal. A durable paint job relies on high-quality paint with a proven track record. Invest in premium paint that offers resistance to chipping, cracking, and fading.
These paints often come with a longer warranty and may save you time and money in the long run by reducing the need for touch-ups and repainting. Look for paint brands with positive reviews and research their long-term performance before making a decision.
– Match Paint Type to the Surface
Different surfaces require different types of paint. For example, water-based paints are typically best for interior walls, while oil-based paints are better suited for exterior surfaces and high-moisture areas such as bathrooms.
For high-traffic areas or surfaces that will be regularly touched or cleaned, consider using a higher sheen or enamel paint which provides a harder, more durable finish.
• Proper Painting Technique
– Thin, Even Coats
Applying thin, even coats of paint to the surface is essential for a professional and durable finish. Multiple thin coats will build up a stronger layer of paint, reducing the likelihood of chipping or peeling over time.
Use a high-quality paintbrush or roller, applying paint in long, smooth strokes to avoid drips or streaks that can lead to an uneven finish.
– Allow for Adequate Drying Time
Allowing sufficient drying time between coats is essential for a durable paint job. Drying times may vary depending on the type of paint, temperature, and humidity levels.
Always follow the manufacturer’s recommendations for drying time and avoid rushing the process, as this can lead to a weaker paint bond and potential peeling in the future.
• Maintenance and Care
– Protect the Surface
Protecting the painted surface from damage is essential for maintaining a durable finish. In high-traffic areas, consider installing protective devices such as doorstops, wall guards, or corner guards to prevent dings and chips caused by everyday use.
– Clean Regularly
Taking the time to regularly clean your painted surfaces will help to maintain their beauty and durability. Use a mild detergent and a non-abrasive cloth or sponge to gently clean the surface as needed.
Regular cleaning not only keeps your paint looking refreshed but can also help prevent the buildup of dirt and grime that can lead to premature wear.
– Touch Up Damage Promptly
Despite your best efforts, painted surfaces may eventually succumb to wear and tear from daily use or exposure to the elements. To maintain a durable finish, promptly repair any damage, such as chips, scratches, or fading, by carefully applying a small amount of matching paint to the affected area.
In conclusion, making a painted surface more durable requires attention to detail in surface preparation, choosing the right paint, proper painting techniques, and regular maintenance.
By following these expert recommendations, you can extend the life of your paint job and keep your painted surfaces looking their best for years to come.
Step | Instructions |
|---|---|
1 | Choose the right paint for the surface and environment. |
2 | Properly prepare the surface by cleaning, sanding, and priming. |
3 | Apply multiple coats of paint, allowing sufficient drying time between coats. |
4 | Apply a clear protective top coat, such as a sealer, varnish, or polyurethane. |
5 | Maintain the painted surface by regularly cleaning and checking for damage. |
6 | Touch up any damaged areas to prevent further deterioration. |
Effective Surface Preparation Techniques for Painting
• Cleaning the Surface
Before starting the surface preparation, it is important to clean the surface thoroughly. Removing dirt, dust, and grime will ensure proper adhesion of the paint to the surface. You can use a simple solution of soap and water to clean most surfaces.
For surfaces with grease or oil contaminants, use a degreaser or a trisodium phosphate (TSP) solution to clean the surface. The Occupational Safety and Health Administration (OSHA) provides a helpful guide on the safe use of TSP, which can be found here.
• Preparing Different Types of Surfaces
– Wood
Wood surfaces require careful preparation to ensure that the paint adheres properly and lasts for a long time. Begin by sanding the surface with medium-grit sandpaper, and then follow with fine-grit sandpaper to create a smooth, even surface.
Remove any dust created by the sanding process with a tack cloth or vacuum cleaner.
Next, inspect the wood for any cracks, gaps, or holes that need to be filled. Use either wood filler or wood putty to fill any imperfections, allowing it to dry according to the manufacturer’s instructions before sanding the filled areas smooth.
If the wood surface has any knots, use a knot sealer to prevent them from bleeding through the paint. Lastly, apply a primer to the wood surface to ensure proper adhesion of the paint and provide a uniform base for the subsequent paint application.
– Masonry
Masonry surfaces, such as brick, concrete, or stucco, must be properly cleaned and prepared for painting. Begin by removing any loose or peeling paint using a wire brush.
Next, remove any efflorescence (white, powdery deposits) on the surface with a mixture of water and muriatic acid, followed by thorough rinsing with clean water.
Fill any cracks or holes with a suitable patching compound, such as a mortar or concrete patch. Allow the patching compound to dry according to the manufacturer’s instructions, then sand the repaired areas smooth.
Apply a masonry primer to the surface to ensure proper adhesion of the paint and to prevent any potential issues with moisture penetration.
– Metal
Proper preparation of metal surfaces is crucial to prevent issues such as rusting, chipping, or peeling paint. First, clean the surface thoroughly with a solution of soap and water or with a degreaser, followed by thorough rinsing with clean water.
If there is any rust present on the surface, use a wire brush or sandpaper to remove the rust.
Once the surface is clean and rust-free, apply a metal primer to protect against corrosion and provide a durable base for the paint. Choose a primer specifically designed for the type of metal you are working with, such as galvanized metal, aluminum, or steel.
• Final Touches Before Painting
Once the surface has been properly prepared, use a tack cloth or vacuum cleaner to remove any dust or debris that may have accumulated during the preparation process. This is especially important for very smooth surfaces, as even small particles can cause visible imperfections in the finished paint job.
Before beginning to paint, apply masking tape and drop cloths to protect adjacent surfaces and objects from paint splatters and drips.
• Conclusion
Proper surface preparation is key to achieving a long-lasting, durable, and professional paint job. The specific techniques and materials used will depend on the type of surface being painted, so it’s important to familiarize yourself with the proper methods for each type of material you work with.
By following these guidelines and investing the necessary time and effort into preparing the surface, you can help ensure that your paint job will be successful and stand the test of time.
Step | Description |
|---|---|
1 | Remove any loose or peeling paint from the surface using a scraper, putty knife, or wire brush. |
2 | Repair any damage or imperfections, such as cracks or holes, using a patching compound or wood filler. |
3 | Sand the surface to remove any remaining loose paint, create a smooth surface, and promote paint adhesion. For large areas, use a power sander, and for small areas or detailed work, use sanding blocks or fine-grit sandpaper. |
4 | Remove any dust, dirt, or debris from the surface by thoroughly cleaning it with a damp cloth or sponge. Allow the surface to dry completely before proceeding. |
5 | Apply a coat of primer to the entire surface, providing a uniform base for the paint to adhere to and ensuring a longer-lasting finish. Allow the primer to dry according to the manufacturer’s instructions. |
6 | Lightly sand the surface once more after the primer has dried to remove any brush strokes or imperfections. Wipe away any dust with a damp cloth or sponge. |
7 | Protect any adjoining surfaces, such as trim or hardware, from paint splatter or drips by applying masking tape or painter’s tape. |
The Importance of Surface Prep Before Applying Paint
• A Crucial Step for a Successful Paint Job
Surface preparation is an essential step in the painting process, as it greatly affects the outcome of any paint job. A properly prepared surface improves paint adhesion, ensures a uniform appearance, and increases the durability of the paint.
– Achieve a Smooth and Durable Finish
Proper surface preparation plays a vital role in achieving a smooth and durable finish. A clean and well-prepared surface enables the paint to bond strongly with the substrate, leading to enhanced paint performance.
Moreover, a well-prepared surface increases the paint’s resistance to chipping, peeling, and cracking, thus ensuring a longer-lasting finish.
– Enhance Aesthetic Appeal
When preparing a surface for painting, it is critical to correct any existing flaws and defects, such as cracks, holes, and rough patches. A well-prepared surface not only allows for better paint coverage but also enhances the aesthetic appeal of the finished paint job.
By properly leveling and smoothing uneven surfaces, the underlying substrate is transformed into a uniform and attractive base for paint application.
– Prevent Future Problems
Addressing potential issues during the surface preparation stage can save time and money by preventing future problems. Proper surface preparation can eliminate moisture problems, such as bubbling or blistering, that can occur when the paint is applied over a damp surface.
Additionally, removing loose or peeling paint, cleaning dirt or grease, and addressing mold or mildew issues can prevent these issues from resurfacing and compromising the paint job’s quality and longevity.
• Surface Preparation Techniques
– Cleaning
The first step in surface preparation involves cleaning the surface to eliminate dirt, debris, and contaminants that can interfere with paint adhesion.
Cleaning methods include using a brush or cloth to remove loose particles, using a detergent solution to remove grease and grime, or pressure washing to clean exterior surfaces thoroughly.
– Degreasing
Oil, grease, and other contaminants can adversely affect paint adhesion, leading to premature paint failures such as chipping or peeling. To degrease a surface effectively, use a commercial degreaser or a water-based cleaning solution that can break down and remove these contaminants.
– Sanding and Scraping
Sanding and scraping are essential techniques for removing loose or peeling paint from the surface. Sanding ensures a smooth and even surface by eliminating rough patches while scraping removes any peeling or loose paint that would otherwise compromise the final paint job.
– Repairing and Filling
One of the most crucial aspects of surface preparation is repairing and filling any defects on the surface, such as cracks, holes, or gouges. Fillers, such as spackle or wood filler, are used to correct these imperfections and provide a smooth, even surface for paint application.
– Priming
Applying a primer is an important step in surface preparation, as it promotes paint adhesion, prevents moisture problems, and enhances the overall appearance of the paint job. Primers can also block stains, seal porous surfaces, and provide a consistent base for topcoat application.
• Expert Tips for Effective Surface Preparation
– Allow Ample Drying Time
After cleaning or repairing a surface, it is essential to allow ample drying time before applying paint. This prevents moisture-related issues such as bubbling or blistering, which can affect a paint job’s appearance and durability.
– Select the Right Tools and Equipment
Using the appropriate tools and equipment for surface preparation tasks, like sanders, scrapers, and brushes, can greatly improve efficiency and effectiveness. High-quality tools can make the process quicker and more comfortable while ensuring a superior final result.
– Follow Manufacturer Recommendations
Always consult and adhere to paint and primer manufacturer recommendations when preparing a surface. Different paint types and finishes require specific surface preparation techniques, and following the manufacturer’s guidelines can ensure optimum results.
• A Worthwhile Investment of Time and Effort
Although surface preparation can be time-consuming and require significant effort, it is a small price to pay for a successful and long-lasting paint job.
By following the techniques and expert recommendations outlined in this article, you can improve paint adhesion, enhance the aesthetic appeal of your project, and prevent future problems, ultimately ensuring a finished result that stands the test of time.
Expert Tips on Wall Preparation by Professional Painters
Thorough wall preparation is crucial for a smooth, long-lasting paint job.
• Inspecting Walls for Damage
The first step in wall preparation is to inspect the walls for any damage or imperfections. This includes minor cracks, loose plaster, dents, or nail holes. These issues need to be addressed before moving on to the next steps.
• Cleaning the Surface
Dirt, dust, and grease accumulate on walls over time, making it essential to clean them before painting. Professional painters use a mild detergent and water mixture to scrub the walls. Following this, they rinse the walls thoroughly and give them enough time to dry completely.
• Repairing Cracks and Holes
In this step, painters fix minor damages on the walls. They use a putty knife to apply a thin layer of joint compound or spackle over small dents and nail holes. For larger cracks or damages, a painter might use a mesh or paper tape along with a joint compound to provide more strength to the repair.
Allowing the compound to dry and sanding it gently ensures a smooth finish.
• Removing Hardware and Covering Fixtures
To avoid paint splatters and ensure an uninterrupted paint job, professionals remove any hardware from the walls, such as outlet covers, switches, and vents. They also protect light fixtures and other non-removable elements with painter’s tape and plastic covers.
• Applying Primer
Applying a primer to the walls is a critical step that should not be skipped. It provides the following benefits:
- Enhances paint adhesion
- Ensures an even and uniform appearance
- Hides dark colors and stains
- Reduces the number of paint coats required
Professional painters either roll or spray primer on the walls, depending on the project’s size and complexity. They let the primer dry according to the manufacturer’s instructions before moving on to the next step.
• Sanding the Walls
After the primer is completely dry, painters sand the walls to create a smooth and even surface for the paint to adhere to. They use fine-grit sandpaper, either attaching it to a sanding pole or using an electric sander for larger projects.
During sanding, it is important to focus on the areas where repairs were completed and any remaining rough spots.
• Removing Dust from Walls and Floors
The sanding process creates a lot of dust, and it is crucial to remove it entirely before painting. Professional painters use a vacuum or soft brush to clean the walls and ensure no debris is left behind.
Additionally, they vacuum or sweep the floors thoroughly to prevent any dust from affecting the paint’s final finish.
• Masking Edges and Trim
The last step before beginning the actual painting process is to mask off any areas where paint should not be applied, such as trim, baseboards, or adjoining walls. Painters use painter’s tape and plastic sheets to ensure clean and crisp edges.
• Final Thoughts
Thorough wall preparation is the key to a successful and long-lasting paint job. Following the steps outlined above, professional painters ensure the walls are clean, repaired, primed, and ready for a flawless paint application.
Adhering to these guidelines will not only save time and effort but also lead to a high-quality finish that will maintain its beauty for years to come.