Outdoor Surface Cleaning Before Paint Application
Are you planning to paint an exterior surface but unsure how to adequately prepare and clean it? Embarking on outdoor painting projects can seem daunting, but don’t worry – we have your back! With the right guidance and expertise in surface cleaning before paint application, your fresh coat of paint will have a pristine foundation and a long-lasting, impressive outcome.
Outdoor surface cleaning before paint application:
Outdoor surface cleaning before paint application is crucial for ensuring proper paint adhesion, durability, and a high-quality finish. The process involves identifying the surface type, removing dirt, debris, mildew, grease, and loose paint, repairing any damages, and priming the surface. Different surfaces may require specific cleaning methods and products, and it’s essential to follow the manufacturer’s instructions to achieve the best results.

Looking to give your outdoor surfaces a fresh coat of paint? Learn about proper cleaning techniques and the importance of preparing the surface before application. Read on for tips and tricks to ensure a smooth and long-lasting paint job. It’s more than just a simple scrub!
Contents
- 1 paring Outdoor Surfaces for Paint Application
- 1.1 • Importance of Proper Surface Cleaning
- 1.2 • Identifying the Surface Type
- 1.3 • Removing Dirt and Debris
- 1.4 • Dealing with Mildew and Mold
- 1.5 • Addressing Grease and Oil Stains
- 1.6 • Sanding and Scraping Loose Paint
- 1.7 • Repairing Surface Damage
- 1.8 • Preparing the Surface for Painting
- 1.9 • Final Tips and Recommendations
- 2 Cleaning Exterior Surfaces Prior to Painting
- 3 Choosing the Right Cleaner for Pre-Painting Surfaces
- 4 Surface Cleaning Before Paint: Necessary Steps
- 4.1 • Why Cleaning the Surface is Important
- 4.2 • Steps for Cleaning Surfaces Before Painting
- 4.2.1 – Step 1: Assess the Surface
- 4.2.2 – Step 2: Choose the Right Cleaning Solution
- 4.2.3 – Step 3: Protect Adjacent Surfaces
- 4.2.4 – Step 4: Apply the Cleaning Solution
- 4.2.5 – Step 5: Scrub the Surface
- 4.2.6 – Step 6: Rinse Thoroughly
- 4.2.7 – Step 7: Dry the Surface
- 4.2.8 – Step 8: Address Surface Imperfections
- 4.3 • Additional Tips for a Successful Painting Project
- 4.4 • Conclusion
- 5 -Painting Surface Preparation: Key Techniques
paring Outdoor Surfaces for Paint Application
• Importance of Proper Surface Cleaning
Outdoor surface cleaning is a crucial step before applying paint to any exterior surface. It ensures the paint adheres properly, maintains its durability, and achieves a high-quality finish.
Skipping this essential process or performing it inadequately can lead to undesirable consequences, such as paint peeling, flaking, or dulling.
• Identifying the Surface Type
Before starting the cleaning process, identify the type of surface you are working with. Common exterior surfaces include brick, wood, stucco, metal, and concrete. Different surfaces may require specific techniques and cleaning solutions to ensure the best results.
• Removing Dirt and Debris
Begin by removing all loose dirt, debris, and spider webs from the surface using a soft-bristled brush or broom.
Consider using a pressure washer on a low setting to speed up the process for larger surfaces. Pressure washers can be rented at many local hardware stores, but be careful not to use excessive pressure or risk damaging the surface.
• Dealing with Mildew and Mold
Mildew and mold can be detrimental to the paint’s longevity and appearance. If either is present, it can be removed with a diluted bleach solution (one part bleach to four parts water) using a scrub brush. Allow the solution to sit for about 20 minutes, and then rinse it thoroughly with clean water.
Ensure you wear protective gear, such as gloves and goggles, when dealing with bleach.
• Addressing Grease and Oil Stains
Grease and oil stains can create adhesion problems between the paint and the surface. To effectively remove grease and oil stains, use a cleaner specifically designed for this purpose, such as a degreaser or trisodium phosphate (TSP). Follow the manufacturer’s instructions and rinse the area with water after use.
• Sanding and Scraping Loose Paint
For surfaces with peeling or flaking paint, you need to remove the loose paint to provide a sound surface for the new paint to adhere to. Use a paint scraper, wire brush, or sandpaper to gently remove any loose or chipped paint.
Sanding is particularly important on wood surfaces to create a smooth and clean surface for the paint to adhere better. Remember to wear a mask to avoid inhaling dust or paint particles while scraping.
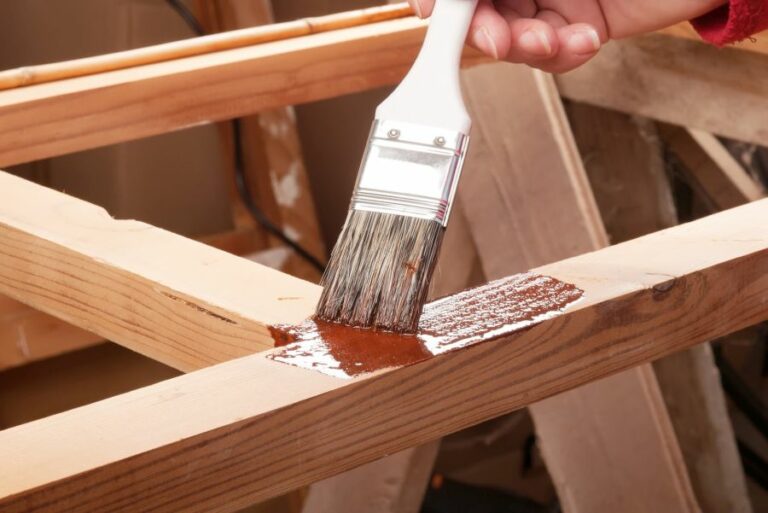
• Repairing Surface Damage
After the cleaning process, inspect the surface for any damage before applying paint. Cracks, holes, and gaps should be repaired with the appropriate filler or caulk, depending on the surface type.
Wood surfaces may require wood filler, while masonry surfaces may require mortar repair or caulking. Allow the filler to dry completely before proceeding.
• Preparing the Surface for Painting
Now that the surface is clean and repaired, it is essential to prime it for the best results. Priming promotes better adhesion, enhances paint durability, and helps maintain a consistent topcoat finish.
Choose a primer specifically designed for your surface type and follow the manufacturer’s instructions for application.
• Final Tips and Recommendations
In summary, proper outdoor surface cleaning involves removing dirt, debris, mildew, grease, and loose paint, followed by repairing any damage and priming the surface. A methodical approach and patience will pay off with a high-quality, durable paint finish.
Some final recommendations include the following:
- Choose the appropriate cleaning method and products for your specific surface type.
- Always follow the manufacturer’s instructions when using chemicals and adhere to safety guidelines.
- Consider renting a pressure washer for quicker and easier surface cleaning (but use caution to avoid surface damage).
- Always wear appropriate safety gear, such as gloves, goggles, and masks, to protect yourself during the cleaning process.
Cleaning Exterior Surfaces Prior to Painting
A thorough cleaning of exterior surfaces is a crucial step in the painting process. Proper cleaning ensures that the paint adheres well to the surface, resulting in a long-lasting and flawless finish.
• Begin with Inspection and Repair
Before you start cleaning, it’s important to inspect the surface for any damages, such as cracks, holes, or loose paint. These issues should be repaired prior to cleaning, as they can lead to further damage during the cleaning process.
If you find any significant damage, consult with a professional contractor for advice on how to proceed. Smaller damages, like hairline cracks, can typically be fixed with high-quality exterior caulking.
For loose paint, use a scraper or wire brush to remove it before you clean the surface. (University of Missouri Extension).
• Choose the Right Cleaning Solution
Selecting the appropriate cleaning solution for your surface is essential. A mild detergent, such as dish soap, is suitable for most cases. However, if you’re dealing with heavy dirt, mold, or mildew, you might need to use a specialized cleaner designed for exterior surfaces.
Always follow the manufacturer’s instructions when using a cleaning solution. Mixing your own solution can lead to unpredictable results and may cause damage to your surface or the environment.
• Protect Surrounding Areas
Before you start cleaning, ensure that any surrounding plants, furniture, and other objects are protected or removed from the area. Cover items with plastic sheeting or move them out of the way to prevent damage from cleaning solutions and water.
• Techniques for Effective Cleaning
There are various methods that you can use to clean exterior surfaces, depending on the type and condition of the surface. Each technique has its advantages and disadvantages, and some require specialized equipment.
– Pressure Washing
Pressure washing is an effective method for removing dirt, mold, and mildew from a variety of surfaces, such as wood, concrete, and brick. It’s important to use the right pressure setting and nozzle for your surface to avoid causing damage.
When using a pressure washer, work in a consistent pattern and hold the nozzle at a 45-degree angle to the surface for the best results.
If you don’t already own a pressure washer, you can rent one from a local tool rental store. Keep in mind, though, that high-pressure water can cause injuries, so always exercise caution and follow the manufacturer’s instructions when using this equipment.
– Hand Scrubbing
For surfaces that cannot withstand high-pressure water, hand scrubbing with a soft-bristle brush may be a suitable cleaning method. Make sure you use an appropriate cleaning solution and rinse the surface thoroughly after scrubbing to remove any residue.
– Chemical Cleaners
There are several types of chemical cleaners available that are designed for cleaning exterior surfaces. Some are specifically formulated for removing mold and mildew, while others are designed for general-purpose use.
When using a chemical cleaner, always follow the manufacturer’s instructions for dilution, application, and safety. Remember to wear proper safety gear, such as gloves and goggles, to protect yourself from potential chemical exposure.
• Allow the Surface to Dry
After the surface has been thoroughly cleaned, it needs time to dry completely before painting. The drying time will depend on the type of surface, as well as the temperature and humidity level of your area.
Generally, you should wait at least 24 hours before painting, but consult the manufacturer’s recommendations for your specific paint product.
• Final Considerations
Proper surface preparation is essential to achieving a high-quality paint job. By taking the time to thoroughly clean and repair your exterior surfaces before painting, you’ll be on your way to a long-lasting and beautiful finish.
Remember that safety should always be your top priority when working with cleaning solutions and equipment. Wear appropriate safety gear, follow all manufacturer’s instructions, and consult a professional if you’re unsure about any aspect of the cleaning process.
Step | Description |
|---|---|
1. Inspect the surface | Check for dirt, mold, mildew, and other contaminants. |
2. Remove loose paint and debris | Use a scraper, wire brush, or pressure washer to remove any loose paint, dirt, and debris. |
3. Clean with detergent | Use a mild detergent and a sponge or brush to clean the surface thoroughly. Pay special attention to areas with mold or mildew. Rinse well with clean water. |
4. Treat mold and mildew | If mold or mildew is present, treat the affected areas with a solution of bleach and water (1 part bleach to 3 parts water). Allow the solution to sit for 15-20 minutes, then rinse thoroughly with clean water. |
5. Allow the surface to dry | Give the surface ample time to dry before applying any paint. This may take 24-48 hours, depending on weather conditions. |
6. Sand and repair as needed | Sand any rough areas and make any necessary repairs to the surface, such as filling holes or cracks, before applying paint. |
Choosing the Right Cleaner for Pre-Painting Surfaces
A flawless paint job starts with a clean and well-prepared surface. As an experienced professional, I have found that using the right product to clean the surface before painting is an essential step.
• Why Cleaning Surfaces Before Painting is Important
Cleaning the surface thoroughly before painting ensures that the paint adheres properly to the surface, preventing peeling, chipping, and other issues down the line.
Dirt, grease, dust, and other debris can prevent the paint from sticking to the surface, resulting in an uneven and unprofessional finish. Additionally, a clean surface can make the paint job last longer, saving time and money on future touch-ups or complete repaints.
• Choosing the Right Cleaning Product
The choice of cleaning product will depend on the type of surface you are working with and the type of paint you plan to use. The following are some of the most common cleaning products for various surfaces:
– TSP (Trisodium Phosphate)
TSP is a popular and powerful cleaning agent often recommended for preparing walls and other surfaces before painting. It effectively removes grease, grime, dirt, and mold and helps to degloss previously painted surfaces.
TSP can be used on wood, metal, tile, and concrete surfaces and is particularly useful for preparing kitchen and bathroom surfaces.
However, it is important to note that, due to its high phosphate content, TSP may not be environmentally friendly and can be harmful to aquatic life. In such cases, consider using a TSP substitute, which is a more eco-friendly option.
– Degreaser or Dishwashing Detergent
For surfaces with significant grease buildup, a degreaser or dishwashing detergent can be an effective cleaning solution.
These products can remove grease and grime without affecting the surface. Be sure to thoroughly rinse the surface with water after using a degreaser or detergent, as any residue can interfere with paint adhesion.
– White Vinegar
White vinegar is a versatile, natural, and non-toxic product that can be used for cleaning various surfaces. It is particularly effective in removing mildew and hard water stains.
Mix equal parts of white vinegar and water in a spray bottle, apply it to the surface, and let it sit for a few minutes before wiping it clean. This solution is safe to use on wood, metal, glass, and tile surfaces.
– Rubbing Alcohol
Rubbing alcohol is an excellent cleaner for glass and metal surfaces. It will remove dirt, grease, fingerprints, and other contaminants, leaving a clean surface for painting. Be sure to use it in a well-ventilated area and wear gloves to protect your hands.
• Best Practices for Cleaning Surfaces Before Painting
When cleaning surfaces in preparation for painting, follow these tips and techniques for the best results:
– Clean from Top to Bottom
Always start cleaning from the top of the surface and work your way down. This ensures that any falling dirt and debris are picked up as you progress downward rather than leaving streaks on already cleaned areas.
– Use a Soft Bristle Brush or Sponge
Avoid using abrasive cleaning tools, such as steel wool or scouring pads, as these can damage the surface and make it difficult for the paint to adhere properly. Instead, opt for a soft bristle brush or sponge that will gently yet effectively remove dirt and grime.
– Rinse Thoroughly
After cleaning the surface with your chosen product, rinse it thoroughly with water to remove any residual cleaner that might interfere with paint adhesion. Allow the surface to dry completely before beginning to paint.
– Protect Surrounding Areas
Before beginning the cleaning process, protect any surrounding areas or items that you do not want to be exposed to water or cleaning products. This might include draping a tarp over furniture, covering nearby plants, or removing any delicate items from the area.
• Conclusion
Selecting the appropriate cleaning product for your specific surfaces is a vital step in ensuring a long-lasting and professional paint job. Carefully consider the unique needs of your project and follow the best practices for cleaning surfaces to achieve optimal results.
For more tips and guidance, the Environmental Protection Agency (EPA) offers guidelines and suggestions for eco-friendly cleaning practices.
Surface Cleaning Before Paint: Necessary Steps
Proper surface preparation is critical for a high-quality and long-lasting paint job.
• Why Cleaning the Surface is Important
A clean surface is essential for the proper adhesion of paint. Dust, dirt, grease, and other contaminants can cause paint to peel or bubble, resulting in an unattractive and less durable finish.
Cleaning the surface before painting also helps to reveal any surface imperfections, such as dents or scratches, that can be addressed before applying paint.
According to the Painting and Decorating Contractors of America (PDCA), proper surface preparation is necessary to achieve a quality paint job, and cleaning should always be included in the process.
• Steps for Cleaning Surfaces Before Painting
– Step 1: Assess the Surface
Before you begin cleaning, evaluate the surface to identify the type of dirt and debris that are present. Understanding the contaminants will help determine the best cleaning method.
Examples of Contaminants:
- Dust and dirt
- Grease and oil
- Mold or mildew
- Chalking or flaking paint
– Step 2: Choose the Right Cleaning Solution
Select a cleaning solution appropriate for the type of contaminants and the surface material. Using the wrong cleaner can damage the surface or fail to remove the contaminants effectively.
Common Cleaning Solutions:
- Water and mild detergent
- Trisodium phosphate (TSP)
- Commercial surface cleaners
- Bleach solution for mildew removal
Always follow the manufacturer’s instructions for the proper dilution and application of the cleaning solution.
– Step 3: Protect Adjacent Surfaces
Cover nearby surfaces, such as flooring or furniture, to prevent damage from splashing cleaning solutions or paint. Use drop cloths, plastic sheeting, or masking tape and paper to protect these areas.
– Step 4: Apply the Cleaning Solution
Using a sponge, brush, or spray bottle, apply the cleaning solution to the surface. Work from the top down, thoroughly wetting the area.
– Step 5: Scrub the Surface
For stubborn dirt or stains, use a brush or scrubbing pad to scrub the surface gently. Avoid using abrasive materials that might scratch or damage the surface.
– Step 6: Rinse Thoroughly
Rinse the surface with clean water, ensuring that all cleaning solutions and contaminants have been removed. A garden hose or pressure washer can be helpful for rinsing large areas or exterior surfaces.
– Step 7: Dry the Surface
Allow the surface to dry completely before applying the paint. A moisture meter can be a helpful tool to check if the surface is adequately dry, particularly for porous materials such as wood.
– Step 8: Address Surface Imperfections
With the surface clean and dry, examine it for any remaining imperfections, such as nail holes, cracks, or gouges. Repair these areas using appropriate patching materials, and sand them smooth before priming and painting.
• Additional Tips for a Successful Painting Project
- Always wear protective clothing and safety gear, such as gloves and goggles, when working with cleaning solutions.
- Follow any local regulations or guidelines for the proper handling and disposal of cleaning solutions and waste materials.
- Clean and dry all painting tools and equipment before use, especially brushes and rollers, to prevent contamination of the paint and surface.
- In some cases, a primer or sealer may be needed to help ensure proper adhesion of the paint to the surface.
- Always follow the paint manufacturer’s recommendations for surface preparation and application.
• Conclusion
Cleaning the surface before painting is a crucial step in ensuring the durability and appearance of your finished project. By following the steps outlined above and paying close attention to the specific requirements of your surface, you can achieve professional-quality results that will stand the test of time.
-Painting Surface Preparation: Key Techniques
Whether you’re a professional painter or a DIY enthusiast, proper surface preparation is crucial to achieving a smooth and lasting paint finish.
• Importance of Surface Preparation
Before we dive into the specifics, it’s essential to understand why surface preparation is so important. Properly preparing your surface:
- Ensures better paint adhesion
- Reduces the risk of paint peeling, cracking, or blistering
- Reveals any hidden defects or damage
- Facilitates a smoother, more even paint application
• Assess the Surface
Begin by examining the surface to identify any defects or damage requiring repair. Look for cracks, holes, peeling paint, mold, and mildew. It’s essential to address these issues before proceeding to avoid compromising the paint’s durability and appearance.
• Clean the Surface
Before any repair work, you’ll need to clean the surface thoroughly. Common cleaning techniques include:
– Soap and Water
Use soap and warm water to remove dirt, grease, and grime. A sponge or soft-bristle brush can help you get into nooks and crannies. Rinse the surface with clean water and allow it to dry completely before moving on.
– TSP (Trisodium Phosphate)
For a deeper clean, use TSP, which you can find at most hardware stores. Mix it with water according to the manufacturer’s instructions, and scrub the surface with a brush. Rinse well and allow the surface to dry. Remember always to wear gloves and eye protection when using TSP.
– Pressure Washing
For exterior surfaces, pressure washing may be necessary to remove dirt, mold, or algae. The U.S. Forest Products Laboratory recommends a pressure of 500-800 psi for wood surfaces and 1200-1500 psi for masonry surfaces. Avoid using excessive pressure that might damage the surface.
• Make Repairs and Fill Gaps
Fix any damage or imperfections you’ve identified, such as filling holes or cracks with appropriate filler material. Sand the filled areas smoothly and flush with the surface.
Caulk any gaps or seams where the surface meets other materials, such as a window or door trim. Allow all repair materials to dry and cure according to the manufacturer’s recommendations.
• Remove Loose or Peeling Paint
Scrape away any loose or peeling paint with a paint scraper or putty knife. For larger areas, a wire brush or power sander might be more efficient. Sand the edges of the remaining paint to create a smooth transition between the old paint and the exposed surface.
• Sanding the Surface
Sanding is vital to creating a smooth, paint-ready surface that promotes proper adhesion. Follow these sanding tips for optimal results:
- Use the right sandpaper grit: Start with a coarse grit (80-100) for rough surfaces, then work your way to medium (120-150) and fine (180-220) grits for progressively smoother results.
- Always sand in the direction of the grain or surface pattern to minimize the appearance of scratches.
- Vacuum or wipe down the surface with a tack cloth to remove any sanding dust.
• Primer Application
The final step in surface preparation is applying primer, which provides a uniform base for your paint job. It’s especially important if you’re painting over bare wood, metal, or difficult-to-cover colors. Here are a few tips for proper primer application:
- Choose the appropriate primer for your surface material and paint type (e.g., latex primer for latex paint).
- Tint the primer with a small amount of your topcoat color for better coverage.
- Apply the primer with a brush, roller, or sprayer, following the manufacturer’s instructions.
- Allow the primer to dry completely, typically 24 hours or more, before applying the topcoat.
With your surface now clean, repaired, sanded, and primed, you’re ready to paint. Remember, taking the time to adequately prepare the surface before painting is essential for a smooth, durable, and professional-looking finish.
Step | Description |
|---|---|
1 | Clean the surface: Remove any dirt, dust, and grime using mild detergent and water. This will ensure that the paint adheres properly to the surface. |
2 | Repair any damage: Fill in any cracks, holes, or dents using appropriate patching material. Sand down any rough or uneven areas. |
3 | Remove any loose or peeling paint: Scrape off any old paint that is peeling or chipping using a paint scraper or wire brush. |
4 | Sand the surface: Lightly sand the entire surface to create a smooth, uniform surface that will promote better paint adhesion. |
5 | Prime the surface: Apply primer to the surface to create a consistent, even base for the paint to adhere to. This is especially important when painting over darker colors, stains, or porous materials. |
6 | Tape off any areas not to be painted: Use painter’s tape to protect any areas that should not receive paint, such as trim, windows, and doors. |