Ensuring Paint Cans’ Longevity Via Cleaning
When it comes to preserving the quality and longevity of paint cans, proper cleaning plays a crucial role. You’ve come to the right place to learn how to keep your paint cans in pristine condition for longer periods of time. With the right techniques and preventive measures, you can rest assured that your paint supply will be ready for both current and future projects.
Ensuring paint cans’ longevity via cleaning:
To ensure paint cans’ longevity through proper cleaning, store them in a cool, dry, well-ventilated area, seal lids securely, clean the rim and lid before closing, label and date cans, dispose of empty cans properly, consider reusable storage solutions, occasionally check stored paint condition, and follow specific cleaning methods for different paint types.

Discover our foolproof methods for enhancing the lifespan of your paint cans through proper cleaning and maintenance. Learn innovative techniques that save time, money, and paints. Stick around to read more!
Contents
- 1 Prolonging Paint Can Life through Proper Cleaning
- 1.1 • Proper Storage of Paint Cans
- 1.2 • Sealing the Paint Cans
- 1.3 • Clean the Rim and Lid Before Closing
- 1.4 • Label and Date the Paint Cans
- 1.5 • Proper Disposal of Empty Paint Cans
- 1.6 • Reusable Paint Can Storage Solutions
- 1.7 • Checking the Condition of Stored Paint
- 1.8 • Overall Tips and Recommendations for Paint Can Longevity
- 2 Methods for Cleaning Paint Cans Effectively
- 3 Preparing Surfaces for Painting: Best Cleaning Practices
- 4 Identifying Spoiled Paint: Tips and Tricks
- 5 Painted Surface Care and Maintenance Techniques
Prolonging Paint Can Life through Proper Cleaning
Paint cans are essential for storing and preserving the quality of the paint. Proper cleaning and maintenance of paint cans can significantly increase their longevity and effectiveness.
• Proper Storage of Paint Cans
The first step to ensure paint cans’ longevity is proper storage. This includes storing the cans in a cool, dry, and well-ventilated area.
Avoid exposing the cans to extreme temperature fluctuations or direct sunlight, as these factors can degrade the paint quality and damage the cans.
• Sealing the Paint Cans
A key factor that determines the longevity of paint cans is how well they are sealed. If air, moisture, or contaminants enter the can, it can compromise the paint’s quality and, ultimately, the can’s longevity.
Make sure the lids are securely fastened and that the seals are intact. A rubber mallet can be used to tap the lids gently, ensuring a tight and secure seal.
• Clean the Rim and Lid Before Closing
Before sealing the paint can, make sure to clean the rim and the lid thoroughly. Any leftover paint residue can prevent the lid from closing properly, allowing air and contaminants to enter the can.
A paintbrush or cloth dampened with a paint thinner or mineral spirits can effectively remove the excess paint from the rim and the lid.
• Label and Date the Paint Cans
When storing multiple paint cans, it’s essential to label and date each can to identify the contents quickly. This will help avoid unnecessary opening and closing of the cans, which can increase their longevity.
Use a permanent marker to write the color, type of paint, and date of purchase on the lid or the side of the can.
• Proper Disposal of Empty Paint Cans
Properly disposing of empty paint cans can help prevent environmental contamination and potential health hazards.
According to the U.S. Environmental Protection Agency (EPA), it’s crucial to dispose of paint cans in accordance with local regulations. Some local recycling centers may accept empty paint cans, while others may require you to take them to a designated hazardous waste collection event.
• Reusable Paint Can Storage Solutions
In addition to traditional metal paint cans, reusable paint can storage solutions can help increase the longevity of paint cans. These solutions include plastic or silicone containers with airtight seals, glass jars with screw-on lids, or specialized paint storage containers designed for long-term storage.
These options can help maintain airtight seals, reduce exposure to contaminants, and protect the paint from temperature fluctuations.
• Checking the Condition of Stored Paint
Occasionally checking the condition of stored paint can help identify any issues that could affect the paint cans’ longevity.
Open the cans carefully and inspect the paint for any signs of contamination or degradation. If the paint has separated, give it a thorough stir to mix the ingredients back together. If the paint has thickened or developed an unpleasant odor, it may be time to dispose of it and replace it with a new can.
• Overall Tips and Recommendations for Paint Can Longevity
Here are some overall tips and recommendations for ensuring paint cans’ longevity through proper cleaning and maintenance:
- Regularly inspect the seals of stored paint cans to ensure that they are airtight and free of contaminants.
- Keep leftover paint covered with a layer of plastic wrap before sealing the lid to prevent skinning.
- Use dedicated paint can openers instead of screwdrivers or other tools, which can damage the lid or the seal.
- Avoid using water to clean oil-based paint cans, as water can entrap and cause rusting.
- Consider transferring paint to smaller containers if the original can gets damaged or is too large.
- Follow the proper cleaning and maintenance routine for different types of paint, water-based (latex) paints, oil-based paints, and specialty paints may require different cleaning methods.
By following these recommendations, one can ensure the longevity and effectiveness of paint cans, ultimately saving time, money, and resources.
Methods for Cleaning Paint Cans Effectively
Cleaning paint cans is an essential step you should take if you plan on reusing or repurposing them. Properly cleaning these cans helps in extending their life, preventing contamination, and ensuring a smooth paint application the next time around.
– Tools and Materials Required
Before diving into the cleaning process, make sure you gather all the necessary tools and materials needed to complete the job. Having the right equipment on hand will ensure your cleaning process goes smoothly and efficiently.
- Paint can opener
- Paintbrush or scouring pad
- Warm water
- Dish soap or paint cleaner
- Rubber gloves
- Paper towel or cloth
- Acetone, rubbing alcohol, or mineral spirits (for oil-based paints)
- A well-ventilated workspace
– Safety First: Precautions to Take
A crucial aspect of cleaning paint cans is taking safety precautions throughout the process. This includes wearing rubber gloves to protect your hands from toxic chemicals and working in a well-ventilated area.
The United States Environmental Protection Agency provides more tips on how to protect yourself from harmful substances when handling paint materials.
– Step by Step Guide for Cleaning Paint Cans
With safety measures in place and tools gathered, you’re now ready to begin the paint can cleaning process.
Step 1: Remove Excess Paint
First, take a paintbrush or a scouring pad to remove any dried or excess paint from the sides of the paint can. Doing so will make the cleaning process easier and help you avoid getting paint everywhere.
Step 2: Dispose of Paint Properly
Before starting to clean, ensure that all excess paint spills and drips are disposed of properly. You can do this by either letting the paint dry completely and disposing of it in the trash or by following local guidelines for disposing of wet paint.
Step 3: Mix Cleaning Solution
- For latex paint: Mix a few drops of dish soap in a container filled with warm water. This will create a gentle cleaning solution that’s effective at removing paint residue.
- For oil-based paint: Use a cleaning agent like acetone, rubbing alcohol, or mineral spirits. These cleaning agents will help dissolve and remove the stubborn paint residue left behind.
Step 4: Clean the Interior of the Can
Now that you have your cleaning solution ready, it’s time to clean the interior of the paint can.
- For latex paint: Dip your paintbrush or scouring pad in soapy water and scrub the interior of the paint can thoroughly.
- For oil-based paint: Apply the cleaning agent to a cloth or paper towel, then gently rub the interior of the can to remove paint residue.
Make sure to get into all the grooves and ridges of the can, paying special attention to the rim and the grooves where the lid sits.
Step 5: Clean the Lid
Using the same cleaning solution as used for the interior, clean the paint can lid thoroughly, ensuring that no residual paint is left behind.
Step 6: Rinse
Once the interior and lid are both clean, rinse the paint can and lid with clean water. Ensure all soap or cleaning agent residue is removed to avoid any contamination or problems with future paint usage.
Step 7: Dry
Lastly, dry the paint can and lid using a clean cloth or paper towel. Make sure they are completely dry before storing or reusing them to prevent any issues with paint adherence or contamination.
– Storing Your Clean Paint Cans
After you have successfully cleaned your paint cans, it’s essential to store them properly to protect them from moisture, dust, and other contaminants that can compromise the quality of the paint.
Store paint cans in a cool, dry place with the lids tightly secured to maintain their integrity and ensure they are ready for reuse.
• Conclusion
Cleaning paint cans may seem like a daunting task, but with the proper tools, materials, and steps outlined in this article, you can achieve effective and safe results.
By following these guidelines, you will ensure that your paint cans are clean, well-maintained, and ready for future use.
So, the next time you find yourself with empty or partially used paint cans, don’t hesitate to give them a little care and attention to extend their life and usefulness.
| How do you clean paint cans? | |
|---|---|
| 1. Remove Excess Paint | Use a paintbrush, putty knife, or other tool to scrape off excess paint from the edges and inside of the can. |
| 2. Clean with Water | If the paint inside the can is water-based, use a hose, sink, or bucket to rinse out the remaining paint from the can. |
| 3. Clean with Solvents | If the paint is oil-based, use a paint thinner, mineral spirits, or another appropriate solvent to clean the can. Be sure to clean and dispose of solvents according to manufacturer directions and municipal guidelines. |
| 4. Wipe Dry | After rinsing or using solvents, use a cloth or paper towels to wipe the inside and outside of the can as dry as possible. |
| 5. Air Dry | Leave the cleaned paint can open to air dry further before storing or disposing of it. |
Preparing Surfaces for Painting: Best Cleaning Practices
• The Importance of Cleaning Surfaces Before Painting
Before delving into the various methods to clean surfaces, it is essential to understand the importance of surface preparation in ensuring a high-quality painting job.
Properly preparing the surface not only leads to a better paint finish but also helps the paint adhere, resulting in increased durability and reduced maintenance. Failure to clean the surfaces properly can lead to complications such as paint peeling, flaking, or blistering.
Now that we have established the significance of surface cleaning, let us explore some effective methods for different surface types.
• Cleaning Methods for Various Surface Types
– Walls
Walls are one of the most common surfaces that require painting. The following steps can help ensure the walls are adequately prepared:
- Remove dust and loose dirt: Utilize a vacuum cleaner with a brush attachment or a microfiber duster to remove dust from the wall surface.
- Clean with a detergent solution: A mixture of warm water and mild dishwashing soap can effectively remove greasy stains and dirt. Use a sponge or a soft cloth to gently apply the solution to the wall, working in small sections. Rinse the sponge frequently to prevent redepositing dirt on the cleaned area.
- Treat mold and mildew: If the wall shows signs of mold or mildew, a solution of one part bleach to three parts water can help treat the problem. Be sure to wear protective gloves and safety glasses when handling bleach.
- Rinse thoroughly: After cleaning the wall with the detergent solution and treating any mold, rinse the surface with clean water using a sponge or a soft cloth. Allow the wall to dry completely before applying any paint or primer.
– Wood
Painting wooden surfaces requires thorough cleaning to avoid uneven finishes or the paint not adhering properly. Here are some steps to clean wood surfaces effectively:
- Remove dust and loose dirt: Use a vacuum cleaner with a brush attachment or a microfiber duster to eliminate any dust and loose particles from the wood surface.
- Sand the surface: Lightly sand the wood surface with fine-grit sandpaper to remove any rough spots and improve paint adhesion. Make sure to sand in the direction of the wood grain and avoid applying too much pressure.
- Wipe away sanding dust: After sanding, use a tack cloth or a damp microfiber cloth to remove any residual sanding dust from the wood surface.
- Clean with a wood cleaner: To remove grease, dirt, and stains, use a wood cleaner or a mixture of warm water and mild dishwashing soap. Apply the cleaning solution gently with a sponge or soft cloth and rinse with clean water afterward.
- Allow to dry: Let the wood surface dry entirely before applying paint or primer.
– Metal
When painting metal surfaces, proper cleaning is vital to prevent rust and ensure a smooth, lasting finish. Follow these steps to prepare metal surfaces:
- Remove loose particles: Use a wire brush, steel wool, or a metal scraper to remove any rust, peeling paint, or other loose particles from the metal surface.
- Clean with a detergent solution: Mix warm water and mild dishwashing soap to create a cleaning solution. Apply the solution to the metal surface with a sponge or cloth, ensuring to remove any grease, dirt, and grime. Rinse the cleaned area with clean water.
- Treat rust spots: If there are any remaining rust spots, treat them with a rust converter or a metal primer designed to inhibit rust formation.
- Rinse and dry: Rinse the entire metal surface with clean water and use a clean, dry cloth to pat the surface dry. Make sure the metal is thoroughly dry before proceeding with the painting process.
• Final Thoughts
In conclusion, properly cleaning surfaces before painting is crucial for ensuring a high-quality, long-lasting finish.
Different surface types, such as walls, wood, and metal, have unique cleaning requirements. Following the recommended methods for cleaning each surface can help achieve the best possible results in your painting projects.
Identifying Spoiled Paint: Tips and Tricks
There’s no denying that a fresh coat of paint can breathe new life into any room, exterior surface, or object. However, when the paint goes bad, it not only fails at its basic function but also poses a health risk to those nearby.
Understanding how to spot paint that’s past its prime becomes a necessity, both for achieving great results and ensuring your safety.
• Discern the Age and Shelf Life of the Paint
Knowing the shelf life of the paint is essential for maintaining its quality. Generally, unopened latex paints last up to 10 years, while oil-based paints have a shelf life of about 15 years. On the other hand, opened latex paints have a lifespan of two years, and opened oil-based paints last for five.
To determine the age of the paint, locate the printed production date on the can. Consult the paint manufacturer’s guidelines, available on their official website, to ensure accuracy in determining its shelf life. (Purdue University)
• Check for Telltale Signs of Spoilage
– Smell the Paint
Upon opening the can, take a whiff of the paint. Fresh paint has a mild odor, whereas spoiled paint tends to emit a distinct, pungent odor. A strong, sour smell indicates that the paint has likely gone bad.
– Examine the Paint Consistency
When examining the paint, first stir it with a flat tool, such as a paint stick or an old spoon. If the paint has a thick or clumpy texture, it may be unusable. Also, look for stringy, separated elements in the paint, which is another sign of spoilage.
Be sure to take note of any dried or hardened pieces in the can. If a thick, rubbery layer has formed atop the paint, scrape it off before stirring the remaining contents. In this case, the paint underneath should still be usable.
However, if the rubbery layer is too thick and cannot be removed, the paint is likely unsalvageable.
– Inspect the Can for Rust and Leakage
Inspect the exterior of the can for any signs of rust or leakage. Rust could indicate that the metal can has been compromised, potentially allowing air and contaminants to infiltrate the paint. Similarly, visible leakage from the can indicates that the paint’s integrity may be compromised.
• Test the Paint’s Performance
If there are no apparent signs of spoilage, testing the paint on a small surface is the next step.
Begin by stirring the paint thoroughly and dipping a brush into it. Apply the paint onto a small, inconspicuous area and observe its behavior. If the paint spreads evenly and dries without any clumps, cracks, or uneven patches, it’s in good condition.
I also recommend examining the dry paint for any peculiar odor, which could indicate unseen issues with the paint’s quality.
• Dispose of Bad Paint Responsibly
If you suspect that your paint has indeed gone bad, take proper disposal measures. Follow the guidelines of your local hazardous waste facility or contact your local environmental protection agency for details on how to handle the disposal process. (U.S. EPA)
• Tips for Extending Paint Shelf Life
- Store paint cans in a cool, dry area away from sunlight.
- Seal the paint can tightly after use by tapping the lid gently with a rubber mallet.
- Clean the groove around the can’s rim to ensure a secure, airtight seal.
- Invert the paint can for a few seconds after closing to create a better seal around the rim.
- For long-term storage, consider pouring unused paint into smaller containers with airtight lids.
By following these steps, you can adequately judge the quality of your paint and avoid potential issues caused by using paint that has gone bad. Remember to store your paint cans properly to prolong their shelf life and to always test the paint before applying it to a larger surface.
Sign | Description |
|---|---|
Strong, foul smell | If the paint emits a strong, foul odor, it is likely that it has gone bad and should not be used. |
Separation of components | If the paint components have separated and cannot be mixed back together, the paint has likely gone bad. |
Presence of mold or bacteria | If there is visible mold, bacteria, or other contaminants in the paint can, the paint has gone bad. |
Hardened or lumpy texture | If the paint has hardened, become lumpy, or has chunks in it, it has gone bad and is not suitable for use. |
Discoloration | If the color of the paint has changed or become uneven, it may be an indication that the paint has gone bad. |
Painted Surface Care and Maintenance Techniques
Proper care and maintenance of painted surfaces are essential to extend their lifespan and ensure they continue to look attractive. Whether it’s the interior or exterior of a building, a vehicle, or a piece of furniture, following the right practices will help preserve the paint’s quality and condition.
• Choosing the Right Paint and Tools
The type of paint and application tools used determines the durability and longevity of a painted surface. Choose paint with higher-quality pigments, binders, and additives that are specifically designed for the surface being painted.
For instance, exterior paint should be weather-resistant, while interior paint should have a low odor and quick drying time.
Also, use high-quality brushes, rollers, or sprays to apply the paint evenly and smoothly, as this contributes significantly to the overall appearance and longevity of the painted surface.
• Cleaning Painted Surfaces Regularly
Keeping painted surfaces clean is key to maintaining their appearance and preventing the buildup of dirt and grime. Follow these recommendations for cleaning various painted surfaces effectively:
– Interior Walls and Ceilings
To clean painted interior walls and ceilings, use a soft sponge or cloth, and a mild detergent mixed with warm water. Avoid using harsh chemicals, as they can damage the paint. Gently wipe the surface in a circular motion and rinse with clean water. Dry with a soft cloth afterward.
– Exterior Painted Surfaces
For exterior painted surfaces, use a garden hose or pressure washer at a low setting to remove dirt and debris. If there’s stubborn dirt or mildew, use a mild detergent mixed with water and a soft-bristle brush to scrub the surface gently. Rinse thoroughly and let the surface dry completely.
– Painted Furniture
To clean painted furniture, dust regularly with a soft cloth or microfiber duster. For deep cleaning, use a damp cloth and mild detergent, then rinse with a clean, damp cloth and dry thoroughly.
– Painted Vehicles
Wash painted vehicles regularly to remove dirt, road salt, and other contaminants. Use a car wash soap designed specifically for painted surfaces, along with a soft sponge or brush.
Rinse with water and dry with a soft, lint-free cloth or chamois. To maintain the paintwork’s shine, apply a quality car wax or paint sealant.
To clean painted vehicles, always wash using clean implements and avoid cross-contaminating with other vehicles or surfaces. This helps to prevent scratches and swirl marks.
• Addressing Paint Issues Promptly
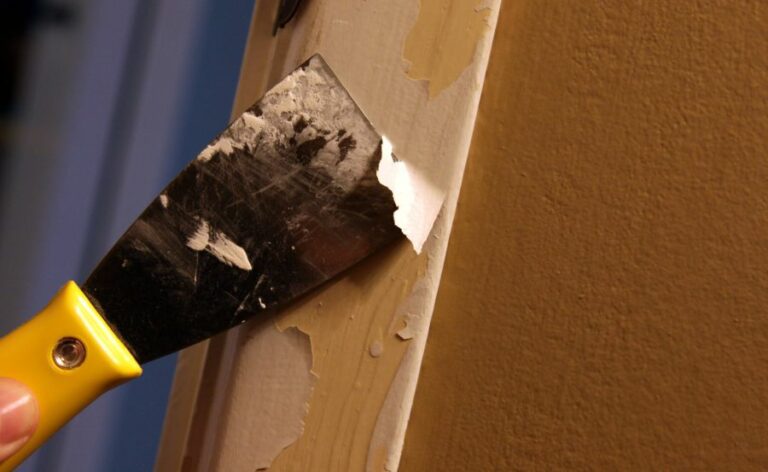
Encountering paint issues such as peeling, flaking, or chipping is not uncommon, especially on exterior surfaces. Address these issues promptly by scraping off the loose paint and applying a good-quality primer.
– Repairing Paint Chips
Small paint chips can be repaired by lightly sanding the affected area with fine-grit sandpaper and wipe clean. Apply a layer of primer and let it dry completely. Then, apply the matching paint color using a small brush or paint pen, and allow it to dry.
– Dealing with Faded Paint
Restore faded paint by applying a fresh coat of paint to the entire surface. Make sure that the new paint matches the existing color or choose a completely new color for a refreshed look.
• Protecting Painted Surfaces from Damage
Prevent damage to painted surfaces by taking the necessary precautions:
– Furniture and Other Items
Avoid placing heavy or sharp objects directly on painted surfaces. Use coasters under hot or cold beverages, trivets under hot dishes, and felt or rubber pads under furniture legs to protect painted surfaces from scratches and heat damage.
– Vehicles
Park your vehicle in a garage or under a carport to protect it from direct sunlight, which can fade the paint over time. Avoid parking under trees, as tree sap, bird droppings, and falling branches can damage the paint.
• In Conclusion
Caring for and maintaining painted surfaces is essential to preserve their appearance and extend their lifespan.
By choosing the right paint and tools, cleaning surfaces regularly, addressing paint issues promptly, and protecting surfaces from damage, you can keep your painted surfaces looking fresh and attractive for years to come.
Step | Description |
|---|---|
1 | Keep the surface clean by gently wiping it with a soft cloth or sponge and mild, soapy water. Rinse and dry immediately. |
2 | Avoid abrasive cleaners, as they can scratch the surface and damage the paint. |
3 | Be cautious while using strong chemicals or solvents near painted surfaces, as they can cause discoloration or other damage. |
4 | Protect the painted surface from direct sunlight or high temperatures, as this can lead to fading or warping. |
5 | Inspect the surface regularly for any signs of damage or wear, such as chipping or peeling paint. |
6 | If any damage is found, touch up the paint as necessary, using the same type and color of paint as the original. |
7 | If you plan to move or store the painted item, wrap it carefully in a soft cloth or padding to prevent scratches or other damage. |

