Spray Painting Maintenance Tips: Ensuring Long-Lasting Results
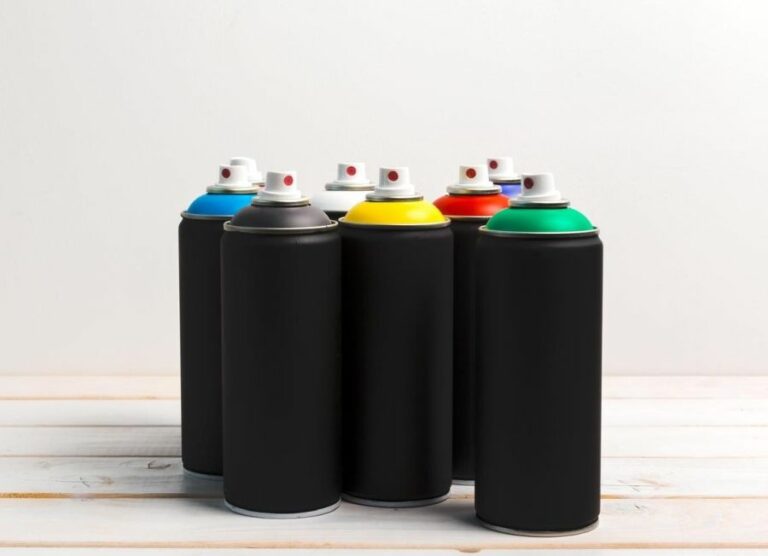
Spray painting can be an incredible way to revamp an old piece or create eye-catching artwork, but achieving those long-lasting results requires a little know-how. Lucky for you, we have the knowledge and experience to provide you with those essential spray painting maintenance tips that will ensure your masterpieces stand the test of time.
Spray painting maintenance tips: ensuring long-lasting results:
To ensure long-lasting spray paint results, properly prepare the surface by cleaning it and applying primer, use the appropriate paint for the material, apply the paint evenly in thin coats, protect the painted surface with a clear coat or sealer, store spray cans correctly, and repair any paint damage promptly.

Unlock the secret to long-lasting spray paint results with our expert maintenance tips! Discover crucial techniques and tricks to protect your surfaces and achieve a flawless finish. Read on to learn more!
Contents
- 1 Prolonging Spray Paint Effects: Maintenance Tips for Durable Results
- 2 Techniques for Extending the Lifespan of Spray Paint
- 3 Achieving Optimal Outcomes with Spray Painting Techniques
- 4 Unlocking the Key to Successful Spray Painting
- 5 Smooth Spray Painting: Essential Steps for a Flawless Finish
- 5.1 • 1. Choose the Right Equipment
- 5.2 • 2. Prepare the Surface
- 5.3 • 3. Select the Right Paint
- 5.4 • 4. Practice Your Technique
- 5.5 • 5. Create a Clean Workspace
- 5.6 • 6. Control the Environmental Conditions
- 5.7 • 7. Strain Your Paint
- 5.8 • 8. Follow Proper Safety Procedures
- 5.9 • 9. Apply Paint in the Proper Sequence
- 5.10 • 10. Inspect and Correct any Imperfections
Prolonging Spray Paint Effects: Maintenance Tips for Durable Results
Spray painting is a popular method for both DIY enthusiasts and professionals alike. The benefits are numerous, including a smooth, even finish and efficient coverage. Following some simple maintenance tips can ensure long-lasting results for your paint job.
• Preparing the Surface
Before even picking up a can of spray paint, it’s crucial to properly prepare the surface you’ll be painting. I recommend thoroughly cleaning the surface with a mild soap and water solution or using a specialized cleaner for specific materials.
Removing dirt, grease, and other contaminants ensures better adhesion of the paint, reducing the likelihood of chipping and peeling.
When painting metal, consider using a rust neutralizer to prevent oxidation from occurring. Apply a suitable primer before spray painting, as it creates a stable base for paint and promotes better adhesion.
• Using the Right Spray Paint
Choose a spray paint specifically designed for the surface you’re painting. There are paint products tailored to a wide range of materials, such as plastic, metal, wood, and more. Using the right type of paint ensures better adhesion and longer-lasting results.
Look for paints with UV and weather-resistant properties, particularly for outdoor surfaces.
Also, take note of the recommended drying and curing times specified by the paint manufacturer. Rushing the process can lead to poor adhesion and a less durable finish.
• Applying Spray Paint Correctly
Applying the paint evenly is key to a long-lasting, professional-looking finish. I recommend holding the can about 10-16 inches away from the surface, keeping it moving in smooth, sweeping motions. Overlap each pass by about 50% to ensure complete and even coverage.
Rather than applying one thick coat, aim for multiple thin coats. Waiting for each layer to be touch dry before applying the next significantly improves adhesion and overall durability. Be patient and allow the paint to fully cure before subjecting it to any handling or contact.
• Protecting the Painted Surface
Once the paint is fully cured, consider applying a clear coat or sealer for added protection. Clear coats can provide a glossy or matte finish and enhance the appearance of the paint. They also help protect the paint from UV exposure, moisture, and abrasion, prolonging its lifespan.
For outdoor surfaces exposed to harsh conditions, consider using a protective wax to shield the paint from the elements. Regularly clean painted surfaces, avoiding harsh chemicals or abrasive materials. A simple solution of mild soap and water often suffices.
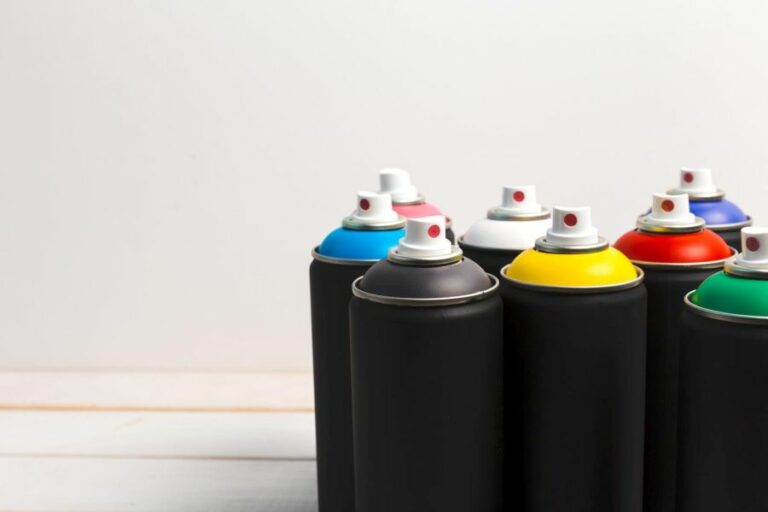
• Proper Storage and Maintenance of Spray Cans
If you’re left with partially used spray cans, proper storage and maintenance will ensure they remain functional for future use. Store cans in a cool, dry environment, away from direct sunlight or heat sources. Avoid exposing them to freezing temperatures.
Before storing, clean the spray nozzle by inverting the can and spraying until only clear propellant escapes. This prevents clogging and ensures the nozzle works effectively next time.
• Repairing Damaged Paint
Despite best efforts, spray-painted surfaces might become damaged or start showing signs of wear. Identifying the issue and addressing it as soon as possible can increase the paint’s longevity. For minor chips and scratches, lightly sand the damaged area and reapply the paint, blending it into the existing paint job.
For more extensive damage or fading, it might be necessary to repaint the entire surface. Always follow the tips provided in this article for surface preparation, proper paint application, and post-painting care.
In conclusion, achieving long-lasting results from spray painting requires not only skillful application but also proper maintenance and care. By following these simple tips, you’ll be able to enjoy a durable, professional-looking finish for years to come.
Techniques for Extending the Lifespan of Spray Paint
As a spray painting enthusiast, I am always searching for ways to make my projects look better and last longer.
Throughout my years of experimenting with different techniques and tools, I have found some essential tips that can help you make your spray paint last longer, ensuring your projects look professional and withstand the test of time.
• Choosing the Right Spray Paint
It all begins with choosing the right spray paint for your project. Opting for high-quality paint will not only make your work look better but also help it last longer.
I recommend using paints from reputable brands like Rust-Oleum, Krylon, or Montana. Going the extra mile in selecting high-quality spray paint will pay off in the long run.
• Surface Preparation: Cleaning and Sanding
Before getting started with spray paint, it’s crucial to spend some time preparing the surface. A clean and properly sanded surface ensures better paint adhesion, ultimately making your paint last longer.
– Cleaning
Start by thoroughly cleaning the surface. Remove dirt, oils, and grease by using a degreaser, rubbing alcohol, or a mild detergent. Avoid using solvents like acetone or paint thinner, as they can leave residue on the surface, which might affect paint adhesion.
– Sanding
Once the surface has been cleaned, it’s time to sand. Sanding creates a rough surface for the paint to grip onto, ensuring a long-lasting finish. Use fine-grit sandpaper (between 220-320 grit) for a smooth surface.
Make sure to always sand in the direction of visible grain or pattern to avoid creating visible scratches on the finished product. Once the sanding is complete, remove all dust particles with a clean cloth or tack cloth.
• Using a Primer
For maximum durability and improved adhesion, I always recommend using a primer. Primers prepare the surface, allowing the paint to stick better and creating a uniform base for a smoother, more polished finish.
Choose a primer specific to the material you are working on – they come in varieties for wood, metal, and plastics. Applying two to three light coats of primer is ideal.
• Applying Your Spray Paint
– Temperature and Humidity
Spray painting in the right conditions is essential in making your paint last longer. The ideal temperature for spray painting is between 60-75°F (15-24°C), and humidity levels should be below 50%.
Search for local weather conditions on websites like NOAA or Weather Underground to ensure optimal painting conditions.
– Technique
Developing proper spray painting techniques will significantly impact the final result. Maintain a consistent distance of 10-12 inches between the spray can and the surface, and always keep the can in motion.
Apply thin coats to avoid drips and runs, allowing each layer to dry slightly before applying the next. To achieve a smooth finish, I recommend applying 2-3 coats of paint.
• Seal It with a Clear Coat
Applying a clear coat is the final touch that will protect your spray paint and make it last longer. A clear coat provides a barrier against scratches, chemicals, and UV rays. Make sure to choose the correct type of clear coat for your project.
They come in different forms, like glossy, matte, and satin finishes. As with the paint, apply thin and even coats, allowing them to dry completely between applications.
• Proper Care and Maintenance
Taking care of your spray-painted surfaces can significantly extend the life of your paint job. Regular cleaning and proper storage (when applicable) can help prevent damage and wear. For outdoor projects, make sure to inspect them regularly, touching up any scratches or chips.
In conclusion, the key to making your spray paint last longer lies in choosing the right paint, meticulous surface preparation, proper painting technique, and finally, sealing and maintaining the painted items.
By following the tips outlined in this article, you can ensure that your spray painting projects will have a professional, long-lasting finish.
Step | Instructions |
|---|---|
1 | Store spray paint cans in a cool, dry place; avoid direct sunlight or extreme temperatures. |
2 | Shake the spray paint can well for at least one minute before use to ensure proper mixing of paint. |
3 | After finishing, turn the can upside down and spray until only clear gas is released to prevent clogging. |
4 | Hold the spray paint can 8-12 inches away from the surface and apply thin, even coats, allowing each layer to dry before applying the next. |
5 | After finishing, turn the can upside down and spray until only a clear gas is released to prevent clogging. |
6 | Store the can with the nozzle removed and tightly sealed using a plastic bag and rubber band to protect it from contaminants. |
7 | When using the spray paint again, clean the nozzle with a toothpick, warm water, and mild soap to ensure proper paint flow. |
Achieving Optimal Outcomes with Spray Painting Techniques
Spray painting is a popular and efficient method for applying paint to various surfaces. It allows for a smooth, even finish without the hassle of brush strokes. If done correctly, spray painting can yield professional-looking results on a variety of materials, including metal, plastic, and wood.
• Choose the Right Spray Paint
Selecting the right spray paint is crucial for achieving the desired outcome. Many factors, such as paint type and finish, can affect the final appearance. Here are some considerations to help you make an informed decision:
- Paint type: There are various types of spray paint available, including enamel, lacquer, acrylic, and more. Each type has its own properties and uses. Research and choose the appropriate type for your project. For instance, enamel paints are known for durability and can be used on outdoor surfaces, while acrylic paints are better suited for indoor projects.
- Finish: Spray paints come in a range of finishes, such as gloss, semi-gloss, satin, and matte. Choose a finish that will enhance the appearance of your project and suit your personal preference.
- Compatibility: Ensure that the spray paint you choose is compatible with the material you are painting. Some paints are specifically formulated for certain surfaces, such as plastics or metals. Always check the label for compatibility information.
• Prepare the Surface
Proper surface preparation is key to achieving a smooth, even finish. Follow these steps to prepare your surface for spray painting:
- Clean the surface: Use a damp cloth and mild detergent to clean the surface of any dirt, grease, or other contaminants. A clean surface will help the paint adhere better and yield a smoother finish.
- Sand the surface: Sanding the surface creates a rough texture for the paint to grip. Use fine-grit sandpaper (around 220 grit) to lightly sand the surface. For metal surfaces, consider using a self-etching primer, which will help create a suitable surface for paint adhesion.
- Tape off areas: If there are areas that you do not want to paint, use painter’s tape to cover and protect them.
- Prime the surface: Applying a primer before spray painting helps create a uniform surface, ensures better adhesion, and enhances the final finish. Select a primer specifically designed for the material you are painting and follow the manufacturer’s instructions for application.
• Proper Spray Painting Techniques
Adopting correct spray painting techniques is critical to achieving a professional-looking finish. Here are some tips for proper application:
- Shake the can: Before using the spray paint, shake the can vigorously for at least a minute. This will ensure proper mixing of the paint and result in a more even application.
- Maintain proper distance: Hold the spray paint can approximately 10-12 inches away from the surface. This distance provides optimal coverage without causing drips or an uneven finish.
- Spray in thin coats: Apply the paint in thin, even coats rather than a single heavy coat. This will help prevent drips, runs, and uneven coverage. Allow each coat to dry according to the manufacturer’s recommendations before applying additional coats.
- Use a consistent motion: When spraying, use a sweeping motion while keeping your arm and wrist steady. Start your spray slightly beyond the edge of your project and continue past the opposite edge. This will help create an even, overlapping pattern and prevent buildup at the edges.
- Ventilation: Spray painting should be done in a well-ventilated area to prevent the inhalation of harmful fumes. If painting indoors, open windows and use fans to promote airflow.
• Post-Painting Tips
After completing the spray painting process, follow these tips for a successful finish:
- Allow time for the paint to dry: Let the paint dry according to the manufacturer’s recommended drying time. Rushing the drying process may lead to a compromised finish.
- Avoid touching the surface: Resist the temptation to touch the newly-painted surface before it is fully dry. Doing so can mar the finish and leave fingerprints.
- Clearcoat for added protection: Applying a clearcoat (available in various finishes) over your painted surface can provide extra protection and enhance the appearance of your project. Follow the manufacturer’s instructions for application and drying times.
- Remove painter’s tape: Carefully remove any painter’s tape applied to protect areas from paint. Doing so while the paint is still slightly tacky can help prevent peeling.
By following these guidelines and techniques, you can achieve professional-looking spray painting results on a variety of surfaces. Experiment with different types of paint and finishes to find the perfect look for your project.
| How do you get the best results from spray painting? | |
|---|---|
| 1. Choose the right paint | Select a high-quality spray paint that is suitable for the material you are painting. |
| 2. Prepare the surface | Clean the surface thoroughly and sand it if necessary to create a smooth and even surface for the paint to adhere to. |
| 3. Use a primer | Apply a primer before spray painting, especially on surfaces that are porous, have an uneven surface, or have never been painted before. |
| 4. Shake the can well | Shake the spray paint can for at least one minute before use and periodically during painting to ensure even color distribution. |
| 5. Spray at the correct distance | Maintain a consistent distance of about 8-12 inches between the can and the surface to avoid drips and uneven coverage. |
| 6. Use a sweeping motion | Use a slow, controlled sweeping motion while painting to ensure even coverage and minimize overspray. |
| 7. Apply multiple thin coats | Apply multiple thin coats of paint, allowing each coat to dry completely before applying the next to achieve the desired coverage and finish. |
| 8. Sand between coats | Lightly sand between coats if needed, with fine-grit sandpaper to remove any imperfections and ensure a smooth finish. |
| 9. Clear coat (if applicable) | Apply a clear coat after the final color coat has dried to provide additional protection and shine to the finished surface. |
| 10. Allow sufficient drying time | Allow the paint to dry completely before handling or reassembling any painted parts. |
Unlocking the Key to Successful Spray Painting
• The Importance of Surface Preparation
One of the most essential aspects of spray painting is surface preparation. Whether you are a beginner or an experienced painter, thorough surface preparation makes a massive difference in your final paint job.
It not only provides optimal adhesion for the paint but also improves the durability and appearance of the finished work. To achieve a professional-looking finish, carefully clean, sand, and prime the surface before painting.
– Cleaning the Surface
Begin by cleaning the surface to remove dust, dirt, and grease. For general cleaning purposes, a mixture of mild detergent and water is ideal. In cases of stubborn grime, consider using a degreasing agent.
When dealing with metal surfaces, a rust remover or rust converter may be necessary to eliminate any rust issues. After cleaning, rinse thoroughly with water and allow the surface to dry completely.
– Sanding for a Smooth Surface
A well-sanded surface provides a better surface for paint adhesion. To achieve this, start with coarse-grit sandpaper and progress to fine-grit sandpaper. The goal is to roughen the substrate while feathering out any imperfections.
– Priming for Improved Adhesion and Finish
To enhance paint adhesion and achieve a uniform finish, apply a coat of primer that corresponds with the material being painted.
Priming prevents surface imperfections from showing through the paint and allows the color to be more vibrant. Primer also seals porous surfaces, reducing the number of paint coats required.
• Choosing the Right Paint and Equipment
– Spray Paint Selection
Selecting the proper paint for your project is vital. Use high-quality paint suitable for the intended surface.
Keep in mind the type of paint – water-based or oil-based – and its compatibility with the primer you applied. Make sure to familiarize yourself with the drying and recoating times specified by the manufacturer.
– Spray Paint Nozzles and Tips
The spray nozzle plays a significant role in paint application. Different spray nozzles allow varying spray patterns, and matching the correct nozzle with your project will ensure a more professional outcome.
For precise, narrow coverage, use a nozzle with a small orifice, while a larger orifice provides a broader spray pattern. Remember to clean the nozzle after each use to prevent clogging.
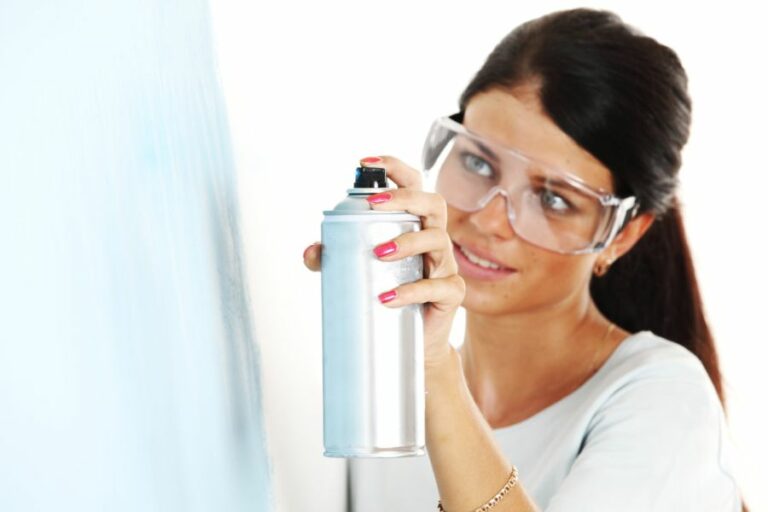
– Safety Equipment
Don’t overlook the importance of safety equipment when spray painting. Use a well-fitting respirator mask, gloves, and safety goggles to protect yourself from paint fumes, overspray, and potential eye hazards.
• The Art of Spray Paint Application
– The Ideal Environment
The environment greatly affects the result of spray painting. For best results, paint in a well-ventilated area with low dust and humidity. The temperature should be between 60F and 80F to ensure the proper drying and curing of the paint.
– Proper Technique is Key
When applying spray paint, hold the can approximately 8-12 inches away from the surface. Maintain a consistent distance and parallel angle while applying paint in sweeping motions, starting and stopping the spray off the painting surface to avoid noticeable marks.
Overlap each pass by approximately 30% to ensure even coverage.
– Light Coats
One of the most widespread mistakes made by novice painters is applying too much paint at once. To avoid runs, sags, and uneven coverage, apply multiple light coats. Allow each coat to dry for the recommended time before applying the next, permitting a smoother and more attractive finish.
– Practicing Makes Perfect
Before diving into your project, practice your technique on a scrap piece of the same material. This will allow you to fine-tune your spraying distance, speed, and overlapping technique.
• Don’t Forget to Finish It Off
– Clear Coating
Once your final coat of color has fully dried, consider applying a clear coat. A clear coat provides additional protection and durability, maintaining the look of your paint job longer. Be sure to follow the manufacturer’s instructions regarding drying and recoating times.
– Curing Process
Keep in mind that a longer curing process often leads to a more robust and durable finish. To ensure optimal paint hardness, follow the curing time recommended by the paint manufacturer. Resist the temptation to rush the process.
• Conclusion
The secret to successful spray painting lies in the combination of diligent surface preparation, selecting the right materials and equipment, mastering the proper techniques during application, and finishing with care.
While practice makes perfect, following these tips will significantly increase the likelihood of achieving a professional-looking outcome in your next spray painting project.
Smooth Spray Painting: Essential Steps for a Flawless Finish
Spray painting is a popular and versatile method for applying paint to various surfaces, from cars and furniture to walls and ceilings. However, achieving a smooth and consistent finish can be challenging, especially for beginners.
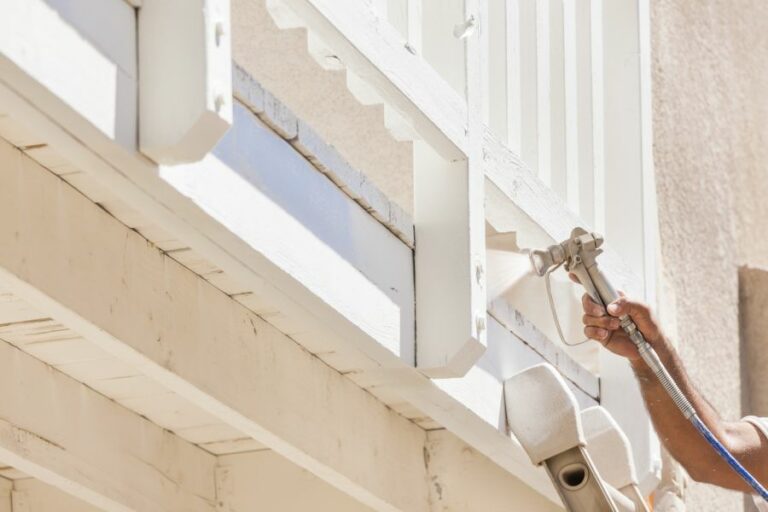
• 1. Choose the Right Equipment
Selecting the appropriate spray painting equipment is crucial for achieving a smooth finish. Ensure that you choose a quality spray gun with the right nozzle size for your project.
A standard nozzle size is 1.4mm for clear coats and base coats, while a larger 1.8mm nozzle can be used for primers and filler coats. Also, invest in a quality air compressor with a moisture trap to avoid water and oil contamination in your paint.
For more information on selecting the appropriate spray painting equipment, visit the Spray Paint Equipment Guide from the PPG Institute.
• 2. Prepare the Surface
Proper surface preparation is crucial to ensure a smooth and durable paint finish. The steps for surface preparation may vary depending on the material being painted. However, common steps include:
- Cleaning: Remove dirt, grease, and any other contaminants from the surface with a suitable cleaner or degreaser.
- Sanding: Smooth out any rough areas with sandpaper, typically using 400-600 grit sandpaper for most surfaces. Remember to sand in one direction for a uniform finish.
- Masking: Protect areas that you do not want to be painted with masking tape and paper or plastic sheets. This will prevent overspray and save time on cleanup.
• 3. Select the Right Paint
Choose a paint specifically formulated for spray application and compatible with the surface you are painting. Consult the paint manufacturer’s recommendations for the best results.
Additionally, ensure that you select the correct primer, if required, to promote proper paint adhesion and enhance the durability of your paint job.
• 4. Practice Your Technique
Before you start your project, practice your spray painting technique on a scrap piece of material. This will help you get comfortable with the spray gun and allow you to adjust the pressure and fan pattern as necessary.
Some key tips to remember for proper spray painting technique are:
- Hold the spray gun perpendicular to the surface and maintain a consistent distance of about 6 to 8 inches.
- Overlap your spray pattern by about 50% with each pass to ensure even coverage.
- Move your arm, not just your wrist, to maintain a consistent distance from the surface.
- Apply multiple thin coats rather than one thick coat to avoid runs, drips, and uneven coverage.
• 5. Create a Clean Workspace
To avoid contamination and achieve a smooth finish, create a clean and dust-free environment to spray paint. Sweep and vacuum your workspace thoroughly, and use a tack cloth to remove any remaining dust from the surface before applying the paint.
• 6. Control the Environmental Conditions
Temperature, humidity, and air movement can all affect the quality of your spray painting job. Aim for an ambient temperature between 65 and 85 degrees Fahrenheit and relative humidity below 50% for optimal painting conditions.
Additionally, avoid painting in windy or drafty conditions to prevent dust and debris from being blown onto the wet paint.
• 7. Strain Your Paint
Before loading your paint into the spray gun, strain it through a fine mesh paint strainer to remove any particles or debris that could clog your spray gun or cause an uneven finish.
• 8. Follow Proper Safety Procedures
Protect yourself from potentially hazardous substances by following proper safety procedures. Wear appropriate personal protective equipment, such as a NIOSH-approved respirator, goggles, gloves, and coveralls, while spray painting.
Also, work in a well-ventilated area to minimize exposure to harmful fumes.
• 9. Apply Paint in the Proper Sequence
To achieve a professional-looking finish, it’s essential to apply your paint in the correct order, starting with the primer if required, followed by the base coat and then the clear coat. Allow adequate drying time between coats as recommended by the paint manufacturer.
• 10. Inspect and Correct any Imperfections
After you’ve completed your spray painting project, inspect the finish closely for any imperfections, such as runs or sags. If necessary, sand the affected area with fine-grit sandpaper and recoat to achieve a smooth and consistent finish.
By following these essential steps, you can ensure a smooth, even, and professional-looking spray painting job. Armed with the right tools, technique, and patience, you will be well on your way to achieving professional-quality spray painting results.