Spray Painting Plastic Surfaces: Tips For Success
Spray painting plastic surfaces can be tricky, but with the right approach and helpful tips, you can achieve a beautifully smooth and professional finish. Whether you’re upcycling an old piece of plastic furniture or giving new life to a worn-out household item, we’ve covered you with the necessary steps and insights for a successful outcome.
Spray painting plastic surfaces: tips for success:
To successfully spray paint plastic surfaces, ensure proper surface preparation by cleaning and sanding the surface, and use a primer specifically designed for plastic. Choose the right spray paint for the project, apply multiple thin coats with the proper technique, and protect the painted surface with a clear coat. Maintain and clean the surface regularly for longevity.

Want to give that old plastic chair a new life or revamp a faded plastic toy? Your spray painting project can be a success with our tried and tested tips! Keep reading to unlock the secrets to a perfect finish.
Contents
- 1 Achieving Success in Spray Painting Plastic Surfaces
- 2 Mastering the Art of Flawlessly Spray Painting Plastic
- 3 Secrets to Exceptional Results with Plastic Spray Painting
- 4 Is Priming Necessary for Plastic Surfaces Before Spray Painting?
- 5 Top Techniques for Expertly Painting on Plastic Materials
Achieving Success in Spray Painting Plastic Surfaces
Spray painting plastic surfaces can be a tricky process, but with the right preparation and techniques, it’s possible to achieve a smooth and professional-looking finish.
• Importance of Proper Surface Preparation
Before you begin, it’s essential to prepare the plastic surface correctly. The success of your spray painting project depends on this step, so don’t skip it.
– Cleaning the Surface
Remove any dirt, dust, and grease from the surface using a mild detergent and water solution. Rinse the surface thoroughly with clean water. Avoid using solvents or harsh chemicals, as these can damage the plastic. Once cleaned, allow the surface to dry completely before proceeding.
– Sanding for Adhesion
Lightly sand the surface with fine-grit sandpaper (around 220-grit) to create a better surface for the paint to adhere to. Sanding also helps remove any glossiness present on the plastic, allowing the paint to bond more effectively. Wipe away any sanding dust with a clean cloth.
– Using a Primer
For best results, use a primer that is specifically designed for plastic surfaces. Primer helps create a uniform surface for the paint to adhere to, improving its overall appearance and durability.
Some spray paints may have a built-in primer, but it’s essential to check the label and follow the manufacturer’s recommendations. Allow the primer to fully dry according to the instructions on the can.
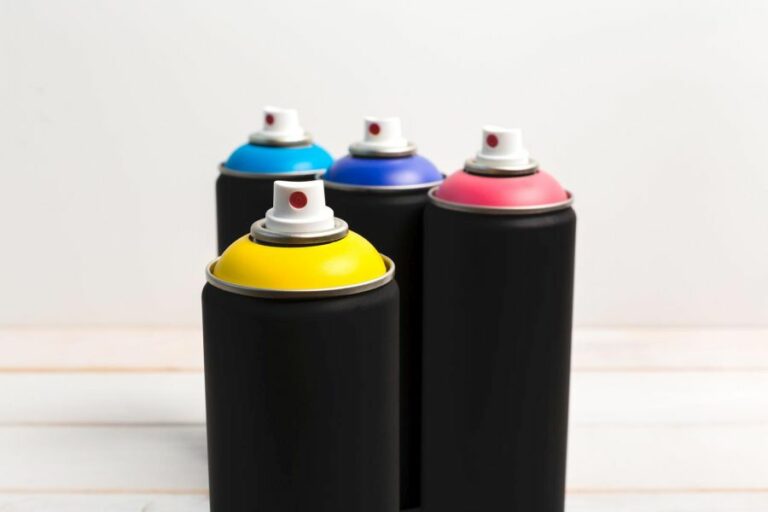
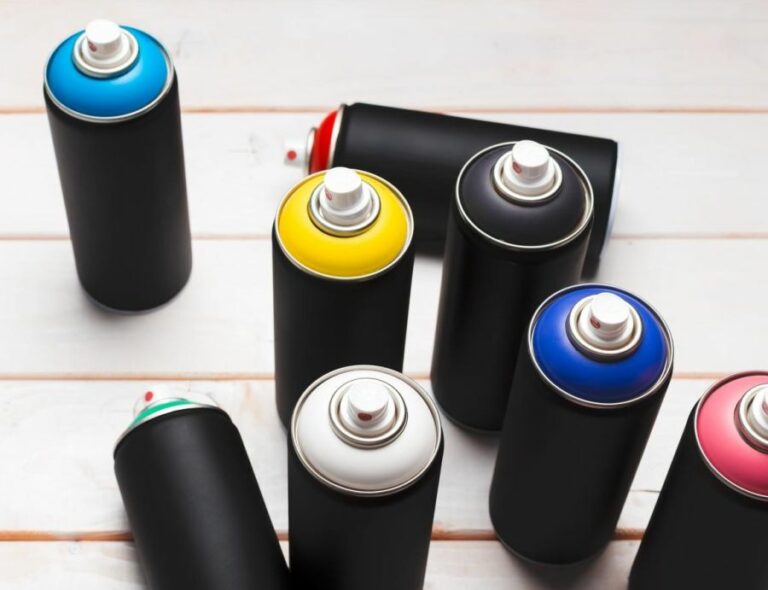
• Choosing the Right Paint for Your Project
There are various types of spray paint suitable for plastic surfaces. Most spray paints will work on plastic, but it’s best to look for products specifically designed for this material. Some reputable brands that offer spray paint for plastic include Rust-Oleum, Krylon, and Montana.
– Considerations for Outdoor Projects
If you’re working on an outdoor project, be sure to use a spray paint that is designed for outdoor use and offers UV protection. This will help ensure that your paint job lasts longer and is better equipped to withstand the elements.
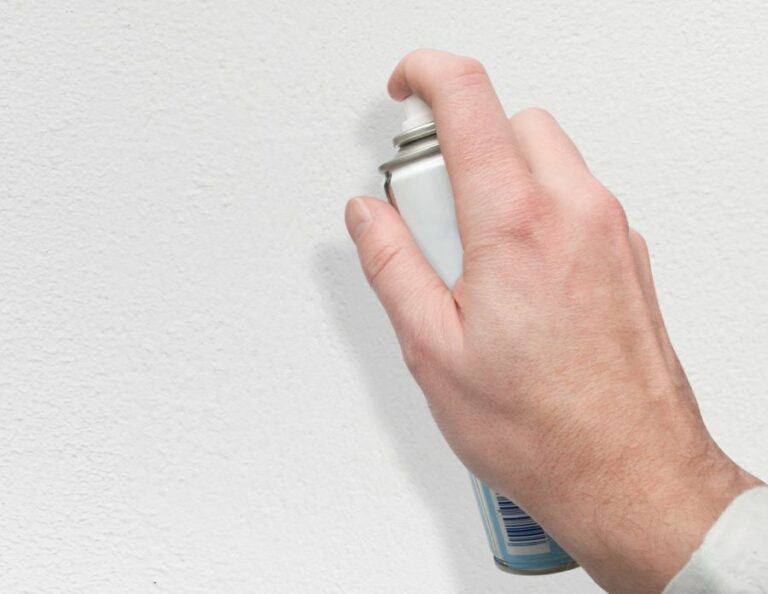
• Guidelines for Proper Spray Painting Technique
Once the surface is fully prepared, it’s time to spray paint. Following the right technique is crucial for achieving smooth, even coverage and avoiding common issues like runs, drips, and uneven paint application.
– Keep a Safe Distance
When spraying, hold the can approximately 8 to 12 inches away from the surface. This distance allows for a more controlled and even application.
– Practice Proper Can Motion
Use a steady, continuous motion when spraying the paint. Move the can horizontally or vertically, overlapping each stroke slightly to ensure thorough coverage. Avoid flicking your wrist, which can result in an uneven paint layer.
– Apply Multiple Thin Coats
It’s better to apply multiple thin coats of paint rather than attempting to cover the surface in one thick coat. Allow each layer to dry according to the manufacturer’s instructions before applying the next coat.
– Avoid Painting in High Humidity or Extreme Temperatures
For optimal results, avoid painting in high humidity or extreme temperatures, as these conditions can affect the paint’s performance. Check the manufacturer’s recommendations for ideal painting conditions, which are typically between 50-90°F and 30-60% relative humidity.
• Protecting Your Painted Surface
Once you’re satisfied with your paint job, it’s essential to protect your work to ensure its longevity.
– Clear Coat for Added Durability
Applying a clear coat over your painted surface can provide extra protection against scratches, fading, and other damage. Choose a clear coat that is compatible with your spray paint and specifically designed for plastic surfaces.
– Proper Curing Time
Allow ample time for the paint to cure before handling or exposing the painted surface to potential damage. The curing time can vary depending on the product, so be sure to check the label for specific instructions.
– Regular Maintenance
Clean and maintain your painted plastic surfaces regularly to keep them looking fresh and free of dirt, which can cause the paint to break down over time. Use mild detergent and water to clean your painted surface gently.
• Additional Resources
For further information and guidance on spray painting plastic surfaces, consider consulting the American Coatings Association, a leading industry resource. Their website offers valuable tips, advice, and educational materials to help you achieve a successful painting project.
In conclusion, spray painting plastic surfaces can be a rewarding and cost-effective way to update and transform various items. By following these expert tips and best practices, you can achieve a professional-looking finish and ensure the long-lasting success of your project.
Mastering the Art of Flawlessly Spray Painting Plastic
Spray painting plastic can be a daunting task, especially because plastic surfaces tend to be smooth and non-absorbent. However, by following these steps and using the right materials, you can achieve a beautiful and durable finish on a variety of plastic items.
• Preparing the Plastic Surface
– Cleaning the Surface
Before you start painting, make sure the plastic surface is clean and free from any dirt, dust, or grease. You can use mild dish soap and water to wash the surface thoroughly. It is essential to clean the surface properly to ensure the paint adheres well to the plastic.
After washing the surface, rinse it well and let it dry completely.
– Lightly Sand the Surface
Although it’s not always necessary, lightly sanding the surface of the plastic will provide better adhesion for the paint. Use fine-grit sandpaper (such as 220 or 300 grit) to gently scuff the surface. It’s crucial to maintain an even sanding pattern, as irregular sanding marks may show through the paint.
When you’re done sanding, make sure to remove any dust particles from the surface using a clean microfiber cloth or a tack cloth.
– Applying a Plastic Primer
Before you apply the spray paint, it’s recommended to use a primer specifically designed for plastic surfaces. A primer will help the paint adhere firmly to the plastic surface and reduce the chances of chipping or peeling.
Follow the manufacturer’s instructions on the primer can regarding the number of coats, drying time, and recoating time.
• Choosing the Right Spray Paint for Plastic
Not all spray paints are designed for use on plastic surfaces, so it’s essential to use a paint specifically formulated for plastic. Look for labels mentioning plastic compatibility, as well as features such as UV resistance and flexibility, which can help prevent the paint from cracking or fading.
Moreover, it’s a good idea to choose a good-quality spray paint that provides coverage in fewer coats, as it will give you smoother and more even results.
As per American Institute for Conservation standards, using paints with low VOC (volatile organic compounds) levels is advisable to minimize health risks associated with fumes.
• Spray Painting Techniques for Plastic
– Setting up Your Workspace
Make sure to spray paint in a well-ventilated area, preferably outdoors. If you must paint indoors, open up windows and doors for proper ventilation. Besides, protect the surrounding area with newspaper, drop cloths, or plastic sheeting to catch any paint overspray.
– Holding the Spray Can
When using a spray paint can, hold it approximately 8-12 inches away from the surface you’re painting. This distance will ensure an even application of the paint and reduce the risk of drips or runs.
– Applying Thin, Even Coats
To achieve a flawless finish, apply the spray paint in thin, even coats. Start by applying light coats, allowing each coat to dry for the recommended time between coats, usually about 10 minutes. Layering multiple thin coats will give you a more uniform finish and prevent paint runs.
– Keeping the Can in Motion
As you spray paint, keep the can in constant motion, moving in a horizontal or vertical direction depending on the shape of the item being painted. This technique helps maintain an even layer of paint and minimizes the risk of drips, pooling, or uneven texture.
– Allow to Dry and Cure
When you’re satisfied with the coverage, allow the painted plastic to dry as per the manufacturer’s recommendations, which could range from a couple of hours to 24 hours. After the paint has dried, it is essential to give it ample time to cure, which is typically about 5-7 days.
During this time, avoid handling or using the painted object to ensure a durable and long-lasting finish.
• Applying a Clear Coat (Optional)
For added protection and durability, you can apply a clear coat compatible with the spray paint you used. This step is particularly useful for outdoor items or objects that will be frequently handled. Follow the manufacturer’s instructions for applying the clear coat, ensuring to allow proper drying and curing times.
By carefully following these steps and using the proper materials, you can achieve excellent results when spray painting plastic items.
Remember that practice makes perfect if you’re new to spray painting. Experiment with some scrap plastic materials to hone your technique before working on important items.
Step | Description |
|---|---|
1 | Clean the plastic surface thoroughly with soap and water to remove any dirt or residue. |
2 | Rinse the surface well and allow it to dry completely. |
3 | Lightly sand the surface with fine-grit sandpaper or a sanding sponge to create a slightly rough texture for the paint to adhere to. |
4 | Wipe down the surface with a clean, damp cloth to remove any dust or debris from sanding. |
5 | Apply a coat of plastic primer to the surface, following the manufacturer’s instructions on the product. Allow it to dry for the recommended time. |
6 | Shake the spray paint can for at least one minute to mix the paint and ensure a smooth, even application. |
7 | Hold the spray paint can 10-12 inches away from the surface and apply thin, even coats in a sweeping motion. Allow each coat to dry for the recommended time before applying another. You may need 2-3 coats for full coverage. |
8 | Allow the final coat to dry for at least 24 hours, or per the manufacturer’s recommendations, before using or reassembling the object. |
9 | Optionally, apply a clear coat or sealant to protect the painted surface and increase its durability. |
Secrets to Exceptional Results with Plastic Spray Painting
• Choose the Right Spray Paint
When it comes to getting the best results from spray painting, selecting the appropriate spray paint is crucial. There are various types of spray paints available in the market, each designed for specific surfaces and purposes.
For instance, there are paints for metal, wood, plastic, and other surfaces. Using the appropriate type of paint for the surface you are working on can significantly improve the final results.
• Prepare the Surface Properly
Before starting the spray painting process, make sure the surface is clean and free of any dust, dirt, or grease. You may use a mild detergent solution to clean the surface if necessary. If there are any existing layers of paint or rust on the surface, remove them using sandpaper, a wire brush, or a paint stripper.
Make sure the surface is dry before you begin spray painting. This is particularly important when painting metal surfaces, as any residual moisture can cause the paint to not adhere properly or may cause bubbles in the finish.
• Prime the Surface
Priming the surface is essential to ensure proper adhesion of the paint and achieve an even, smooth finish. Primers provide a base coat that helps the paint stick better to the surface and allows for better coverage.
Make sure to choose a primer that matches the type of spray paint you are using and the surface you are painting.
Once the surface is clean and dry, apply one or two thin layers of primer as recommended by the manufacturer. Allow the primer to dry fully before moving on to the next step.
• Work in a Ventilated Area
Spray painting should always be done in a well-ventilated area, preferably outdoors, to ensure proper airflow and minimize the risk of inhaling harmful fumes. If you must work indoors, open windows and doors and use a fan to help circulate the air.
It is essential to wear a mask or a respirator designed to filter paint fumes when spray painting.
• Test the Paint
Before starting the actual painting process, it is a good idea to test the spray paint on a small, inconspicuous area or on a scrap piece of material from the same surface you are working on.
This allows you to confirm the color, finish, and adherence of the paint, ensuring that you are satisfied with the results before committing to the entire project.
• Apply the Paint in Thin, Even Coats
One of the keys to achieving a professional-looking finish with spray paint is to apply multiple thin, even coats. Avoid trying to cover the entire surface in one single coat, as this can result in uneven coverage, dripping, or pooling of the paint.
Starting at one edge of the surface, spray in a consistent back-and-forth motion, overlapping each pass slightly. Keep the spray can approximately 10-12 inches away from the surface and maintain a steady speed during application.
Allow each coat to dry for the recommended time before applying the next coat. This may vary depending on the specific paint you are using, so check the manufacturer’s instructions for exact drying times.
• Sand Between Coats for a Smooth Finish
For an ultra-smooth finish, lightly sand the surface between each coat of spray paint using fine-grit sandpaper (around 400-grit). This will help to remove any imperfections or irregularities in the paint application, ensuring a uniform final result.
Remember to clean the surface gently with a tack cloth to remove any dust before applying the next coat of paint.
• Properly Seal and Protect the Paint
After you have applied the desired number of coats and the paint has completely dried, it is important to apply a clear sealer or protective coating to preserve the finish and protect it from damage.
Again, choose a sealer that is compatible with the spray paint you have used and follow the manufacturer’s instructions for application.
• Clean the Spray Nozzle
After completing your spray painting project, make sure to clean the spray nozzle to prevent clogging and extend the life of the paint can. Invert the can and spray onto a scrap piece of paper or cardboard until only clear gas is being emitted.
This process clears any remaining paint from the nozzle and helps prevent clogging.
By following these steps and adopting proper spraying techniques, you can achieve professional-looking results from your spray painting projects.
Remember that patience, practice, and attention to detail are the keys to success, and soon you will be able to tackle even the most demanding spray painting tasks with confidence.
Step | Action |
|---|---|
1 | Choose the right spray paint for the particular material and finish you’re working with. |
2 | Prepare the surface by cleaning it thoroughly to remove dirt, rust, and any loose or peeling paint. |
3 | Apply a primer, if needed, to ensure proper paint adhesion and coverage. |
4 | Shake the spray paint can well before use and periodically during the painting process to ensure even color distribution. |
5 | Hold the can 8-12 inches away from the surface and use a sweeping motion while applying, overlapping each pass by about 50%. |
6 | Apply multiple thin coats to achieve the desired coverage and finish, allowing the paint to dry between each application. |
7 | Allow the paint to dry fully, and then apply a clear topcoat if required for added protection or to achieve a specific finish. |
8 | Clean the spray nozzle after use to prevent clogging and ensure smooth application for future projects. |
Is Priming Necessary for Plastic Surfaces Before Spray Painting?
Painting plastic surfaces can be a tricky task, as they often don’t adhere well to paint, and the incorrect application can lead to a poor finish or chipping over time. One crucial step in the process of spray painting plastic is priming the surface.
• Importance of Priming Plastic
Priming is essential for ensuring the paint bonds properly to the plastic surface. It seals the surface, allowing the paint to adhere better, and aids in providing an even, smooth finish.
Additionally, priming enhances the durability of the paint job and offers extra protection to the plastic surface, increasing resistance to chipping, peeling, and fading.
Furthermore, priming plastic can also help to obscure minor imperfections, providing a forgiving foundation for the paint to be applied upon. In summary, investing time in correctly priming a plastic surface before spray painting will help ensure long-lasting and professional-looking results.
• Choosing the Right Primer
Not all primers are created equal, and selecting the appropriate product for your specific plastic project is essential. A general-purpose primer may not provide the optimal level of adhesion required for plastic surfaces, potentially leading to poor results.
Instead, choose a primer specifically designed for plastic materials, such as a plastic primer or an adhesion promoter.
These specialized primers are formulated to bond with plastic surfaces, providing superior adhesion and ensuring a smooth, even base for the paint. It is also crucial to read the label and follow the manufacturer’s recommendations, as some primers are intended for specific types of plastics.
The Journal of Coatings Technology and Research offers a comprehensive study on the performance and properties of different primers for use on various plastic substrates.
• Proper Surface Preparation
Before applying the primer, ensure that the plastic surface is clean and free of any contaminants, such as dirt, dust, or grease.
A thorough cleaning using a mild detergent solution or rubbing alcohol, followed by a rinse with water, should result in a suitably clean surface. Then, allow the plastic to dry completely before proceeding.
Sanding the surface lightly with fine-grit sandpaper can further help to facilitate better adhesion of the primer. Be cautious not to sand too aggressively, as it may leave scratches or cause damage to the plastic. After sanding, remove any dust or debris using a tack cloth or a soft, lint-free cloth.
• Application Techniques and Tips
When applying the primer, it is essential to use proper spray painting techniques to achieve an even and smooth finish. To ensure the following recommendations will be useful:
- Shake the primer can thoroughly before use, as per the manufacturer’s instructions.
- Hold the can 10-12 inches away from the plastic surface to avoid applying too much primer at once, which can lead to drips or runs.
- Apply the primer using thin, even coats, using a side-to-side motion, while overlapping each pass by about 50%.
- Allow sufficient drying time between each coat, as outlined on the primer’s label. This will prevent build-up and encourage an even surface.
- Apply 2-3 coats of primer to achieve a consistent, solid foundation for the paint.
• Proceeding to Paint
Once the primer is applied and has been allowed to dry fully, as per the manufacturer’s suggestions, it is time to apply the chosen spray paint. It is essential to select a paint that is compatible with both the plastic material and the primer used.
Further, follow similar application techniques and recommendations, as outlined in the primer application section, ensuring the best possible finish.
In conclusion, priming plastic surfaces before spray painting is essential for achieving professional, long-lasting, and high-quality results. By following the recommendations and guidelines outlined in this guide, you can be confident in your ability to produce a successful paint job on any plastic surface.
Top Techniques for Expertly Painting on Plastic Materials
Painting plastic can be a bit tricky, but with the right tools, techniques, and knowledge, you can achieve a professional finish.
• Choosing the Right Paint
The first step in painting plastic is choosing the right type of paint. Not all paints adhere well to plastic surfaces, so it’s essential to choose a paint specifically designed for use on plastics.
Many paint manufacturers offer specialized plastic paints, typically in the form of spray paint or acrylic paints. These paints create a strong bond with plastic surfaces and are less likely to chip or peel.
One popular option for painting plastic is Krylon Fusion for Plastic, which comes in a wide range of colors and finishes. You can also use acrylic craft paints, like those made by DecoArt, FolkArt, and Americana. For more information on choosing the right paint for your project, consult this helpful guide from the American Coatings Association.
• Preparing the Surface
Before applying any paint, it’s important to prepare the plastic surface properly. Follow these steps to ensure a smooth, long-lasting finish:
1. Cleaning
Clean the object thoroughly to remove any dirt, dust, or oils. Use a mild detergent and warm water to scrub the surface, then rinse it thoroughly and allow it to dry completely. Make sure your hands are also clean during this process to avoid transferring oils to the plastic.
2. Sanding
Sanding the plastic surface will help the paint adhere better by providing some texture for the paint to grip. Use fine-grit sandpaper (around 400 grit) to lightly sand the surface, being careful not to scratch or gouge the plastic. After sanding, wipe the surface with a clean, damp cloth to remove any dust.
3. Priming (Optional)
While some plastic-specific paints include a built-in primer, it can be helpful to use a separate primer for certain projects.
Priming the surface will provide an additional layer of adhesion for the paint and can improve the final appearance of the paint job, particularly on darker plastics. If you choose to use a primer, ensure that it is specifically designed for use on plastics.
• Painting Techniques
Now that you have chosen the right paint and prepared the surface, it’s time to apply the paint. Follow these techniques for a smooth, even finish:
1. Spray Painting
If you’re using spray paint, shake the can well before beginning to ensure the paint is properly mixed. Holding the can about 12-14 inches away from the object, apply the paint in thin, even coats. It’s better to apply multiple light coats rather than one heavy coat – this will help prevent drips and runs.
Allow each coat to dry for the amount of time recommended by the manufacturer before applying the next coat.
– 2. Brush Painting
For projects requiring more detail or where spray paint isn’t practical, acrylic craft paints and a paintbrush can be used. Use soft, synthetic bristle brushes in the appropriate size for your project.
When painting, apply thin coats and allow each coat to dry completely before applying the next. Use a light touch, as pushing too hard with the brush can cause brush strokes to be more visible.
– 3. Airbrushing
For an even smoother finish, consider using an airbrush to apply the paint. Airbrushing is particularly useful for larger projects or objects with intricate details. Follow the manufacturer’s instructions for preparing the paint for airbrush use, and clean the airbrush thoroughly after each use.
• Sealing and Finishing
After the paint has dried completely, it’s essential to protect your work by applying a clear sealer. Choose a sealer that is compatible with your chosen paint and follow the manufacturer’s application instructions.
A clear sealer helps protect the paint from scratches, marks, and UV damage, extending the life of your paint job.
• Final Thoughts
Painting plastic can be a rewarding and enjoyable project when equipped with the right knowledge and tools.
Remember to choose the appropriate paint, prepare the surface, use proper painting techniques, and apply a clear sealer to protect your work. By following these tips, you’ll achieve a professional finish that lasts. Happy painting!
| Tips |
|---|
| Clean the plastic surface thoroughly to remove any dirt or oils that may prevent the paint from adhering. |
| Lightly sand the plastic surface to create a rougher texture for the paint to adhere to. |
| Use a primer specifically designed for plastic surfaces to provide a smooth base for the paint. |
| Choose a paint that is specifically formulated for plastic, as other types of paint may not adhere properly or may damage the plastic. |
| Apply thin, even layers of paint, allowing each layer to dry before adding another to avoid drips or uneven paint coverage. |
| Allow the paint to fully dry and cure before handling the plastic piece to prevent smudging or damage to the paint. |
| Seal the paint with a clear coat or varnish specifically designed for plastic to protect the paint and add a glossy finish. |