Choosing And Applying Primers On Different Surfaces
Choosing the right primer for different surfaces can be challenging, especially when working with varying materials and conditions. But fear not! With our expertise, we are here to guide you through the process, ensuring that you can confidently apply the ideal primer on any surface.
Choosing and applying primers on different surfaces:
Selecting the right primer is crucial for a professional, long-lasting paint finish. Consider factors like surface material, whether it’s for exteriors or interiors, and paint type compatibility. Properly prepare the surface before application and follow the recommendations for specific primer types, such as latex, oil-based, or shellac, to ensure enhanced durability and appearance.

Unlock the secret to achieving flawless paint jobs! Dive into our comprehensive guide on choosing and applying primers on various surfaces, ensuring excellent adhesion, durability, and aesthetic appeal. Don’t let your next project fall flat – read on!
Contents
- 1 Selecting and Applying Primers for Various Surfaces
- 2 Is Primer Suitable for All Surface Types?
- 3 Can Primer Smooth Out Uneven Surfaces?
- 4 Determining the Ideal Primer for Specific Surfaces
- 5 Can Primer Adhere to All Surface Materials?
Selecting and Applying Primers for Various Surfaces
• Importance of Primer Selection
Selecting the right primer for your painting project is essential in achieving a professional, long-lasting finish. Primers serve as a base coat to promote better adhesion of paint to surfaces, enhance paint durability, and offer additional protection to the material being painted.
Prioritizing the correct primer allows the paint to stick more effectively while also masking surface imperfections such as stains, discoloration, and small cracks.
• Factors to Consider when Choosing a Primer
– Surface Material and Condition
To choose the right primer, you must first consider the surface material and its condition. Different materials require specific primers, as primers are formulated to adhere to specific substrates. For instance:
- Wood: Select a wood primer or stain-blocking primer to prevent wood tannins from bleeding through the paint.
- Metals: Choose a metal primer or rust-inhibiting primer for corrosion-resistant properties.
- Masonry: Opt for a masonry primer to fill pores and improve adhesion on porous surfaces.
- Drywall: Utilize a drywall primer to seal the surface and minimize paint absorption.
Furthermore, assess the surface for any imperfections, stains, or damage. If present, an additional coat of primer or a specialized primer may be necessary to address these issues.
– Exterior or Interior Surfaces
Exterior surfaces are exposed to harsh weather conditions, UV rays, and temperature fluctuations, requiring primers with higher durability and water resistance. On the other hand, interior surfaces often demand primers that address stains and odors and resist mold or mildew growth.
– Paint Type and Color
Primers should be compatible with the paint type (latex, oil, or alkyd-based) and adequately complement the paint color. Using a tinted primer can significantly enhance the color of the topcoat, helping save on coats of paint.
• Types of Primers
– Latex Primers (Water-Based)
- Ideal for drywall and softwood surfaces
- Low odor and fast dry time
- Easy clean-up with soap and water
- Lower durability compared to oil-based primers
– Oil-Based Primers (Alkyd-Based)
- Suitable for hard and porous surfaces like wood, fiberglass, or masonry
- Excellent adhesion and prevention of tannins or rust
- Strong odor and longer dry time
- Requires mineral spirits for clean-up
– Shellac Primers
- Best for sealing stains, odors, smoke, and water damage
- Creates a strong bond on various surfaces
- High odor and flammable; proper ventilation is critical
- Alcohol-based solvents needed for clean-up
• Proper Primer Application
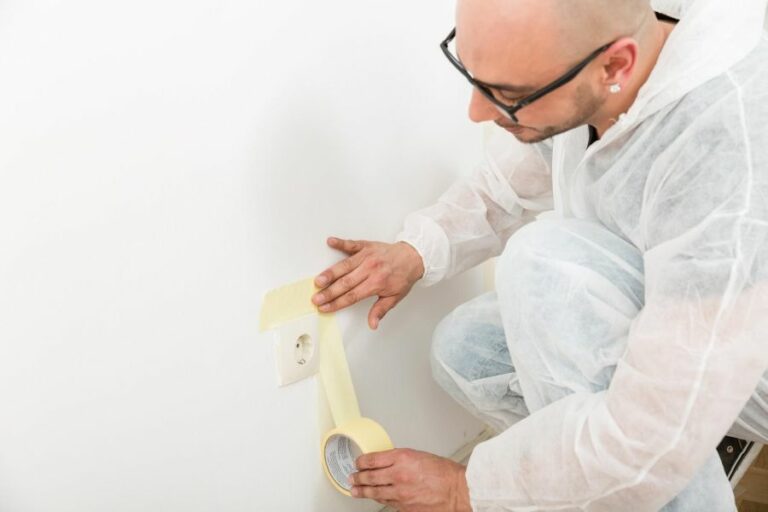
– Surface Preparation
Prior to applying primer, follow these necessary steps to prepare the surface:
- Clean the Surface: Remove dirt, debris, and grease using soapy water and rinse thoroughly with a clean cloth.
- Repair Imperfections: Fill any cracks or holes with an appropriate filler, allow it to dry, then sand the surface to create an even finish.
- Degloss: Remove glossy finishes, rust, or loose paint by sanding or using a de-glossing product.
- Dust Removal: Clean the surface with a damp cloth or tack cloth to eliminate dust, and wipe with a dry cloth before priming.
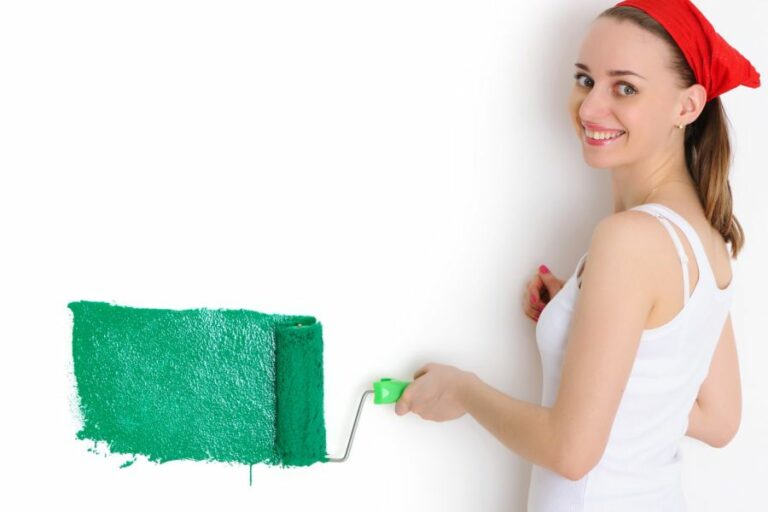
– Primer Application
- Stir the Primer: Thoroughly stir the primer with a paint stick.
- Loading the Brush/Roller: Fully immerse the bristles or roller nap for even application and proper absorption.
- Technique: Apply the primer in long, even strokes or roll in a “W” pattern for uniform coverage.
- Coverage: Apply a single coat of primer and allow it to dry according to the manufacturer’s instructions. Check for even coverage and apply a second coat if necessary.
- Clean Up: Clean your tools with appropriate solvents and allow the surface to dry entirely before applying the topcoat.
• In Conclusion
To achieve an exceptional painting outcome, selecting and applying the appropriate primer is critical.
Following the above recommendations, combined with careful surface preparation and proper application techniques, can guarantee an enhanced, long-lasting finish for your painting project.
Is Primer Suitable for All Surface Types?
The use of primer is an essential step in the painting process and is often the key to achieving a smooth and long-lasting finish. But can primer be used on any surface?
Let’s explore the various types of primers available and their compatibility with different surfaces to help you make the right choice for your painting project.
• Importance of Primer in Painting
Primer serves multiple purposes:
- Adhesion: It helps the paint adhere better to the surface, reducing the chances of peeling and flaking.
- Durability: Primer can help increase the durability of the paint, protecting it from moisture, stains, and daily wear and tear.
- Smooth finish: Primers can fill in small imperfections on the surface, providing a smooth canvas for painting.
- Color accuracy: Applying primer before painting can help maintain the true color of the paint, especially when covering dark or bold colors.
Understanding these benefits is essential in determining whether a primer is necessary for your specific surface and project.
• Types of Primers: Which One is Right for Your Surface?
There are various types of primers available on the market, each with its characteristics and intended use. Let’s explore the primary primer types and their compatibility with different surfaces:
– Latex Primers
Latex primers are water-based and suitable for both interior and exterior surfaces. They are compatible with most surfaces, including:
- Drywall
- Plaster
- Wood
- Masonry
- Metal (with proper surface preparation)
Latex primers dry quickly, provide good adhesion, and are easy to clean up using soap and water. For most painting projects, a latex primer is an excellent choice.
– Oil-Based Primers
Oil-based primers have been used for decades due to their excellent adhesion and stain-blocking capabilities. They are suitable for both interior and exterior surfaces and are recommended for:
- Wood (interior and exterior)
- Metal
- Stained surfaces
- Surfaces with water damage or smoke
Oil-based primers take longer to dry than latex-based primers but provide excellent surface penetration and can be used under either oil or water-based paint.
– Shellac Primer
Shellac primer is an alcohol-based primer known for its stain-blocking qualities, making it ideal for surfaces with tough stains, such as water, smoke, or ink. It can be used on both interior and exterior surfaces, including:
- Wood
- Drywall
- Plaster
- Metal
Shellac primer dries quickly, typically in under an hour, but it can be more challenging to work with due to its strong odor and the need for denatured alcohol for cleanup.
• Surface Preparation: The Key to Primer Success
Before applying primer, it is essential to adequately prepare the surface. Proper surface preparation ensures that the primer adheres well to the substrate, providing a strong foundation for the paint. Some crucial steps to take before priming include:
- Cleaning: Remove dirt, grease, and other contaminants from the surface using a mild detergent or cleaning solution.
- Sanding: For surfaces like wood or previously painted surfaces, lightly sand the surface to promote better adhesion of the primer.
- Repairing: Repair any surface defects, such as cracks, holes, or uneven areas, to create a smooth surface for priming.
- Deglossing: If the surface is glossy, a deglosser may be necessary to improve primer adhesion.
Note: Some surfaces, like metals and plastics, require specific primers or surface treatments for optimal adhesion. Always read the primer manufacturer’s instructions for surface preparation and compatibility.
• In Conclusion
In most cases, the answer to whether primer can be used on any surface is a qualified ‘yes.’ With the right choice of primer and proper surface preparation, you can achieve a smooth and durable finish on practically any surface.
It is always encouraged to consult product labels, manufacturer literature, or consulting with industry experts to ensure proper primer selection and application for your unique painting project.
Can Primer Smooth Out Uneven Surfaces?
Primer is a crucial step in creating a flawless and professional-looking paint job, and one of the questions often asked is whether primer can fill in uneven surfaces.
• The Role of Primer in a Paint Job
Primer plays a pivotal role in preparing surfaces for painting, as it accomplishes several objectives:
- Enhancing paint adhesion: Primer creates a suitable surface for the paint to adhere to, reducing the chances of peeling and flaking.
- Blocking stains: Some primers can prevent stains, such as watermarks and knots in the wood, from bleeding through the paint.
- Sealing porous surfaces: Primer can seal porous surfaces like wood, drywall, and masonry, which helps prevent paint from being absorbed and ensures uniform coverage.
- Improving paint color: Using a primer can enhance the paint color, making it appear more vibrant and true to the intended shade.
Now that we understand the purpose of primer in a paint job, let’s look at how primer contributes to uneven surfaces.
• Primer and Uneven Surfaces
The level of effectiveness of primer in filling uneven surfaces depends on the type of primer used and the degree of the unevenness on the surface.
– Oil-based Primer
Oil-based primer is a versatile option that works well on wood, metal, and even some plastics. It has excellent adhesion properties and can prevent tannin bleed on wood.
However, oil-based primer is not specifically designed to fill in uneven surfaces. It can provide a smoother surface by sealing porous materials, but it won’t fix significant imperfections on the surface.
– Latex-based Primer
Latex-based primer is a water-based option that is easy to clean up and has a faster drying time compared to oil-based primers. It works well on a variety of surfaces like drywall, wood, and masonry.
However, like oil-based primer, latex-based primer is not designed to fill in uneven surfaces. It can create a smoother surface by sealing porous materials, but will not significantly fix surface imperfections.
– High-build Primer
High-build primer, also known as surfacer or filler primer, is specifically designed to fill in uneven surfaces and small imperfections. It is a thick primer used primarily on surfaces with significant texture or scratches.
High-build primer can be found in both oil-based and water-based formulas. This type of primer is the ideal choice if you are looking for a primer that can effectively fill in uneven surfaces.
– Shellac Primer
Primarily used for sealing knots and stains, shellac primer is less common but has some unique advantages. It dries quickly and adheres well to a variety of surfaces, including metal, wood, and masonry.
Shellac primer can effectively seal porous surfaces but, like oil-based and latex-based primers, is not specifically designed to fill in uneven surfaces.
• Tips for Using Primer on Uneven Surfaces
If you are working with a surface with unevenness, here are some tips to achieve the best results:
- Choose the right primer: If you need to fill in uneven surfaces or small imperfections, opt for a high-build primer specifically designed for this task.
- Prepare the surface: Before applying any primer, clean the surface thoroughly and remove all loose debris, dirt, and dust. For surfaces with old paint, use a scraper or sandpaper to remove peeling or flaking areas.
- Apply multiple coats: For high-build primers, you may need to apply multiple coats to achieve the desired level of smoothness on the surface. Be sure to wait for each coat to dry before applying another layer.
- Sanding: After applying the primer, you may need to sand the surface gently to further enhance the smoothness. Use fine-grit sandpaper, and be careful not to remove too much primer.
- Topcoat: Finish the job with high-quality paint to create a durable, professional, and vibrant paint job.
In conclusion, primer can fill in uneven surfaces depending on the type of primer used and the degree of unevenness on the surface. For surfaces with minor imperfections, high-build primer is the ideal choice for its filling capabilities.
Proper surface preparation and application techniques are also essential in achieving a smooth and professional finish.
Determining the Ideal Primer for Specific Surfaces
When it comes to painting, the importance of selecting the right primer cannot be overstressed. Primers help in creating a smooth and uniform surface for the finish coat, thus ensuring a long-lasting paint job. The type of primer you choose largely depends on the surface to be painted.
• Wood Surfaces: Oil-Based or Latex Primer
When painting wood surfaces, whether it’s furniture, trim, or cabinetry, it’s crucial to choose a primer specifically designed to bond well with wood. There are two main types of primer suitable for wood: oil-based and latex.
- Oil-based primer is an excellent choice for wood surfaces that’s been proven effective over time. It penetrates deeply into the wood fibers, providing a durable and long-lasting protective barrier. Oil-based primer is particularly suitable for areas exposed to heavy wear or moisture, such as kitchens and bathrooms.
- Latex primer is becoming increasingly popular for wood surfaces because it’s water-based and has a lower odor than oil-based alternatives. It dries quickly and provides excellent adhesion, making it ideal for interior woodwork. Latex primer is not recommended for exterior wood surfaces or areas of high humidity.
• Metal Surfaces: Rust-Inhibiting Primer
Metal surfaces, such as railings, gates, and outdoor furniture, require a primer designed to protect from rust and corrosion.
Rust-inhibiting primers, such as those containing zinc or zinc phosphate, are specially formulated to bond with metal surfaces, creating a barrier that prevents moisture from coming into contact with the metal.
It is worth noting that some rust-inhibiting primers are not suitable for use with certain metals, such as galvanized steel or aluminum. Always check the label of your chosen primer to confirm compatibility.
• Concrete and Masonry Surfaces: Masonry Primer
Concrete and masonry surfaces, like walls, driveways, and walkways, require a primer specifically designed for these porous materials. Masonry primers are designed to penetrate the pores and provide a strong bond between the surface and the finish coat.
These primers are formulated to withstand moisture and harsh weather conditions, making them suitable for both interior and exterior applications. Some masonry primers also provide a waterproofing effect, which can be beneficial in areas exposed to water or high humidity.
• Drywall Surfaces: Drywall Primer and Sealer
New drywall surfaces, such as those in newly constructed or renovated homes, require a specific primer to prevent the finish coat from being absorbed unevenly. Drywall primers are designed to seal the porous surface and provide a smooth, even base for the subsequent layer of paint.
Drywall primers also help in reducing the number of finish coats required, saving time and money in the long run. For best results, it’s essential to use a primer that is specified for use on drywall surfaces.
• Previously Painted Surfaces: Bonding Primer
When painting over a previously painted surface, it’s crucial to use a primer designed to bond well with the existing paint. Bonding primers are specially formulated to adhere to glossy or difficult-to-paint surfaces, ensuring a strong bond between the old paint and the new finish coat.
Bonding primers are particularly useful when the existing paint is oil-based, and you wish to apply a latex finish coat, as they help bridge the two incompatible surfaces.
• Recommendations and Conclusion
In conclusion, choosing the right primer for your surface is critical for achieving a successful and long-lasting paint job. Always consider the type of surface and its specific requirements before selecting a primer.
- For wood surfaces, opt for an oil-based or latex primer
- For metal surfaces, use a rust-inhibiting primer
- For concrete and masonry surfaces, choose a masonry primer
- For drywall surfaces, select a drywall primer and sealer
- And for previously painted surfaces, use a bonding primer
By following these guidelines and ensuring proper surface preparation, you can guarantee a smooth and durable finish for your painting project.
Type of Surface | Type of Primer |
|---|---|
Wood | Oil-based primer, latex primer |
Metal | Oil-based primer, metal primer |
Concrete | Concrete primer, masonry primer |
Drywall | Drywall primer, latex primer |
Plaster | Oil-based primer, latex primer |
Brick | Masonry primer, latex primer |
Plastic | Plastic primer, latex primer |
Fiberglass | Fiberglass primer, latex primer |
Can Primer Adhere to All Surface Materials?
Priming any surface is a crucial step in the painting process. Having an understanding of how primers adhere to different types of surfaces can save time and money and help ensure a successful final result.
• The Purpose of Primer
Primer is commonly applied before painting, as it serves as an interim layer between the substrate and the paint. It has several primary functions, such as:
- Promoting adhesion: Primer helps the paint to bond more effectively to the surface, enabling a stronger and more durable finish.
- Blocking stains: Primer can block stains, grease, and other contaminants from bleeding through the paint layer.
- Enhancing appearance: Primer can improve the overall appearance of the painted surface by providing a consistent base color and ensuring uniformity.
• Factors Affecting Primer Adhesion
– Surface Preparation
One of the most significant factors in determining whether a primer will bond to a surface is how well the surface is prepared. Proper surface preparation includes:
- Cleaning: Remove dirt, dust, debris, and any other contaminants from the surface.
- Sanding: Lightly sand the surface to create a rough texture, which will improve the primer’s adhesion.
- Repairing: Fill any gaps, cracks, or holes in the surface using appropriate filler or caulk.
- Degreasing: For surfaces with oil or grease, use a degreaser to remove these substances before applying the primer.
By ensuring that the surface is correctly prepared, you increase the likelihood of the primer adhering to it.
– Type of Primer
Different types of primers are available, each formulated to work with specific substrates. Selecting the appropriate primer can significantly impact its bonding ability:
- Oil-based primers: Suitable for surfaces such as wood, metal, and masonry. These primers are durable and offer excellent adhesion.
- Latex-based primers: Appropriate for drywall or bare wood surfaces, these water-based primers offer easy cleanup and emit fewer odors than oil-based primers.
- Shellac-based primers: Ideal for surfaces with severe stains or odors, shellac-based primers provide excellent adhesion and stain-blocking properties.
To ensure that the primer bonds well with the surface, it is important to choose a type that is compatible with the substrate.
– Surface Characteristics
The properties of the surface directly influence primer adhesion. Some surfaces may require additional treatment or specific primer types to ensure proper adhesion:
- Porous surfaces: Highly porous surfaces, such as concrete or untreated wood, may require a primer that is specially formulated to penetrate and bond with the substrate.
- High-gloss surfaces: Glossy surfaces, such as lacquer or high-gloss paint, may require a unique bonding primer designed for these types of finishes.
- Challenging surfaces: Some surfaces, like plastics, may require a specialty primer designed to bond with these materials.
By considering the unique characteristics of the surface, you can select a primer that will provide adequate bonding capabilities.
• Recommendations for Successful Primer Adhesion
- Proper surface preparation: Ensure that your surface is thoroughly cleaned, sanded, repaired, and degreased before applying the primer.
- Choose the right primer: Select a primer type that is compatible with your specific surface and application.
- Test adhesion: Perform a small test by applying primer to an inconspicuous area on the surface. Examine the area after the primer has dried to ensure proper adhesion.
- Follow manufacturer instructions: Always read and abide by the primer’s application instructions, as these may offer crucial information about adhesion, drying time, and other factors that can affect the final result.
By following these recommendations, you can be confident that your primer will bond to the surface and provide a strong foundation for your paint job.
• Conclusion
While primers are formulated to bond well with a wide range of surfaces, there is no guarantee that primer will adhere to any surface without proper preparation and selection.
By understanding how different factors can impact the primer’s adhesion and taking the necessary steps to prepare the surface and select the right primer, you can help ensure a successful painting project.