Match The Primer To The Surface: Selection Tips
Are you tired of endless hours looking for the perfect primer for your project, only to have it fail in the end? Stress no more because we are here to guide you through matching the ideal primer to the surface you’re working on. With our expert tips, you’ll be able to confidently select the right primer, ensuring a successful and professional outcome.
Match the primer to the surface: selection tips:
To achieve a professional and durable paint job, choose the right primer for the surface: use oil-based or latex-based primers for wood, rust-inhibiting or galvanized metal primers for metals, PVA or high-build primers for drywall, masonry primers for brick and concrete, and alkali-resistant primers for plaster surfaces.

Discover the secrets to choosing the perfect primer for your next painting project. Step up your DIY game with expert advice on matching primers to different surfaces for flawless results. Read on for invaluable tips that’ll have you primed for success!
Contents
- 1 Primer Selection Guide: Tips for Matching Surfaces
- 2 Picking the Perfect Primer for Your Painting Project
- 3 Preparing a Surface for Primer Application: Steps
- 4 The Versatility of Primer: Is it Suitable for All Surfaces?
- 5 Primer Compatibility: Does it Depend on Paint Type?
Primer Selection Guide: Tips for Matching Surfaces
Painting a surface may appear to be an easy task, but to achieve the best results, it is crucial to choose the right primer. A primer ensures proper adhesion of the topcoat and enhances the durability and appearance of the paint job
• Primer Selection for Different Types of Surfaces
– Wood Surfaces
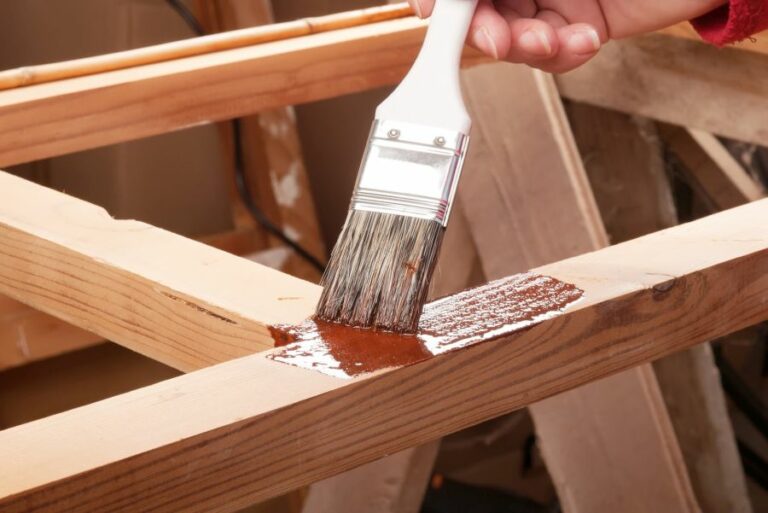
Wood surfaces require a dedicated primer to properly seal the porous material and ensure even coverage with the topcoat.
- Oil-based primers: These are ideal for both interior and exterior wood surfaces, as they offer excellent penetration, adhesion, and stain-blocking capabilities.
- Latex-based primers: These are more environmentally friendly and offer easier cleanup compared to oil-based primers. Latex primers are suitable for new or previously painted wood surfaces, but they may not have the same penetration and stain-blocking capabilities as oil-based primers.
I recommend using an oil-based primer for exterior wood surfaces where there is a higher risk of exposure to extreme weather conditions. For interior projects, a latex-based primer should suffice.
– Metal Surfaces
Metal surfaces require primers that provide excellent adhesion while preventing rust and corrosion.
- Rust-inhibiting primers: These are specifically designed for use on ferrous metal surfaces (iron and steel). They prevent rust and corrosion and ensure a smooth, durable finish. Popular rust-inhibiting primers include oil-based and acrylic-latex options.
- Galvanized metal primers: These are designed for use on galvanized steel and other non-ferrous metals. They provide a corrosion-resistant barrier between the metal surface and the topcoat.
I recommend using a rust-inhibiting primer for ferrous metal surfaces and a galvanized metal primer for non-ferrous metals. Always make sure that the primer is compatible with the type of metal it is being applied to.
– Drywall Surfaces
Drywall surfaces are porous and require a primer to ensure even coverage and adhesion of the topcoat.
- PVA (Polyvinyl Acetate) primer: This is the most common type of primer used for drywall surfaces. It is a latex-based primer that provides excellent adhesion on both new and painted drywall while also improving the overall appearance of the topcoat.
- High-build primer: This type of primer is used when there are significant imperfections in the drywall surface. It helps to smooth out rough areas, providing a uniform surface for the topcoat.
I recommend using a PVA primer for standard drywall surfaces and a high-build primer for those with significant imperfections.
– Masonry Surfaces
Masonry surfaces, such as brick and concrete, are porous and can readily absorb water, resulting in efflorescence (salt deposits) and peeling paint. An appropriate primer is necessary for proper sealing and adhesion.
- Masonry primer: This type of primer is specifically formulated for use on porous masonry surfaces. It provides excellent adhesion and seals the surface, preventing water absorption and efflorescence. There are both latex and acrylic masonry primers available on the market.
I recommend using a masonry primer for all brick and concrete surfaces. Prior to application, always ensure that the surface is thoroughly cleaned and any efflorescence is removed.
– Plaster Surfaces
Plaster is another porous material that requires a primer for proper adhesion and durability.
- Alkali-resistant primer: Plaster surfaces can have a high pH level, which can cause paint to peel or discolor. An alkali-resistant primer helps neutralize the high pH level, ensuring proper adhesion and a longer-lasting paint job.
I recommend using an alkali-resistant primer for plaster surfaces to prevent potential issues related to high pH levels.
• Conclusion
Selecting the right primer for the surface is critical to achieving a professional, durable, and long-lasting paint job. By taking the time to evaluate the surface’s unique requirements and matching it with the appropriate primer, you can ensure a successful project outcome.
For more in-depth information on selecting primers, you can refer to this comprehensive guide from the U.S. Department of Agriculture.
Picking the Perfect Primer for Your Painting Project
A primer is an essential component in any paint job as it provides a solid foundation for a long-lasting, professional-looking finish. Choosing the right primer for your paint project can make all the difference in how the final result turns out.
• Understanding the Purpose of Primers
Before we dive into the types of primers available, it’s essential to understand their purpose. Primers are designed to:
- Improve adhesion: A primer helps the topcoat adhere to the surface, preventing peeling and chipping.
- Enhance coverage: Applying a primer can reduce the number of paint coats required for a uniform and vibrant finish, as it promotes even coverage.
- Seal porous surfaces: Primers can help seal porous materials like wood, providing a smooth and even base for painting.
- Block stains: Certain primers can prevent stains, such as water spots or knots in the wood, from bleeding through your paint job.
Having a clear understanding of these benefits can guide you in selecting the right primer for your project.
• Types of Primers: Oil-based, Water-based, and Shellac
There are three main types of primers: oil-based, water-based (also referred to as latex or acrylic), and shellac. Each type has its unique properties and is best suited for specific surfaces and environments.
– Oil-Based Primers
Oil-based primers are typically used for the following applications:
- Properly sealing wood surfaces, preventing tannin bleed
- Ideal for painting over stained surfaces, as they have exceptional stain-blocking abilities
- Suitable for use on metal surfaces to prevent rust formation
While oil-based primers offer excellent adhesion and stain-blocking capabilities, they do release a strong odor and require proper ventilation during application. In addition, they are generally not compatible with water-based paints, requiring a solvent-based topcoat.
– Water-Based Primers
Water-based primers are an increasingly popular choice due to their low odor, ease of application, and quick drying times. Some advantages of water-based primers include the following:
- Compatibility with both water-based and solvent-based paints
- Suitable for interior and exterior use
- Can be used on various surfaces, including drywall, wood, masonry, and previously painted surfaces
However, keep in mind that water-based primers may not be the best choice for heavily stained surfaces or for blocking tannin bleed from wood.
– Shellac Primers
Shellac primers are known for their unmatched stain-blocking capabilities and are excellent for use on:
- Hard-to-cover stains, such as smoke or water damage
- Wood knots and sap streaks
- Sealing odors (e.g., pet odors or smoke)
Though shellac primers offer top-of-the-line stain blocking, they do come with some drawbacks, such as a strong odor, limited compatibility with topcoats (mainly works with solvent-based paints), and potential brittleness over time.
• Assessing the Surface and Environment
To choose the right primer for your project, you must consider the surface you’re working on and the conditions of your project site. Some factors to keep in mind are:
- Surface material: Different materials, such as wood, drywall, or metal, require different primers. Refer to the types of primers mentioned above for guidance on the best option for your specific surface.
- Interior vs. exterior: Some primers are specifically designed for either indoor or outdoor use. Always check the product label to ensure you’re using the appropriate primer for your project location.
- Existing stains: If you’re dealing with a heavily stained or damaged surface, opt for a primer with superior stain-blocking capabilities, such as an oil-based or shellac primer.
• Recommendations
Based on personal experience and understanding of the different types of primers presented here, I recommend the following:
- For general-purpose priming on various surfaces: Opt for a water-based primer as it offers versatility, compatibility with different topcoats, and ease of use.
- For stained or porous wood surfaces: An oil-based primer is best for sealing the wood and preventing tannin bleed.
- For heavily stained or odor-ridden surfaces: A shellac primer is your best bet, as its unmatched stain-blocking capabilities will ensure an even and clean finish.
Lastly, always read and follow the manufacturer’s instructions for the primer you choose. This will ensure proper application and optimal results. Additionally, you can visit this primer guide provided by Bob Vila for further information and in-depth guidance on selecting and applying primers.
By understanding the different types of primers, assessing the specific needs of your project, and following expert recommendations, you’ll be well on your way to choosing the perfect primer for a professional and lasting paint job.
Preparing a Surface for Primer Application: Steps
• Introduction
Preparing a surface for primer is an essential step in the painting process, ensuring that the surface is clean, smooth, and ready for a fresh coat of paint.
• Assessing the Surface
– Wood Surface Preparation
Before you begin preparing a wood surface for primer, it’s essential to inspect the surface for any imperfections, rough spots, or gaps.
Look for any loose or peeling paint, loose nails, or damaged sections of wood. Take note of these areas, as they will require additional attention during the preparation process.
– Metal Surface Examination
When dealing with metal surfaces, rust, and corrosion are common issues that need to be addressed before applying a primer. Check for signs of rust or corrosion, chipped or peeling paint, and any dents or scratches on the surface.
– Wall Inspection
For preparing walls, first, identify the type of wall material, such as drywall, plaster, or brick. Inspect the walls for any damage, like cracks, holes, or discoloration. Additionally, look for any loose or peeling wallpaper, as this will need to be removed before applying primer.
• Cleaning the Surface
– Wood Surface Cleaning
Remove dirt, grease, and any other residue from the wood surface using a mild detergent mixed with water.
Wipe the surface with a cloth, making sure to remove any excess moisture afterward. For tougher stains, use a gentle abrasive cleaner and a soft brush to scrub the area. Allow the wood to dry completely before proceeding to the next step.
– Metal Surface Cleaning
Remove dust and dirt from metal surfaces with a cloth or vacuum. To address grease and oil, use a degreasing cleaner or a solution of trisodium phosphate (TSP) mixed with water.
Follow the manufacturer’s instructions for mixing the solution and applying it with a cloth, making sure to wear rubber gloves for protection. Rinse the metal thoroughly with clean water and allow it to dry.
– Wall Cleaning
For drywall or plaster, remove dust and dirt with a cloth or a vacuum with a dusting attachment. For more resilient wall materials, such as brick or concrete, use a broom to sweep away debris.
Wash the walls using a mild detergent and water solution, and then rinse with clean water. Ensure all surfaces are completely dry before proceeding.
• Repair and Sanding
– Wood Surface Repairs
Fill any dents, gouges, or gaps in the wood with wood filler or putty. Follow the manufacturer’s directions for application and drying times. Once dry, sand the repaired areas with medium-grit sandpaper (80-120 grit) to ensure a smooth surface.
Finish by lightly sanding the entire wood surface with fine-grit sandpaper (180-220 grit) to remove any old paint or rough spots.
– Metal Surface Repairs
Remove any rust or corrosion by sanding the metal surface with coarse-grit sandpaper or a wire brush. For more substantial rust, consider using an electric sander, grinder, or chemical rust removal.
Prime the bare metal with a rust-preventative primer, following the manufacturer’s instructions. Fill any dents, scratches, or imperfections with metal filler or putty, and sand smooth once dry.
– Wall Repairs
Repair small holes or cracks in drywall or plaster with a pre-mixed patching compound, spreading it evenly with a putty knife. Allow the compound to dry, and then sand the area smoothly with fine-grit sandpaper (180-220 grit).
For brick or concrete walls, use a masonry patching compound to fill any cracks or gaps, following the manufacturer’s directions for drying and sanding.
• Before Applying Primer: Dust Removal and Masking
Before applying primer to any surface, be sure to remove any dust or debris using a cloth or vacuum. This is especially important after sanding, as dust can interfere with primer adhesion.
Mask off any areas that you do not want to be painted, such as windows, doors, and trim, using painter’s tape. Additionally, cover any furniture, fixtures, or flooring to protect them from drips or spills during the priming process.
• Conclusion
Properly preparing a surface for primer is crucial for achieving a professional-looking paint job. By following this comprehensive guide for wood, metal, and wall surfaces, you’ll be well-equipped to tackle any painting project with confidence.
Remember always to inspect, clean, repair, sand, and dust the surface before applying primer to ensure the best possible results.
Step | Description |
|---|---|
1 | Clean the surface by removing dirt, dust, and grease with a cloth, sponge, or brush. |
2 | Remove any loose, peeling, or flaking paint with a paint scraper, putty knife, or wire brush. |
3 | Repair any imperfections, such as cracks or holes, with a filler or patching compound. Allow it to dry completely, then sand the surface smooth. |
4 | Sand the entire surface, especially glossy or nonporous areas, to ensure proper adhesion of the primer. Use fine-grit sandpaper for a smooth finish. |
5 | Wipe down the surface with a damp cloth to remove any sanding dust and let it dry completely. |
6 | Apply painter’s tape and drop cloths to protect areas not to be primed. |
7 | Stir the primer well before applying with a brush, roller, or spray gun. Follow the manufacturer’s instructions on proper application and drying times. |
The Versatility of Primer: Is it Suitable for All Surfaces?
Primer is an essential component in the painting process. It creates a smooth, even base that allows the paint to adhere better to its surface, ultimately providing a smoother finish and longer-lasting results. But the question remains, can primer be used on any surface?.
• Benefits of Using Primer
Before discussing the specific surfaces suitable for primer, it is important to understand the benefits that it provides. Some advantages of using primer include:
- Improved paint adhesion
- Better coverage and color accuracy
- Longer-lasting paint results
- Protection of the surface from moisture and stains
• Primers for Different Surfaces
– Wood Primer
Wood surfaces often require a dedicated wood primer to create an even, smooth base for paint. There are various wood primers available, such as oil-based, water-based, and shellac-based primers.
Oil-based wood primers are ideal for sealing the wood and preventing tannin stains from bleeding through. They provide a solid, smooth base for both oil-based and latex paints. However, they tend to dry slowly and emit a strong odor.
Water-based wood primers, also known as latex primers, are more eco-friendly and have lower levels of toxic emissions than oil-based primers. They dry quickly and provide a stable base for water-based paint. However, they do not provide the same level of stain blocking and may not be as durable.
Shellac-based wood primers offer excellent stain blocking and adhesion. They dry quickly and can be used under either oil-based or water-based paints.
– Metal Primer
To achieve optimal results on metal surfaces, it is crucial to use a metal-specific primer. There are two main types of metal primers: latex-based and oil-based.
Latex-based metal primers are suitable for galvanized and non-ferrous metals, such as aluminum and copper. Oil-based metal primers can be used on ferrous metals, such as steel, as well as non-ferrous metals.
Metal primers generally offer excellent rust protection and ensure that the painting results are durable and long-lasting.
– Drywall Primer
New drywall surfaces require a specific drywall primer, which helps even out the surface and seal any potential stains. Drywall primers are typically water-based, so they dry quickly and offer a suitable base for latex paints.
– Concrete and Masonry Primer
Primers specifically created for concrete and masonry surfaces are essential for preventing moisture intrusion, sealing pores, and providing a stable base for paint.
The use of a primer in these cases helps achieve adequate adhesion and improves the longevity of the paint job.
– Plastic Primer
Primers formulated for plastic surfaces are necessary to create a solid bond between the paint and the surface. These primers typically come in spray form and improve adhesion, ensuring the paint sticks better to the plastic and does not easily scratch or peel off.
• Situations Where Primer is Not Required
Although primer is highly beneficial for most surfaces and painting projects, there are cases where it is not necessary. These situations often involve surfaces that have already been sealed or primed, as well as surfaces that are only receiving a minor touch-up or a simple color change.
For repainting previously primed or painted surfaces, assuming they are in good condition, a primer may not be necessary.
The existing paint acts as an adequate base, and applying additional primer may add unnecessary thickness or layers, compromising the final result.
• Conclusion
In conclusion, primers can be used on various surfaces, including wood, metal, drywall, concrete, masonry, and plastic, provided that they are specifically formulated for the material in question.
The use of an appropriate primer ensures better paint adhesion, improved coverage, and a longer-lasting paint job.
However, it is important to remember that primer may not always be necessary, especially in cases of repainting previously primed or painted surfaces. To achieve optimal painting results, always assess the specific requirements of your project and choose the appropriate primer accordingly.
For more information on primers and their applications, the Department of Energy’s website can provide valuable resources and guidance.
Primer Compatibility: Does it Depend on Paint Type?
When it comes to selecting a primer for your painting project, one of the most common questions asked is whether the primer needs to match the type of paint that will be used. The simple answer to this question is yes; your primer should generally match your paint type.
However, the details of this process may be slightly more complex than simply selecting the same paint type for both products.
• The Role of Primer
Primer plays a crucial role in preparing surfaces for painting. It ensures proper adhesion of paint to the surface, allowing for a more uniform finish and preventing peeling or flaking.
Additionally, it helps to seal porous surfaces, allowing for a more even application of paint and reducing the overall number of coats required. It can also help to block stains and imperfections on the surface from showing through the paint.
• Water-Based vs. Oil-Based: Understanding the Basics
There are two main types of paint and primer: water-based and oil-based. Each has its own unique properties and benefits, so it is essential to understand the differences when considering whether to match your primer to your paint type.
– Water-Based Products
Water-based paints and primers, also known as latex or acrylic, are the most common choice for most interior and exterior applications. They are easy to apply, dry quickly, and have a low odor. Additionally, they are easy to clean up, typically requiring only soap and water.
Water-based products are generally more environmentally friendly and have lower volatile organic compounds (VOCs) than their oil-based counterparts.
– Oil-Based Products
Oil-based paints and primers are more durable and resistant to wear and tear, making them ideal for surfaces that will receive a lot of use, such as floors, doors, and trim.
They also have better adhesion to surfaces and provide a smoother finish, making them suitable for areas with high humidity or moisture levels. However, oil-based products have a stronger odor, require longer drying times, and are harder to clean up, usually needing mineral spirits or paint thinner.
They also tend to have higher VOCs, posing potential environmental and health concerns.
• Why Matching Primer and Paint Type Matters
There are several reasons why it is crucial to match your primer and paint type:
- Compatibility: Using a primer that is compatible with your paint type ensures that the two products will work together to provide adequate adhesion to the surface and deliver a smooth, even finish. Mixing water-based and oil-based products may result in poor adhesion or uneven drying, causing issues such as peeling, flaking, or blistering.
- Surface Preparation: Different types of primer are designed to work best with specific surfaces. For instance, oil-based primers are better suited for sealing porous surfaces like wood, while water-based primers are better for drywall. Matching your primer to your paint type ensures that the surface is properly prepared for painting and achieves the best possible outcome.
- Performance: Matching your primer type to your paint type ensures that both products will perform optimally, providing the desired level of durability and protection for your painted surface.
• Tips and Recommendations for Selecting the Right Primer and Paint Type
- Consider the surface you are painting and the specific needs of your project. Choose a primer and paint type that best suits the material and conditions of your painting project.
- Read the manufacturer’s instructions and recommendations for both your primer and paint products. They will typically provide guidance on which primer types are compatible with their paint, as well as any specific surface preparation steps.
- Consult with professionals at your local paint store who can help you select the right primer and paint type for your project based on their experience.
- Always perform a test patch when using new primer and paint products. Apply both the primer and paint to a small, inconspicuous area of your surface, following the manufacturer’s instructions. Observe the results, checking for proper adhesion, coverage, and drying, as well as any unwanted reactions or issues.
In conclusion, matching your primer to your paint type is an essential aspect of ensuring a successful painting project. By selecting compatible products and preparing your surface properly, you can achieve a smooth, durable, and professional-looking finish that will last for years to come.
Primer Type | Paint Type | Compatibility |
|---|---|---|
Latex Primer | Latex Paint | Yes |
Latex Primer | Oil-Based Paint | Yes, but not ideal |
Oil-Based Primer | Latex Paint | Yes |
Oil-Based Primer | Oil-Based Paint | Yes |
Shellac Primer | Latex Paint | Yes |
Shellac Primer | Oil-Based Paint | Yes |