Paint Ready Surfaces Cleaning & Degreasing Guide, What Pros Say
Preparing surfaces for painting can feel daunting, but fear not! Our comprehensive guide to cleaning and degreasing paint-ready surfaces will give you the confidence and know-how to achieve professional-grade results every time. With our expert tips, you’ll easily transform any space, ensuring long-lasting, vibrant color for years to come.
Paint ready surfaces: cleaning & degreasing guide:
To prepare a surface for painting, ensure it is clean and degreased to enhance paint adhesion and durability. Identify contaminants such as dirt, grease, oil, and mildew, and use appropriate cleaning techniques. Finish with sanding, repairing, and priming the surface for a professional, long-lasting paint job.

Discover the secrets to a spotless surface before you start painting! Dive into our comprehensive guide on cleaning and degreasing paint-ready surfaces to achieve flawless results. Read on to learn expert tips and tricks to make your next paint job a breeze.
Contents
- 1 Guide to Cleaning & Degreasing for Paint-Ready Surfaces
- 2 Preparing Painted Surfaces for Repainting: Cleaning Tips
- 3 Safely Cleaning Surfaces: Preserving Existing Paint
- 4 Post-Painting Surface Cleaning Methods
- 5 Top Wall Cleaners for Effective Paint Preparation
Guide to Cleaning & Degreasing for Paint-Ready Surfaces
Preparing a surface for painting is a critical step in any painting project. A clean and well-prepared surface ensures a long-lasting and professional-looking finish.
• Understanding the Importance of Surface Cleaning and Degreasing
Before diving into the cleaning process, it is essential to understand the importance of surface cleaning and degreasing. A dirty or greasy surface can severely affect the adhesion and durability of paint, leading to peeling, chipping, and unevenness.
According to the US General Services Administration, proper surface preparation is crucial in ensuring long-lasting paint performance.
Thorough cleaning and degreasing play a vital role in reducing the possibility of paint failures and ensuring a smoother, more attractive final result.
• Identifying Contaminants on the Surface
There are various contaminants that can be found on surfaces, including dirt, grease, oil, and mildew. These contaminants can affect paint adhesion, leading to improper coverage and shortening the lifespan of the paint job.
To properly clean and degrease a surface, it is essential first to identify the type of contaminants present.
– Dirt and Dust
Most surfaces accumulate dirt and dust over time due to foot traffic, environmental conditions, and everyday use. If not removed before painting, dirt, and dust can cause adhesion issues, resulting in an uneven finish.
– Grease and Oil
Grease and oil are common contaminants found on surfaces, particularly in kitchens and garages. As oils do not mix well with water-based paints, they can create a barrier between the paint and the surface, leading to poor adhesion and, ultimately, paint failure.
– Mildew
Mildew is a fungal growth that occurs in damp or poorly ventilated areas, such as bathrooms or basements. Painting over mildew can cause the paint to peel, and the mildew can continue to grow beneath the paint layer, posing potential health risks.
• Effective Cleaning Techniques for Various Contaminants
To obtain a paint-ready surface, it is essential to use effective cleaning techniques for the specific contaminants present. This section will guide you through the recommended methods for removing dirt, dust, grease, oil, and mildew.
– Dirt and Dust Removal
To remove dirt and dust, first, vacuum or sweep the area to remove loose particles. Next, mix warm water with a mild detergent in a bucket, then use a sponge or cloth to wipe down the surface, removing any remaining dirt and dust.
Rinse the surface with clean water and allow it to dry completely before proceeding with the paint job.
– Grease and Oil Removal
To remove grease and oil, use a degreasing cleaner specifically designed for this purpose, such as trisodium phosphate (TSP) or a TSP substitute.
Follow the manufacturer’s instructions for mixing the cleaner with water, then apply the solution to the surface using a sponge or cloth. Rinse thoroughly with clean water and allow the surface to dry completely.
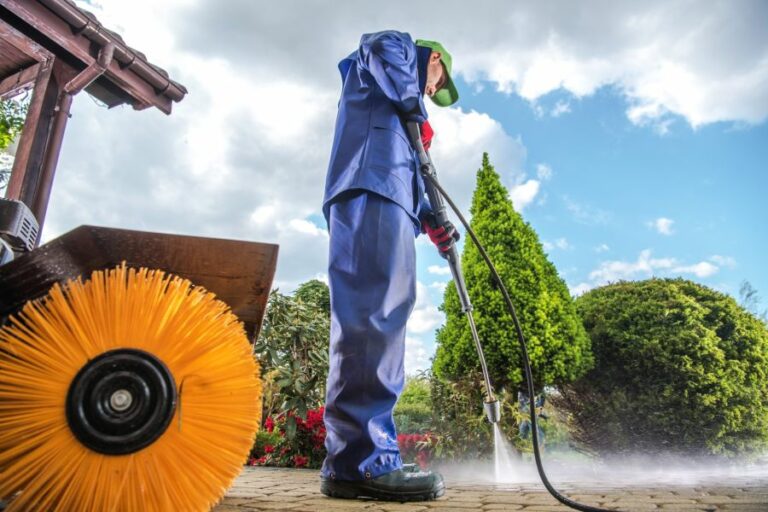
Additional degreasing methods may be required in some industrial settings, such as steam cleaning or pressure washing. Always consult industry-specific guidelines and regulations to ensure proper degreasing techniques are used.
– Mildew Removal
To remove mildew, first, put on safety goggles and gloves for protection. Use a bleach and water solution, mixing one part bleach with three parts water. Apply the solution to the mildew with a sponge or cloth and allow it to sit for at least 15 minutes.
Scrub the area vigorously with a stiff-bristle brush or scrubbing pad to remove the mildew, then rinse the surface with clean water. Allow the surface to dry completely before painting.
• Final Surface Preparations
Once the surface is thoroughly cleaned and degreased, it is essential to complete a few final steps for proper paint adhesion.
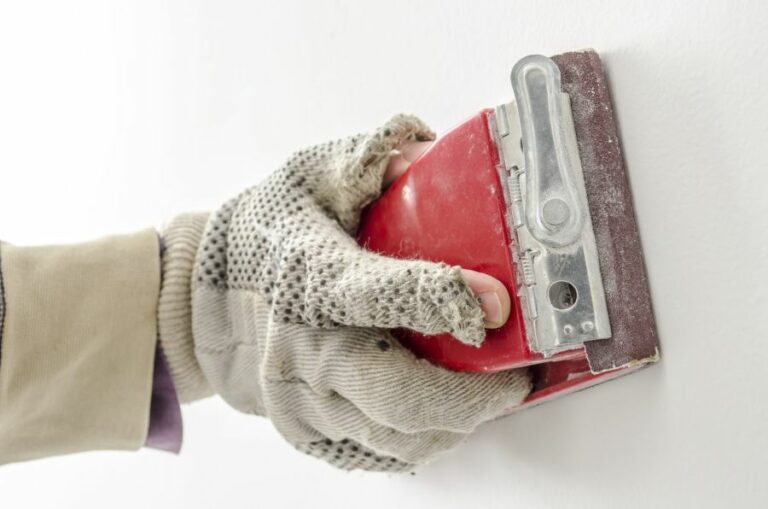
- Sanding: Lightly sand the surface, particularly any glossy or semi-glossy areas, to create a better bond between the paint and the surface. Be sure to remove any sanding dust with a tack cloth or vacuum cleaner.
- Repairing: Fill any holes, cracks, or dents with an appropriate filler, such as spackling or wood filler, and allow it to dry. Sand the filled areas until they are smooth and level with the surrounding surface.
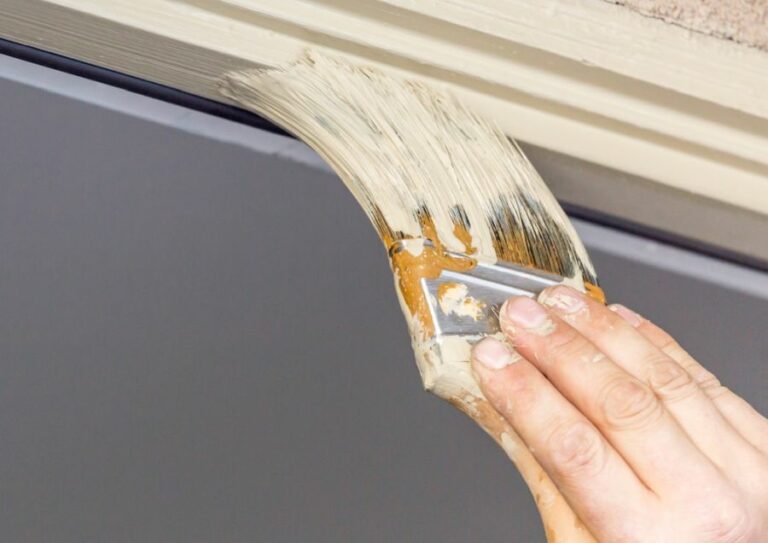
- Priming: Apply a primer to the surface, particularly if painting over dark colors, stains, or porous materials. Priming seals the surface provides better paint coverage and ensures a more even and durable finish.
By following this comprehensive guide, you’ll ensure a paint-ready surface that leads to a successful, long-lasting, and professional-looking paint job.
Remember, proper cleaning and degreasing are vital steps in the painting process. Take the time to do it right for a superior result.
Preparing Painted Surfaces for Repainting: Cleaning Tips
Refreshing your home’s appearance with a new coat of paint is an appealing project. However, to ensure your painting efforts yield professional and long-lasting results, it’s crucial to properly prepare the surface beforehand.
This includes cleaning painted surfaces to remove dirt, grime, and even old paint.
• Why Cleaning Matters
Properly cleaning a painted surface is essential for many reasons. Firstly, it allows the new paint to adhere better to the surface, improving the paint’s appearance and extending its durability.
Moreover, cleaning eliminates contaminants that might otherwise cause the new paint to chip or peel.
• When to Clean
It is advisable to clean the painted surface when it’s visibly dirty or has accumulated dust and grime over time.
Additionally, you should also prepare the surface when transitioning to a new type of paint, such as from oil-based to water-based, as the new paint may not adhere well to the old paint.
• Tools and Materials
To clean painted surfaces effectively, you’ll need the following tools and materials:
- A clean cloth or sponge
- Water
- Mild detergent or cleaning solution
- Bucket
- Rubber gloves (optional)
- Soft-bristled brush (for removing stubborn stains)
• Methods for Cleaning Painted Surfaces
Depending on the painted surface’s condition, you can choose from the following cleaning methods.
1. Basic Cleaning
This method is suitable for surfaces with minor dirt and smudges. Start by mixing a mild detergent with warm water in a bucket.
Next, dip a clean cloth or sponge into the solution and wring out excess water. Gently wipe the surface paying particular attention to stained areas.
Finally, rinse the surface with a clean cloth and water, then allow it to dry completely before repainting.
2. Industrial Cleaning Solution
Stubborn stains may require using a specialized cleaning solution. When using industrial cleaners, make sure to follow the manufacturer’s instructions carefully and wear rubber gloves to avoid skin irritation.
Apply the cleaner using a cloth or sponge, then scrub gently with a soft brush if necessary. Rinse the surface thoroughly and allow it to dry before applying new paint.
3. Trisodium Phosphate (TSP)
TSP is a heavy-duty cleaner that works great for extremely dirty surfaces or surfaces with layers of old paint.
According to the United States Environmental Protection Agency (EPA), TSP should be used with caution, as it can cause irritation to the skin and eyes. Therefore, it’s essential to wear rubber gloves and safety goggles while using TSP.
To use TSP, mix it with water according to the manufacturer’s instructions, and apply it to the surface using a cloth or sponge.
Allow the TSP to work for a few minutes, then scrub the surface gently with a brush. Rinse the surface thoroughly and let it dry before repainting.
• Removing Loose or Peeling Paint
In some instances, you may need to remove loose or peeling paint before repainting. You can use a putty knife or paint scraper to lift and remove the loose paint carefully.
Take care not to damage the surface underneath the paint. After removing the loose paint, sand the surface lightly to create a smooth finish for the new paint to adhere to.
• Final Thoughts
Cleaning painted surfaces before repainting is an essential step that should not be overlooked. By following the appropriate methods and using the right tools, you can ensure your new paint job looks flawless and lasts for years.
Remember to exercise caution when using strong cleaning solutions like TSP and to always allow the cleaned surface to dry completely before applying new paint.
Method | Description |
|---|---|
1. Remove dirt and dust | Use a soft brush or vacuum with a brush attachment to remove dirt and dust from the surface. |
2. Clean with mild detergent and water | Mix a few drops of mild dishwashing soap with water and use a soft sponge or cloth to gently clean the surface. Rinse with clean water and let the surface dry. |
3. Use a degreaser | If the painted surface is greasy or oily, use a degreaser to remove any residue. Rinse with clean water and let the surface dry. |
4. Remove mold and mildew | If mold or mildew is present, mix one part bleach with three parts water and use a soft brush or sponge to clean the surface. Rinse with clean water and let the surface dry. |
5. Sand the surface | If the surface is glossy, lightly sand it with fine sandpaper to help the new paint adhere better. Wipe away sanding dust with a damp cloth and let the surface dry. |
Safely Cleaning Surfaces: Preserving Existing Paint
Maintaining the cleanliness of painted surfaces is essential in preserving their appearance and durability. However, cleaning these surfaces often comes with the risk of removing paint.
• Choosing the Right Cleaning Agents
The first step to ensure you don’t remove paint while cleaning is to choose the appropriate cleaning agent. Some powerful cleaning products can strip paint from surfaces. On the other hand, gentler cleaning agents protect the paint while still effectively removing dirt, dust, and stains.
– For Water-Based Paints
Water-based paints (also known as latex or acrylic paints) are typically used for interior walls and surfaces. These types of paints are sensitive to harsh chemicals or cleaning agents.
To prevent any damage, opt for mild cleaning solutions, such as a mixture of warm water and mild dish soap.
– For Oil-Based Paints
Oil-based paints are more resistant to chemicals and scratching than water-based paints. They can generally withstand stronger cleaning agents. However, it is still essential to be cautious when using any cleaning product on oil-based painted surfaces.
Start with a mild cleaning solution and test it on a small, inconspicuous area before using it on the entire surface.
• Proper Technique for Cleaning Painted Surfaces
Cleanliness is crucial in maintaining the appearance of painted surfaces. However, using the wrong technique can lead to scratches, paint removal, or discoloration. Follow these steps to ensure thorough cleaning without damaging the paint.
– Dusting Regularly
Regular dusting is vital to prevent dust and dirt buildup on painted surfaces. Use a soft, dry cloth or duster to wipe away dust and debris gently. Dusting should be done at least once a week to maintain the surface’s cleanliness and appearance.
– Wiping Gently
When cleaning painted surfaces, it’s important to be gentle to avoid removing the paint. Use a soft cloth or sponge dampened with the cleaning solution of your choice. Wipe the surface gently using circular motions to remove dirt and stains without causing any damage to the paint.
– Rinsing Carefully
After using a cleaning solution on a painted surface, it’s essential to rinse off any residue thoroughly. Mix warm water with a few drops of mild dish soap to create a gentle rinsing solution.
With a clean, soft cloth, wipe the surface gently to remove any lingering cleaning solution or soap residue. Failure to rinse the surface properly can result in a dull or sticky finish.
– Drying Thoroughly
Leaving moisture on painted surfaces can cause damage to the paint, leading to peeling, bubbling, or discoloration.
To prevent this, dry the surface thoroughly using a clean, dry cloth or towel. Gently pat the surface dry instead of rubbing, as rubbing may strip the paint or leave streaks.
• Tips for Cleaning Stubborn Stains
Occasionally, some stains may not come off using the standard cleaning method. In these cases, extra care and attention are required to remove stubborn stains without damaging the paint.
– Using Baking Soda
Baking soda is a non-abrasive, safe, and effective cleaning option for painted surfaces. Make a paste by mixing equal parts baking soda and water. Apply the paste to the stained area and let it sit for a few minutes.
Gently rub the paste with a soft cloth or sponge, using circular motions to remove the stain. Rinse the surface with a damp cloth and dry thoroughly.
– Magic Eraser
A Magic Eraser (a melamine foam sponge) can be a useful tool for cleaning stubborn stains on painted surfaces. However, it is essential to be cautious when using this product as it can cause abrasion and remove paint when used aggressively.
Gently rub the Magic Eraser on the stain using light pressure and circular motions. Continually check the area to ensure that the paint remains intact.
• Final Thoughts
Keeping painted surfaces clean and well-maintained is crucial for preserving the surfaces’ beauty and longevity. By using the appropriate cleaning agents and techniques, you can eliminate dirt, dust, and stains from your painted surfaces without damaging the paint.
Remember to test any cleaning technique or product on a small, inconspicuous area before applying it to the entire surface. For more information on protecting and maintaining painted surfaces, consult resources like The Painting and Decorating Contractors of America (PDCA) organization.
Step | Description |
|---|---|
1 | Remove any loose dirt, dust, or debris from the surface using a soft cloth or brush. |
2 | Mix a gentle cleaning solution by combining warm water and a small amount of mild dish soap. |
3 | Dampen a soft cloth or sponge with soapy water, ensuring it’s not overly saturated. |
4 | Gently clean the surface using damp cloth or sponge, being careful not to scrub too hard or use abrasive materials. |
5 | Rinse the cloth or sponge with clean water and go over the surface again to remove any soap residue. |
6 | Dry the surface with a clean, soft cloth or towel, avoiding any rubbing or buffing motions that could damage the paint. |
Post-Painting Surface Cleaning Methods
Painting, whether it is a DIY project or a professional job, can sometimes leave a mess on surfaces. Cleaning up after a painting job is an essential aspect that needs to be done correctly for the best results and to preserve your surfaces.
• Why Proper Cleaning Is Crucial
Proper cleaning after a painting project has numerous benefits:
- Prevents accidents, such as slipping on dried paint
- Protects your surfaces from damage
- Enhances the longevity and appearance of your paint job
- Helps to maintain a clean and healthy environment
- Keeps surfaces looking fresh and new
According to the [United States Environmental Protection Agency (EPA), improper paint removal or cleaning can result in the release of lead dust, potentially hazardous to health, especially for young children.
Therefore, safe and effective cleaning practices are necessary for maintaining a healthy environment.
• Gearing Up With the Right Supplies
Before diving into the cleaning process, assemble the right cleaning supplies for an effective and smooth approach. Here is a list of common supplies you will need:
- Warm, soapy water
- A towel or cloth for wiping
- A sponge or soft scrubber
- Paint thinner or mineral spirits (for oil-based paints)
- A multi-purpose cleaner or degreaser
- A vacuum cleaner with a brush attachment
• Step-by-Step Process for Cleaning Surfaces After Painting
– Cleaning Painted Surfaces
To clean freshly painted surfaces, follow these steps:
- Remove loose debris, such as dirt, dust, or paint flakes, with a soft-bristle brush or a vacuum cleaner with a brush attachment.
- Mix warm, soapy water using a mild detergent. Avoid using harsh chemicals, as they may damage the freshly painted surface.
- Dip a soft cloth, sponge, or soft scrubber into the soapy water and wring it out to avoid dripping.
- Gently clean the surface using soft circular motions, ensuring not to apply too much pressure that may damage the paint.
- Rinse the surface with clean water and wipe it dry with a clean, lint-free cloth.
- For stubborn stains or grease, use a multi-purpose cleaner or degreaser. Apply it sparingly and follow the manufacturer’s instructions for best results.
– Cleaning Hard Floors
To clean hard floors such as tiles, laminates, or hardwood after painting, follow these steps:
- Remove paint drips, splatters, or spills using a plastic spatula or scraper. Be careful not to scratch the floor surface.
- Vacuum the floor to remove loose dirt, dust, or paint flakes.
- Mop the floor using warm, soapy water. For stubborn stains, use a multi-purpose cleaner or degreaser.
- Dry the floor with a clean, absorbent mop or towel.
– Cleaning Carpeted Floors
Cleaning paint spills or stains from carpets can be challenging. Follow these steps for effective cleaning:
- Blot the paint spill immediately using a clean, absorbent cloth or paper towel.
- Mix a solution of warm water, mild detergent, and white vinegar in equal parts.
- Apply the solution to the paint stain and blot with a clean cloth or sponge.
- Continue blotting the stain until it dissipates or loosens, repeating steps 3 and 4 as needed.
- Rinse the area with clean water and blot dry.
- If the stain persists, consider using a carpet cleaner, following the manufacturer’s instructions.
– Cleaning Tools and Equipment
Proper cleaning and maintenance of tools and equipment are essential for extending their lifespan and effectiveness. Here’s how to clean some common painting tools:
Brushes and Rollers
- For water-based paints, clean brushes and rollers using warm, soapy water. For oil-based paints, use a paint thinner or mineral spirits. Always follow the manufacturer’s instructions for the proper use and disposal of these products.
- Rinse the brushes thoroughly and gently remove excess water by squeezing or shaking.
- Use a brush comb to separate the bristles and reshape the brush head.
- Store the brushes upright or hang them to dry.
Paint Trays and Buckets
- Remove excess paint from the trays and buckets using a scraper or spatula.
- For water-based paints, clean with warm, soapy water. For oil-based paints, use a paint thinner or mineral spirits, following the manufacturer’s instructions.
- Rinse thoroughly and dry before storing.
• Expert Tips for an Efficient and Safe Cleanup
- Use protective gear, such as gloves and goggles, when handling paint thinners or other chemicals.
- Dispose of paint residues, thinner, or other chemicals responsibly, following local regulations.
- Always work in a well-ventilated area to avoid inhaling fumes from paint or chemicals.
- Keep surfaces and tools clean during the painting process to make the post-painting cleanup faster and more manageable.
In conclusion, proper cleaning of surfaces after painting is essential for the longevity of your paint job, maintaining a clean environment, and preserving the surfaces themselves.
By following the steps outlined above and using the right cleaning supplies, you can ensure an efficient and effective post-painting cleanup.
Step | Description |
|---|---|
1 | Allow the paint to dry before cleaning the surface. |
2 | Use a soft cloth or sponge to remove dust and debris from the surface. |
3 | For difficult stains, use a mild soap or detergent mixed with water. |
4 | Gently scrub the surface with the soapy mixture using a soft cloth or sponge. Avoid using abrasive materials that could damage the paint. |
5 | Rinse the surface with water to remove any soap residue. |
6 | Use a clean, dry cloth to wipe the surface dry. |
7 | If necessary, clean any tools or equipment used for painting following the manufacturer’s instructions. |
Top Wall Cleaners for Effective Paint Preparation
When preparing to paint a wall, one of the most essential steps is ensuring that the surface is clean and free of dirt, dust, and grime. This is crucial for both better adhesion of the new paint and a smoother, more professional-looking finish.
• Trisodium Phosphate (TSP): The Preferred Wall Cleaner
Trisodium Phosphate, commonly known as TSP, is a highly effective and widely recommended wall cleaner for paint prep.
Available in both powder and liquid forms, TSP can be found at most home improvement stores and is known for its ability to quickly remove accumulated dirt, grease, and mildew from surfaces.
In addition to its impressive cleaning prowess, TSP is also an excellent deglosser, which helps create a better surface for paint to adhere to.
– Benefits of TSP
- Efficient cleaning: TSP is known for its potent cleaning abilities, easily removing heavy grime and stains from walls, making it ideal for paint prep.
- Deglossing properties: TSP helps eliminate glossy finishes from previously painted surfaces, enabling better adhesion of the new paint.
- Affordable: TSP is a cost-effective cleaning solution, easily found at most home improvement stores.
– How to Use TSP
- Dilute the TSP according to the manufacturer’s instructions. The commonly recommended ratio is one cup of TSP for every four gallons of warm water.
- Apply the TSP solution to the wall using a sponge or brush, working in manageable sections.
- Let the solution sit for a few minutes to allow it to break down the dirt and grease.
- Rinse the wall thoroughly with clean water, ensuring that no TSP residue remains on the surface.
– Safety Precautions When Using TSP
While TSP is a highly effective wall cleaner, it is important to follow safety precautions to avoid any potential hazards, such as skin irritation or potential harm to the environment.
- Use gloves: Always wear rubber gloves when handling TSP to protect your skin from irritation.
- Wear goggles: TSP can cause eye irritation if it comes in contact with your eyes. Wearing safety goggles can help prevent this.
- Protect surfaces: TSP can damage some materials, like metal and wood. Be sure to cover and protect any nearby surfaces from potential contact.
• Alternatives to TSP: Environmentally Friendly and Gentle Options
TSP is not the only wall cleaner available for paint prep. For those seeking a more eco-friendly or gentler option, there are several alternatives that are effective and safe.
– Vinegar Solution
A mixture of water and distilled white vinegar can serve as a natural and environmentally friendly alternative to TSP.
To create the solution, mix one cup of vinegar with a gallon of warm water. Apply the mixture to the wall using a sponge or brush, then rinse thoroughly with clean water.
– Detergent Solution
A mild detergent, such as dish soap, can also be used to clean walls before painting. Mix a few drops of detergent in a gallon of warm water and use the solution in the same way as TSP or vinegar. Rinse the wall thoroughly after using detergent to ensure a residue-free surface.
– Store-Bought Alternatives
Some home improvement stores carry TSP-free wall cleaners specifically designed for paint prep. These products are formulated to be both effective and environmentally friendly. Be sure to follow the manufacturer’s instructions closely for best results.
• Additional Tips for Success
Along with selecting the best wall cleaner, it is crucial to follow these tips to ensure a successful paint job.
- Remove all furniture and cover the floor: Always clear the area and cover the floor with drop cloths to protect surfaces from any accidental spills or splatters.
- Repair any wall damage: Before cleaning and painting, repair any cracks or holes in the wall to create a smooth surface for the new paint.
- Time your project wisely: To ensure optimal drying and curing times, avoid painting on humid or excessively cold days.
In conclusion, Trisodium Phosphate (TSP) is the preferred wall cleaner for paint prep due to its efficient cleaning and deglossing properties. However, environmentally friendly alternatives like vinegar, mild detergent, or store-bought TSP-free cleaners can also achieve impressive results.
Adhering to the guidelines and recommendations discussed in this article will help ensure a flawless and professional-looking paint job.
Product Name | Description | Application |
|---|---|---|
TSP (Trisodium Phosphate) | A heavy-duty cleaner that removes grease, grime, and dirt effectively. | Dilute with water, apply with sponge or brush, and rinse. |
Krud Kutter Prepaint Cleaner | A water-based, biodegradable cleaner that removes tough stains, dirt, and grease. | Spray, wipe with a clean cloth, and let dry. |
Sugar Soap | An alkaline cleaner that removes dirt, grease, and grime. | Mix with water, apply with sponge or cloth, and rinse. |
Simple Green All-Purpose Cleaner | A non-toxic cleaner that removes grease, grime, and dirt without harmful chemicals. | Dilute with water, spray, and wipe with a clean cloth. |