Prepping Surfaces By Cleaning & Degreasing
Preparing surfaces for painting or applying adhesives can feel daunting, but with the right knowledge, you can tackle it like a pro. The key to achieving a flawless finish is thoroughly cleaning and degreasing the surface. Fortunately, we’re here to guide you through the essential steps and best practices, ensuring your project is a resounding success with long-lasting results.
Prepping surfaces by cleaning & degreasing:
Cleaning and degreasing surfaces is essential for construction, renovation, and maintenance projects, as it ensures the durability and longevity of finishes such as paint, bonding, or sealing. Properly prepared surfaces help prevent poor adhesion, damaged finishes, and structural problems, thus contributing to the overall appearance and functionality of a project.

Learn how to properly clean and degrease various surfaces to ensure a successful paint job or adhesive application. Discover the right techniques and products to use in order to achieve a smooth, long-lasting finish. Keep reading for practical tips that will make all the difference in your next project!
Contents
- 1 Cleaning & Degreasing: Surface Preparation Essentials
- 2 Steps to Effectively Prepare Surfaces for Cleaning
- 2.1 • Determining the Surface Material
- 2.2 • Clearing the Area
- 2.3 • Removing Loose Dirt and Debris
- 2.4 • Pre-Treating Stains
- 2.5 • Choosing the Right Cleaning Solution
- 2.6 • Diluting the Cleaning Solution
- 2.7 • Applying the Cleaning Solution
- 2.8 • Allowing the Solution to Sit for Optimal Results
- 2.9 • Rinsing or Wiping the Area
- 2.10 • Drying the Surface
- 3 Exploring the Surface Cleaning Process
- 4 Popular Techniques for Surface Preparation: A Guide
- 5 Chemical Cleaning Techniques Prior to Surface Coating
Cleaning & Degreasing: Surface Preparation Essentials
Cleaning and degreasing surfaces is a vital step in many construction, renovation, and maintenance projects. By removing contaminants like dirt, grease, and oil from surfaces, you can ensure a durable and long-lasting finish, whether it’s for painting, bonding, or sealing.
• Why Cleaning and Degreasing Surfaces is Essential
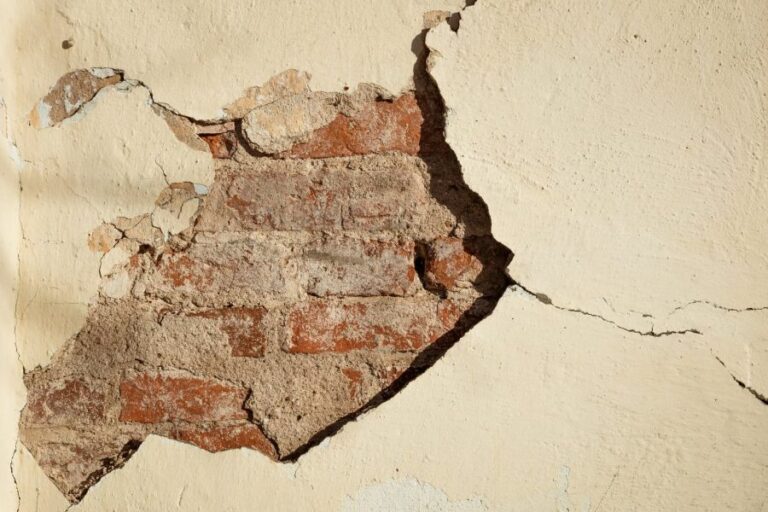
Whether working with wood, metal, plastic, or any other material, it is crucial to properly clean and degrease surfaces before moving forward with your project.
The presence of contaminants on surfaces can lead to poor adhesion, damaging finishes, or even structural issues.
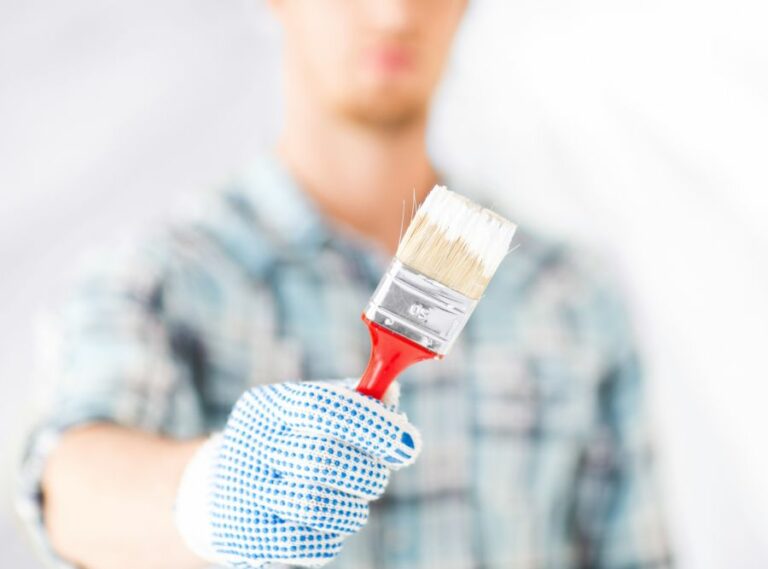
For example, when painting, any dirt or grease present on the surface will prevent the paint from sticking properly, leading to peeling, bubbling, or poor coverage.
In bonding applications, the adhesion strength of glue or other bonding agents can be compromised if there are any contaminants on the surface, resulting in weak bonds and potential failure.
Thus, cleaning and degreasing surfaces not only helps ensure the long-term success and durability of your project but also contributes to its overall appearance and functionality.
• Cleaning: Tools, Techniques, and Solutions
To achieve the best possible surface cleanliness, there are several tools and techniques you can employ.
– Brushes, Brooms, and Rollers
For removing loose dirt, dust, and debris from surfaces, you can use brushes, brooms, or rollers, depending on the size of the area. Stiff brushes or brooms are particularly useful for scrubbing away stubborn dirt and grime.
– Vacuum Cleaners
A vacuum cleaner equipped with the proper attachments can be particularly useful for clearing away dust and particulate matter from surfaces. Be sure to use a high-quality filter for trapping even the smallest dust particles.
– Cleaners and Degreasers
There are numerous commercially available cleaners and degreasers on the market, and you should choose one that is appropriate for the specific material you’re working with, as well as for the type of contaminants present.
When choosing a cleaner, follow the manufacturer’s recommendations for dilution or concentrations, and always make sure to rinse thoroughly after use.
Some common household cleaners like vinegar, dish soap, or baking soda mixed with water can also be effective in cleaning and degreasing surfaces.
However, be sure to test the cleaning solution on a small, inconspicuous section of the surface first to check for any adverse reactions or potential damage.
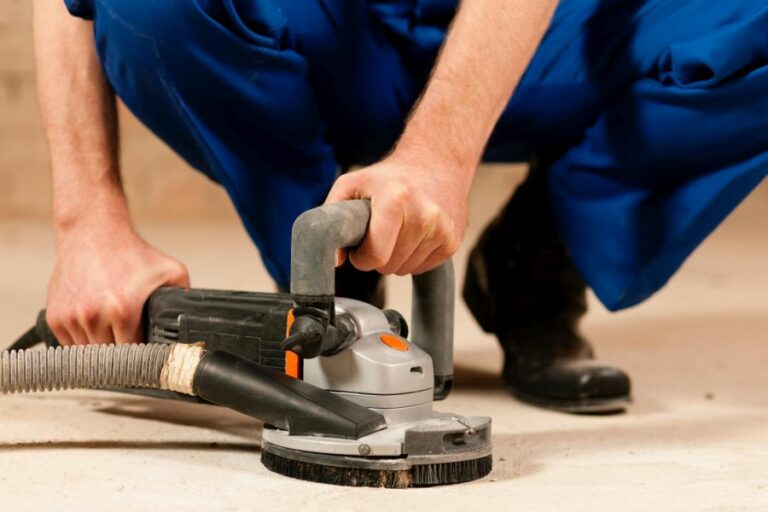
– Steam Cleaning
For particularly tough grime, steam cleaning is an effective method of loosening and removing contaminants. Steam cleaners are especially valuable for cleaning metal surfaces, as they can quickly cut through several layers of oil, grease, and other buildup without causing harm to the surface material.
• Degreasing: Cutting Through Grease and Oil
One of the most important steps in surface preparation is degreasing, ensuring that all grease and oil residues are removed from the surface.
This can be done using chemical degreasers or even applying simple household products that are effective at breaking down grease.
– Degreasers and Solvents
Commercial degreasers and solvents are specifically formulated to break down and dissolve various types of oils and greases.
Be sure to carefully read and follow the manufacturer’s instructions for use, as some solvents can damage certain materials if not used properly.
Always provide proper ventilation when using chemical degreasers and solvents, wear appropriate protective gear, and dispose of used materials according to local regulations.
– Alternatives to Chemical Degreasers
If you prefer a more environmentally friendly option, there are alternatives like using a mixture of hot water and dish soap, applying citrus-based cleaners, or even using a paste made from baking soda and water.
While these options may not be as potent as commercial solvents, they can still be effective at loosening and removing grease and oil.
• Tips and Tricks for Effective Surface Preparation
From our personal experience, here are some recommendations to help you achieve the best results when cleaning and degreasing surfaces:
- Begin the cleaning process by removing as much loose dirt and debris as possible. This will ensure that when you start scrubbing or utilizing other cleaning techniques, you aren’t simply pushing around the same dirt particles.
- Always work from top to bottom when cleaning surfaces, particularly for walls and other vertical surfaces. This way, you won’t inadvertently do more work for yourself by having to re-clean lower sections that were dirtied by dripping water or cleaning solution.
- Give yourself plenty of time for surface preparation. Rushing the process can ultimately result in more work if you need to go back and re-clean or re-degrease later on.
In conclusion, cleaning and degreasing surfaces is a crucial step in the overall success of any construction or renovation project.
By employing the tools, techniques, and solutions discussed in this guide, you can ensure that your surfaces are properly prepared, leading to a durable, long-lasting, and appealing finish.
Steps to Effectively Prepare Surfaces for Cleaning
Cleaning any surface is a crucial task, whether it’s in a residential or commercial setting. However, before embarking on the actual cleaning process, it is essential to prepare the surfaces properly to ensure effective and efficient results.
• Determining the Surface Material
Before you start, it’s crucial to identify the material of the surface you need to clean. This will help you choose the right cleaning solution and method for that particular surface. Common surfaces include wood, metal, glass, plastic, and textiles.
• Clearing the Area
Before preparing the surface, it’s essential to clear the area to ensure no obstacles are in the way. Remove all objects from the surface and, if necessary, relocate furniture or items to a safe location to provide enough space for cleaning.
• Removing Loose Dirt and Debris
Before applying any cleaning solution, it’s essential to remove loose dirt, dust, and debris from the surface. This step can be done using a vacuum cleaner, a dry microfiber cloth, or a soft brush, depending on the surface.
Vacuum cleaners with HEPA filters are recommended for improved indoor air quality, and you can consult the American Lung Association for more guidance on choosing the right vacuum cleaner for your needs.
• Pre-Treating Stains
In situations where there are noticeable stains on the surface, it’s recommended to pretreat these stains before the overall cleaning process.
Apply a stain remover or a solution compatible with the specific surface material, and follow the instructions on the product’s label. Allow the solution to sit for the recommended period to break down the stain effectively.
• Choosing the Right Cleaning Solution
Selecting the right cleaning solution is a critical step in preparing surfaces for cleaning. Ensure that the chosen cleaner is appropriate for the surface material and the type of dirt or stain.
When possible, opt for eco-friendly and non-toxic cleaning solutions to minimize environmental and health risks.
A helpful resource for selecting green cleaning products is the Green Seal, which certifies environmentally friendly cleaning products that meet specific performance standards.
• Diluting the Cleaning Solution
Often cleaning solutions need to be diluted before use. Carefully read the instructions on the product’s label and dilute the solution accordingly. Over-diluting or under-diluting may reduce the product’s effectiveness or damage the surface, so adhering to the manufacturer’s recommendations is essential.
• Applying the Cleaning Solution
After preparing the cleaning solution, it’s time to apply it to the surface. Use a spray bottle or a clean cloth to gently apply the solution to the surface, ensuring even coverage. Avoid using excessive amounts of solution, as this may leave residue or damage the material.
• Allowing the Solution to Sit for Optimal Results
To ensure the best possible results, allow the cleaning solution to sit on the surface for the recommended time.
This dwell time will enable the solution to break down dirt, grease, and other contaminants effectively. Refer to the product’s instructions for specific dwell time recommendations.
• Rinsing or Wiping the Area
After the cleaning solution has had time to work, it’s essential to rinse or wipe down the surface. Rinsing is necessary for surfaces that can withstand water, like countertops or tile floors.
For surfaces that cannot tolerate water, use a damp microfiber cloth to remove the cleaning solution residue.
To ensure thorough rinsing or wiping, check the surface from different angles and make sure there isn’t any residue, streaks, or remaining dirt.
• Drying the Surface
Properly drying the surface after cleaning is vital to prevent moisture buildup, which can lead to mold and mildew growth. Use a clean, dry microfiber cloth to wipe down the surface, or allow it to air dry if it can withstand exposure to air.
In conclusion, the proper preparation of surfaces for cleaning is crucial to achieving the best cleaning results. By following the steps outlined above, you can help ensure that your surfaces are adequately prepared and avoid potential damage to the surface material.
Step | Description |
|---|---|
1 | Clear the surface of any objects, debris, or dust. |
2 | Check the surface for any damage, stains, or residue that may require special cleaning methods or products. |
3 | Choose the appropriate cleaning solution and tool for the specific type of surface (e.g., a sponge, cloth, or brush). |
4 | Test the cleaning solution on a small, inconspicuous area of the surface to ensure it does not cause damage or discoloration. |
5 | Prepare any necessary personal protective equipment, such as gloves or goggles, especially if using strong or harsh cleaning products. |
6 | Apply the cleaning solution and use the appropriate cleaning tool to clean the surface, following the product’s instructions. |
7 | Rinse the surface with water if necessary, and then dry it thoroughly with a clean, dry cloth. |
Exploring the Surface Cleaning Process
Surface cleaning is a crucial step in maintaining a safe and hygienic environment, as well as preserving the quality and appearance of various objects and surfaces.
• Understanding the Importance of Surface Cleaning
Proper surface cleaning plays a vital role in a range of industries, including healthcare, food service, and manufacturing. It prevents the spread of contaminants and infections, maintains the structural integrity of materials, and ensures a safe and aesthetically-pleasing environment.
Additionally, proper surface cleaning can prolong the lifespan of equipment and reduce maintenance costs.
• Types of Surface Cleaning Methods
There are several different methods used in surface cleaning, each with its unique benefits and applications.
– Manual Cleaning
Manual cleaning involves physically removing dirt, debris, and contaminants using tools and techniques such as wiping, scrubbing, and brushing. This method is generally simple and cost-effective and can be used for various types of surfaces.
However, manual cleaning can be time-consuming and may not effectively remove contamination from hard-to-reach areas.
– Chemical Cleaning
Chemical cleaning involves using specific chemicals to break down or dissolve contaminants. This method is widely used in industries dealing with heavy contamination or the need to sanitize surfaces. Examples of chemical cleaning agents include detergents, solvents, and disinfectants.
It is essential to choose the appropriate chemical agent for the specific surface and contaminant to achieve the best results.
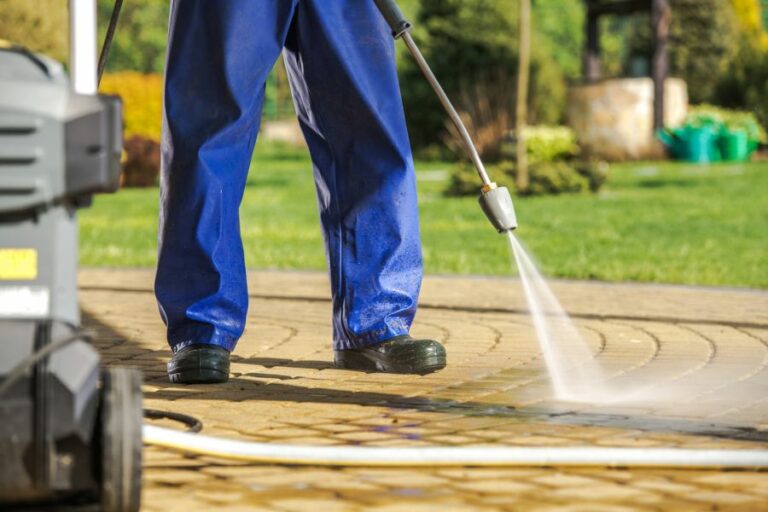
– High-Pressure Cleaning
High-pressure cleaning uses water or other liquid substances propelled at high velocity to dislodge and remove debris from surfaces. This method is highly effective for cleaning large areas, heavy soiling, or stubborn contaminants.
Generally, high-pressure cleaning is used in conjunction with other cleaning methods, such as manual or chemical cleaning, to enhance overall effectiveness.
– Dry Cleaning
Dry cleaning involves the use of specialized equipment and materials, such as vacuum cleaners, brooms, or cloths, to remove dirt and debris without the use of liquids.
This method is ideal for surfaces sensitive to moisture, such as textiles, electronics, and delicate materials.
• Selecting the Appropriate Cleaning Method
To choose the best cleaning method for a specific surface, it is essential to consider the type of contaminant, the surface’s sensitivity to cleaning agents or methods, and the desired level of cleanliness. In some cases, multiple cleaning methods may be combined for optimal results.
For example, the Centers for Disease Control and Prevention (CDC) recommends using a combination of manual and chemical cleaning methods for healthcare facilities to minimize infection risks effectively.
• Tips for Optimizing the Surface Cleaning Process
Here are some recommendations for enhancing the cleaning process, regardless of the method selected:
- Always start with the least aggressive cleaning technique and work your way up if the desired cleanliness levels are not achieved. This approach helps prevent damage to surfaces and materials.
- Train staff to use appropriate cleaning techniques and agents, as well as proper personal protective equipment (PPE) where necessary.
- Regularly review cleaning procedures and update them as needed based on new information or changes in industry standards.
- Establish a routine cleaning schedule and procedures for various surfaces and areas. Frequent cleaning is crucial to maintain a safe and hygienic environment.
- Dispose of waste materials and cleaning agents according to environmental regulations and best practices.
• In Conclusion
Surface cleaning is an essential aspect of various industries, contributing to safe and hygienic environments, maintaining material integrity, and prolonging equipment life.
By understanding the different surface cleaning methods, selecting the appropriate techniques for specific situations, and following best practices, surface cleaning processes can be optimized for maximum efficiency and effectiveness.
Popular Techniques for Surface Preparation: A Guide
Surface preparation is a crucial step in various industries, such as painting, coating, and manufacturing. The most common technique employed for surface preparation is abrasive blasting or sandblasting.
• What is Abrasive Blasting?
Abrasive blasting is a method of forcibly propelling a stream of abrasive material against a surface under high pressure. It is used to remove contaminants, rust, old coatings or paint and create a suitable surface for a new coating.
This technique can clean and roughen surfaces, ensuring better adhesion and longevity of the applied coating.
– Types of Abrasive Blasting
There are several types of abrasive blasting techniques, depending on the materials used and the desired outcome. The most common types include:
1. Dry Abrasive Blasting
Dry abrasive blasting is the most common form, using air to propel abrasive materials against the surface. It typically uses sand, steel grit, or glass beads as the abrasive material. This method is effective in removing rust, old coatings, and paint.
2. Wet Abrasive Blasting
Wet abrasive blasting, also known as vapor blasting or wet blasting, utilizes water and abrasive materials in a slurry, reducing dust and airborne contaminants. By adding water, the method reduces friction, making it ideal for cleaning delicate surfaces, such as soft metals or wood.
3. Dustless Blasting
Dustless blasting is a combination of wet and dry abrasive techniques using water, abrasive materials, and rust inhibitors.
This method eliminates dust by trapping particles with water and is considered an eco-friendly option. It is commonly used for industrial and automotive applications.
4. Shot Blasting
Shot blasting employs spherical steel shots or glass beads propelled at high speed, creating a smooth and polished surface. This method is ideal for removing coatings and contaminants from surfaces, such as metal and concrete.
• Advantages of Abrasive Blasting
Abrasive blasting comes with several benefits in surface preparation:
– Speed
Abrasive blasting is a fast and efficient method of surface preparation. It can quickly remove contaminants and roughen surfaces, reducing the time required for surface preparation compared to manual methods, such as sanding or scraping.
– Thoroughness
Abrasive blasting effectively removes all types of contaminants, ensuring a clean and ideal surface for coating adhesion. Proper surface preparation can prevent common issues such as peeling or chipping of coatings.
– Versatility
The various types of abrasive blasting make it suitable for a wide range of surfaces and applications. By choosing the right abrasive material and method, it can effectively clean and prepare delicate, rough, or hard surfaces.
• Factors to Consider When Choosing Abrasive Blasting
To ensure the best results, there are several factors to consider when choosing abrasive blasting for surface preparation:
– Surface Material
The material of the surface being prepared is crucial in choosing the appropriate abrasive blasting method. Softer materials, like wood or aluminum, require gentler techniques, such as wet blasting or dustless blasting, to prevent damage.
– Contaminant Type
Different types of contaminants require different abrasive blasting techniques. Heavy rust, for example, may require dry blasting with steel grit, whereas lighter contaminants can be effectively removed with wet or dustless blasting.
– Environmental Factors
Environmental regulations and air quality standards should be considered when selecting an abrasive blasting method. Dustless blasting, for instance, is an eco-friendly option, eliminating dust and reducing emissions.
– Budget Constraints
The cost of abrasive blasting services and equipment varies depending on the method and materials used. Consider the budget and overall project costs when selecting the abrasive blasting technique.
• Conclusion
In summary, abrasive blasting is the most common and versatile technique for surface preparation, offering various types and benefits depending on the application.
Understanding the surface material, contaminants, and environmental factors ensures optimal results and proper adhesion of coatings.
Employing this technique can help professionals achieve a clean and prepared surface for a successful project. To learn more about abrasive blasting and its applications, you can visit the SSPC website.
Technique | Description |
|---|---|
Abrasive Blasting | Abrasive blasting, also known as sandblasting, is the most common technique of surface preparation. It involves the use of high-pressure air or water to propel abrasive particles against the surface, removing dirt, rust, paint, and other contaminants. |
Chemical Cleaning Techniques Prior to Surface Coating
• Introduction
Surface coating is an essential step in many industries, ranging from automotive, aerospace, construction, and electronics. It enhances the performance, durability, and appearance of various materials.
Before applying a surface coating, it is crucial to clean the surface to ensure proper adhesion and prevent defects. The chemical cleaning process plays a significant role in removing contaminants from the surface.
• Basic Principles of Chemical Cleaning
Chemical cleaning is a process that involves using chemicals to remove contaminants such as oil, grease, rust, and other residues from a surface.
This process is influenced by several factors, including the type of contaminants, the nature of the surface material, and the chosen cleaning solution.
– Choosing the Right Chemical Cleaner
Selecting the appropriate chemical cleaner for a specific surface is vital for efficient cleaning. First, the cleaner must dissolve or loosen the contaminants to be removed. Second, it should be compatible with the surface material, not causing any damage, discoloration, or other adverse effects.
Various cleaning agents are available, ranging from solvents, alkaline cleaners, and acidic cleaners to more specialized and environmentally friendly options. A single cleaner or a combination may be used depending on the application.
– Duration and Temperature
The duration and temperature of the cleaning process greatly impact the cleaning efficiency. Generally, increasing the temperature of the cleaning solution enhances its ability to dissolve or loosen contaminants, allowing for faster and more effective cleaning.
However, caution must be taken, as excessive temperatures may damage the surface material or cause adverse chemical reactions.
– Agitation and Mechanical Assistance
Incorporating agitation or mechanical assistance into the chemical cleaning process can significantly improve cleaning efficiency. Techniques such as brushing, rinsing, spraying, and ultrasonic agitation help remove loosened contaminants from the surface, decreasing the overall cleaning time.
• Common Chemical Cleaning Processes
– Degreasing
Degreasing is the removal of oil, grease, and similar substances from a surface. Common degreasing agents include organic solvents, such as hydrocarbon-based solvents, chlorinated solvents, and terpenes. Water-based degreasing agents, like alkaline cleaners, may also be used.
These agents typically contain a blend of alkaline salts, surfactants, sequestrants, and other additives.
Degreasing can be conducted using techniques such as immersion, spraying, and vapor degreasing. The choice of method depends on factors like the size and shape of the parts, the degree of contamination, and the specific degreasing agent used.
– Pickling
Pickling involves the use of acidic solutions to remove rust, scale, and other oxidation residues from metallic surfaces. Typical pickling agents include mineral acids, such as sulfuric, hydrochloric, and phosphoric acid. In some cases, organic acids, like citric or acetic acid, may be used.
Parts are immersed in the pickling solution for a certain duration to dissolve the contaminants. Care should be taken to avoid over-pickling, which can lead to corrosion, roughening, and discoloration of the surface.
– Etching
Etching is similar to pickling but serves a different purpose. While pickling targets specific contaminants, etching aims to create a roughened or textured surface to promote better adhesion of the coating. Etching is typically performed using acids, alkaline solutions, or chemical conversion coatings.
– Passivation
Passivation is the application of a chemical treatment to create a thin protective layer on a metal surface, primarily stainless steel, to prevent corrosion.
Generally, passivation is performed using nitric or citric acid solutions. It forms a protective oxide layer that resists rust and enhances the adhesion of subsequent coatings.
• Safety and Environmental Considerations
During the chemical cleaning process, it is essential to protect workers and the environment. Chemical cleaning agents may be hazardous, posing risks to human health and the environment.
Personal protective equipment (PPE) must be worn by operators, and proper ventilation, containment, and waste disposal must be in place.
Furthermore, in recent years, the industry has been shifting toward using more environmentally friendly cleaning processes and agents. This includes utilizing water-based and biodegradable cleaning solutions to reduce environmental impacts.
In conclusion, chemical cleaning is a critical preconditioning step before applying surface coatings. It helps ensure better adhesion, appearance, and performance of the coated materials.
To achieve optimal cleaning results, it is crucial to select the right cleaning solution and consider factors such as duration, temperature, agitation, and mechanical assistance.
Additionally, workplace safety and environmental protection measures must be taken into account when performing chemical cleaning processes.