Fixing Surface Cracks, Holes, And Flaws. What Pros Say
Dealing with surface cracks, holes, and flaws in your home or workspace can seem like a daunting task. But don’t worry; we’re here to guide you through the process with ease and confidence. By understanding the right techniques and materials needed to tackle these imperfections, you’ll restore the beauty and functionality of your surfaces in no time.
Fixing surface cracks, holes, and flaws:
To fix surface cracks, holes, and flaws, assess the damage, gather necessary tools, and perform repairs. For hairline cracks, apply joint compound, let dry, sand, and paint. For small to medium-sized holes, fill them with compound, sand, and paint. For large holes and deep cracks, use mesh tape or patches, and apply multiple layers of compound, sand, and paint. In case of extensive damage, consult a professional.

Don’t let surface imperfections ruin your project’s appearance! Dive deeper as we reveal expert tips and techniques for repairing various types of cracks, holes, and flaws, ensuring a smooth and flawless finish! Keep reading to elevate your skills and achieve top-notch results.
Contents
- 1 Repairing Surface Cracks, Holes, and Imperfections
- 2 Effective Methods for Repairing Holes and Cracks
- 3 Repairing Wall Surface: Cracks and Defects Solutions
- 4 Repairing Surface Cracks in Concrete: Is it Possible?
- 5 Are Cracks a Sign of Structural Issues?
Repairing Surface Cracks, Holes, and Imperfections
Maintaining the look and structural integrity of walls, floors, and other surfaces is crucial for any homeowner or property manager.
Unsightly surface damage, such as cracks, holes, and flaws, can be caused by various factors, including age, weather, and general wear and tear.
By addressing these issues promptly and effectively, you can preserve the aesthetic appeal and value of your property.
• Assessing the Extent of the Damage
Before embarking on any repair work, it’s important to identify the type, extent, and cause of the damage. This will help you determine the most appropriate repair techniques and materials to use. The following are common types of surface damage and their respective causes:
- Hairline cracks: These thin, shallow cracks often result from the natural contraction and expansion of building materials due to temperature fluctuations.
- Small to medium-sized holes: These can be caused by nail and screw removal, accidental impact, or the drilling of holes for various purposes (such as mounting fixtures).
- Large holes and deep cracks: These typically indicate more severe structural issues, such as foundation movement or water damage.
If the damage appears to be extensive or indicates a more significant underlying problem, it is advisable to consult with a professional (like the ones in this assistance program) to determine the best course of action.
• Preparation and Tools
Before starting the repair process, gather the necessary tools and materials. A basic list of items required includes:
- Putty knife
- Sandpaper (of various grits)
- Utility knife
- Paintbrush
- Joint compound or patching plaster
- Paint or finish (to match the existing surface)
Additionally, ensure the surface is clean and free from dirt, dust, and loose debris. Use a utility knife to carefully remove any loose or crumbling material around the damaged areas before proceeding with repairs.
• Repairing Hairline Cracks
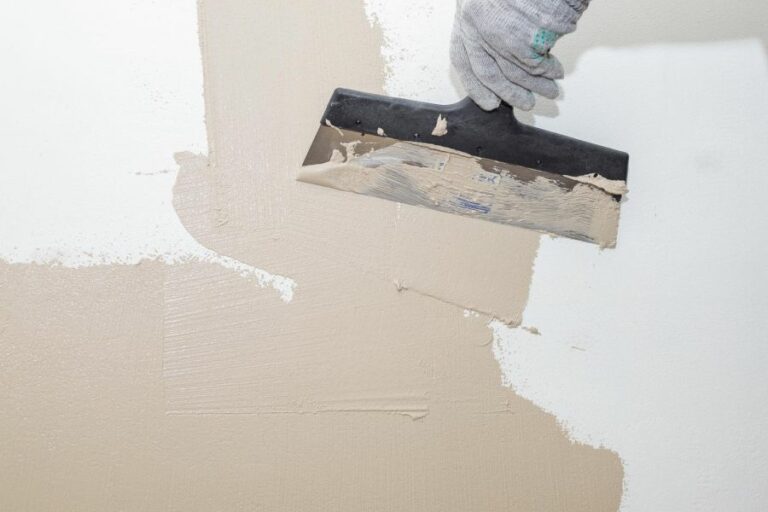
- To repair hairline cracks, use a putty knife to apply a thin layer of joint compound or patching plaster directly over the crack. Feather the edges of the compound outward to blend it into the surrounding surface.
- Allow the compound to dry, as per the manufacturer’s instructions. Drying times can vary depending on the product used and local humidity.
- Once dry, lightly sand the surface with fine-grit sandpaper to create a smooth, even finish. Be sure to wear a dust mask and work in a well-ventilated area.
- Wipe the area with a damp cloth to remove any sanding dust and let it dry.
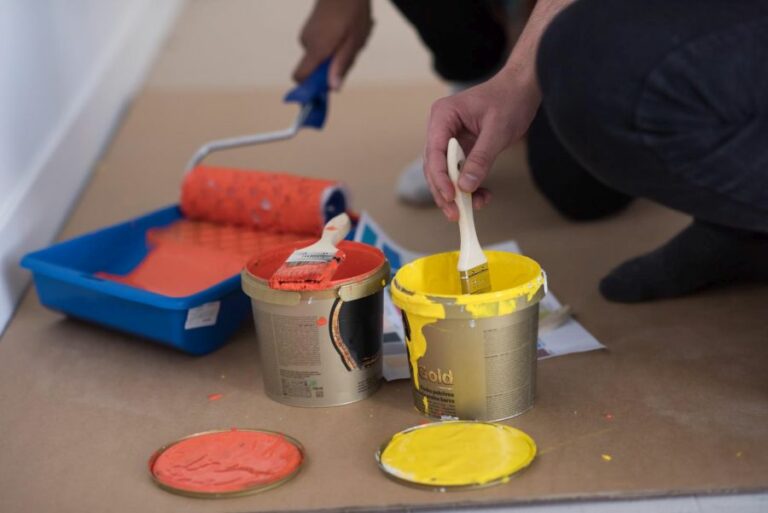
- Apply a coat of high-quality primer to the repaired area, followed by a matching paint or finish. Use a paintbrush to blend the repaired area with the surrounding surface.
• Filling Small to Medium-Sized Holes
- Using a putty knife, apply a generous layer of joint compound or patching plaster to the hole, ensuring that the compound fills the hole completely.
- Smooth the surface of the compound with the putty knife, feathering the edges as previously mentioned.
- Allow the compound to dry, following the manufacturer’s drying time recommendations.
- Once dry, use medium-grit sandpaper to smooth the surface and ensure that it matches the surrounding area. Use fine-grit sandpaper for a final smoothing pass.
- Wipe down the surface with a damp cloth to remove any sanding dust, and allow it to dry.
- Apply a coat of primer, followed by a matching paint or finish, blending the repaired area with the surrounding surface.
• Addressing Large Holes and Deep Cracks
- For large holes, first remove any loose or damaged material using a utility knife. Next, measure and cut a piece of mesh tape or self-adhesive patch to fit securely over the hole.
- Apply the mesh tape or patch to the hole, ensuring it is firmly adhered to the surface.
- Use a putty knife to apply several layers of joint compound, allowing each layer to dry and be sanded before applying the next. Feather the edges of the compound, as previously discussed.
- Once the final layer of joint compound is dry and sanded, wipe the area with a damp cloth to remove any sanding dust and let it dry.
- Apply a coat of primer, followed by a matching paint or finish, blending the repaired area with the surrounding surface.
By following this comprehensive guide, you can effectively fix surface cracks, holes, and flaws, restoring the appearance and value of your property.
Remember that for more extensive damage, it is always recommended to consult with professionals to ensure that the repairs are not only aesthetically pleasing but also structurally sound.
Effective Methods for Repairing Holes and Cracks
Whether it’s a hole in the wall, a crack in the ceiling, or a gap in the floor, repairing holes and cracks in any surface requires the right tools, materials, and techniques.
• Repairing Holes and Cracks in Drywall
Drywall is commonly used in the construction of interior walls and ceilings. It’s relatively easy to work with but can easily develop holes and cracks over time. Luckily, fixing these issues is a straightforward process.
There are a variety of patching materials and techniques you can use, depending on the size and depth of the damage.
– Small Holes (Less Than an inch)
Small holes, such as those caused by nails and screws, can be easily filled using a premixed joint compound or spackling compound.
- Begin by cleaning the hole and removing any loose or damaged drywall.
- Apply the compound using a putty knife, smoothing it into the hole and feathering the edges for a seamless finish.
- Allow the compound to dry as per the manufacturer’s instructions before sanding it flush with the surrounding surface.
- Finish by priming and painting the repaired area to match the rest of the wall.
– Medium to Large Holes (Greater Than an inch)
For holes larger than inch, you’ll need to use a patching material like a drywall patch, which is a pre-cut piece of drywall designed to fill larger holes.
- Begin by cutting the damaged section out from the wall in a square or rectangular shape.
- Cut your patch from a spare piece of drywall, making it slightly larger than the hole.
- Insert a small piece of wood or another support material, such as a wall repair clip, behind the hole and secure it in place using screws.
- Place the patch over the hole and attach it to the support using screws.
- Apply a thin layer of joint compound over the patch, being sure to feather the edges for a seamless finish.
- Allow the compound to dry before applying additional layers, if needed, and sanding it smooth.
- Finish by priming and painting the repaired area to match the rest of the wall.
– Repairing Drywall Cracks
- Use a utility knife to remove any loose or damaged material from the crack.
- Apply a mesh or paper drywall tape over the crack, pressing it into place with a putty knife.
- Apply a thin layer of joint compound over the tape, feathering the edges for a seamless finish.
- Allow the compound to dry before applying additional layers if needed and sanding it smooth.
- Finish by priming and painting the repaired area to match the rest of the wall.
• Repairing Holes and Cracks in Concrete
Concrete surfaces, such as floors, walls, and sidewalks, can develop cracks and holes over time due to wear and tear, settling, or other damage. Concrete repair products, such as patching compounds and epoxy resins, can help you repair these issues effectively.
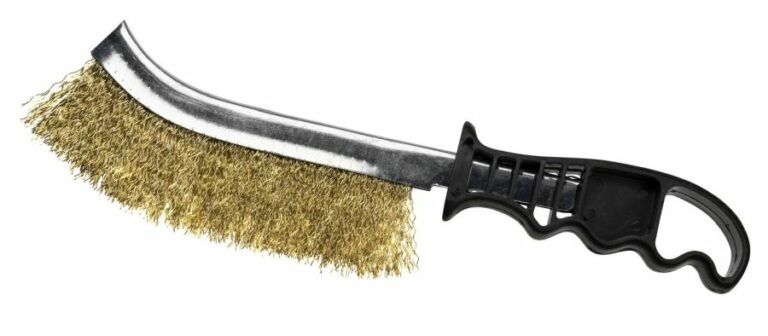
- Begin by removing any loose or damaged material from the hole or crack, using a chisel or wire brush as needed.
- Thoroughly clean the area, using water, detergent, or a concrete cleaner as necessary.
- Follow the manufacturer’s instructions to mix the patching compound or epoxy resin, ensuring it is the correct consistency.
- Dampen the hole or crack with water before applying the repair product to prevent it from drying out too quickly and weakening the repair.
- Fill the hole or crack with the repair product, using a trowel or similar tool as appropriate. Be sure to push the product firmly into the repair area to ensure a strong bond.
- Smooth and level the surface of the repair, feathering the edges to blend in with the surrounding concrete.
- Allow the product to cure as specified by the manufacturer before applying any sealer or paint if desired.
For more in-depth guidance on concrete repairs, consult resources like the Portland Cement Association’s guide to the subject.
• Repairing Holes and Cracks in Wood
Wooden surfaces, such as furniture, trim, and floors, can develop holes and cracks over time. Wood filler, wood glue, or epoxy resin can be used to repair these issues effectively.
- Remove any loose or damaged wood from the hole or crack using a chisel or knife.
- Sand the area to create a smooth surface for the repair product to adhere to.
- Choose the appropriate wood filler, wood glue, or epoxy resin for your specific repair, and follow the manufacturer’s instructions for preparing the product.
- Apply the repair product to the hole or crack, using a putty knife or similar tool to work it into the damaged area.
- Smooth and level the surface of the repair, feathering the edges to blend in with the surrounding wood.
- Allow the product to dry or cure as specified by the manufacturer before sanding it smooth and flush with the surrounding wood.
- If necessary, stain or paint the repaired area to match the rest of the wood.
• Final Thoughts
Repairing holes and cracks in various materials can seem daunting at first, but with the right tools, materials, and techniques, you can successfully restore the appearance and functionality of your home or workplace.
Just remember to follow the manufacturer’s instructions for any repair product you use and undertake proper surface preparation for the best results.
Whether it’s patching holes in drywall, fixing cracks in concrete, or repairing damaged wood, a little patience and attention to detail will go a long way in achieving professional-looking repairs that stand the test of time.
Steps | Description |
|---|---|
Step 1 | Inspect the hole or crack and determine its size and depth. |
Step 2 | Clean the area to remove any debris, dust, or loose materials. |
Step 3 | Choose the appropriate filler or patching compound based on the type and size of the hole or crack. |
Step 4 | Follow the manufacturer’s instructions for preparing and applying the filler or patching compound. |
Step 5 | Fill the hole or crack with the prepared filler or patching compound and level the surface with a putty knife or trowel. |
Step 6 | Allow the patched area to dry according to the manufacturer’s recommended time. |
Step 7 | Sand the patched area smoothly with sandpaper to blend in with the surrounding surface. |
Step 8 | Apply primer and paint over the repaired area to match the existing surface. |
Repairing Wall Surface: Cracks and Defects Solutions
Cracks in walls may seem like minor issue, but they can lead to more significant problems if not addressed properly.
• Identify the Type of Wall and Crack
The first step is to identify the type of wall and crack you’re dealing with. Cracks can occur on plaster, drywall, or masonry surfaces, and each requires a different approach.
– Plaster Walls
Plaster walls are more common in older homes and consist of layers of plaster laid over wooden laths. To determine if your wall is made of plaster, try tapping it gently; a plaster wall should produce a solid sound.
– Drywall
Drywall, also known as gypsum board, is a more modern building material that consists of a layer of gypsum sandwiched between two sheets of paper. To verify if you have a drywall surface, tap it, and if the sound is slightly hollow, you have a drywall wall.
– Masonry Walls
Masonry walls include materials such as brick, concrete, and stone and are identifiable by their visible brick or stone pattern.
Once you have identified your wall type, it’s important to determine the severity of the crack. Smaller hairline cracks are generally easier to fix and less concerning, while larger or deeper cracks may require additional attention or professional help.
• Tools and Materials You’ll Need
Having the right tools and materials will help you to fix any wall cracks effectively. Here’s a list of essential items:
- Utility knife or scraper
- Sandpaper (120-grit and 220-grit)
- Joint compound
- Drywall tape (if working with drywall)
- Plaster (if working with plaster walls)
- Masonry repair caulking (if working with masonry walls)
- Putty knife
- Paintbrush or paint roller
- Primer
- Paint (matching the existing wall color)
• Preparing the Crack for Repair
Before you start repairing the crack, it’s essential to prepare the affected area. This process ensures that the repair material adheres properly and provides a smooth, even finish. Follow these steps to prepare the crack:
– Step 1: Clean the Crack
Using a utility knife or scraper, remove any loose or peeling paint, plaster, or drywall around the crack. This step creates a clean surface for the repair material to bond.
– Step 2: Widen and Deepen the Crack
For a more effective repair, slightly widen and deepen the crack using your utility knife. This step provides more surface area for the repair material to adhere to, reducing the risk of the crack reappearing in the future.
– Step 3: Sand the Area
Using your 120-grit sandpaper, roughen the surface around the crack to improve the repair material’s adhesion. Then, use the 220-grit sandpaper to smooth the area and remove any dust or debris.
• Repairing the Crack
After preparing the area, you can move on to the actual repair process. The steps will vary depending on the type of wall.
– Repairing Plaster Walls
Step 1: Apply the Plaster
Using a putty knife or trowel, apply the plaster to the crack. Press the plaster firmly into the crack to ensure a strong bond. Smooth the plaster so that it is flush with the surrounding surface.
Step 2: Sand the Area
Allow the plaster to dry according to the manufacturer’s instructions. Once dry, use your 220-grit sandpaper to smooth the repair and blend it into the surrounding wall.
– Repairing Drywall
Step 1: Apply the Joint Compound
Using a putty knife, apply a thin layer of joint compound to the crack. Press the compound firmly into the crack to ensure proper adhesion.
Step 2: Add the Drywall Tape
Place a strip of drywall tape over the crack, ensuring the tape is centered over the crack. Press the tape firmly into the joint compound.
Step 3: Cover with Joint Compound
Apply a second layer of joint compound over the drywall tape, feathering the edges for a smooth transition to the surrounding wall. Allow the compound to dry according to the manufacturer’s instructions.
Step 4: Sand the Area
Once the joint compound has dried, use your 220-grit sandpaper to smooth the repair and blend it into the surrounding wall.
– Repairing Masonry Walls
Step 1: Apply the Masonry Repair Caulking
Using a caulking gun, apply the masonry repair caulking to the crack, following the product’s instructions. Smooth the caulking with a putty knife or your finger (wearing gloves) for an even finish.
Step 2: Allow to Cure
Allow the masonry repair caulking to cure according to the manufacturer’s instructions before proceeding with any painting.
• Finishing the Repair
After repairing the crack, it’s essential to finish the area with primer and paint for a seamless appearance.
– Step 1: Apply the Primer
Using a paintbrush or paint roller, apply a layer of primer over the repaired area. Allow the primer to dry according to the manufacturer’s instructions.
– Step 2: Paint the Area
Match the existing wall color and use a paintbrush or paint roller to apply the paint over the primed area. Apply a second coat if necessary for optimal coverage.
By following these steps, you can successfully fix a crack in the surface of a wall, ultimately prolonging its lifespan and maintaining its aesthetics. For more information on wall repair and maintenance, visit the National Center for Healthy Housing’s website here.
Step | Instructions |
|---|---|
1 | Inspect the crack to ensure it’s not a structural issue. If in doubt, consult a professional. |
2 | Clean the crack by removing any loose debris using a brush or vacuum cleaner. |
3 | If the crack is deep or wide, use a utility knife or chisel to widen the crack so that the filler can adhere better. |
4 | Apply a layer of joint compound or patching compound into the crack using a putty knife. Spread the compound well beyond the edges of the crack to create a smooth surface. |
5 | If the crack is wider or deeper than 1/8 inch, apply a piece of fiberglass mesh tape over the crack to provide extra reinforcement. |
6 | Apply a second layer of joint compound or patching compound, feathering the edges to blend with the surrounding wall surface. |
7 | Allow the compound to dry completely as per the manufacturer’s recommendations. |
8 | Lightly sand the patched area with fine-grit sandpaper to create a smooth, even surface. |
9 | Prime and paint the repaired area to match the surrounding wall. |
Repairing Surface Cracks in Concrete: Is it Possible?
Cracks in concrete surfaces can be a common problem, but don’t worry – they can be fixed!
• Identifying the Type of Crack
Before starting any repair job, it is important to understand the type of crack you are dealing with. There are three main types:
- Hairline cracks: These are very thin cracks that are usually less than 1 mm wide. They are not a structural concern but can be unsightly.
- Non-structural cracks: These cracks are wider than hairline cracks but do not pose a structural risk. They are usually caused by shrinkage or temperature changes.
- Structural cracks: These cracks can compromise the integrity of your concrete structure and should be repaired by a professional.
To help determine the type of crack, you can refer to this guide from Concrete Construction.
• Repairing Hairline Cracks
For hairline cracks, you can use a few simple tools and materials to repair them:
- Clean the crack with a wire brush to remove any dirt or debris.
- Apply a concrete sealant to the crack. Make sure the product is specifically designed for hairline cracks. You can use a small paintbrush or an applicator bottle for more accurate application.
- Allow the sealant to cure according to the manufacturer’s instructions. Once it’s cured, you can sand it to match the surrounding concrete surface, if necessary.
• Repairing Non-Structural Cracks
For non-structural cracks, you can follow these steps to repair them:
- Begin by cleaning the crack with a wire brush to remove any loose debris or dirt.
- Use a cold chisel and hammer to widen the crack slightly, creating a V-shaped groove. This will allow the repair material to bond more effectively and prevent further cracking.
- Remove all debris and dust from the crack using a vacuum cleaner or air compressor.
- Apply a concrete bonding adhesive to the crack, gently brushing it in with a paintbrush. This will ensure a strong bond between the existing concrete and the repair material.
- Mix concrete patching compound according to the manufacturer’s instructions and use a trowel or putty knife to fill the crack, making sure to press the material into the crack for proper adhesion.
- Smooth the patching compound with the trowel to blend it seamlessly with the surrounding concrete.
- Allow the patch to cure as per the manufacturer’s instructions. Once cured, you can sand or grind the repaired area to match the original surface texture and appearance.
• Repairing Structural Cracks
As mentioned earlier, structural cracks should be repaired by professionals. However, if you’re interested, the process typically involves the following steps:
- Epoxy injection to bond the crack back together.
- Installing carbon fiber or steel reinforcement to strengthen and support the damaged area.
- Making any necessary structural modifications to prevent future cracking.
• Preventing Future Cracks
Here are some recommendations to help prevent future cracks in concrete:
- Properly prepare the ground before pouring the concrete. This includes leveling, compacting, and providing adequate drainage.
- Add appropriate reinforcement to the concrete, such as steel rebar or fiber mesh.
- Use control joints to control where the concrete will inevitably crack, creating a neat line instead of random cracks.
- Ensure the proper mix of water and concrete to avoid adding too much water, which can weaken the concrete and make it more susceptible to cracking.
- Keep the concrete moist during the curing process to provide strength and prevent the development of shrinkage cracks.
In conclusion, repairing surface cracks in concrete can be a simple process if you have the right knowledge, tools, and materials.
By carefully identifying the type of crack and following the appropriate repair steps, you can easily fix unsightly cracks and restore the appearance of your concrete surfaces.
Additionally, by taking preventative measures, you can reduce the likelihood of future cracks and maintain the integrity and appearance of your concrete structures.
Method | Description |
|---|---|
Sealing | Filling the surface cracks with a suitable sealant can prevent further damage and protect the concrete from water intrusion and other environmental elements. |
Resurfacing | Applying a thin layer of new concrete or a polymer-based material over the existing surface can effectively hide minor cracks and improve the appearance of the concrete surface. |
Epoxy injection | For deeper cracks, epoxy injections can be used to fill and seal the crack, providing structural support and preventing water and other contaminants from entering the concrete. |
Routing and sealing | This method involves enlarging the crack and then filling it with a flexible sealant material, allowing for the natural movement of the concrete without causing additional damage. |
Are Cracks a Sign of Structural Issues?
Cracks are often seen in buildings, both old and new. They can appear in various places, such as walls, ceilings, and floors. But do all cracks indicate a structural problem?
• Understanding Types of Cracks
– Hairline Cracks
Hairline cracks are very thin, usually less than 1 mm wide, and can appear on the surface of plaster or paint. These cracks are typically not a sign of a structural issue and are more likely caused by the natural expansion and contraction of building materials due to temperature changes.
In addition, they may be a result of initial settlement and can be expected in new buildings. I recommend regular monitoring of hairline cracks to ensure they do not widen or multiply, signaling a more significant issue.
– Shrinkage Cracks
Shrinkage cracks occur as concrete or masonry dries and shrinks over time, pulling apart the material and causing cracks to form. These cracks can be wider than hairline cracks, but they are also generally not a sign of a structural problem.
Proper curing and control joints can help minimize the occurrence of shrinkage cracks in new construction.
– Foundation Settlement Cracks
Foundation settlement cracks are caused by the settling of a building’s foundation, which is a natural process that occurs over time. These cracks may appear as diagonal, vertical, or horizontal and can be found in walls, doors, and windows.
Minor settlement cracks may not pose an immediate structural concern; however, significant or ongoing settlement could lead to structural damage. I recommend consulting with a structural engineer if significant settlement cracks are observed.
– Structural Cracks
Structural cracks are more severe and could indicate a potential problem with the building’s stability. These cracks typically result from excessive load stress or misaligned structural components, such as beams, columns, or footings.
Structural cracks may be wider and more pronounced, extending through building materials like brick or blockwork.
For more information about crack types and their causes, the Concrete Network provides a comprehensive guide to crack identification in concrete structures, while the American Concrete Institute (ACI) offers guidelines for evaluating and repairing concrete cracks.
• Assessing Cracks
– Location of Cracks
The location of a crack can provide insight into the cause and significance of the issue. For example, cracks that occur at the junction of two different building materials may indicate differential movement or a lack of adequate expansion joints.
Meanwhile, cracks that occur near the base of the wall might be related to foundation settlement or water intrusion.
– Crack Width and Direction
Wider cracks, particularly those larger than 1/4 inch or growing over time, may signify a more serious issue.
Additionally, the direction of a crack can provide clues about its cause. Vertical and diagonal cracks are often associated with foundation settlement, while horizontal cracks could result from soil pressure, inadequate reinforcement, or excessive load stress.
– Signs of Movement
Look for other signs of movement in your building to help determine if a crack is part of a larger problem.
For instance, doors and windows that stick or won’t close properly, or gaps appearing between walls and ceilings or around windows, could indicate ongoing settlement or structural movement.
– Water Intrusion
Cracks that show signs of water intrusion, such as staining, mold growth, or dampness, should be addressed promptly, as water infiltration can exacerbate any existing or potential structural problems and lead to additional issues like wood rot or corrosion.
• Seeking Professional Advice
When in doubt about the severity or cause of a crack, the safest course of action is to consult with a structural engineer, particularly if you notice any of the following:
- Cracks larger than 1/4 inch
- Cracks extending through walls or running the entire length of a wall
- Numerous cracks appearing suddenly
- Cracks growing wider or longer over time
- Other signs of movement or damage in your building, such as sticking doors or windows, or misaligned components
A qualified structural engineer will assess your building and provide expert guidance regarding the significance of any observed cracks, as well as recommendations for any required repairs.
In conclusion, not all cracks indicate a structural problem. Hairline and shrinkage cracks are common in construction and may not pose an immediate threat.
However, more significant cracks or those that display signs of ongoing movement or water intrusion should be monitored and evaluated by a professional to ensure the safety and longevity of your building.