DIY Surface Repair For Cracks & Holes. What Pros Say
Dealing with pesky cracks and holes in your walls and surfaces doesn’t have to be an intimidating task. Armed with the right knowledge and tools, you can take matters into your own hands and achieve professional-looking results. In this DIY surface repair guide, we will walk you through the simple steps to tackle those annoying imperfections, restore your surfaces to their original glory, and save you time and money.
Diy surface repair for cracks & holes:
DIY surface repair involves assessing the damage, choosing appropriate materials such as joint compound or spackling paste, and following a step-by-step process to clean, repair, and finish the affected area. By carefully preparing the surface and applying the right materials, you can achieve professional-looking results while saving time and money.

Ready to tackle those unsightly cracks and holes in your walls, floors, or furniture? We have easy, budget-friendly tips and step-by-step guides for DIY surface repair projects! Read on to learn the tricks of the trade and turn your space from drab to fab.
Contents
- 1 Easy Surface Repair: Fix Cracks & Holes Yourself
- 2 Repairing Cracked Surfaces: A Step-by-Step Guide
- 3 Best Solutions for Filling Slab Cracks Effectively
- 4 Home Repair Guide: Covering Cracks with Ease
- 5 Tips to Conceal Settling Cracks Successfully
Easy Surface Repair: Fix Cracks & Holes Yourself
Cracks and holes on surfaces can be unsightly and may lead to further damage if left unattended.
• Assessing the Damage
Before starting the repair process, it’s essential to assess the extent of the damage. Cracks and holes vary in size and severity, which will dictate the appropriate repair techniques and materials to use. When evaluating the damage, be sure to examine the underlying cause to prevent recurring issues.
• Choosing the Right Materials
Selecting the appropriate materials for your repair project is crucial to ensure lasting results. Common repair materials include:
- Joint compound
- Spackling paste
- Patching plaster
- Epoxy filler
For small, shallow cracks and holes, joint compound or spackling paste are suitable options. If you’re dealing with larger, deeper damage or dealing with textured surfaces, patching plaster or epoxy filler might be a better choice.
• Preparing the Surface
Before applying any repair materials, ensure the area is clean, dry, and free of debris. If the damage is a result of moisture, make sure that the issue is resolved to prevent future damage.
If you’re repairing cracks or gaps, use a utility knife to remove any loose or damaged material, creating a slightly larger, clean opening for easier filling.
• Repairing Small Cracks and Holes
– Application
For small repairs, apply the chosen material (joint compound or spackling paste) directly to the crack or hole using a putty knife. Press the material firmly, ensuring that it fills the entire area and removes any excess. Smooth the surface with the putty knife, blending it seamlessly with the surrounding area.
– Drying and Sanding
Allow the repair material to dry according to the manufacturer’s instructions. Once fully dry, use fine-grit sandpaper to sand the area carefully, ensuring a smooth and even surface.
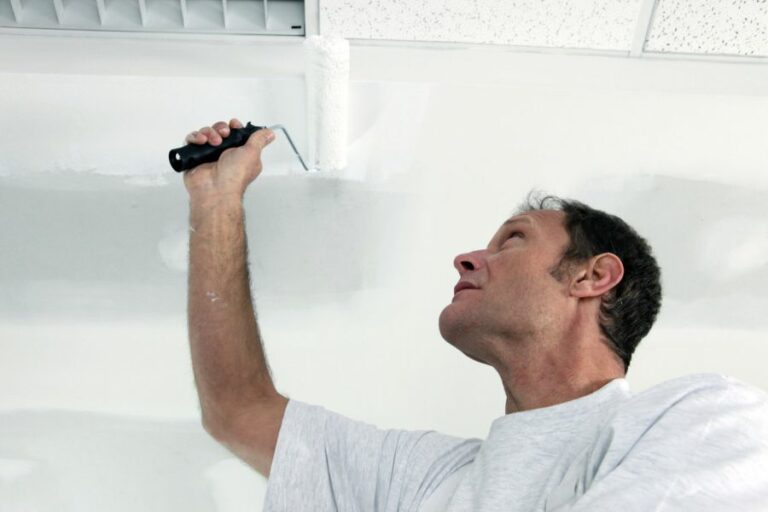
– Painting
If the repaired surface is painted, prime the patch before applying a matching paint color. This will ensure proper adhesion and color consistency.
• Repairing Large Cracks or Holes
– Creating a Patch
For more extensive repairs, using a patch made from a piece of drywall or a pre-made patching material is crucial for stability and durability. Cut out a piece of the patching material that covers the hole with an additional 1-inch margin.
– Attaching the Patch
Apply a layer of joint compound to the surrounding area where the patch will be placed. Press the patch firmly onto the joint compound, smoothing out any bumps or excess material.
– Applying Joint Compound and Finishing
Apply a thin layer of joint compound over the patch, extending it slightly beyond the patch edges. This will blend the edges seamlessly with the surrounding surface. Allow the joint compound to dry completely, then sand the surface smoothly.
– Texturing (If Necessary)
If the repaired surface is textured, replicate the texture using the appropriate technique (e.g., stippling, knockdown, or orange peel). Once the texture has dried, paint the surface as described above.
• Final Thoughts
With patience and care, DIY surface repair for cracks and holes can produce professional-looking results, saving you both time and money. By taking the time to assess the damage, choosing suitable materials, and carefully following each step in the repair process, you’ll achieve flawless and lasting repair.
Step | Tool or Material | Action |
|---|---|---|
1 | Utility knife or scraper | Remove loose debris and widen the crack or hole |
2 | Brush or vacuum | Clean the area to remove dust and debris |
3 | Primer or sealer | Apply primer or sealer to the crack or hole, if needed |
4 | Putty knife or trowel | Apply filler, patching compound, or joint compound to fill the crack or hole |
5 | Sandpaper or sanding block | Allow the filler to dry, then sand the area smooth |
6 | Paint, primer, and brush or roller | Prime and paint the repaired area to blend with the surrounding surface |
Repairing Cracked Surfaces: A Step-by-Step Guide
Cracked surfaces can be a common issue in various types of materials, from concrete and asphalt to wood, glass or even plaster. No matter what kind of surface you have, it is essential to repair cracks as soon as possible to prevent further damage or potential hazards.
• Identifying the Type of Surface and Crack Severity
Before beginning any repair work, it is crucial to identify the type of surface and understand the severity of the crack. This will determine the most suitable repair method and the necessary materials. Common surface types include concrete, asphalt, wood, glass, and plaster.
Cracks can range in size from hairline fractures to large, deep gaps. Additionally, they may be confined to a single spot or spread out across the surface. Knowing the crack’s nature will help you choose the appropriate repair technique.
– Concrete Cracks
Concrete is a versatile and durable building material, but it is also prone to cracking over time. Causes of concrete cracks may include ground movement, extreme temperatures, and heavy loads.
Hairline Cracks
Materials and Tools
- Concrete crack filler or sealer
- Putty knife or trowel
- Wire brush
- Hose or bucket of water
Steps
- Begin by cleaning the crack using a wire brush.
- Rinse away any loose debris with water.
- Follow the manufacturer’s directions for using the concrete crack filler or sealer.
- Apply the filler to the crack using a putty knife or trowel, ensuring complete coverage.
- Allow the filler to cure for the designated time (usually 24 hours). Keep the area clear during this time.
Large Cracks
Materials and Tools
- Epoxy or polyurethane injection
- Concrete chisel
- Hammer
- Stiff brush
- Vacuum
- Injection ports and epoxy adhesive (included in the injection kit)
- Gloves and eye protection
Steps
- Remove any loose concrete with a chisel and hammer.
- Clean the crack using a stiff brush, then vacuum out debris.
- Apply epoxy adhesive to the injection ports (follow kit instructions).
- Space the ports along the crack, following the kits recommendations.
- Mix the epoxy or polyurethane injection according to the manufacturer’s directions.
- Inject the epoxy/polyurethane into the ports, starting from the lowest point.
- Allow the material to cure for the designated time (usually 24-48 hours).
- Confirm that the crack has been filled and sealed effectively.
– Asphalt Cracks
Fixing asphalt cracks is crucial to prevent moisture penetration, which can lead to potholes and other damage. Asphalt repairs are typically done using hot or cold asphalt filler.
Hot Asphalt Filler
Materials and Tools
- Hot asphalt crack filler
- Melting kettle or portable heater
- Trowel or asphalt squeegee
- Gloves and eye protection
Steps
- Clean the crack area using a broom or vacuum to remove debris.
- Heat the hot asphalt crack filler using a melting kettle or portable heater, following the manufacturer’s instructions.
- Pour the asphalt filler into the crack and spread it evenly using a trowel or squeegee.
- Allow the filler to set and cool for the designated time (usually a few hours) before use.
Cold Asphalt Filler
Materials and Tools
- Cold asphalt crack filler
- Putty knife or trowel
- Wire brush
- Gloves and eye protection
Steps
- Clean the crack using a wire brush.
- Fill the crack with the cold asphalt crack filler, ensuring full coverage.
- Tamp down the filler using a trowel or putty knife.
- Allow the filler to set for the designated time (usually a few hours) before use.
– Wood Cracks
Wood cracks can be an aesthetic concern or a structural issue, depending on their size and location. Common solutions for wood cracks are wood fillers, epoxy, and wood glue.
Wood Filler
Materials and Tools
- Wood filler (matching the wood color)
- Putty knife
- Sandpaper
- Cloth or sponge
- Wood stain or paint (if applicable)
Steps
- Clean the crack and surrounding area.
- Fill the gap with wood filler using a putty knife, ensuring full coverage.
- Allow the filler to dry for the designated time (usually a few hours).
- Sand the area to achieve a smooth surface.
- Remove any dust with a cloth or sponge.
- Apply wood stain, paint, or other finish as desired.
– Glass Cracks
Cracked glass can be repaired or replaced, depending on the severity and location of the crack. Small cracks can be repaired using a windshield repair kit, while larger cracks may require professional replacement.
Windshield Repair Kit
Materials and Tools:
- Windshield repair kit (including resin and curing film)
- Razor blade or scraper
- Alcohol
- Clean cloth
Steps
- Clean the cracked area with alcohol and a clean cloth.
- Follow the manufacturer’s instructions for the windshield repair kit, typically involving the application of resin and curing film to the cracked area.
- Once the resin is cured (as specified in the kit’s directions), remove the curing film.
- Use a razor blade or scraper to remove any excess or uneven resin.
- Clean the area again with alcohol and a clean cloth.
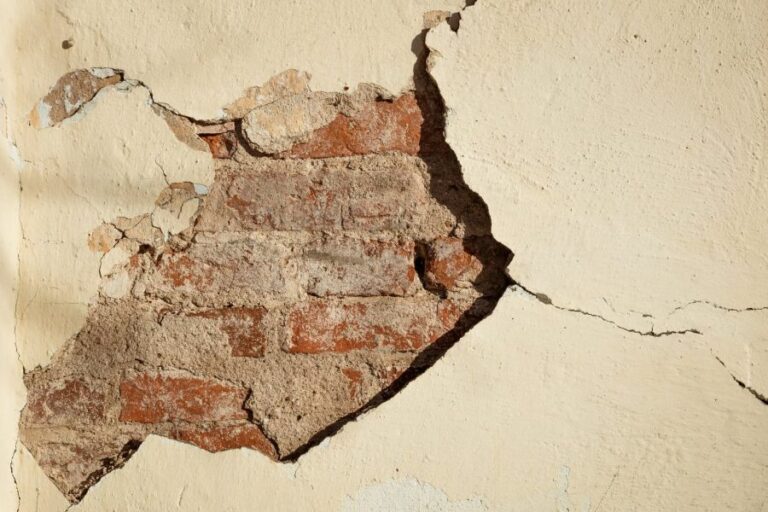
– Plaster Cracks
Cracks in plaster can occur due to settling, moisture, temperature fluctuations, or impact damage. Repairing plaster cracks generally involves a simple patching process.
Materials and Tools
- Plaster patching compound
- Putty knife
- Sandpaper
- Paint (if applicable)
Steps
- Remove any loose or damaged plaster around the crack.
- Apply a layer of plaster patching compound to the crack using a putty knife, ensuring full coverage.
- Allow the patching compound to dry for the recommended time (usually a few hours).
- Sand the patched area to achieve a smooth surface.
- Paint over the patched area if desired.
• Conclusion
Fixing cracked surfaces can help prevent further damage and ensure the longevity of the material. With appropriate tools, materials, and expert guidance, you can repair cracks in various surfaces, including concrete, asphalt, wood, glass, and plaster.
Always follow manufacturer recommendations and exercise caution to achieve the best results.
Step | Description |
|---|---|
1 | Clean the cracked area to remove any debris or dirt. |
2 | Prepare a filler material suitable for the type of surface (e.g., epoxy for concrete, wood filler for wood). |
3 | Apply the filler material to the crack, making sure to completely fill the void. |
4 | Smooth the surface of the filler material with a putty knife or similar tool until it is level with the surrounding area. |
5 | Allow the filler material to cure according to the manufacturer’s instructions. |
6 | Sand the repaired area smooth, blending it into the surrounding surface. |
7 | Apply an appropriate finishing material, such as paint or sealer, to protect the repair and blend it with the rest of the surface. |
Best Solutions for Filling Slab Cracks Effectively
Cracks in concrete slabs can be both distressing and hazardous, especially if not treated on time. Identifying the most suitable method for repairing these cracks is essential in preserving the longevity and safety of the structures.
• Understanding the Nature of Cracks
Before diving into the solutions, it is essential to understand the nature and type of the crack. Concrete slabs can experience various forms of cracking, including shrinkage, settlement, overloading, or frost heaves. Each type of crack may require a different approach or filling material.
• Epoxy Injection
Epoxy injection is a popular and durable solution for filling and bonding cracks in concrete slabs. The epoxy resin not only fills the cracks but also provides additional strength and reinforcement to the slab.
This technique is highly effective for treating narrow cracks and works best on structures where the cracks have not resulted from major settlement issues.
– Process
- Inspect the cracks and prepare the surface by cleaning it thoroughly.
- Seal the crack with epoxy gel adhesive, leaving small injection ports at regular intervals.
- Inject epoxy resin into the ports, ensuring the entire crack is filled.
- Allow the epoxy resin to cure before removing the injection ports and sealing the surface.
• Polyurethane Foam Injection
Polyurethane foam injection is another effective method for filling slab cracks that can accommodate the movement and expansion associated with high levels of moisture exposure. The foam is flexible and water-resistant, making it an ideal choice for both interior and exterior slab cracks.
– Process
- Inspect and clean the cracks.
- Seal the surface with an epoxy gel adhesive, leaving small injection ports at regular intervals.
- Inject polyurethane foam into the ports, allowing it to expand and fill the entire crack.
- Allow the foam to cure before removing the injection ports and sealing the surface.
• Hydraulic Cement
Hydraulic cement is a fast-setting material ideal for filling larger cracks in concrete slabs, particularly those that are exposed to water or moisture. It expands slightly as it hardens, making it an excellent choice for effectively sealing larger cracks and gaps.
– Process
- Inspect and clean the cracks.
- Dampen the area surrounding the crack.
- Mix hydraulic cement and water per the manufacturer’s instructions.
- Apply the cement mix into the crack, pressing it firmly to ensure proper bonding.
- Allow the cement to cure and finish the surface as desired.
• Flexible Sealants
Flexible sealants, such as silicone and polyurethane caulks, are ideal for filling small, non-structural cracks in concrete slabs. These sealants provide a weather-resistant and flexible bond that can accommodate minor movements in the slab without breaking.
Additionally, they have excellent adhesion properties and are easy to apply, making them a popular choice for DIY repairs.
– Process
- Inspect and clean the cracks.
- Apply a bead of flexible sealant along the entire length of the crack.
- Smooth the sealant using a trowel or putty knife to ensure proper adhesion and a clean finish.
- Allow the sealant to cure fully before subjecting the area to traffic or loads.
• Recommendations from Personal Experience
As someone who has dealt with various types of slab cracks, I highly recommend starting with a thorough inspection to determine the root cause of the crack. This will help you choose the most suitable repair material and technique.
In my experience, the epoxy injection has been highly effective for in-depth reinforcement and bonding of narrow cracks. For wider cracks or areas exposed to water and moisture, hydraulic cement or polyurethane foam injection can provide excellent results.
Before taking on the repair task, ensure you have all the necessary tools, materials, and protective gear on hand. Additionally, familiarize yourself with the specific instructions provided by the product manufacturer, as it can vary between brands.
While DIY repairs can be effective for small-scale cracks, we recommend consulting with a professional contractor for significant structural damage or complex cases.
These experts can assess the damage and recommend the best course of action to ensure the longevity and safety of your concrete slab.
Home Repair Guide: Covering Cracks with Ease
Cracks at home can be unsightly and even cause structural problems. However, fixing those cracks without professional help is possible by following the right techniques and using the right materials.
• Identifying the Type of Crack
Before proceeding with the repair, it is essential to understand the type of crack present. Various cracks can occur due to different reasons, such as thermal expansion, moisture variations, or even structural problems.
• Repairing Cracks in Plaster Walls
- Clean the Crack: Use a utility knife to remove loose material and widen the crack slightly. Gently vacuum or brush away debris from the crack.
- Apply a Patching Compound: Use a pre-mixed patching compound, such as a ready-mixed joint compound or rapid-setting gypsum-based compound, to fill the crack. Apply the compound using a putty knife and ensure it is flush with the surface.
- Smooth the Surface: Once the compound has dried, use fine-grit sandpaper to smooth the area until it blends seamlessly with the surrounding wall. Be careful not to over-sand and create an indentation.
- Prime and Paint: Finally, apply a coat of primer followed by a matching paint to finish the repair process.
• Repairing Cracks in Drywall
- Remove Loose Material: Use a utility knife to cut away any loose or crumbling drywall surrounding the crack.
- Apply Mesh Tape: Use fiberglass mesh tape to cover the crack, extending approximately an inch on each side. This tape will provide support and prevent future cracks from forming.
- Apply Joint Compound: Use a pre-mixed joint compound to cover the mesh tape, ensuring it is at least 1/8 inch thick. Smooth the compound with a putty knife, feathering the edges to blend with the surrounding wall.
- Sand and Repeat: Allow the compound to dry thoroughly, then sand the area smooth using fine-grit sandpaper. Repeat steps 3 and 4 if necessary until the repair is flush with the surrounding wall.
- Prime and Paint: Apply a coat of primer, and once dry, finish with matching paint.
• Repairing Cracks in Concrete Floors
- Clean the Crack: Use a wire brush to remove loose material from the crack. Vacuum or sweep away debris.
- Apply a Concrete Repair Mix: Choose a repair mix suitable for your crack width, such as a pre-mixed concrete patch or epoxy-based filler. Follow the manufacturer’s instructions for proper application.
- Use a Trowel to Smooth: Smooth the repair mix using a trowel, ensuring it is level with the surrounding floor. Let it cure as per the manufacturer’s recommendations.
- Seal the Repair: Use a concrete sealer to protect the repair from water infiltration and to blend the color with the surrounding concrete.
• Repairing Cracks in Brick or Masonry Walls
- Chisel Out the Crack: Use a masonry chisel and hammer to widen and deepen the crack. Remove any loose material from the crack.
- Clean the Crack: Clear debris from the crack with a wire brush, then vacuum or brush away any remaining dust.
- Apply Mortar Mix: Pre-wet the crack, then use a pointing trowel to push the mortar mix into the crack. Pack the mortar firmly and ensure it is slightly overfilled.
- Smooth the Mortar: Once the mortar has set, use a jointer tool to smooth and shape the mortar, ensuring it is flush with the surrounding brick or masonry. Remove any excess mortar from the surface.
- Cure the Mortar: Finally, mist the repaired crack with water and cover it with plastic for at least 48 hours to aid in curing.
• Final Thoughts
Taking the time to properly identify and repair cracks in your home is essential to maintain its structural integrity and aesthetic appeal. By following the steps and recommendations outlined in this article, you will effectively cover and repair cracks, preventing any further damage.
Remember, if you encounter any severe cracks or are unsure about the repair process, consult a professional for advice and assistance.
Tips to Conceal Settling Cracks Successfully
• Understanding Settling Cracks
Settling cracks are a common occurrence in most buildings, especially in older structures. These cracks can develop due to several factors, such as changes in temperature, moisture levels, and foundation movement.
It is essential to correctly identify and address settling cracks to maintain the structural integrity of your building.
• Types of Settling Cracks
– Hairline Cracks
These are thin cracks that may not be easily visible. They usually do not pose a significant threat to the structural integrity of your building. Treating hairline cracks is essential to prevent them from becoming more extensive and problematic.
– Wide Cracks
These are larger cracks that can be easily seen and may indicate a more significant structural issue. Wide cracks often require professional assessment and repair to ensure safety.
• Repairing Settling Cracks
Before attempting to repair settling cracks, ensure that the issue causing the cracks has been properly addressed. Repairing the crack without solving the underlying problem will likely result in reoccurrence.
– Clean the Crack
The first step to repairing a settling crack is to clean it thoroughly. Use a utility knife or putty knife to remove any loose debris or paint around the crack. A vacuum cleaner can help to remove any remaining dust or dirt.
– Use a Patching Compound
After cleaning the crack, apply a patching compound to fill the gap. I recommend using a pre-mixed compound for small cracks or a powder compound for more significant cracks. Ensure that the compound is adequately mixed and free of any lumps.
Apply the compound to the crack using a putty knife, working in small sections to ensure proper adhesion. Press the compound firmly into the crack, smooth it out, and ensure that there are no visible air bubbles.
– Allow the Compound to Dry
The drying time for patching compounds varies depending on the product and the size of the crack. Follow the manufacturer’s recommendations for drying time. Usually, a 24-hour period is sufficient for most compounds to dry.
– Sand the Surface
Once the compound is dry, use fine-grit sandpaper to smooth the surface. Ensure that the area is level with the surrounding wall and free of any rough spots.
– Prime and Paint
The final step in covering settling cracks is to prime and paint the repaired area. Using a high-quality primer will help to ensure proper adhesion and coverage of the paint. After the primer is dry, apply paint that matches the surrounding surface.
It may be necessary to paint the entire wall or ceiling to ensure a uniform appearance.
• Preventing Settling Cracks
Preventing settling cracks is essential for maintaining the structural integrity of your building. Some preventive measures include:
- Monitoring and maintaining proper moisture levels in your building.
- Installing gutters and downspouts to divert water away from the foundation.
- Regularly inspecting your foundation for signs of movement or damage.
- Addressing any structural concerns promptly and professionally.
• Hiring a Professional Contractor
While minor settling cracks can often be addressed by homeowners, it is essential to consult a professional contractor for more extensive repairs.
A professional contractor will have the appropriate tools, expertise, and certifications to properly assess and repair settling cracks, ensuring the safety and longevity of your building.
• Conclusion
Settling cracks can be a concerning issue for building owners. However, properly identifying, addressing, and preventing settling cracks can help maintain the structural integrity of your building.
Remember to clean the crack, use a high-quality patching compound, allow the patch to dry thoroughly, sand the surface, and paint the repaired area. If the cracks are extensive or cause for concern, consult a professional contractor for assistance.