Stripping Wallpaper: The First Step To Paint. What Pros Say
Are you ready to give your walls a fresh, new look but feel a little intimidated by stripping wallpaper? Worry no more; it can be a straightforward and satisfying process with the right tools and know-how. Follow along as we walk you through the essential first step to paint: effectively and efficiently stripping wallpaper.
Stripping wallpaper: the first step to painting:
Stripping wallpaper is crucial before painting a room as it ensures paint adheres properly and prevents an uneven finish. To do so, prepare the room, score the wallpaper, and use either a wallpaper steamer or a liquid solution to loosen the adhesive. Then, remove the paper, clean the walls, and repair any damages before painting.

Peeling off that old wallpaper is just the beginning! Discover the essential steps and expert tips to prepare your walls for a fresh coat of paint. Continue reading to unlock the secrets to a perfect DIY paint job.
Contents
- 1 Wallpaper Removal: Essential Preparation for Painting
- 2 Pre-Painting Actions After Wallpaper Extraction
- 3 Priming Necessity Following Wallpaper Disposal for Painting
- 4 Immediate Painting Possibility Post-Wallpaper Removal
- 5 Optimal Waiting Time Post-Wallpaper Stripping for Painting
Wallpaper Removal: Essential Preparation for Painting
• Why Remove Wallpaper Before Painting
Stripping wallpaper is an essential step prior to painting a room. Wallpaper can make it difficult for paint to adhere properly, resulting in an uneven, unprofessional finish. Furthermore, painting over wallpaper can cause the paper to bubble and peel, leading to problems down the line.
• Tools and Materials Needed
To strip wallpaper effectively, you will need the following tools and materials:
- Drop cloths or plastic sheeting to protect your floors
- A wallpaper scoring tool or utility knife to create perforations in the wallpaper
- A wallpaper steamer or spray bottle filled with water and a mild detergent or vinegar solution to loosen the wallpaper adhesive
- Wide and narrow putty knives or scrapers to remove the wallpaper
- A bucket of water and a sponge for cleaning
- Ladder or step stool to reach higher areas
• Preparing the Room for Stripping Wallpaper
Before you start stripping wallpaper, it’s essential to prepare the room to protect your belongings and surfaces. Follow these steps to ensure a clean, efficient process:
- Remove all furniture, decorations, and outlet covers from the room. You may want to photograph or sketch the layout for easier reassembly after painting.
- Lay down drop cloths or plastic sheeting to cover your flooring. Use heavy-duty tape to secure the covering in place.
- Turn off the power to any outlets or switches in the room. You can use a circuit breaker or fuse box to do this.
- Ventilate the room by opening windows and doors, if possible. This can help prevent mold growth and expedite the drying process.
• Scoring the Wallpaper
To begin the stripping process, you will need to create perforations in the wallpaper. These punctures allow the steamer or liquid solution to penetrate the adhesive, making it easier to remove the paper.
- Use a wallpaper scoring tool or utility knife to create a series of small cuts or punctures in the wallpaper. Apply gentle pressure, as pressing too hard may damage the wall beneath the paper.
- Move in a consistent pattern, ensuring that you cover the entire surface area of the room.
- Pay particular attention to areas where the wallpaper meets seams, corners, or other surfaces, as these can be more challenging to strip.
• Loosening the Wallpaper Adhesive
Once the wallpaper has been scored, you can proceed with loosening the adhesive. There are two primary methods for this step, and the one you choose will depend on your preference, time constraints, and the type of wallpaper and adhesive used.
– Wallpaper Steamer Method
A wallpaper steamer is an efficient and effective tool for loosening adhesive. Follow these steps to use a steamer:
- Fill the steamer with water and heat according to the manufacturer’s instructions.
- Hold the steamer pad against the scored wallpaper, starting from the top and working your way down. Keep the pad in place for 10-15 seconds or until the wallpaper begins to loosen.
- While the steamer is still on the wallpaper, use your putty knife or scraper to gently lift the paper away from the wall. Be careful not to gouge the wall.
- Continue to strip the wallpaper, overlapping the steamed areas as you progress.
– Liquid Solution Method
If you don’t have access to a wallpaper steamer, a liquid solution can also be used to loosen the adhesive. Mix water with a mild detergent or white vinegar in a spray bottle for this method.
- Spray the scored wallpaper evenly with the liquid solution, making sure to saturate every area.
- Allow the solution to soak into the wallpaper for 15-20 minutes.
- Use your putty knife or scraper to gently lift and peel away the wallpaper from the wall.
• Cleaning the Walls
After the wallpaper has been stripped, you may notice residual adhesive or paper on the walls. It’s essential to remove these remnants before painting to ensure a smooth, even finish.
- Dip a sponge in a bucket of water mixed with a small amount of mild detergent or vinegar. Wring out the excess liquid.
- Gently scrub the walls, being careful not to damage the surface. Use a narrow putty knife to scrape away stubborn adhesive if necessary.
- Once the walls are clean, allow them to dry thoroughly before proceeding with painting.
• Repairing Wall Damage
During the stripping process, it’s possible that minor damage to the wall may occur. Patching these areas before painting will help maintain a professional finish.
By following these steps, you can successfully strip wallpaper and prepare your walls for painting. While this process can be time-consuming and labor-intensive, the result is a fresh, clean surface ready for a new coat of paint. Happy painting!
Pre-Painting Actions After Wallpaper Extraction
• Step 1: Assess the Wall Condition
Before starting the painting process, it’s crucial to assess the condition of your walls. Look for any leftover wallpaper residue, glue, or adhesive that might still be present. If you find any of these, be sure to remove them using a solution of hot water and dish soap applied with a sponge or soft-bristle brush.
You can also use a commercially available wallpaper adhesive remover, typically found in hardware or paint stores.
• Step 2: Repair Damaged Areas
Upon removing the wallpaper, you might encounter damaged areas on your walls, such as holes, dents, or cracks. Before painting, you need to repair them by doing the following:
- Fill small holes and dents with a pre-mixed joint compound or spackling paste. Apply the compound using a putty knife and smooth it out evenly on the wall.
- Repair larger damages or cracks by applying joint tape and a layer of joint compound. For better results, apply 2-3 layers of the compound, allowing each layer to dry and sand it smooth before applying the next.
- Once all repairs are done and the compound is dry, sand the wall surface to ensure a smooth and even finish.
• Step 3: Clean the Wall Surface
After repairing any damages, the next step is to clean the wall thoroughly. This will guarantee proper adhesion of primer and paint, as well as a cleaner finish.
Use a solution of warm water and mild dish soap to scrub the walls gently with a sponge or soft cloth. Make sure to remove any leftover residue, grease, or dirt from the walls completely.
Once the walls are clean, rinse them with clean water and let them dry for 24 hours before applying any primer or paint.
• Step 4: Seal and Prime the Walls
Priming is a critical step before painting, as it helps the paint adhere better and provides a smooth and long-lasting finish. Primer also prevents any stains or discolorations from the wallpaper glue from seeping through the paint.
- Before priming, apply a sealing primer or a shellac-based primer to seal any remaining wallpaper adhesive. This will ensure that the adhesive remnants won’t affect the final paint job.
- Next, apply an acrylic or oil-based primer to the walls. Make sure to cover the entire surface evenly. Allow the primer to dry according to the manufacturer’s instructions, which is typically 24 hours.
• Step 5: Caulk Gaps and Joints
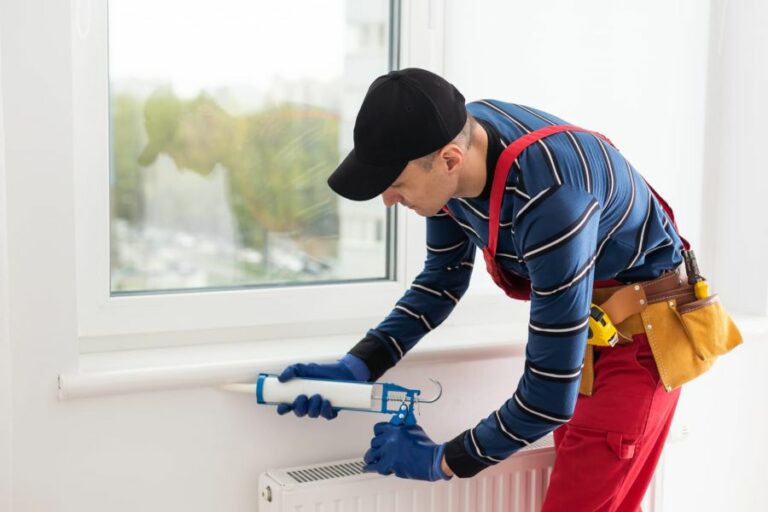
To achieve professional-looking results, fill any gaps or joints between the wall and trim (e.g., baseboards, crown molding, etc.) with the painter’s caulk.
Apply the caulk using a caulking gun and smooth the bead with a wet finger or damp sponge. Allow the caulk to dry according to the manufacturer’s instructions before painting.
• Step 6: Choose High-Quality Paint and Supplies
Investing in high-quality paint and painting supplies is essential for achieving the best results. Choose paint with excellent coverage, durability, and color retention. When selecting supplies, opt for a high-quality brush, roller, and paint tray to ensure a smooth and even application.
Moreover, it’s essential to choose the appropriate paint sheen for your walls. Flat or matte finishes can help hide wall imperfections, while glossier finishes are suitable for areas with high traffic or moisture, such as kitchens and bathrooms.
• Step 7: Paint Your Walls
Now that your walls are prepped and primed, it’s time to paint! Follow these recommendations for a successful painting project:
- Start at the top of the wall and work your way down.
- Use a brush to cut in around trim work, windows, and corners.
- Roll the paint on the walls in a “W” pattern to ensure even coverage.
- Apply at least two coats of paint, allowing the paint to dry between coats according to the manufacturer’s instructions.
With these steps in mind, you’ll be well-prepared to successfully paint your walls after removing wallpaper, leaving you with beautifully updated and refreshed rooms.
Steps | Description |
|---|---|
1. Remove any leftover adhesive | Ensure all wallpaper adhesive is completely removed by wiping walls with a sponge and warm water mixed with some liquid detergent. |
2. Repair any wall damage | Fix any cracks, holes, or damage to the walls by using a patching compound, sanding it smooth once it has dried. |
3. Clean and dry the walls | Wash the walls with a mixture of water and some mild detergent. Rinse thoroughly and allow the walls to dry completely. |
4. Prime the walls | Apply a high-quality stain-blocking primer to the walls to create a smooth and even surface for painting and to prevent any remaining adhesive or residue from bleeding through. |
5. Lightly sand the walls | Once the primer is dry, lightly sand the walls with fine-grit sandpaper to create a smooth surface for painting. |
6. Clean up any dust | Use a tack cloth or vacuum cleaner to remove any dust created by sanding before you start painting. |
7. Apply the paint | Start painting the walls using the chosen paint, applying it evenly using a brush, roller, or spray equipment. Apply multiple coats if necessary to achieve the desired coverage and finish. |
Priming Necessity Following Wallpaper Disposal for Painting
When it comes to home improvement, one common question many homeowners have is whether priming is necessary after removing wallpaper before painting.
• The Importance of Priming
Priming is an important step in the painting process because it helps create a surface that ensures optimal adhesion of the paint.
Essentially, priming creates a barrier that seals the wall and provides a base for paint to adhere better than if it were applied directly to the wall itself. There are several reasons why priming after removing wallpaper is vital, including the following:
– Smooth Surface Preparation
Wallpaper removal can leave behind a textured or rough surface, and uneven areas can become visible once a new coat of paint is applied. Priming helps fill in minor imperfections on the wall, creating a smoother surface for your paint to adhere to.
– Sealing Residue and Stains
After removing the wallpaper, there may be leftover adhesive residue or paste on the wall. Skipping the priming step can cause the paint to react with the residue, resulting in poor adhesion or a bumpy texture.
Primer also helps seal any stains that may have been concealed by the wallpaper, preventing them from bleeding through the new paint job.
– Improved Paint Coverage
A primer layer ensures that the paint achieves an even and uniform finish. By providing a consistent base, primer helps the paint absorb more evenly and reduces the number of coats needed for full coverage.
• Choosing the Right Primer
There are several types of primers available, each designed to address specific issues found on different surfaces. When selecting a primer after removing wallpaper, consider the following:
– Oil-Based Primer
An oil-based primer is recommended for surfaces with significant adhesive residue or staining. These primers are highly effective at sealing stains and preventing them from bleeding through the paint. However, oil-based primers have a strong odor and take longer to dry compared to other types.
You can learn more about oil-based primers from the Environmental Protection Agency’s Guide on Indoor Air Quality.
– Water-Based Primer
For most projects, a water-based primer is a popular choice because of its quick drying time and low odor. It’s suitable for adhesion and preparing a smooth surface but might not be as effective at sealing heavy stains or residual adhesive as oil-based primers.
– High-Build Primer
High-build primers are designed to create an extra-thick layer to fill in deeper imperfections on the wall. If your walls have significant damage or roughness after wallpaper removal, a high-build primer may be an appropriate option.
• Priming Steps After Wallpaper Removal
– Prepare the Walls
Before applying the primer, it’s essential to clean the walls and remove any remaining adhesive or loose debris. You may need to use a wallpaper adhesive remover or a mixture of warm water and dish soap to help dissolve and scrub away the residue. Allow the walls to dry completely before proceeding.
– Repair Damaged Areas
Examine the walls for any damage or imperfections, such as holes, cracks, or gouges. Repair these areas using spackling compound or a patch repair kit, and sand the area down to create a smooth surface.
– Apply the Primer
Using a roller or brush, apply the chosen primer to the wall with even strokes. Pay attention to edges, corners, and areas with imperfections to ensure proper coverage and adhesion. Allow the primer to dry fully according to the manufacturer’s instructions before applying paint.
• In Conclusion
Priming your walls after removing wallpaper is an essential step to achieve a professional-quality paint job. By selecting the right primer and following the proper preparation and application steps, you can create a smooth, even, and durable painted surface that enhances the beauty and value of your home.
Steps | Description |
|---|---|
1. Walls inspection | Inspect the walls for any remaining glue or damaged surfaces after removing the wallpaper. |
2. Clean the walls | Ensure walls are clean and free of any residue from the wallpaper removal process. You may need to wash the walls with soap and water and let them dry completely. |
3. Repair damaged surfaces | Fill any holes or cracks in the wall with a patching compound or joint compound. Sand the repaired areas so they are smooth and level with the rest of the wall. |
4. Prime the walls | Apply a high-quality primer to the walls, ensuring full coverage. This step is essential since it creates a clean, uniform surface for the paint to adhere to and helps prevent stains from seeping through. |
5. Paint the walls | After the primer has dried, apply the desired paint color using a roller or brush. It may require multiple coats to achieve the desired coverage and finish. |
Immediate Painting Possibility Post-Wallpaper Removal
Removing wallpaper is a challenging task, and painting immediately after removing it can be tempting. The answer to this question, unfortunately, is no. It is essential to undertake proper surface preparation before applying paint to ensure a long-lasting and flawless finish.
• Assessing and Fixing Damage
– Inspecting Your Walls
After removing wallpaper, you should thoroughly examine your walls for any imperfections. Look for holes, cracks, and peeling paint. Don’t forget to check the corners and edges for any leftover adhesive residue.
– Repairing Damage
If you discover any damage to your walls, it’s important to repair these imperfections. For small holes or cracks, you can use a premixed patching compound or a drywall joint compound. For larger holes, consider using a drywall repair kit, which often includes a patch and joint compound.
Here’s an excellent resource from HomeDepot that discusses repairing drywall in detail, including the materials you will need and step-by-step instructions on how to repair holes and cracks.
• Cleaning Your Walls
– Removing Adhesive Residue
Before painting, you must remove any remaining adhesive residue from the surface of your walls. A trisodium phosphate (TSP) cleaner mixed with water is a highly effective cleaning solution for this purpose.
Be sure to follow the manufacturer’s instructions on the proper dilution and application of TSP. A scraper may be necessary to remove more stubborn adhesive residue.
– Washing Your Walls
After addressing any adhesive residue, wash the entire surface of your walls with warm, soapy water. This will remove any dirt, grease, and dust that may interfere with the adhesion of your paint. Rinse your walls with clean water to remove any soap residue, and allow them to dry completely.
• Priming the Surface
– Selecting the Correct Primer
Applying a primer to your walls before painting is critical for a smooth, even, and long-lasting finish. Choose a primer that is specifically designed for your wall type (e.g., drywall, plaster, or masonry) and one that is compatible with the paint you plan to use.
– Applying the Primer
Before applying the primer, use painter’s tape to protect any surfaces you do not want to paint, such as baseboards, crown molding, and adjacent walls. Use a brush to cut in the edges and a roller for the larger areas.
Be sure to follow the manufacturer’s instructions on the primer’s dry time before applying paint.
• Painting Your Walls
– Choosing the Right Paint
Selecting the appropriate paint for your walls is crucial for a durable and cleanable finish. Consider factors such as the type of room you are painting, the amount of natural light, and your desired final finish (e.g., matte or glossy).
– Applying the Paint
Start by stirring your paint to ensure consistent color. Use a brush to cut in the edges, and then use a roller to apply paint to the larger areas. It is often necessary to apply multiple coats of paint to achieve your desired finish. Be sure to follow the manufacturer’s instructions for dry time between coats.
• Final Thoughts
In conclusion, while it is not advisable to paint immediately after removing wallpaper, by following the essential steps outlined in this article, you can ensure a professional-quality finish on your walls.
Taking the time to properly prepare your walls for painting will result in a beautiful and long-lasting transformation of your space. Remember, patience and attention to detail are key ingredients for success.
Optimal Waiting Time Post-Wallpaper Stripping for Painting
The question of how long to wait after stripping wallpaper before painting can be an essential one for many homeowners.
• Importance of Preparation
It is crucial to understand that thorough and adequate preparation is the key to a professional-looking paint job. Skipping this step can lead to many complications like uneven surfaces and poor paint adhesion, making it vital to invest time and effort in preparing walls after removing wallpaper.
• Assessing the Wall Condition
Once the wallpaper is removed, it is essential to assess the wall for any residue of adhesive, patches, or imperfections. These issues can affect the paint job if not addressed correctly.
– Removing Wallpaper Adhesive
Leftover wallpaper paste can cause the new paint to peel or bubble, making it necessary to remove any traces of adhesive. You can use a sponge and warm water with mild dish soap to gently scrub the walls. In case of stubborn residue, a wallpaper adhesive remover can be used.
Follow the manufacturer’s instructions and use a scraper or a bristle brush for effective removal. Allow the wall to dry completely before moving on to the next step.
You may want to visit EPA.gov to learn more about maintaining proper ventilation in your home during the cleaning process.
– Repairing Imperfections
After eliminating any residue, examine the walls for holes, cracks, or other imperfections that need to be filled and smoothed out.
Following the manufacturer’s instructions, use a suitable filler and allow it to dry as per the stipulated time. Once dry, lightly sand the repaired areas to achieve a smooth surface.
• Ensuring a Smooth Surface
Before painting, it’s crucial to have a clean, smooth, and primed surface. This guarantees a high-quality, long-lasting result. The following steps will help achieve this.
– Cleaning the Walls
Thoroughly wipe and clean the walls, paying close attention to any dust or dirt. It’s essential to have a pristine surface for the paint to adhere to properly.
– Sanding the Walls
Once the walls are clean and dry, it is advisable to sand them lightly with fine-grit sandpaper. This creates a better surface to promote paint adhesion, ensures a smoother finish, and helps remove any remaining inconsistencies.
– Priming the Walls
Priming the walls not only provides a uniform base but also helps seal any remaining adhesive residue and aids in paint coverage.
It is crucial to choose the right primer based on the wall surface and paint type. Read the manufacturer’s instructions and apply the primer using a roller or brush. Allow the primer to dry completely, which typically takes 12-24 hours, depending on the product and environmental conditions.
• Waiting Period Before Painting
Now that the wall is primed and ready to be painted, the final consideration is how long to wait after stripping the wallpaper before starting to paint.
As a general rule, it is essential to let the wall dry and settle for at least 24 hours after primer application. Factors such as humidity, temperature, and airflow in the room also influence the drying duration.
To ensure a flawless paint job, it is recommended to err on the side of caution and wait for 48 hours or longer after stripping wallpaper before commencing the painting process. This allows ample time for the wall to dry thoroughly and helps avoid potential complications.
• Conclusion
In conclusion, it is essential to devote time and effort to the preparation stage when transitioning from wallpaper to paint. Following the above steps will ensure a perfectly smooth surface and a professional result.
Waiting for at least 48 hours after stripping wallpaper before painting will allow the wall to dry adequately and guarantee an appealing, long-lasting finish.
Steps | Duration |
|---|---|
1. Stripping wallpaper | Varies depending on the room size and complexity |
2. Cleaning and prepping the wall | 1-2 hours |
3. Applying a primer or sealer (if required) | 1-2 hours for application, 1-4 hours for drying |
4. Applying the first coat of paint | 2-4 hours |
5. Drying time between coats (if multiple coats are required) | 2-4 hours |
6. Applying additional coats (if needed) | 1-2 hours per coat |
7. Total time before the paint job is complete | Typically 24-48 hours after stripping wallpaper |

