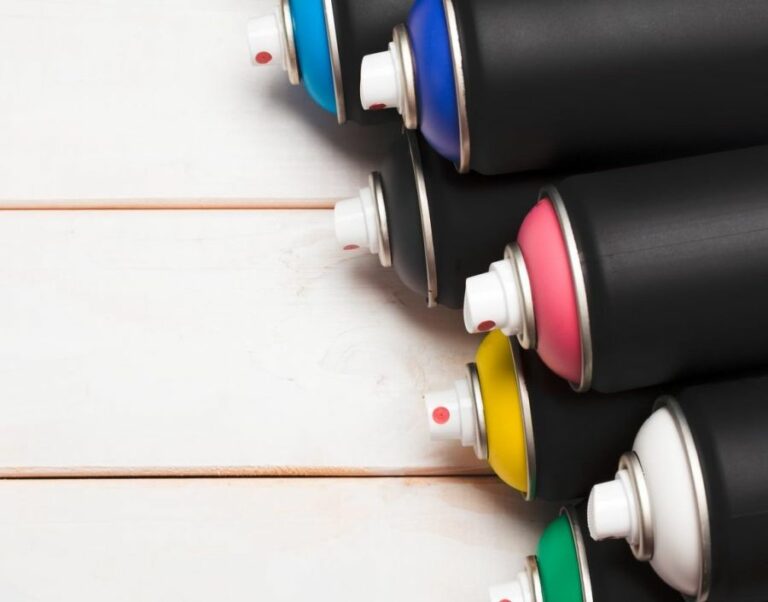
How To Create A Faux Finish With Spray Paint, What Pros Say
Are you looking to recreate the professional, luxurious look of a faux finish with spray paint? Look no further; we can help! Faux finishing techniques aren’t just for skilled artisans anymore, and by following our step-by-step guide, you can easily create a stunning result at a fraction of the cost. Trust me, with the right tools, knowledge, and a little bit of practice; you’ll be able to achieve that beautiful faux finish you’ve been dreaming of with ease.
How to create a faux finish with spray paint:
To create a faux finish with spray paint, prepare a clean, well-ventilated work area and protect surfaces with a drop cloth. Choose high-quality spray paint designed for your desired finish, prime and sand the surface, and apply multiple thin coats using proper spray painting techniques. For added depth and texture, apply multiple layers and colors, if needed, according to the paint’s instructions. Finish by sealing and protecting your faux finish with a clear protective topcoat.

Unleash your inner artist and transform ordinary surfaces into extraordinary masterpieces! Learn the techniques, tips, and tricks to create a faux finish using spray paint. Read on for your DIY guide to achieving professional results without breaking the bank.
Contents
- 1 Crafting Faux Finishes using Spray Paint: A Guide
- 2 Achieving a Textured Look with Spray Paint Techniques
- 3 Mastering the Flat Finish with Spray Paint Tips
- 4 Creating Faux Paint Finishes: Expert Techniques
- 5 Spray Paint Peeling Effect: How to Achieve It
- 6 Attaining a Glossy Finish using Spray Paint
- 7 Mimicking Spray Paint Effects with Traditional Paint
Crafting Faux Finishes using Spray Paint: A Guide
• Prepare Your Work Area
Before starting any spray paint project, it’s essential to have a well-ventilated and clean environment to work in.
Choose an area away from direct sunlight, and make sure there are no open flames or sparks nearby. Lay down a drop cloth or newspaper to catch any overspray and protect surfaces from paint drips.
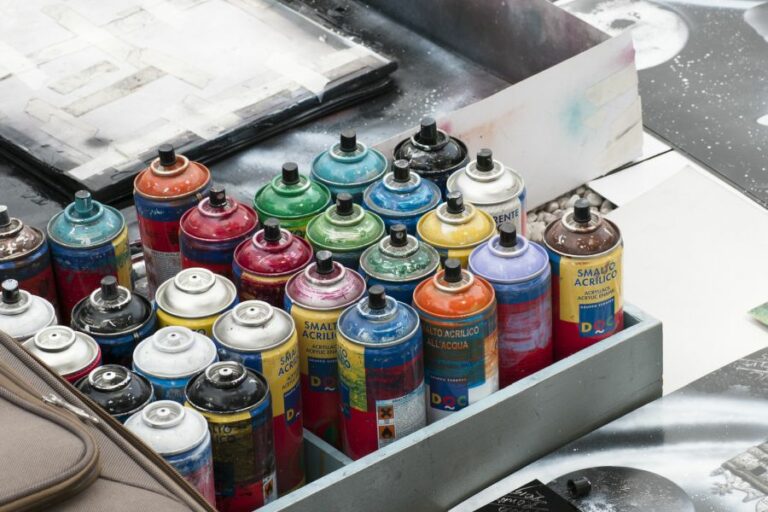
• Select the Proper Spray Paint
To achieve the perfect faux finish, you’ll need high-quality spray paint specifically designed for the type of finish you want. There are various options for achieving different faux finishes, such as stone, wood, and metal.
Be sure to read the instructions on the paint can carefully and abide by the recommended drying times.
I recommend using paints from well-known brands like Rust-Oleum or Krylon. These trusted brands offer a wide variety of spray paint options designed for different faux finishes, and they are generally known for producing high-quality and durable results.
Furthermore, you may find more information about their products on their respective websites: Rust-Oleum and Krylon.
• Prime and Sand the Surface
An essential step to achieving a high-quality faux finish is to prepare your surface correctly. Make sure the area is clean, dry, and free of any dust or debris. If necessary, use a primer specifically designed for spray paint applications.
The primed surface will provide better adhesion for the faux finish paint, ensuring a durable and long-lasting result.
Additionally, sanding the surface with fine-grit sandpaper (220-grit or higher) will help create a smooth and even base. This step is particularly crucial when attempting a metallic faux finish where imperfections on the surface can lead to an undesirable result.
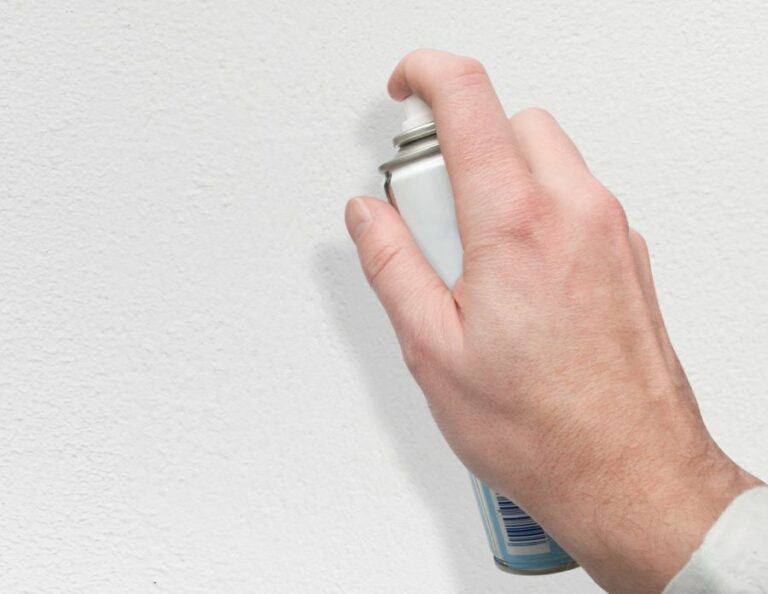
• Use Proper Spray Painting Techniques
When applying spray paint, it’s essential to use proper techniques to ensure an even and consistent faux finish.
- Shake the spray paint can vigorously for at least one minute to mix the paint thoroughly.
- Hold the spray paint can approximately 10-12 inches away from the surface you are painting.
- Apply the paint using multiple thin coats. Aim for complete coverage, but avoid making the paint layers too thick or heavy, as it may result in drips, runs, or an uneven finish.
- Use a sweeping motion, slightly overlapping each pass for even coverage.
- Allow adequate drying time between coats as recommended on the paint can.
Using these techniques will give you a better chance of achieving a uniform and professional-looking faux finish.
• Apply Multiple Layers and Colors (If Necessary)
Many faux finishes, such as stone or wood, require multiple layers of paint to create depth and texture. In these cases, it’s essential to carefully read the paint’s specific instructions and follow them to the letter.
For example, when creating a faux stone finish, you may need to apply a base coat followed by one or more additional colors with a specialized technique like sponging, ragging, or stippling.
These methods involve applying the paint using a natural sponge, cloth, or stippling brush, respectively, to create the desired pattern and depth.
For a faux wood finish, you might need to use two or more shades of brown spray paint and apply them in long, narrow strokes to mimic the grain of the wood.
• Seal and Protect Your Faux Finish
Finally, to protect your beautiful faux finish and ensure its longevity, consider applying a clear protective topcoat. This step is especially crucial for outdoor projects or areas prone to moisture, wear, or frequent contact.
Most spray paint brands offer clear, protective topcoats specifically designed for their paint products. Follow the instructions on the topcoat can, and be sure to allow adequate drying time before handling or exposing the finished piece to the elements.
• In Conclusion
Creating a faux finish with spray paint is an affordable and versatile way to customize your home and belongings. With proper surface preparation, the correct spray paint, and attention to detail, you can achieve a stunning and professional faux finish that enhances the beauty and style of your items.
Remember to follow the steps outlined above, always adhere to the paint manufacturer’s instructions, and practice your painting techniques to master the art of faux finishing with spray paint..
Step | Description |
|---|---|
1 | Choose your spray paint: Select the colors you want for your faux finish. You will need a base color and one or more accent colors for the faux effect. |
2 | Prepare the surface: Clean the surface you want to paint, making sure it is free of dirt, dust, and grease. If necessary, sand the surface to create a smooth and even base for painting. |
3 | Apply the base color: Spray the base color onto the surface, following the instructions on the can for proper application. Make sure to apply an even layer of paint and let it dry completely before moving on to the next step. |
4 | Create your faux finish technique: Choose a technique for applying the faux finish. This can include using a sponge, rag, or brush to dab or brush the accent color onto the base color. You can also use plastic bags, crumpled paper, or other textured materials to create a pattern with the accent color. |
5 | Apply the accent color: Using your chosen technique, apply the accent color to the surface, leaving some of the base color visible. Make sure to blend the accent color well so it looks natural and organic. |
6 | Seal and protect the faux finish: Once the accent color is dry, apply a clear sealer (if desired) to protect the faux finish and prolong the life of the paint job. |
Achieving a Textured Look with Spray Paint Techniques
Creating a textured look with spray paint is not only an effective way to add depth and dimension to various surfaces but also an excellent opportunity for beginners and professionals alike to explore their creativity.
• Understanding Spray Paint Characteristics
Spray paint comes in various formulations and finishes, each offering its unique set of properties to achieve a textured look. When selecting spray paint for your project, it’s essential to choose one compatible with the surface you’re working on, providing the desired texture and finish.
For additional guidance in selecting the appropriate spray paint, consult the manufacturer’s guidelines and experiment with various types and brands to find the most suitable product for your needs.
The Environmental Protection Agency’s website offers valuable information on choosing environmentally friendly paint products.
• Preparing the Surface for Spray Painting
Proper surface preparation is key to attaining a textured look with spray paint, ensuring the paint adheres well, and the texture is preserved. Follow these steps to prepare your surface:
- Clean the surface: Remove any dirt, dust, or debris using a cloth, soft brush, or microfiber towel. For more stubborn contaminants, use water and mild soap or detergent. Ensure the surface is completely dry before proceeding.
- Sand the surface: If your surface is rough or uneven, use medium-grit sandpaper to smoothen it out. This step is especially crucial for surfaces that have a glossy or slick finish. Wipe the surface with a clean, damp cloth after sanding to remove any remaining dust.
- Apply a primer: Using a primer on your surface can enhance paint adhesion, hide imperfections, and contribute to a more uniform texture. Choose a primer compatible with your surface and spray paint. Apply the primer following the manufacturer’s instructions and allow it to dry thoroughly.
• Choosing and Creating Textures
There are several methods to create textures with spray paint. Here are some common techniques for achieving a textured look:
– Layering Colors
Layering multiple colors of spray paint can create depth and dimension in your project. To achieve this effect:
- Choose your color palette: Select complementary or contrasting colors that appeal to you and coordinate them with your overall design vision.
- Apply the base color: Spray the first color on your surface, using a sweeping motion to ensure even coverage. Allow the paint to dry for the recommended time specified by the manufacturer.
- Add subsequent layers: Apply additional colors, allowing each layer to dry before proceeding to the next one. Experiment with spraying the paint from different angles, distances, and patterns to add visual interest and texture.
– Using Textured Spray Paint
Textured spray paint is specifically formulated to produce a textured finish when applied, eliminating the need for additional techniques. To use textured spray paint:
- Choose a textured spray paint: Opt for a product designed to create the texture you desire, such as stone, metallic, or hammered finishes.
- Apply the textured spray paint: Following the manufacturer’s instructions, apply the textured spray paint to your surface. It may require multiple coats to achieve the desired effect, so be patient and allow the paint to dry between coats.
– Implementing Stencils or Patterns
Using stencils or patterns can create a textured effect by combining multiple layers of paint and intricate designs. To incorporate this technique:
- Select a stencil or pattern: Choose a design that complements your surface and fits within the desired texture style.
- Position and secure the stencil: Place your stencil on the surface and secure it with painter’s tape or adhesive to prevent any movement.
- Spray the paint: Using your preferred spray paint, apply the paint over the stencil, ensuring even coverage. Once the paint is dry, carefully remove the stencil to reveal the pattern beneath.
• Sealing and Protecting Your Textured Finish
Once you’ve achieved the desired texture with spray paint, it’s essential to seal and protect your work. Apply a clear sealer or topcoat designed for use with spray paint, following the manufacturer’s instructions.
Allow the sealer to dry for the recommended time before handling or displaying your finished piece.
• Achieving Success with Textured Spray Paint
In conclusion, creating a textured look with spray paint is a versatile and rewarding process that requires selecting the appropriate paint, properly preparing the surface, experimenting with various techniques, and sealing the final product.
As you sharpen your skills and gain experience, you’ll be able to develop unique textures and finishes that showcase your creativity and mastery of spray paint.
Steps | Description |
|---|---|
1. Gather materials | Gather the necessary materials, such as spray paint cans in various colors, a canvas, protective gloves, and a face mask. |
2. Set up the workspace | Set up a well-ventilated workspace, ideally outdoors, and lay down a protective cover, such as a drop cloth, to catch any excess spray paint. |
3. Apply a base coat | Apply a base coat of spray paint to the canvas. Allow it to dry completely before moving on to the next step. |
4. Create texture with materials | Use materials such as plastic bags, sponges, or crumpled paper to create texture on the canvas. Press the material onto the canvas and then lightly spray over it with a second color of spray paint. Gently remove the material to reveal the textured pattern. |
5. Layer textures | Continue layering textures by using different colors of spray paint and different materials. Be sure to let each layer dry before moving on to the next one. |
6. Add details | Add details to your work, such as using a fine brush to paint in lines, shadows, or highlights. |
7. Seal your work | Apply a clear coat of sealant to protect your artwork and allow it to dry fully before displaying it. |
Mastering the Flat Finish with Spray Paint Tips
Spray paints are versatile and easy-to-use products, suitable for various applications, from automotive and industrial to artistic and decorative projects.
While glossy finishes might be more popular, a flat (matte) finish can be desirable for certain projects as it provides an understated appearance that often looks more natural and less reflective.
• Surface Preparation: The Key to Success
– Cleaning and Sanding
To achieve a consistent and even flat finish, start by thoroughly cleaning the surface to remove any dust, dirt, grease, or other contaminants.
One option to remove such debris is to use a low-lint cloth with a mixture of warm water and mild detergent or rubbing alcohol.
Once the surface is clean and dry, use a fine-grit sandpaper or sanding sponge (180 to 240 grit) to lightly scuff the surface.
This will create small scratches, helping the paint adhere better and producing a more even finish. After sanding, use a tack cloth or a clean, dry cloth to remove any dust particles from the surface.
– Priming
Priming is an essential step for achieving a perfectly flat finish as it helps fill in surface imperfections, increases paint adhesion, and enhances the paint’s opacity. Select a primer that is suitable for the specific material you are painting and available in a flat finish.
Apply the primer using smooth, overlapping strokes, maintaining a consistent distance of around 8-12 inches from the surface.
Allow the primer to dry according to the manufacturer’s recommended time, and lightly sand the primed surface with fine-grit sandpaper to remove any imperfections or dust particles.
• Proper Spray Painting Technique
– Shake the Can
Before spray painting, shake the can vigorously for at least a minute to ensure the paint is thoroughly mixed. This helps achieve a consistent color and prevents clogging of the nozzle.
– Maintaining the Right Distance and Angle
When spray painting, maintain a consistent distance of approximately 8-12 inches from the surface. If you spray too close, you risk creating runs and drips, whereas spraying from too far away will result in an uneven and coarse finish.
Hold the spray can perpendicular to the surface to avoid uneven coverage. Spray in smooth, horizontal strokes, overlapping each pass by about 50%. Always start and stop spraying off the surface to avoid buildup and unevenness.
– Multiple Thin Coats
Apply multiple thin coats, allowing each coat to dry according to the manufacturer’s recommended time (typically 15-20 minutes). This will help prevent drips, runs, and unevenness, contributing to a smooth and consistent flat finish.
• Paint and Nozzle Selection
– Flat/Matte Spray Paints
For a flat finish, select flat or matte spray paint. These paints contain less gloss, creating the desired non-reflective surface. Some brands even offer a 2-in-1 primer and paint in a single product, designed specifically for achieving a flat finish.
– Nozzle Options
Using a spray paint can with an adjustable nozzle allows you to control the spray pattern and achieve a more even application. A fan-shaped spray pattern is ideal for achieving a smooth, flat finish.
• Conclusion
Achieving a flat finish with spray paint requires attention to detail in surface preparation, proper painting technique, and paint and nozzle selection. By following these guidelines, you will be able to create a professional-looking, flat finish on various surfaces and materials.
Step | Description |
|---|---|
1. Choose a flat spray paint | Select a spray paint with a flat or matte finish, as these types of paint do not have any gloss or sheen to it. |
2. Prepare the surface | Ensure that the surface you are painting is clean, dry, and free of any debris or grease. You may need to sand the surface to remove any previous paint or finish. |
3. Shake the spray paint can | Shake the spray paint can vigorously for at least 1 minute to mix the paint properly and ensure a smooth application. |
4. Test spray | Test the spray paint on a piece of scrap material to ensure the nozzle is working properly and the paint is mixed well. |
5. Apply paint in thin layers | Hold the spray paint can about 10-12 inches away from the surface and apply thin, even layers. Allow each layer to dry before applying more coats to avoid drips and unevenness. |
6. Let it dry | Allow the paint to dry completely. Check the label of the spray paint can for the recommended drying time. |
7. Clear coat (optional) | If desired, you can apply a clear flat or matte finish over the paint for added protection and durability. |
Creating Faux Paint Finishes: Expert Techniques
Faux paint finishes are an excellent way to create beautiful and unique surfaces that mimic natural textures and patterns like wood, stone, and metal.
• What Are Faux Paint Finishes?
Faux paint finishes, derived from the French word for “false,” involve various techniques to give surfaces the appearance of more elaborate and expensive materials.
These finishes are widely used in interior design, adding depth, texture, and personality to spaces, making them a popular choice among homeowners and decorators alike.
• Essential Tools and Materials
Before diving into the step-by-step process, it’s important to gather the necessary tools and materials. Here are some essentials that will help you achieve the perfect faux finish:
- Base paint: A suitable base paint is essential for the specific faux finish you desire. It’s crucial to choose high-quality acrylic or latex paint for the desired end result.
- Top coat paint: This paint will interact with the base paint to create the desired texture and pattern. Some popular choices include metallic, glaze or other specialty paints.
- Primer: A good primer will ensure better adhesion and longevity for your faux finish, particularly when working on smooth surfaces.
- Paint rollers, brushes, and trays: Select various sizes and styles of brushes and rollers for different techniques, making sure to use quality tools.
- Additional tools: Depending on the finish you choose, additional tools like sponges, rags, and feather dusters may come in handy.
- Painter’s tape: This will help protect areas you don’t want to be painted, ensuring clean edges and a professional appearance.
Now that you have your tools and materials ready, let’s dive into different faux finish techniques and their processes.
• Technique 1: Sponging
Sponging is a popular and easy technique that creates a soft, textured surface. Follow these steps:
- Preparation: Clean and prep the surface, applying primer if necessary. Once dried, paint the entire surface with your base color.
- Top coat: Mix a glaze with your chosen top coat paint, following the manufacturer’s recommendations. This will help create a more transparent effect.
- Sponging: Dip a natural sea sponge into the top coat mixture, dabbing off the excess on a paper towel. Lightly dab the sponge onto the wall in a random pattern, making sure to cover the entire surface.
- Finishing touches: If desired, use a clean, dry sponge to soften any harsh spots or blend the paint further. Once dry, apply a clear protective finish for added durability.
• Technique 2: Color Washing
Color washing creates a subtle, aged texture and is a versatile faux finish technique. Here’s how to achieve this look:
- Preparation: Ensure your surface is clean and primed, then apply the base coat paint.
- Top coat: Mix the top coat paint in a separate container with water to achieve a watery consistency.
- Washing: Use a large brush to apply the watery top coat paint in a crosshatching motion, working in small sections to avoid uneven coverage.
- Blending: Once the top coat is applied, use a clean, dry brush to blend and soften the effect, using gentle, sweeping motions.
- Protect: After the paint has dried, apply a clear protective finish for added durability.
• Technique 3: Rag Rolling
Rag rolling is a technique that produces a rich, textured appearance with visual depth. Follow these steps to achieve this effect:
- Preparation: Clean, prime, and paint the surface with your chosen base color.
- Top coat: Mix your desired top coat paint with glaze, following the manufacturer’s recommendations.
- Rag rolling: Crumple a clean, lint-free rag or cloth, and dip it into the top coat mixture. Roll the rag in a uniform motion, removing excess paint on a disposable surface or paper towel.
- Application: Roll the rag onto the surface, using a random pattern and overlapping previous sections. Ensure that the cloth remains crumpled throughout the process.
- Finishing touches: Once the paint is dry, apply a clear protective finish for added durability.
With these simple techniques and a bit of practice, you, too, can create professional-looking faux paint finishes and transform any space into a stunning masterpiece.
Step | Description |
|---|---|
1. Choose a base color | Choose a base paint color to serve as the foundation for the faux finish. This should be a color that will complement the desired faux effect. |
2. Apply the base coat | Apply the base coat of paint to the surface using a roller or paintbrush, allowing it to dry completely before proceeding. |
3. Select a faux finish technique | Choose a faux finish technique such as sponge painting, rag rolling, or color washing that will help create the desired texture and appearance. |
4. Prepare the glaze mixture | Prepare a glaze mixture by combining glaze medium and additional paint color(s). The mixture should be thinner than the base paint and should coordinate with the base color. |
5. Test the technique | Practice the chosen faux finish technique on a sample board or a hidden area of the wall to ensure you achieve the desired effect. |
6. Apply the faux finish | Working in small sections, apply the faux finish using the chosen technique. Follow the specific application instructions for the chosen method, blending edges and adjusting the finish as needed. |
7. Allow to dry | Once the faux finish is complete, allow it to dry completely before touching or adding further decoration. |
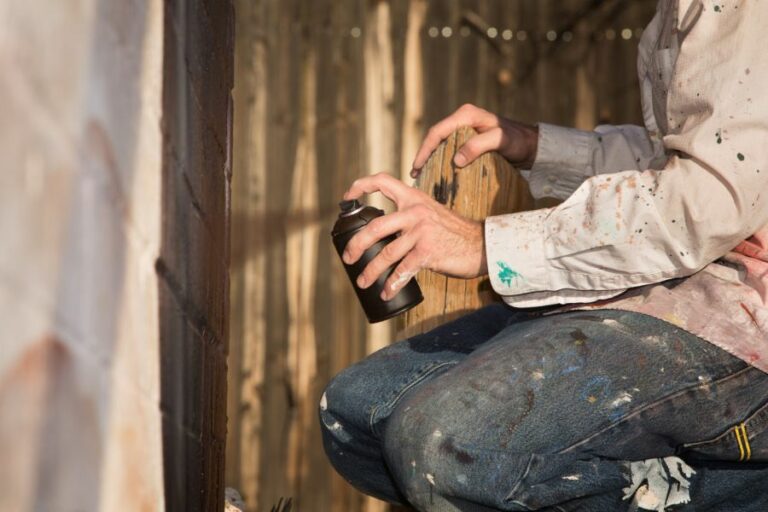
Spray Paint Peeling Effect: How to Achieve It
Are you tired of staring at that old, chipped, or unsightly spray paint and ready for a change? We will explore the process of making spray paint peel, so you can easily revitalize any surface.
Follow these step-by-step instructions and expert recommendations for the most effective and efficient way to remove spray paint.
• Preparing the Surface for Spray Paint Removal
Before you begin making spray paint peel, it is essential to prepare the surface properly. Start by clearing away any dirt, debris, or dust that may interfere with the paint removal process. Use a soft brush or cloth to avoid scratching the underlying material.
– Protect Surrounding Areas
Next, protect the surrounding area from potential removal of chemicals or paint fragments by covering it with plastic sheeting, drop cloths, or masking tape. This will also make the cleanup process a breeze.
• Selecting the Right Removal Method
There is no one-size-fits-all solution when it comes to making spray paint peel. You must consider the surface material and type of paint used to determine the most effective removal method. Here are some popular techniques for various surfaces:
– Chemical Strippers
For wooden, metal, or fiberglass surfaces, a chemical stripper can be an effective solution. There are many different types of chemical strippers available, including:
- Solvent-based strippers: These contain harsh chemicals like methylene chloride, acetone, or toluene. They can be extremely effective but are also potentially hazardous to your health and the environment. Always use appropriate safety gear such as gloves, goggles, and a respirator when using solvent-based strippers.
- Bio-based strippers: These are eco-friendly alternatives to solvent-based strippers derived from plant-based materials. While they are gentler on human health and the environment, they may not be as powerful at removing stubborn spray paint.
- Caustic strippers: These typically contain sodium hydroxide, which breaks down the paint’s bond with the surface. Caustic strippers can be effective but may also damage the underlying material, especially wood. Test a small area before proceeding.
Note: Please consult the Environmental Protection Agency (EPA) for guidance on choosing environmentally friendly and effective chemical strippers.
– Heat Gun or Hairdryer
If you’re working with a heat-resistant surface, such as wood or metal, consider using a heat gun or hairdryer to loosen and peel the spray paint away. This method generates high temperatures that soften the paint, causing it to bubble and eventually peel off.
Keep the heat gun or hairdryer at a safe distance from the surface to avoid burning the paint or material underneath. Then, use a scraper or putty knife to gently remove the paint as it softens.
– Power Washer or Sandblaster
For durable outdoor surfaces, like brick or concrete, a power washer or sandblaster can make spray paint peel quickly and efficiently. When using these high-powered tools, always wear proper safety gear and follow the manufacturer’s guidelines for safe usage.
Keep in mind that power washing and sandblasting may remove other coatings or layers of paint beneath the spray paint, so approach with caution.
• Applying the Removal Technique
Once you have chosen the appropriate method for making spray paint peel, the next step is to apply the technique properly. Carefully follow the instructions provided by the manufacturer of your chosen removal product or tool.
– Safety First
Regardless of the removal method, it is essential to prioritize safety during the process. Always wear gloves, goggles, and other appropriate protective equipment, and avoid working in enclosed spaces when using chemical strippers or power tools.
• Cleaning Up After Spray Paint Removal
With the spray paint successfully peeled away, the final step is to clean up the area. For chemical strippers, use a paint scraper or putty knife to remove any remaining residue or softened paint. Rinse the surface thoroughly with clean water and allow it to dry.
For other removal methods, such as heat guns, power washers, or sandblasting, you may need to brush or vacuum away paint debris and residue.
You may also want to consider neutralizing the surface after using caustic strippers by wiping it down with a cloth dampened with white vinegar.
• Conclusion
Making spray paint peel can be a straightforward process when approached correctly, and the result can be a rejuvenated surface. By selecting the appropriate removal method and carefully following the necessary steps, you can achieve a clean, fresh look for your painted surfaces.
Step | Description |
|---|---|
1 | Apply a layer of plastic wrap or cling film over the painted surface before it dries. |
2 | Press the plastic wrap or cling film onto the surface to create texture. |
3 | Allow the paint to dry for a few minutes. |
4 | Slowly and carefully remove the plastic wrap or cling film. |
5 | Optional: Use a heat gun or hairdryer to soften the paint and make peeling easier. |
6 | Peel the paint off the surface to create a distressed or worn look. |
Attaining a Glossy Finish using Spray Paint
A glossy finish can make any object look polished and professional, elevating it to a whole new level. Spray paint is a popular choice for creating this effect, as it is applied evenly and smoothly.
• Preparing The Surface
The first step in achieving a glossy finish is preparing the surface. This ensures that the paint adheres properly and has an even appearance.
– Clean The Surface
Given that dirt, oils, and other impurities can cause issues, cleaning the surface thoroughly is essential. Use a mild detergent, warm water, and a soft cloth to gently remove grime.
For stubborn stains or grease, consider employing a degreaser, then rinse the surface well to remove any soap residue.
– Sand The Surface
Smooth surfaces are vital for a glossy finish. Start by using 400-grit sandpaper to remove imperfections and rough spots.
If the object has a highly textured or rough surface, start with coarser sandpaper and work up to the 400-grit gradually. After sanding, wipe the surface with a damp cloth to remove any dust.
– Apply Primer
A primer creates a consistent, even base for the paint. Choose a spray primer intended for the specific surface material (wood, metal, plastic, etc.). Apply light coats using a sweeping motion, allowing each coat to dry completely before adding another. Two to three coats are typically sufficient.
Once the final coat is dry, you may need to sand the primer lightly with fine-grit sandpaper (600 to 800-grit) to achieve a smooth surface.
• Selecting The Right Spray Paint
Choosing the appropriate spray paint is crucial for achieving a glossy finish. Consider these factors when making your selection:
– Gloss Level
Spray paints come in various gloss levels, ranging from semi-gloss to high-gloss. To create a glossy finish, opt for high-gloss spray paint.
– Paint Quality
Not all spray paints are created equal. Higher-quality paints typically provide better coverage, gloss levels, and durability. Look for trusted paint brands, and read reviews to ensure that the paint offers the desired finish.
– Compatibility
Ensure that the spray paint is compatible with the surface you are working on, be it wood, metal, plastic, or other materials.
Compatibility guarantees proper adherence and a long-lasting finish. Check the paint’s label for information on its intended use and compatibility.
• Application Techniques
Proper spray paint application is the key to achieving a glossy finish. Several factors contribute to this, such as technique, distance, and environmental conditions.
– Technique
The technique used while applying spray paint has a substantial impact on the final appearance. Maintain a consistent speed and keep the can level while spraying.
Use back-and-forth, sweeping motions, overlapping each stroke slightly to ensure even coverage. Apply several light coats instead of one thick coat to achieve a smooth, glossy finish.
– Distance
Maintain a distance of 10 to 12 inches between the spray can and the surface. This minimizes the risks of drips, runs, and uneven coverage, which can compromise the glossy finish. Note that spraying too close might result in drips while spraying from afar can cause a dusty, uneven texture.
– Environmental Conditions
Ideal painting conditions contribute to achieving a glossy finish. Paint in a well-ventilated area to minimize inhalation of fumes, but make sure the area is free of dust and debris as they can adhere to the wet paint and ruin the finish.
Also, avoid painting in direct sunlight, as it can cause the paint to dry too quickly, leading to an uneven finish. Finally, aim for a painting environment with a temperature between 60-80ºF and humidity levels below 85%, as extreme heat, cold, or humidity can negatively affect the paint’s performance.
• Post-Painting Steps
– Drying Time
Allow the paint to dry for the recommended time mentioned on the paint’s label. Drying time may vary depending on the paint, surface material, and environmental factors. Rushing the drying process can cause issues with the finish.
– Polishing And Buffing
To create an even glossier finish, consider polishing the painted surface with a fine, automotive-grade polishing compound.
Polishing removes small imperfections and further smoothens the surface. After polishing, use a buffing pad or clean, soft cloth to buff the surface gently. This step enhances the shine, giving your paint job that desired glossy finish.
In conclusion, achieving a glossy finish with spray paint requires careful surface preparation, selecting the right paint, correct application techniques, and some post-painting steps.
By following these guidelines and being patient throughout the process, you can achieve a professional-looking, glossy finish on any object.
Step | Description |
|---|---|
1 | Choose a high-gloss spray paint suitable for the material you are painting. |
2 | Prepare the surface by cleaning and sanding it to ensure proper adhesion of the paint. |
3 | Apply a primer if needed, especially when painting a porous surface or changing the color dramatically. |
4 | Shake the spray paint can well for at least 1 minute to ensure proper mixing of the paint. |
5 | Hold the spray paint can approximately 10-12 inches away from the surface and apply the paint using smooth, sweeping motions. |
6 | Allow each coat to dry for the recommended time on the paint can, usually about 15 minutes to 1 hour. |
7 | Apply multiple thin coats of paint, waiting for the recommended drying time between each coat, until you achieve the desired coverage and gloss level. |
8 | Allow the final coat of paint to dry for at least 24 hours before handling or using the painted object. |
Mimicking Spray Paint Effects with Traditional Paint
Achieving the finish and texture of spray paint using regular paint can be a daunting task, but with the right techniques and tools, you can mimic the appearance of spray paint effectively.
• Choosing the Right Paint
The first step in achieving a spray-paint-like effect is to select the most suitable paint for the job. An acrylic-based paint is recommended due to its quick drying time, durability, and ease of use.
Moreover, it adheres well to various surfaces, including wood, metal, and plastic. You can find a wide range of acrylic paints from your local paint or hobby store.
Choosing a satin or semi-gloss finish is advised, as these finishes closely resembles the texture and shine of spray paint. Furthermore, having a satin or semi-gloss finish helps achieve a smoother surface, providing a more spray-paint-like appearance.
• Preparing the Surface
Proper surface preparation is crucial to obtain a smooth and even finish. Start by cleaning the surface thoroughly to remove any dirt, grease, or debris. Use a mild detergent or cleaning solution to scrub the surface gently, then allow it to dry completely.
For surfaces with existing paint, it is essential to sand them lightly with fine-grit sandpaper (around 220 grit). This step helps to remove any imperfections, resulting in a more even surface for your paint application. Additionally, it promotes better adhesion between the surface and the paint.
Once you’ve sanded the surface, remove any dust or residue with a damp cloth or tack cloth. Finally, apply a high-quality primer and let it dry according to the manufacturer’s instructions.
• Applying the Paint
Now that your surface is prepped and primed, you’re ready to apply the paint. Remember that the key to achieving a spray-paint-like finish is to apply thin, even coats of paint.
– Tools and Techniques
Using an airbrush or an HVLP (high-volume, low-pressure), paint sprayer is recommended, as they provide the closest resemblance to spray paint in terms of application and finish. Both tools atomize the paint into fine droplets, ensuring a smooth, even coat with no brush strokes.
If you don’t have access to an airbrush or paint sprayer, a high-quality paintbrush or foam roller can also yield satisfactory results. Opt for a brush with synthetic bristles or a foam roller with a low nap, as these are more likely to produce smoother finishes.
When applying paint with a brush or roller, be sure to use long, straight strokes while maintaining even pressure. This technique helps avoid visible brush strokes and provides a more uniform finish.
– Tips for a Flawless Finish
- Thinning the paint: Thinning your acrylic paint with water or a paint thinner designed for acrylics is essential for a smoother application. The ideal consistency should be similar to that of milk; however, do not over-thin the paint, as it may weaken its adhesion.
- Multiple thin coats: Applying several thin coats is better than applying one thick coat. Thin coats dry more quickly and evenly, resulting in fewer imperfections such as drips, sags, or uneven texture.
- Sanding between coats: For an ultra-smooth finish, lightly sand the surface with fine-grit sandpaper (around 400-600 grit) between each coat of paint. Remove any dust or residue with a damp cloth or tack cloth before applying the next coat.
- Drying time: Allow each coat to dry according to the manufacturer’s instructions before applying the next one. Patience is crucial, as insufficient drying time may result in an irregular or uneven finish.
• Sealing and Protecting the Paint
To protect the paint and further enhance the spray-paint-like finish, apply a clear coat of satin or semi-gloss polyurethane or varnish.
Follow the same application technique used for the paint, ensuring a thin, even coat. If needed, lightly sand the surface with fine-grit sandpaper (around 600 grit) between coats, removing any dust or residue with a damp cloth or tack cloth.
By following these recommendations and techniques, you will be able to create a paint finish that resembles the texture, shine, and quality of spray paint. With practice and patience, you can achieve professional-looking results using regular paint.
Step | Instructions |
|---|---|
1 | Choose a paint suitable for your project. Acrylic paints are recommended because they can be thinned down and dry quickly. |
2 | Thin the paint using a suitable thinning agent. For acrylic paint, you can use water or an acrylic medium. The paint should be thin enough to pass through a spray bottle nozzle but not too watery. |
3 | Test the thinned paint on a small area or sample piece to ensure proper spray consistency. |
4 | Fill a spray bottle with the thinned paint. Make sure the nozzle is clean and unclogged. Choose a nozzle with an adjustable spray pattern for better control. |
5 | Prepare your work area. Lay down a drop cloth or tarp to protect your surfaces, and make sure your project is in a well-ventilated area. |
6 | Apply the paint by spraying even, sweeping motions. Hold the spray bottle about 10-12 inches away from the surface. Apply multiple thin coats for even coverage. |
7 | Allow each coat to dry before applying the next one. The drying time will depend on the paint and thinning agent used. |
8 | Once you have achieved your desired coverage and finish, allow the paint to dry completely. |