Even Paint Finish With Caulk And Sealant. What Pros Say
Achieving an even paint finish with caulk and sealant may seem daunting, but with the right guidance, it is a breeze. I have the perfect tips and techniques to ensure your paint job will look professionally done every time—no more uneven surfaces or visible cracks, just smooth, consistent paint that lasts.
Even paint finish with caulk and sealant:
To achieve a smooth paint finish using caulk and sealant, properly prepare the surface by cleaning it and removing any old paint or imperfections. Apply the caulk or sealant evenly with a caulking gun, smoothing it out using a damp cloth, tool, or silicone spatula before it dries. Allow adequate drying time according to the manufacturer’s instructions before painting the surface with a primer and high-quality paint in thin, even coats.

Discover the secrets to achieving a flawless paint finish using caulk and sealant. Learn from experts how these materials can enhance your painting projects and deliver professional-looking results. Read on to unveil the best techniques, tips, and tricks to make your surfaces stand out. Don’t miss it!
Contents
- 1 Achieve a Smooth Paint Finish Using Caulk and Sealant
- 2 Attaining a Uniform Finish with Sealant Application
- 2.1 • Choose the Right Sealant for the Job
- 2.2 • Preparing the Surface
- 2.3 • Gather Your Tools and Materials
- 2.4 • Apply the Masking Tape
- 2.5 • Load the Sealant Applicator
- 2.6 • Applying the Sealant
- 2.7 • Smoothing the Sealant
- 2.8 • Remove the Masking Tape
- 2.9 • Allow the Sealant to Dry
- 2.10 • Maintenance and Upkeep
- 2.11 • Conclusion
- 3 Creating Precise Lines with Painter’s Tape and Caulk
- 4 Simultaneously Caulking and Painting: Is it Possible?
- 5 Is Caulking a Standard Practice for Professional Painters?
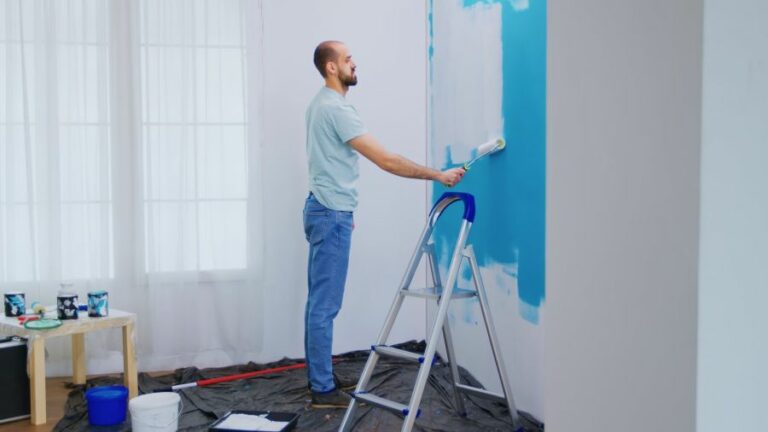
Achieve a Smooth Paint Finish Using Caulk and Sealant
It’s essential to achieve an even and smooth paint finish when undertaking any painting project. One of the best ways to achieve this is by using the right combination of caulk and sealant.
• The Importance of Caulk and Sealant in a Paint Project
Caulk and sealants play a crucial role in ensuring adhesion, sealing gaps and cracks, as well as delivering a smooth surface for painting. They contribute significantly to the final appearance of your painted surface, as well as the longevity of the paint job.
By using the correct caulk and sealant, you can prevent potential problems such as cracking and peeling.
– Choosing the Right Caulk and Sealant for Your Project
Different types of caulk and sealant are designed for various applications. Therefore, selecting the most suitable product for your specific project is crucial. Some considerations to bear in mind include:
- Material compatibility: Ensure that the caulk or sealant you choose is compatible with the surface you’ll be applying it.
- Paintability: Ensure that the caulk or sealant you choose can be painted over.
- Durability: The quality and longevity of a caulk or sealant can significantly impact the final outcome and lifespan of your paint job.
• Practical Tips for Applying Caulk and Sealant
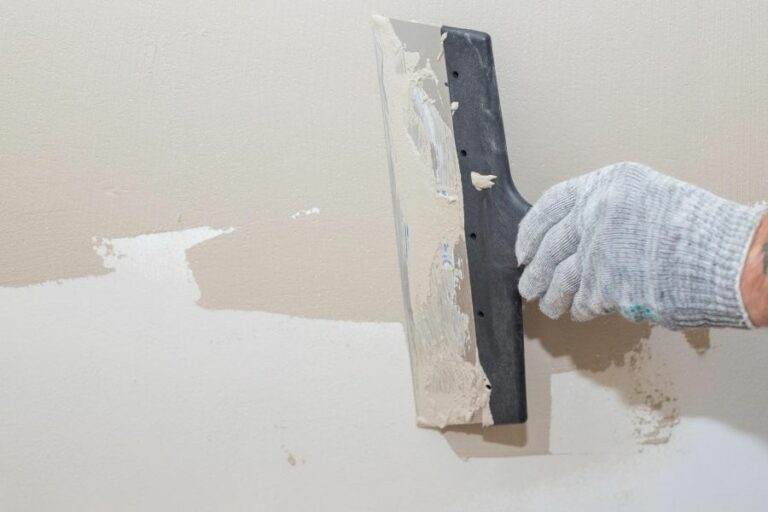
– Proper Surface Preparation
Before making any caulk or sealant application, it’s essential first to clean and prepare the surface. This process involves:
- Cleaning the surface thoroughly to remove any dirt, dust, or loose paint.
- If required, use a scraper, sandpaper, or a wire brush to remove old paint or other imperfections.
- Make sure the surface is dry before applying caulk or sealant.
– Achieving Smooth Caulk and Sealant Lines
To attain an even paint finish, it’s important to have smooth caulk and sealant lines. To accomplish this, you can:
- Use a caulking gun with a steady hand and a smooth, continuous motion.
- Apply consistent pressure on the trigger while moving the gun at an even pace.
- Utilize an appropriate size tip for the caulking gun to achieve the desired bead width.
– Tooling and Smoothing Caulk and Sealant
After applying the caulk or sealant, you’ll want to smooth it out to ensure an even surface for painting. There are several techniques you can use to accomplish this:
- Use your finger, wrapped in a damp cloth, to smooth the caulk or sealant.
- Alternatively, employ a caulking tool or a silicone spatula to smooth the applied caulk or sealant.
- Make sure to do this before the caulk or sealant starts to dry and skin over.
– Allow Caulk and Sealant to Dry Properly
To get the best results from your caulk and sealant application, allow ample time for drying before proceeding with your paint job. Follow the manufacturer’s recommended drying time, typically found on the product label.
Drying times can vary depending on factors such as temperature and humidity. As you wait for the caulk or sealant to dry, it will shrink slightly, so it’s essential to ensure adequate drying time to avoid inconsistencies in the final paint finish.
• Painting Over Caulk and Sealant for an Even Finish
After ensuring that the caulk and sealant have properly dried, it’s time to begin painting. Follow these procedures to achieve an even paint finish:
- Use a high-quality paint primer, which can enhance the paint’s adhesion to the caulked surface.
- Utilize a suitable brush or roller, depending on the size and texture of the surface being painted.
- Apply the paint in thin, even coats, and avoid overloading your brush or roller with paint.
– Helpful Tips for an Even Paint Finish
Here are a few additional practical tips for achieving the best results when painting over caulk and sealant:
- Observe the recommended paint drying times between coats.
- In case any imperfections or unevenness become apparent after the first coat, do some light sanding with fine-grit sandpaper in between coats.
- Always work in well-lit conditions to ensure even paint coverage.
Achieving an even paint finish can significantly improve the visual appeal and longevity of your paint job. By applying these tips and techniques when working with caulk and sealant, you can ensure a smooth, professional-looking finish in your painting projects.
Attaining a Uniform Finish with Sealant Application
A well-applied sealant can make all the difference in the appearance and longevity of various surfaces. Whether it’s for your bathroom tiles, kitchen countertop, or wooden furniture, ensuring an even finish with a sealant is crucial.
An expertly applied sealant prevents water damage, mold, and mildew and prolongs the life of the material.
• Choose the Right Sealant for the Job
Selecting the right sealant is imperative for a successful application. Some of the common types include silicone, acrylic, and polyurethane. Each has its unique properties and usage guidelines.
I recommend consulting the manufacturer’s guidelines to choose the best sealant for your specific project.
• Preparing the Surface
A clean and dry surface is essential for the sealant to adhere properly. Begin by removing any existing sealant or caulking material using a scraper, and then thoroughly clean the surface with a suitable cleaning agent.
Ensure the surface is free of dust, debris, and any residue before moving on to the next step.
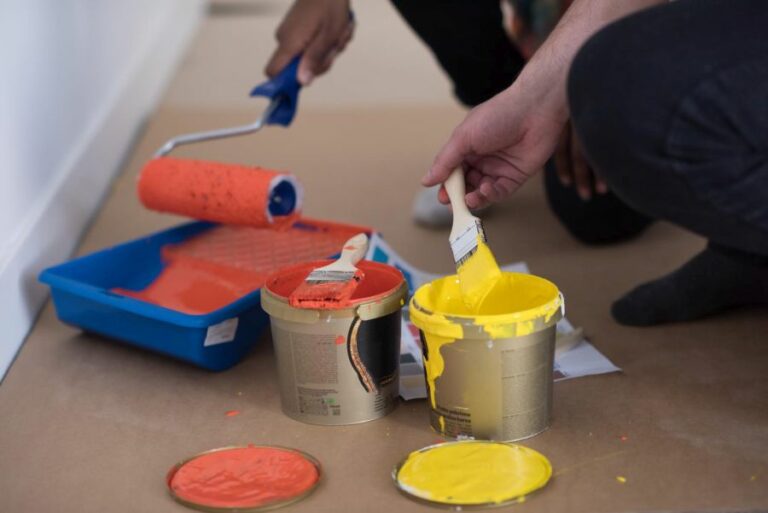
• Gather Your Tools and Materials
Gather the necessary tools and materials needed for the job. This includes:
- Sealant
- Sealant applicator or caulking gun
- Masking tape
- Spatula or fine-edge tool
- Damp cloth or sponge
- Safety gear (gloves, goggles)
• Apply the Masking Tape
To achieve clean lines and a consistent finish, apply masking tape around the area where the sealant will be applied. This technique helps to create a barrier, preventing the sealant from spreading beyond the intended area.
• Load the Sealant Applicator
Cut the sealant nozzle at an angle, ensuring the opening size matches the desired bead width. Load the sealant into the caulking gun or applicator, and squeeze the trigger gently until the sealant flows out consistently.
• Applying the Sealant
Hold the applicator at a 45-degree angle to the surface, and apply a steady and consistent bead of sealant along the joint, ensuring full coverage while maintaining even pressure. It is best to start from the furthest point and work your way toward your body to avoid smearing the freshly applied sealant.
• Smoothing the Sealant
Once you have applied the sealant along the entire joint, use a spatula or fine-edge tool to smooth the material. Working at a 45-degree angle, glide the tool along the joint to remove excess and create a well-finished, even surface.
Wipe the edge of the tool on a damp cloth or sponge to remove the excess sealant after each pass.
• Remove the Masking Tape
Carefully remove the masking tape before the sealant is dry. This ensures a crisp, clean line and prevents the tape from damaging the newly applied sealant.
• Allow the Sealant to Dry
Follow the manufacturer’s guidelines for curing time to allow the sealant to set and achieve optimal adhesion. Typically, the minimum cure time ranges from 24 to 48 hours, but it may vary depending on the sealant type and environmental conditions.
• Maintenance and Upkeep
Inspect the sealed area periodically to ensure it remains in good condition. Over time, wear and tear, UV exposure, and temperature fluctuations can deteriorate the sealant. In such cases, replace the damaged sealant by following the aforementioned steps.
• Conclusion
Achieving an even finish with sealants is a skill that requires practice and patience. Following these steps, along with regular maintenance and periodic inspections, will ensure a professional and durable result for any sealant application project.
Step | Action |
|---|---|
1 | Clean the surface thoroughly to ensure there is no dust or debris. |
2 | Prepare the sealant by cutting the nozzle at an angle and puncturing the seal inside the tube. |
3 | Apply the sealant evenly using a sealant gun along the desired area. |
4 | Use a sealant shaping tool or a wet finger to smooth out the sealant, making sure to apply consistent pressure. |
5 | Wipe away any excess sealant with a damp cloth, ensuring a clean and even finish. |
6 | Allow the sealant to cure for the recommended time as per the manufacturer’s instructions. |
Creating Precise Lines with Painter’s Tape and Caulk
Creating perfectly straight lines when painting is crucial for achieving a professional and clean appearance. One effective method for doing this is by using painter’s tape and caulk.
• Necessary Materials
To get started, collect the following materials:
- Painter’s tape
- Caulk
- Caulking gun
- Paintbrush or paint roller
- Utility knife or scissors
- Damp cloth or sponge
• Step 1: Prepare the Surface
Begin by cleaning the surface you plan to paint, removing any dust or debris. This will help the painter’s tape adhere properly for better results.
• Step 2: Apply the Painters Tape
Carefully apply the painter’s tape along the edges of the area you plan to paint. Make sure the tape is straight and pressed firmly against the surface, leaving no gaps or wrinkles that could allow the paint to seep underneath.
– Tip: Use a Longer Piece of Tape
When applying painter’s tape, using a longer piece will help maintain a straight line. This is especially important when working with larger surfaces.
• Step 3: Apply the Caulk
Load the caulking gun with caulk and cut the tip at a 45-degree angle. Apply a thin, continuous bead of caulk along the tape’s edge, ensuring there are no gaps or breaks. The goal is to create a seal between the tape and the surface to prevent paint from seeping under the tape.
– Tip: Choose the Right Caulk
I recommend using a clear, paintable caulk or a caulk that matches the color of your paint for best results. Silicone caulk is not recommended, as it is not paintable.
• Step 4: Smooth the Caulk
Using a damp cloth, gently smooth out the caulk bead, removing excess caulk, and ensuring the entire edge of the tape is sealed. Do not apply too much pressure, as this may cause the caulk to seep under the tape or create an uneven surface.
• Step 5: Begin Painting
Allow the caulk to dry according to the manufacturer’s instructions, usually for a few hours. Once dry, begin painting the desired area using a paintbrush or roller. Make sure to paint over the edge of the caulk to ensure a seamless transition from the painted area to the taped-off section.
– Tip: Use a Quality Paintbrush
Using a high-quality paintbrush or roller will provide better coverage and a smoother application. This will result in a more professional finish.
• Step 6: Remove the Painters Tape
Before the paint dries completely, carefully remove the painter’s tape by pulling it away from the painted area at a 45-degree angle. This will help prevent any paint from peeling off with the tape.
– Tip: Remove Tape While the Paint is Still Wet
Removing the painter’s tape while the paint is still wet will help prevent any paint from sticking to the tape and peeling off when removed. However, be cautious not to smudge the wet paint in the process.
• Step 7: Inspect and Touch-Up
Inspect the painted area for any imperfections, and touch up as needed with a small paintbrush. Allow the paint to dry completely before removing any protective coverings or rehanging decorations.
• Conclusion
By using painter’s tape and caulk properly, you can achieve perfectly straight lines and a professional finish for your painting project. Keep these tips and steps in mind, and you’ll have a beautifully painted surface in no time.
Step | Description |
|---|---|
1 | Measure and mark the line you want to create using a ruler or straight edge. |
2 | Apply painter’s tape along the marked line, ensuring that the edge of the tape is aligned with the line. |
3 | Press down firmly on the edge of the tape to ensure a good seal and prevent the caulk from bleeding under the tape. |
4 | Apply a thin bead of paintable caulk along the edge of the tape using a caulking gun. |
5 | Use a damp sponge or your finger to smooth out the bead of caulk, making sure it fills any gaps between the tape and the surface. |
6 | Before the caulk dries, carefully and slowly remove the painter’s tape, peeling away from the caulk line at a 45-degree angle. |
7 | Allow the caulk to dry completely according to the manufacturer’s instructions before painting or applying any additional finishes. |
Simultaneously Caulking and Painting: Is it Possible?
Caulking and painting may overlap during a renovation or maintenance process, but is it possible to do them at the same time? The quick answer is no; it is not recommended to do both tasks simultaneously.
• Importance of Proper Preparation
– Importance of Caulking
Caulking helps in creating a seamless, airtight seal around your windows, doors, trim, and other joints. It prevents moisture intrusion and drafts and reduces energy loss.
Choosing the right caulk (silicone, acrylic, or hybrid) and properly applying it are vital steps to ensure long-lasting and optimum performance.
– Importance of Painting
Painting adds visual appeal and protects surfaces from harsh elements, wear, and tear. Proper surface preparation, choosing the right paint type (acrylic, water-based, or oil-based), and using the appropriate tools (brushes, rollers, or sprayers) are essential aspects to consider in every paint job.
• Steps to Properly Apply Caulk and Paint
– Step 1: Surface Preparation
- Thoroughly clean the surface, removing dirt, dust, and grease.
- Remove old caulk and paint with a scraper or a caulk remover.
- Fill any nail holes with filler and sand the surface if needed.
– Step 2: Applying Caulk
- Choose the appropriate caulk type for your project.
- Cut the nozzle of the caulk tube to a 45-degree angle.
- Apply caulk using a caulking gun by holding it at a 45-degree angle and gradually moving it across the joints.
- Smooth the caulk with a wet finger or a caulk smoothing tool.
– Step 3: Allow Caulk to Dry
- Check the manufacturer’s drying time recommendations, usually between 30 minutes to 24 hours.
- Let the caulk dry completely before moving on to the painting process.
– Step 4: Applying Primer
- Use a quality primer to ensure better paint adhesion and a more even finish.
- Choose a primer that is compatible with both the surface material and the paint you have selected.
- Allow the primer to dry according to the manufacturer’s recommendations.
– Step 5: Painting
- Choose the desired paint color and finish (satin, eggshell, flat, glossy, or semi-glossy).
- Use appropriate tools like brushes, rollers, or sprayers for a smooth and even application.
- Apply the paint in a systematic way, starting from the top and working your way down.
- Allow the first coat to dry, and apply a second coat if necessary.
• Reasons for Separating Caulk and Paint Processes
– Adhesion Problems
Applying paint over wet caulk can prevent the caulk from adhering correctly to the surface, diminishing its performance and longevity. Similarly, wet paint can prevent the caulk from curing properly, leading to cracks and gaps in the future.
– Appearance Issues
Wet caulk, when mixed with paint, may create an uneven and unattractive appearance. By allowing the caulk to dry and cure properly, you can ensure a neat and uniform finish.
– Longevity Concerns
To uphold the integrity of the project, it is essential to follow the manufacturer’s recommendations for drying times. This will allow both the caulk and the paint to cure and perform optimally in the long run.
• Personal Recommendations
- Make sure to read and follow the manufacturer’s instructions and safety guidelines for both the caulking and painting processes.
- Choose high-quality caulking and painting supplies to ensure the longevity of the project.
- Do not rush through the preparation or application stages – patience is key to achieving a professional-looking result.
- When unsure, consulting with a professional is always recommended.
In conclusion, while caulking and painting may seem like tasks that can be completed simultaneously, they should not be attempted simultaneously. By following the proper steps and allowing sufficient time for drying and curing, you can achieve a long-lasting, visually appealing result.
For useful information on caulking and painting projects, visit the U.S. Environmental Protection Agency’s website.
Is Caulking a Standard Practice for Professional Painters?
• Importance of Caulking in Painting Projects
Caulking is an essential step in any painting project. It is the process of sealing gaps, cracks, and seams with a flexible, waterproof material, such as silicone or acrylic-based sealant. This helps to prevent water damage, improve energy efficiency, and even enhance the overall appearance of the painted surfaces.
As a professional painter, I always recommend incorporating caulking into any painting project for several reasons:
- Ensuring proper adhesion: Caulking helps paint adhere better to the surfaces, making it more durable and long-lasting.
- Energy efficiency: Proper caulking can reduce drafts and increase energy efficiency in your home or building.
- Preventing water damage: By sealing gaps and cracks, caulking helps keep moisture out, thereby protecting the underlying surfaces from water damage and potential mold growth.
- Aesthetic appeal: Caulking creates a smooth and uniform appearance, ensuring that the paint job looks polished and professional.
• Professional Painters and Caulking
While some homeowners might opt to tackle caulking jobs themselves, many prefer to hire a professional painter for the task. So, do professional painters do caulking? The short answer is yes.
Most professional painters offer caulking services as part of their overall painting packages. This is advantageous for several reasons:
- Expertise: Professional painters have the skills, knowledge, and experience to properly apply caulking in a manner that ensures long-lasting results.
- Attention to detail: Professionals know how to properly prepare surfaces for caulking, ensuring that the sealant adheres well and remains durable.
- Time-saving: Hiring a professional painter to do the caulking and painting saves you time and effort, allowing you to focus on other tasks or simply enjoy your newly painted space.
• Types of Caulking Material
Caulking materials typically fall into two categories: silicone-based and acrylic-based sealants. Understanding the differences between these materials is crucial for ensuring that the right product is used for the right job.
– Silicone-Based Caulking
Silicone-based caulking is highly flexible and waterproof, making it ideal for use in areas where there is high moisture or significant temperature fluctuations. Some common applications for silicone-based caulking include:
- Bathrooms and kitchens
- Around windows and doors
- In exterior projects, such as siding and gutters
However, silicone-based caulking can be challenging to work with, as it generally requires specialized tools and techniques for proper application.
– Acrylic-Based Caulking
Acrylic-based caulking is more rigid and less flexible than silicone-based caulking, but it is also easier to work with and paint over.
It is ideal for use on interior projects, such as baseboards, crown molding, and window casings. Acrylic-based caulking is also generally more cost-effective than silicone-based caulking.
As a professional painter, I usually recommend acrylic-based caulking for most interior projects, as it offers a nice balance between performance and ease of use.
• Caulking Techniques and Tips
Proper caulking application is crucial for achieving the best results. Some professional tips for ensuring flawless caulking include:
- Surface preparation: Ensure that the surfaces to be caulked are clean, dry, and free of loose paint or debris. This will help the caulking adhere well and last longer.
- Choosing the right sealant: As discussed earlier, select the appropriate caulking material based on the specific needs of the project.
- Proper application: Use a caulking gun to dispense the sealant and ensure even application, taking care to avoid creating air bubbles or gaps.
- Tooling: Use a specialized tool or your finger dampened with water or a mild soapy solution to smooth the caulking and create a clean, even finish.
- Allow for proper curing time: Before painting over the caulk, ensure that it has fully cured, as per the manufacturer’s recommendations.
• In Conclusion
Professional painters are well-equipped to handle caulking jobs as part of your painting project. They bring the necessary expertise, attention to detail, and knowledge of materials and techniques to ensure a professional finished result.
By hiring a professional painter for your caulking needs, you can enjoy the peace of mind that comes from knowing your investment is in good hands.