Tips For Long-Lasting Paint: Surface Prep. What Pros Say
Are you tired of having to repaint your walls frequently, only to see the paint choices fade quickly and the aesthetics ruined? Say goodbye to this frustrating process because we are here to provide simple but effective solutions to make your paint last long! Follow our expert tips on surface preparation to ensure that your paint job exceeds expectations and maintains that eye-catching finish for years.
Tips for long-lasting paint: surface prep:
To achieve long-lasting paint, proper surface preparation is crucial. Thoroughly clean the surface, removing dirt and loose paint. Repair any imperfections, sand smooth, and prime before painting. Use high-quality tools and follow the paint manufacturer’s recommendations for ideal application conditions.

Ready to make your new paint job last for years to come? We’ve got you covered! Keep reading to discover essential surface prep tips that will ensure your freshly painted walls stay vibrant and protected. With our expert guidance, your dream interior is within reach. Don’t wait – read on now!
Contents
- 1 Long-Lasting Paint Tips: Effective Surface Preparation
- 2 Optimal Surface Preparation for Painting Success
- 3 Enhance Paint Durability with Proper Surface Prep
- 4 Expert Painters’ Techniques for Wall Preparation
Long-Lasting Paint Tips: Effective Surface Preparation
A Well-Prepared Surface is Key to Durable Paint
As an experienced professional, I can confidently say that proper surface preparation is the most crucial factor for achieving a long-lasting paint job. It’s worth every bit of time and effort you put into it.
Here, we’ve assembled some expert tips to help you prepare your surface like a pro and create a smooth, durable finish that will stand the test of time.
• Clean the Surface Thoroughly
Before you start sanding, scraping, or repairing, you must remove all dirt, grime, and loose paint from the surface. Clean with water and mild detergent, and use a soft bristle brush or sponge to get into all the nooks and corners.
For stubborn dirt or mold, consider using a mildew-resistant cleaner or a diluted bleach solution followed by a thorough rinse. A clean surface will provide the best possible bond for the paint.
Tip: I recommend using a pressure washer for larger exterior surfaces. It efficiently removes dirt, loose paint, and other debris, speeding up the cleaning process.
• Remove Old, Peeling, or Loose Paint
Any old paint that is unstable, peeling, or loose must be removed to ensure a proper bond with the new paint. Use a paint scraper, wire brush, or sandpaper to free the surface of any loose paint that isn’t adhering. Be careful not to gouge the surface while scraping.
Also, take necessary precautions while dealing with lead-based paints, as their dust can be hazardous.
Resource: For guidance on handling lead-based paint, visit the Environmental Protection Agency’s lead information page.
• Repair Surface Imperfections
Fill any holes or cracks using a suitable patching compound such as filler or spackling compound. Repair larger holes with a piece of drywall or wood cut to fit the opening, and secure it with screws or nails. Be sure to sand the filled area smoothly and flush with the surface to create an even appearance.
Fixing Dents and Depressions
For dented or depressed areas, use a suitable filler or putty to fill the void. Apply the filler using a putty knife, pressing firmly into the depression until it is completely filled. Once the filler has dried, sand the area until it is even and flush with the surrounding surface.
• Sand and Smooth the Surface
A smooth surface is critical for a clean, even paint job. Use sandpaper to sand down the surface, paying special attention to areas where old paint was removed, or repairs were made. Feather the edges of these areas for a seamless transition.
After sanding, use a tack cloth or vacuum to remove all sanding dust from the surface.
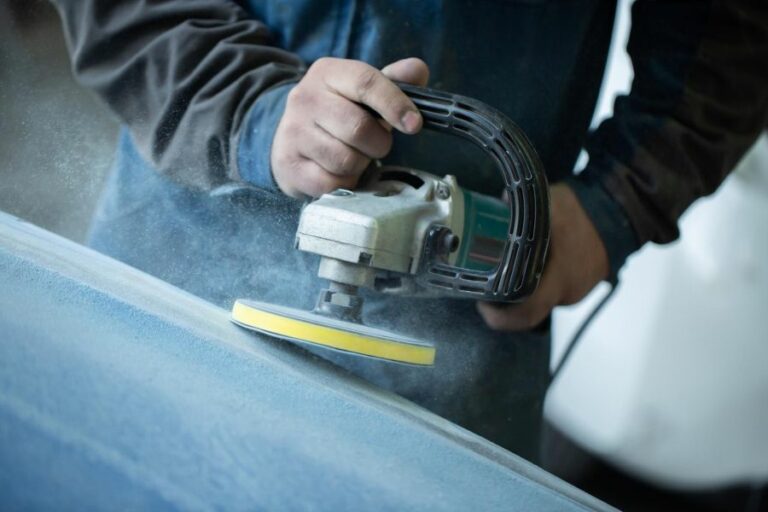
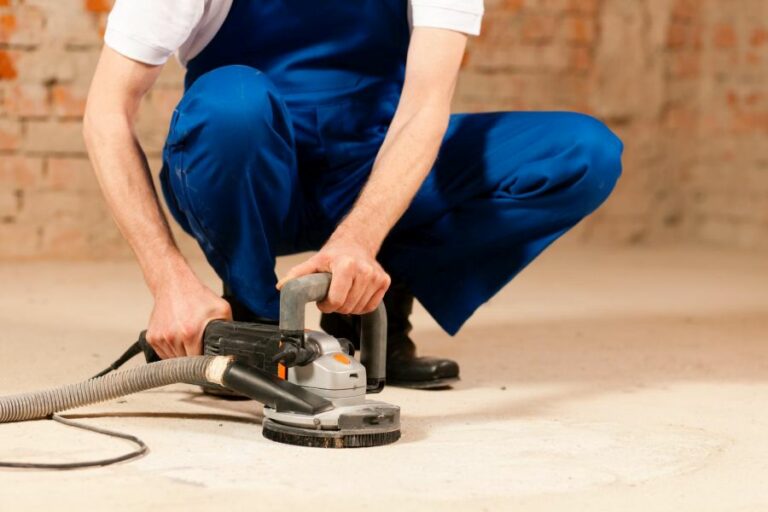
Note: For exterior surfaces, consider using a power sander or grinder to speed up the process.
• Prime the Surface
Priming ensures an even, long-lasting finish. It seals the surface, provides a solid bond for the paint, and helps achieve a uniform color. Choose a primer based on the surface material, paint type, and any specific problems like stains, odors, or moisture.
Tip: Tinting the primer can be useful for achieving an even color, especially when using bold or deep paint colors. Add a small amount of paint to the primer to create a similar shade to your topcoat.
• Protect Adjacent Areas
Before painting, protect nearby surfaces from drips and spatters with drop cloths, masking tape, or plastic sheeting. Remove or cover outlet covers, switch plates, door hardware, and window sashes to keep them paint-free.
Note: Be sure to remove masking tape immediately after painting to avoid pulling off fresh paint or leaving adhesive residue.
• Practice Proper Painting Techniques
Finally, when it’s time to paint, use high-quality brushes, rollers, and painting tools that are suited for the specific paint and surface type. Be mindful of the paint manufacturer’s recommended application temperature and humidity levels to achieve the best finish possible.
Follow these surface prep tips to ensure your paint job lasts for years to come – it’s worth the extra effort. The better you prepare your surface, the more professional-looking and durable your finished paint job will be.
Optimal Surface Preparation for Painting Success
Proper surface preparation is essential for a successful painting project. It ensures that the paint adheres correctly and provides a long-lasting, durable finish.
• Surface Cleaning and General Preparation
– Cleaning the Surface
Before applying paint, it is crucial to remove dirt, dust, and debris from the surface. A clean surface will promote better paint adhesion and allow for a smoother finish.
For this purpose, using a mild detergent and water solution or a commercial cleaner formulated for that specific surface (e.g., wood or metal) can be helpful. Additionally, for exterior surfaces or stubborn stains, a power washer can be an excellent tool for cleaning.
Recommendation: When using a power washer, begin with a lower pressure setting and gradually increase the pressure as needed to avoid damaging the surface.
– Sanding and Smoothing
Sanding is an important step in surface preparation, as it helps to remove old, peeling paint and create a more even surface to promote better paint adhesion. Depending on the surface’s condition, different sanding tools and grits may be required, such as sandpaper, a sanding block, or an electric sander.
When sanding, be sure to follow the grain of the wood (if applicable) and work in a consistent, methodical manner.
Recommendation: Start with coarser-grit sandpaper (e.g., 80 or 100 grit) to remove major imperfections and gradually work up to finer grit (e.g., 220 grit) for a smooth finish.
– Patching and Repairing
Damages such as cracks, dents, or holes must be repaired before painting, as the paint will not effectively mask these imperfections. For wood surfaces, wood filler or epoxy can be used to fill and repair damage.
For drywall, joint compound or premixed patching materials are suitable. Follow the manufacturer’s instructions for the repair material and sand the area smoothly once it has dried.
Recommendation: When using wood filler, it is wise to overfill the area slightly. This allows for inevitable shrinkage during the drying process and ensures a smooth, level surface after sanding.
• Prepping Specific Surfaces
– Wood Surfaces
When preparing wood surfaces for painting, the goal is to create a smooth, clean, and dry surface for optimal paint adhesion.
- Remove any loose paint or wood fibers with a scraper or putty knife.
- Clean the wood using a mild detergent solution or wood cleaner, then rinse with water and allow it to dry completely.
- Sand the wood to create a smooth surface, following the wood grain and working in a consistent pattern.
- Fix any damages, such as holes or dents, with wood filler or epoxy and sand the area smoothly after it has dried.
- Wipe the wood down with a tack cloth or damp cloth to remove any sanding residue.
Recommendation: For wood surfaces exposed to moisture or prone to swelling, consider using an oil-based primer to seal the wood and provide a water-resistant foundation for your paint.
– Drywall and Plaster
Repairing any damages, cleaning the surface, and using the appropriate primer is crucial for successful paint application on drywall and plaster surfaces.
- Patch any damages, such as dents or holes, using a joint compound or a premixed patching material, then sand the area smoothly after it has dried.
- Sand the entire surface lightly with fine-grit sandpaper to create a more receptive surface for the paint.
- Clean the surface, removing dust, dirt, and debris with a vacuum or a damp cloth.
- If the surface has not previously been painted, apply a primer designed for drywall or plaster to create an even base for your paint.
Recommendation: For areas with high moisture or humidity, such as bathrooms or kitchens, use a mold-resistant primer to prevent potential mold issues.
– Metal Surfaces
Remove any rust or oxidation, clean the surface, and apply a metal-specific primer for optimal paint adhesion on metal surfaces.
- Scrape away loose or peeling paint with a wire brush, scraper, or power sander.
- Remove rust or oxidization using a wire brush, naval jelly, or rust converter.
- Clean the metal surface with a solvent cleaner or mild detergent solution, then rinse and allow it to dry completely.
- Apply a metal-specific primer to create a secure bond between the paint and the metal surface.
Recommendation: When applying paint to metal surfaces, ensure that the paint product is specifically formulated for metal use to ensure a durable, long-lasting finish.
• Final Thoughts on Surface Preparation for Painting
In conclusion, proper surface preparation is a critical step for a successful painting project. Ensuring a clean, dry, and damage-free surface will promote better paint adhesion and result in a long-lasting, smooth, and attractive finish.
Ultimately, thorough preparation and the use of appropriate products and techniques will save time and effort in the long run, ensuring a high-quality outcome for your painting project.
Step | Description |
|---|---|
1 | Clean the surface by removing dirt, dust, and grease. |
2 | Scrape off any loose or peeling paint. |
3 | Sand the surface to even out rough spots and create a smooth surface for the paint to adhere to. |
4 | Fill in any holes or cracks with filler, and then sand the filled areas smooth. |
5 | Prime the surface with a suitable primer to ensure even coverage and proper adhesion of the paint. |
6 | Tape off any areas that should not be painted, such as trim or hardware. |
Enhance Paint Durability with Proper Surface Prep
A well-painted surface enhances the beauty of any space. However, over time, elements such as sunlight, rain, and everyday wear and tear can cause the paint to deteriorate. Hence, it is essential to make a painted surface more durable.
• Selecting the Appropriate Paint
The first step in ensuring a durable painted surface is choosing the right paint. Generally, high-quality paints tend to be more durable than those of lesser quality. While they may be slightly more expensive, the long-term benefits are worth the cost.
– Acrylic vs. Oil-Based Paints
There are two primary types of paints: acrylic and oil-based. Acrylic paints dry faster, are water-soluble and have low VOC (Volatile Organic Compound) levels. They are ideal for indoor and outdoor use on a variety of surfaces.
Oil-based paints, on the other hand, are best suited for metal and wood surfaces, as they offer a high level of resistance to moisture and abrasion. They tend to take longer to dry and have higher VOC levels.
As a rule of thumb, choose acrylic paint for most surfaces while picking oil-based paint when painting surfaces that require added protection from moisture.
• Surface Preparation
Proper surface preparation is crucial in ensuring a long-lasting paint job. In my experience, most paint failures result from inadequate surface preparation.
– Cleaning the Surface
Before applying paint, thoroughly clean the surface to remove dirt, dust, and any debris. For exterior surfaces, using a pressure washer with detergent is an efficient method. For interior walls, a damp cloth or sponge, along with mild soap, can suffice.
– Repairing Damaged Surfaces
Inspect the surface for any damages, such as cracks or holes. These must be repaired to create a smooth surface for painting. Use patching compounds, wood fillers, or other repair materials, depending on the surface.
– Sanding and Priming
Sanding the surface is necessary to create a proper bonding between the paint and the surface. Use appropriate grit sandpaper and sand the surface until it is smooth. After sanding, apply a high-quality primer to the surface. Priming improves paint adhesion and ensures an even and durable finish.
• Proper Application Techniques
The way you apply your paint is just as important as the type of paint you choose. Here are some application tips that will help ensure a durable paint job:
– Using the Right Tools
Invest in high-quality brushes, rollers, and other painting tools. Good-quality brushes and rollers tend to yield better coverage and are less likely to leave brush marks or lint behind.
– Painting in Ideal Conditions
Avoid painting in extreme temperatures or humidity levels. For exterior surfaces, try to paint during mild temperatures and on days when the humidity is low. For interior painting, ensure that the room is well-ventilated and temperature-controlled.
– Applying the Correct Number of Coats
Applying multiple coats of paint not only improves the appearance but also adds durability to the surface. The number of coats depends on the paint type, color, and surface texture. Generally, two coats are recommended for most surfaces.
– Allowing Adequate Drying Time
Allowing enough time for the paint to dry between coats is essential for a durable finish. Follow the drying time recommendations provided on the paint can, as rushing this process can lead to paint failure or an uneven finish.
• Additional Protection for Painted Surfaces
Here are some additional measures that can be taken to extend the life of your painted surfaces:
– Use of Protective Coatings
For surfaces exposed to harsh conditions or high-traffic areas, consider applying a clear protective coating. These coatings, available in different finishes, add an extra layer of protection from wear and tear.
– Maintenance and Cleaning
Regular maintenance and cleaning can prolong the life of your painted surfaces. Gently clean interior surfaces with a damp cloth while pressure washing exterior surfaces at least once a year to help remove any dirt and debris.
– Inspect and Touch-Up
Regularly inspect your painted surfaces for any signs of deterioration, such as peeling or blistering. Addressing these issues promptly and performing touch-ups can prevent further damage and preserve the longevity of the paint job.
In conclusion, ensuring the durability of a painted surface requires careful attention to the paints used, proper surface preparation, and correct application techniques. Utilizing these tips and recommendations will result in a long-lasting and beautiful paint job.
Step | Instructions |
|---|---|
1 | Choose the right type of paint. Durable surfaces usually require high-quality paint that is suitable for the material you’re painting on. |
2 | Prepare the surface. Ensure the surface is clean and smooth by sanding, cleaning, and repairing any damage or imperfections. |
3 | Use the right type of primer. A high-quality primer will help the paint adhere to the surface and ensure a smoother, more durable finish. |
4 | Apply the paint in thin, even coats. This will help ensure better adhesion and durability over time. |
5 | Allow the paint to dry completely between coats. Follow the manufacturer’s recommendations for drying times. |
6 | Apply a protective topcoat or sealer. This will help protect the painted surface from scratches, stains, and other damage, ensuring it remains more durable over time. |
7 | Keep the painted surface clean and well-maintained. Regular cleaning and maintenance will help prevent damage and keep the surface looking better for longer. |
Expert Painters’ Techniques for Wall Preparation
• Importance of Wall Preparation
Proper wall preparation is an essential step in achieving a high-quality paint job. Skipping the prep work can lead to uneven paint application, poor adhesion, and an overall lower-quality outcome. A smooth, clean surface allows the paint to adhere correctly and deliver a flawless finish.
• Cleaning the Walls
Before starting the preparation process, it is essential to clean the wall thoroughly. Dust, dirt, and grease can accumulate on the surface and impact paint adhesion. The following steps ensure walls are properly cleaned:
- Remove all hanging objects, such as pictures, mirrors, and shelves.
- Move furniture away from the walls or cover it with a drop cloth.
- Using a microfiber cloth or soft-bristled broom, dust the walls and baseboards to remove any loose dirt and cobwebs.
- Mix a solution of mild detergent and water in a bucket.
- Using a soft sponge or cloth, wipe down the walls using the soapy solution.
- Rinse the walls with clean water to remove any soap residue and allow them to dry.
If the walls are damaged by mold or mildew, a bleach solution may be necessary to kill the growth before painting. Mix a cup of bleach per gallon of water and apply it to the affected areas. Allow it to sit for a few minutes, then rinse with clean water and let the wall dry completely.
• Repairing Surface Damage
Inspect the walls for any cracks, holes, or other surface imperfections that need repair. Small defects can become more noticeable after painting, so it’s essential to fix any issues before beginning. The following steps outline the repair process:
- For small holes or dents, apply a lightweight spackling compound using a putty knife. I recommend using fast-drying spackling for quicker results.
- For larger holes, apply a patch made of fiberglass mesh tape, then cover it with joint compound.
- Sand the repaired areas with fine-grit sandpaper to create a smooth surface.
- If there are any cracks in the drywall or plaster, use a utility knife to remove any loose material and patch it with a flexible crack filler.
- Once all repairs are dry and sanded, use a tack cloth to remove any dust or debris from the surface.
• Removing Old Wallpaper
If the walls are currently covered in wallpaper, it must be removed before painting. The following steps provide an efficient method for wallpaper removal:
- Loose, peeling wallpaper should be removed by hand, being careful not to damage the underlying wall surface.
- For stubborn wallpaper, consider using a wallpaper steamer or a wallpaper removal solution combined with a scraping tool.
- Once all wallpaper is removed, wash the walls with a mixture of water and mild detergent to remove any remaining adhesive residue.
- Allow the walls to dry completely before continuing with the prep work.
• Sanding the Walls
Sanding the walls creates a smooth and uniformly porous surface for the paint to adhere to. The following steps outline the proper sanding technique:
- Using fine-grit sandpaper or sanding sponge, lightly sand the entire surface of the walls, paying particular attention to any rough or uneven areas.
- Be sure to wear appropriate safety gear such as eye protection, gloves, and a dust mask to prevent inhaling fine particles.
- After sanding, use a tack cloth or vacuum to remove any dust or debris from the surface.
• Applying Primer
Primer seals the surface, improves paint adhesion and provides a uniform base for the topcoat. The following steps guide you through the primer application process:
- Choose the appropriate primer for the surface and paint type. For example, use an oil-based primer for surfaces stained by water, smoke, or grease or if you are applying an oil-based paint.
- If the walls are stained or have a strong, uneven color, consider using a stain-blocking or high-hide primer to achieve a uniform base and reduced topcoat layers.
- Apply the primer using a roller, brush, or paint sprayer, evenly covering the entire surface.
- Allow the primer to dry according to the manufacturer’s instructions before applying the paint.
By meticulously following these steps and taking the necessary time to properly prepare the walls, professional painters can achieve a flawless, long-lasting paint job that will impress clients and stand the test of time.


