Advice On Prepping Interior Surfaces. What Pros Say
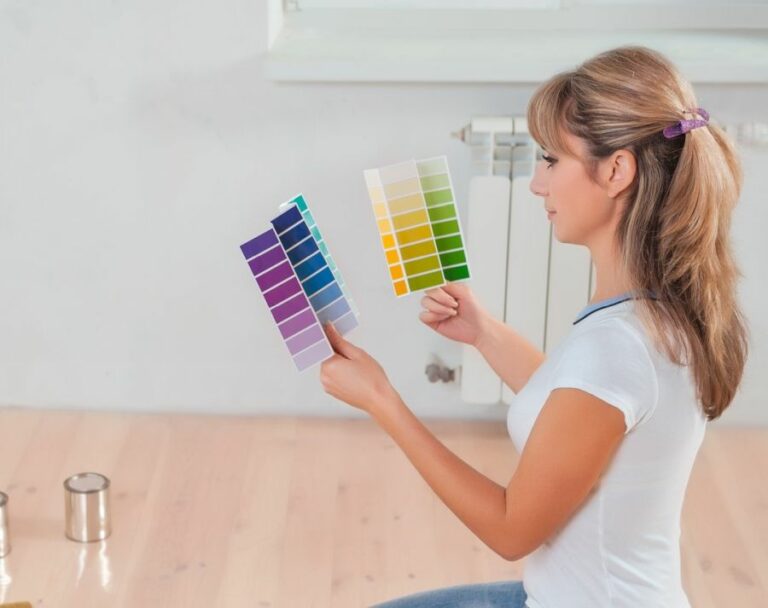
Are you looking to give your home a fresh, new look? Preparing interior surfaces for painting or wallpapering can be daunting, but don’t worry, I’ve got your back! Having helped countless people like you achieve smooth, professional-looking results, I can confidently say that with the right advice and techniques, you, too, can effectively prep your surfaces for a stunning transformation.
Advice on prepping interior surfaces:
To prep interior surfaces for painting, first assess the wall and ceiling conditions for cracks, holes, peeling paint, water damage, and other issues. Clean and degrease surfaces using a gentle cleaner, then repair any damage found. Sand the surfaces with fine-grit sandpaper and apply a high-quality primer for proper paint adhesion and coverage. Proper preparation is crucial for a professional, durable result.

Ready to give your interior space a fresh look? Our comprehensive guide on prepping interior surfaces covers all you need to know, from choosing the right materials to applying the finishing touches. Keep reading for expert advice that’ll ensure your next makeover is a success!
Contents
- 1 Prepping Interior Surfaces for Painting
- 2 Top Methods for Wall Preparation Before Painting
- 3 Effective Techniques for Prepping Surfaces for Indoor Painting
- 4 Expert Painters’ Secrets to Wall Preparation Success
- 5 Choosing the Ideal Painting Order: Trim or Walls First?
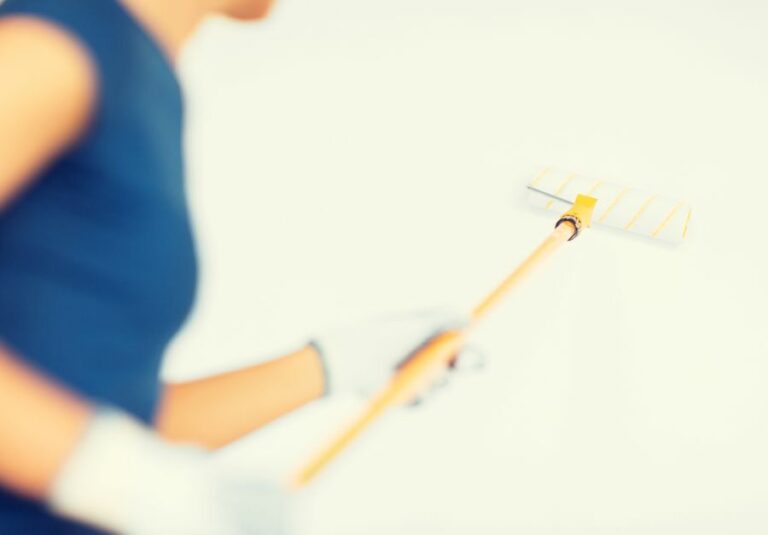
Prepping Interior Surfaces for Painting
A well-prepared surface is key to achieving a professional-looking paint job. Whether you’re a seasoned professional or new to painting, the right preparation will make all the difference in the final result.
• Assessing the Surface Condition
Before getting started with any prep work, it’s crucial to assess the condition of the walls, ceilings, and trim in your space. Look for any signs of damage or irregularities, such as:
- Cracks or holes
- Peeling paint
- Water damage
- Molding or mildew
- Loose or damaged drywall
Make a list of necessary repairs and tackle them before you begin with the actual painting process. Neglecting to address these problems may cause them to reappear after you’ve finished painting.
– Link for further reading:
Check out this helpful guide from the U.S. Department of Housing and Urban Development on assessing surfaces before painting.
• Cleaning and Degreasing
The next step in surface preparation is cleaning the walls and ceilings. This process ensures that the paint will adhere properly and create a smooth, even finish. Use a gentle, non-abrasive cleaner that won’t damage surfaces, such as a diluted dish soap solution.
- Begin by dusting off the walls and ceilings with a broom or vacuum extension.
- Wipe down the surfaces with the cleaner, working from the top down.
- Rinse the walls with clean water and a sponge to remove any soap residue.
- Allow surfaces to dry thoroughly before proceeding.
Keep in mind that areas with significant kitchen grease or tobacco smoke may require a stronger cleaning solution, such as trisodium phosphate (TSP).
• Repairing Damage
With the surfaces clean and dry, you’re now ready to tackle any necessary repairs you identified earlier. Here’s how to address the most common surface issues:
– Fill Cracks and Holes
To repair small cracks and holes, use a spackling compound or joint compound and a putty knife, following these steps:
- Apply the compound to the damaged area, pressing firmly to fill the crack or hole completely.
- Smooth the surface with the putty knife, removing any excess compound.
- Allow the compound to dry according to the manufacturer’s instructions.
- Sand the repaired area until it’s smooth, and then dust off any residue.
– Deal with Peeling Paint
For areas with peeling paint, follow these steps:
- Remove loose paint chips with a scraper or putty knife.
- Sand the edges of the remaining paint to create a smooth transition from the bare surface to the painted area.
- Dust off the surface and wipe with a damp cloth to remove any residue.
– Address Water Damage
If your wall or ceiling has water damage, you’ll need to address this issue accordingly:
- Identify and repair the source of the water damage.
- Remove any loose or damaged drywall or plaster.
- Replace the damaged area with new drywall or plaster.
- Prime the repaired area with a stain-blocking primer to prevent any water stains from seeping through the new paint.
• Sanding and Priming
After repairing any damage, it’s time to sand and prime the surfaces. Sanding will remove any remaining imperfections, while priming ensures proper paint adhesion and coverage.
– Sanding Technique
Use fine-grit sandpaper (150-220 grit) and a sanding block or pole sander for large, flat surfaces. Sand all surfaces in a circular motion, applying even pressure. Be sure to dust off the surfaces and wipe with a damp cloth after sanding.
– Priming the Surface
Applying a high-quality primer will create a uniform surface for the paint to adhere to, reducing the chances of peeling or uneven coverage. Choose a primer based on the type of paint you’ll be using (latex or oil-based). For stains or significant color changes, consider using a stain-blocking primer.
Apply the primer using a roller for large surfaces and an angled brush for cutting in along edges and corners. Allow the primer to dry according to the manufacturer’s instructions before painting.
• Final Thoughts
Proper surface preparation is essential for achieving professional results when painting any interior space. By thoroughly assessing, cleaning, repairing, and priming surfaces, you’ll set the stage for a successful painting project.
Remember, the time you invest in preparation will pay off in the long run by ensuring a smooth, durable, and long-lasting finish.
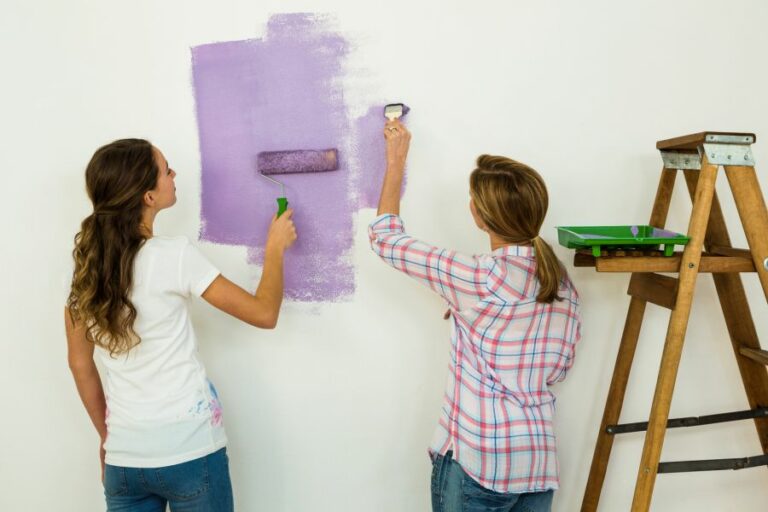
Top Methods for Wall Preparation Before Painting
Prepping walls before applying paint or wallpaper is a vital step in achieving a professional-looking outcome. Properly prepared surfaces ensure that the paint or wallpaper will adhere seamlessly, eliminate the possibility of peeling, and create a smooth, visually appealing result.
• Assessing Wall Conditions
- Initial Inspection: Begin by closely examining the walls for any damage or imperfections, such as cracks, holes, and dents. Make a note of these areas that will need repairs.
- Removing Fixtures: Remove any wall fixtures, such as outlet covers, switch plates, vents, and wall hangings. This will make it easier to clean the surface and apply paint or wallpaper.
- Identifying Problem Areas: Look for signs of moisture damage or mold, as these issues must be addressed before proceeding with wall preparation.
• Cleaning and Repairing the Walls
- Cleaning: Remove dirt, dust, and debris from the walls by wiping them down with a damp cloth. For more robust cleaning, use a solution of water and mild detergent or a specially formulated wall cleaner. Allow the walls to dry completely before proceeding with further preparation.
- Repairing Cracks and Holes: Fill any cracks or holes with a suitable patching compound or joint compound. Sand the patches smoothly, and feather the edges to blend them with the rest of the wall.
- Addressing Mold and Moisture: If mold or moisture damage is discovered during the wall assessment, it is essential to address these issues before continuing with wall preparations. Consult a professional for guidance in treating and preventing mold growth and moisture problems.
• Preparing the Surface
- Sanding: Once all repairs have been completed and the wall is clean, use fine-grit sandpaper (120-150 grit) for sanding the entire wall surface. This will help the paint or wallpaper adhesive adhere better to the surface.
- Wiping Down: After sanding, use a damp cloth to remove any dust or debris from the sanding process. Allow the wall to dry completely before proceeding.
- Priming: Apply a high-quality primer to the walls, following the manufacturer’s instructions. A primer provides a consistent base for your paint or wallpaper to adhere to and helps seal any repairs and create a smooth, even surface. Allow the primer to dry completely, as per the manufacturer’s recommendations.
• Additional Steps for Wallpaper
If you are planning to apply wallpaper to your walls, there are some additional steps to take after priming the walls.
- Sizing: Apply a wallpaper size, which is a diluted adhesive solution, to the primed walls. This will help the wallpaper adhesive adhere better and make it easier to adjust and position the wallpaper during installation.
- Seams and Corners: Prepare walls for wallpapering by paying special attention to corners and seams. Using a high-quality wallpaper liner can help to create a smooth, even surface and improve the appearance of wallpaper seams.
• Final Touches
Before applying paint or wallpaper, take a moment to re-assess the walls, checking for any imperfections or repairs that may have been missed. Address these issues as necessary.
Finally, ensure that the room is well-ventilated, all surfaces and belongings are protected, and you have all necessary equipment and materials to complete your painting or wallpapering project.
By following this comprehensive guide on the best way to prep walls, you will create a smooth, professional surface ideal for paint or wallpaper application. Taking the time to meticulously prepare your walls will ensure that you achieve an impressive, long-lasting result.
Step | Description |
|---|---|
1 | Remove any furniture, decorations, and fixtures from the walls. |
2 | Clean the walls with a solution of water and mild detergent to remove dirt, grease, and other contaminants. |
3 | Inspect the walls for any cracks or holes, and repair them using a patching compound if necessary. |
4 | sand the walls with fine-grit sandpaper to smooth out any rough spots and provide better adhesion for paint or wallpaper. |
5 | Wipe down the sanded walls with a damp cloth to remove any remaining dust or debris. |
6 | Apply a primer to the walls to ensure even coverage and a smoother finish for the final paint or wallpaper application. |
7 | Allow the primer to dry completely before applying paint or wallpaper. |
Effective Techniques for Prepping Surfaces for Indoor Painting
A well-painted interior can transform the look and feel of your home. But before you start painting, preparing the surfaces you’ll be working on is crucial. Ensuring proper preparation will help the paint adhere better, last longer, and look great.
• Cleaning the Surface
The first step in preparing any surface for paint is to clean it thoroughly. Dust, dirt, and other contaminants can cause paint to adhere poorly or look uneven. Use a damp cloth or sponge to wipe down the surface, removing any visible dirt and debris.
For stubborn stains, you may need to use a mild detergent.
If you are working with a wall that is prone to mold, it is important to use a specific cleaning solution designed to combat mold, such as a 1:3 bleach-to-water solution, which can be found from various sources like the Environmental Protection Agency’s recommendations.
• Repairing Damages
Next, inspect the surface for any cracks, holes, or other damages. These imperfections can cause paint to adhere unevenly and detract from the overall appearance of your finished project. Repair any cracks or holes using spackle or joint compound, and allow the patches to dry completely before moving on.
For larger holes or severe damage, it’s a good idea to consult with a professional to ensure the best repair job is completed on your surface.
• Sanding the Surface
Once the repairs are dry, sand the surface to create a smooth and even base for your paint. Start with coarse grit (80-100 grit) sandpaper, and then work your way up to fine grit (180-220 grit) sandpaper for a perfectly smooth finish. If your surface is already smooth, you might be able to skip this step.
Always sand in the direction of the surface’s grain for wooden surfaces. And when sanding walls or ceilings, sand in a circular motion to avoid creating scratches that will show through the paint.
• Removing Sanding Dust
After sanding, it’s essential to remove any dust or debris created during the process. Dust can prevent paint from adhering correctly and cause uneven or streaked finishes. Use a tack cloth or a slightly damp cloth to wipe away the dust, ensuring the surface is completely clean and ready for paint.
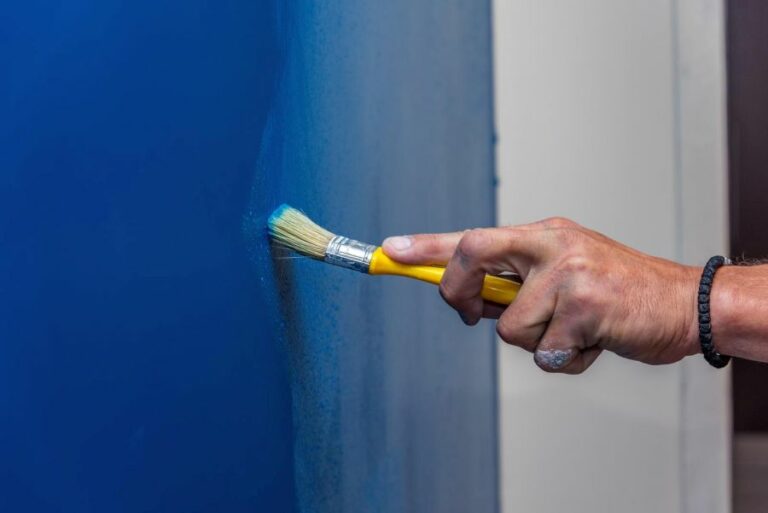
• Applying a Primer
Priming the surface is a crucial step in the preparation process. Primer helps seal the surface, provides better paint adhesion, and can improve the overall appearance of your paint job. Choose a primer that is appropriate for the type of surface you’re working on, such as drywall, wood, or masonry.
Apply the primer using a brush, roller, or paint sprayer, and allow it to dry completely before proceeding. In most cases, one coat of primer will suffice, but for surfaces with significant stains or color changes, applying a second coat might be beneficial.
• Taping Off Adjacent Surfaces
One last step before you begin painting is to use painter’s tape to protect adjacent surfaces that you don’t want to get paint on. This includes baseboards, trim, window frames, and other surrounding areas. Apply the tape securely to create a clean edge, which will help you achieve professional-looking results.
• Final Thoughts
Taking the time to properly prepare surfaces for interior paint is essential in achieving a beautiful and lasting result. By following these guidelines, you’ll ensure a smooth and even base for your paint, as well as create an environment in which the paint can adhere correctly and last for years to come.
The extra time and effort spent during the preparation stage will save you from potential headaches and touch-ups in the future.
Step | Action |
|---|---|
1 | Remove furniture and belongings from the room, or cover them with drop cloths to protect them from dust and paint. |
2 | Clean the surface with a mild detergent and water mixture to remove dirt, grease, and other contaminants. |
3 | Repair any damage to the surface, such as holes or cracks, with a suitable filler or repair compound. |
4 | Sand the surface with fine-grit sandpaper to remove any rough spots or uneven areas and to help the paint adhere better. |
5 | Wipe down the surface with a damp cloth to remove any dust or debris left behind after sanding. |
6 | Apply a coat of primer to the surface to provide a uniform base for the paint and to help ensure better coverage and adhesion. |
7 | Allow the primer to dry according to the manufacturer’s instructions before applying the paint. |
Expert Painters’ Secrets to Wall Preparation Success
As an experienced painter, I can assure you that proper wall preparation is the key to achieving a flawless and long-lasting paint job.
• Cleaning the Walls
The first step to any painting project is to ensure your working area and the walls are clean and free of dirt, dust, and grease. Over time, walls accrue layers of grime that can affect the adhesion of paint significantly.
– Removing Dirt and Dust
- Start by dusting: Use a soft brush, a broom, or a vacuum cleaner with a brush attachment to remove any loose dust and cobwebs from the walls and ceiling. Pay close attention to corners and edges.
- Wash the walls: Prepare a mild detergent solution using warm water and a few drops of liquid dish soap. Gently wash the walls using a sponge or a soft cloth, working from top to bottom. It’s best to work in small sections.
- Rinse thoroughly: Wipe the walls with a clean, damp cloth or sponge to remove any soap residue. It’s important to rinse thoroughly, as any leftover soap can affect the paint job.
– Removing Grease
In high-traffic areas such as kitchens or bathrooms, walls may have built-up layers of grease that can prevent paint from adhering properly. In such cases, you must use a more potent cleaning solution.
- Prepare a degreasing solution: Mix one part white vinegar with four parts water. This mixture can effectively break down grease without damaging your wall surfaces.
- Apply the solution: Dip a clean sponge or cloth in the vinegar solution and gently scrub the walls in a circular motion, focusing on areas with visible grease stains.
- Rinse thoroughly: Wipe the walls with a clean, damp cloth or sponge to remove vinegar residue. Remember to allow the surface to dry completely before proceeding with the painting process.
• Repairing Damaged Walls
After cleaning the walls, the next step is to repair any damaged areas. From small nail holes to large cracks, addressing these imperfections will guarantee a smooth and even finish.
– Fixing Small Holes and Dents
- Fill the hole: Apply premixed spackling compound to a flexible putty knife and press it into the hole or dent until it’s filled. Smooth the surface using the edge of the knife, removing any excess spackling.
- Allow to dry: Give the spackling compound enough time to dry, typically at least a few hours.
- Sand the surface: Use fine-grit sandpaper to sand the patched area gently until it’s smooth and even with the surrounding wall.
– Repairing Large Holes and Cracks
- Clean the damaged area: Begin by removing any loose debris from the hole or crack with a utility knife or scraper.
- Apply patching compound: Using a putty knife, apply patching compound to the damaged area, pressing it firmly into the hole or crack.
- Sand the surface: Once the patching compound is dry, sand the area with fine-grit sandpaper until it’s smooth and even with the surrounding wall.
– Addressing Severe Damages
For more extensive damages such as large holes, water damage, or mold, consider consulting with a professional. It’s essential to address these issues correctly, as they can compromise the paint job’s durability and even pose health risks.
The Environmental Protection Agency provides valuable information on handling mold problems in homes, which can be found here.
• Priming the Walls
A crucial step that many amateur painters overlook is priming the walls before applying paint. Priming seals the wall’s pores, allowing the paint to stick better and provide a smooth, even finish.
- Choose the right primer: Select a primer based on your wall’s surface material and the paint you plan to use. Most paints adhere well to a latex-based primer.
- Apply the primer: Use a roller or brush to apply the primer to the wall, beginning at the top and working your way down.
- Allow to dry: Give the primer enough time to dry, usually around three to four hours. If you’re painting on a dark surface, you may need to apply a second coat of primer for better coverage.
• Final Tips
Remember, proper preparation is key to a flawless and lasting paint job. By cleaning, repairing, and priming your walls, you can achieve results that rival professional painters. Lastly, invest in high-quality paint, brushes, and rollers for the best results.
The extra money spent will be worth it when you see the final outcome on your beautifully painted walls.
Choosing the Ideal Painting Order: Trim or Walls First?
When it comes to painting a room, one of the most common questions that arise is whether to paint the trim or walls first. The answer to this question can greatly impact the overall look and feel of your space, as well as the efficiency of the painting process.
• Why It Matters: Quality and Efficiency
The order in which you paint the trim and walls can significantly affect the quality of your paint job and the time it takes to complete it. By carefully considering the pros and cons of painting the trim or walls first, you can make an informed decision that will lead to a more efficient and visually appealing result.
– Pros of Painting Trim First
There are several advantages to painting the trim before the walls. These include:
- Easier to Tape Off: When painting the trim first, it’s easier to tape off the trim to protect it from wall paint later. Since the trim is typically narrower than the wall, there will be less surface area to cover with painter’s tape.
- Neater Lines: Painting the trim first allows for easier cutting-in along the trim lines with a brush. This creates cleaner, more professional-looking lines when you paint the walls.
- Less Fuss: Since you’ll be painting the walls after the trim, any paint that accidentally gets on the walls won’t matter since you’ll be covering it with wall paint anyway.
- Faster Drying Time: Trim paint generally dries faster than wall paint. By painting the trim first, you’ll be able to remove the painter’s tape sooner and proceed with painting the walls.
– Cons of Painting Trim First
However, there are also certain disadvantages to painting the trim first:
- Risk of Drips: When painting the trim, there is a risk of paint dripping onto the floor or other surfaces. Although you should use drop cloths to protect your floor, drips can still occur, and they may be more noticeable against the backdrop of unpainted walls.
- Limited Access: Painting the trim first can limit your access to certain areas of the room, making it more difficult to maneuver as you paint the walls.
– Pros of Painting Walls First
There are several advantages to painting the walls before the trim:
- Easier Access: Painting the walls first allows greater access to the entire room, so you can more easily tackle the trim afterward.
- Less Risk of Overspray: Using a roller to paint the walls may lead to some paint splattering onto the trim. By painting the walls first, you can easily touch up the trim afterwards without worrying about damaging the wall paint.
– Cons of Painting Walls First
However, there are also certain disadvantages to painting the walls first:
- Messier Lines: When painting walls first, it can be more difficult to create clean lines along the trim, especially if using a darker color.
- Potential for Damage: By painting the walls first, you risk getting paint on the trim, which may require extra touch-up work.
• Expert Recommendations and Tips
Based on the pros and cons discussed above, most painting professionals recommend painting the trim first for a cleaner, more efficient paint job. To help you achieve professional-looking results, consider the following tips:
- Proper Prep Work: Clean, sand, and prime your trim and walls as needed to ensure the paint adheres properly and the final result is smooth and even.
- Quality Paint and Brushes: Invest in high-quality paint and brushes to ensure better coverage and less risk of brush marks or drips.
- Use Painter’s Tape: Use painter’s tape to protect your trim when painting the walls. For best results, wait for the trim paint to dry completely before applying the tape.
- Use a Steady Hand: To achieve clean lines along the trim, use a steady hand and a high-quality angled brush to precisely cut-in the wall paint along the trim.
- Touch Up as Needed: If any paint gets on the trim or walls, wait for it to dry and then carefully touch it up with the appropriate paint.
While there is no one-size-fits-all answer to whether you should paint trim or walls first, considering the pros and cons of each approach while adhering to expert recommendations can help you make the best decision for your particular project.