Clearing Mold From Surfaces Before Prep. What Pros Say
Dealing with mold can be a daunting and time-consuming task, but rest assured, we have the know-how to help you tackle this pesky issue. Clearing mold from surfaces before prep is crucial in maintaining a clean and safe environment. With our tried and tested methods, we are confident that we can guide you in effectively removing mold from different surfaces and preventing future growth. Say goodbye to mold and hello to a fresh, clean space!
Clearing mold from surfaces before prep:
To clear mold from surfaces before preparation, first identify mold-affected areas, which can appear as discolored patches or have a musty smell. Wear protective gear during inspection and removal. Choose a cleaning solution like bleach, vinegar, or hydrogen peroxide, and follow the recommended steps for application, scrubbing, rinsing, and drying. Prevent future mold growth by monitoring humidity, ventilating rooms, fixing leaks, and using mold-resistant materials. Seek professional help if needed for large mold areas or HVAC systems.
Discover foolproof methods to eliminate mold growth from various surfaces and prevent its comeback! Dive into our comprehensive guide that will help you prepare surfaces efficiently for any project. Don’t let this pesky fungus hold you back. Read on to learn more!
Contents
- 1 Eliminating Mold on Surfaces Prior to Preparation
- 2 Techniques for mold removal before applying stain
- 3 Safety duration post mold cleaning: A guide
- 4 Methods for effective mold removal from surfaces
- 5 Drying out mold before cleaning: Is it necessary?
Eliminating Mold on Surfaces Prior to Preparation
• Understanding Mold Growth
Mold, a type of fungus, grows in damp and humid conditions. It can appear on various surfaces, such as wood, drywall, painted surfaces, and even fabric.
Mold not only poses health risks such as allergies and respiratory issues, but it also weakens the structure of the material it grows on. Hence, it is crucial to clear mold from surfaces before preparing them for any project or activity.
For further information on mold growth, visit the United States Environmental Protection Agency (EPA).
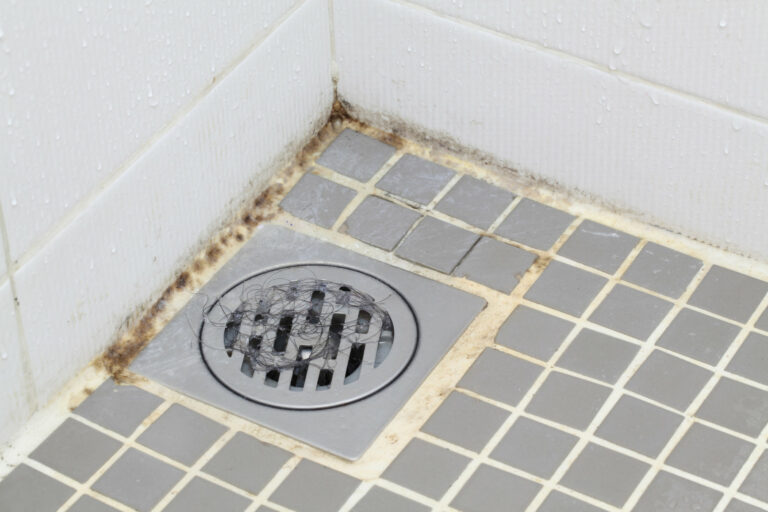
• Identifying Mold-Affected Surfaces
Before you start with any mold removal process, it is essential to identify all mold-affected surfaces. Mold can appear as discolored patches, fuzzy growth, or a musty smell. A visual inspection is usually enough to spot mold growth, but for hidden mold, professional assistance may be needed.
Also, always remember to wear protective gear, such as gloves, goggles, and a mask, during the inspection and removal process.
• Choosing the Right Cleaning Solution
There are various cleaning solutions available in the market that help clear mold from surfaces. Some of the most effective solutions include:
- Bleach: A diluted solution of bleach and water (1 cup of bleach to 1 gallon of water) can remove mold effectively from non-porous surfaces like glass, metal, and tiles.
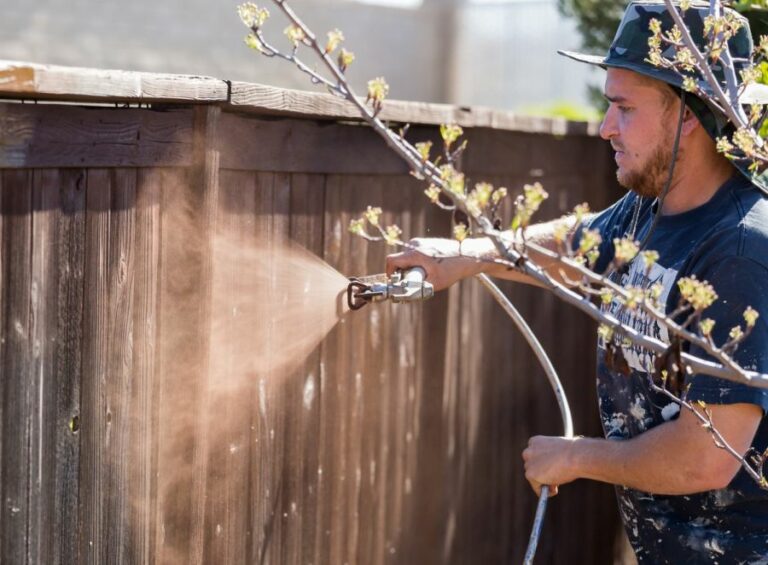
- Vinegar: White distilled vinegar is a natural and eco-friendly alternative for cleaning mold. Pour the vinegar into a spray bottle, without diluting it, and apply it to the moldy surface.
- Hydrogen Peroxide: A 3% hydrogen peroxide solution is effective in removing mold from a variety of surfaces. Mix equal parts of water and hydrogen peroxide in a spray bottle before applying it to the moldy areas.
I recommend first testing any cleaning solution on a small, inconspicuous area to ensure it does not damage the surface.
• Steps to Clear Mold from Surfaces
Once you have selected the right cleaning solution, follow these steps to remove mold from the surfaces:
- Protect the Surrounding Area: Cover the surrounding area with plastic sheets to prevent mold spores from spreading during the cleaning process.
- Apply Cleaning Solution: Spray the cleaning solution onto the mold-affected surface, ensuring it is saturated. For porous surfaces like wood, scrubbing may be necessary to reach the roots of the mold.
- Let it Sit: Allow the cleaning solution to sit on the surface for the recommended period. For bleach and hydrogen peroxide, leave it for at least 10 minutes, while vinegar may require an hour.
- Scrub the Surface: After letting the cleaning solution sit, use a stiff brush or sponge to scrub the moldy surface thoroughly.
- Rinse the Surface: Rinse the surface with clean water to remove any remaining cleaning solution and mold residue.
- Dry the Surface: Use a clean cloth or towel to dry the surface completely. You can also use fans or dehumidifiers to speed up the drying process.
- Dispose of Materials Safely: Seal all cleaning materials, such as gloves, brushes, and plastic sheets, in a plastic bag and dispose of them properly.
• Preventing Future Mold Growth
After you’ve cleared the mold from the surfaces, it is essential to take preventive measures to avoid future mold growth:
- Monitor indoor humidity levels and keep them below 60%.
- Ventilate rooms properly to increase air circulation.
- Fix any leaks or water damage as soon as they are discovered.
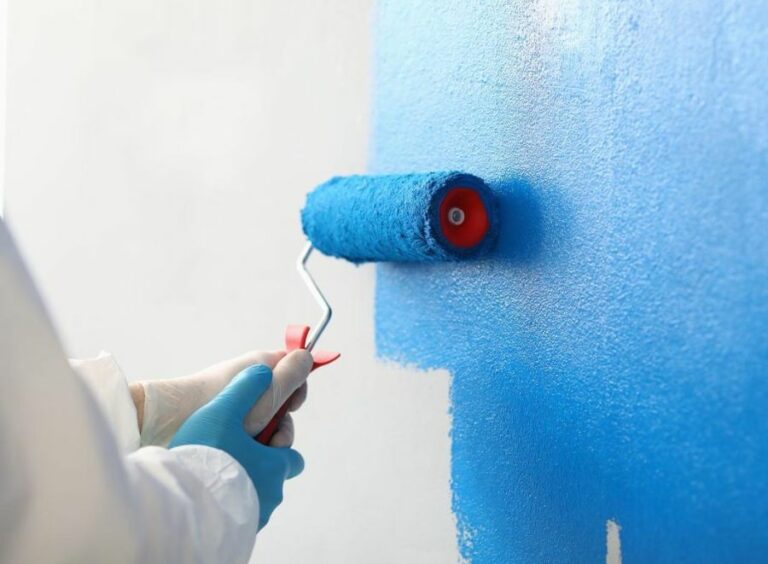
- Use mold-resistant paints and materials when prepping surfaces.
• When to Seek Professional Help
In some cases, it might be necessary to seek professional help for mold removal, especially when:
- The mold covers a large area (greater than 10 square feet).
- Mold is present in the heating, ventilation, and air conditioning (HVAC) systems.
- The building has a history of water damage, flooding, or mold-related health issues.
In such cases, contact a mold remediation specialist to ensure safe and complete removal.
Techniques for mold removal before applying stain
Staining wood surfaces is essential for ensuring their durability and enhancing their appearance. However, it is crucial to remove any existing mold on the wood before staining, as mold spores can compromise the stain’s longevity and effectiveness.
• Identifying Mold on Wood Surfaces
Before diving into the mold removal process, it is essential to identify whether the wood surface has mold or not. Mold grows in damp, dark, and humid conditions and can appear in many colors, like black, green, or white. A musty smell and a fuzzy texture are also indicators of mold presence.
The Environmental Protection Agency (EPA) provides A Brief Guide to Mold, Moisture, and Your Home (available here), which can further assist in identifying and understanding mold.
• Safely Addressing Mold Issues
Mold exposure can be harmful to health, causing allergies, asthma attacks, and other respiratory issues. Therefore, it is essential to take appropriate safety measures during mold removal. These include:
- Wearing protective gear such as gloves, goggles, and a mask
- Ensuring proper ventilation in the working area
- Taping plastic sheets over doors and vents to avoid cross-contamination
• Preparing the Wood Surface for Mold Removal
Before removing mold, it is crucial to prepare the wood surface. This process involves:
- Clearing the area: Remove any furniture or items from the wood surface to allow for thorough cleaning.
- Vacuuming the surface: Using a vacuum cleaner with a HEPA filter, vacuum the wood surface to remove loose mold spores, dirt, and debris.
• Choosing a Mold Removal Solution
There are various mold removal solutions available, including commercial mold removers, bleach solutions, and natural alternatives like vinegar or baking soda.
It is essential to choose one that is appropriate for the wood type and will not cause damage. I recommend testing the solution on a small, inconspicuous area before applying it to the entire surface.
• Applying the Mold Removal Solution
After selecting a suitable solution, follow these steps to remove mold from the wood surface:
- Applying the solution: Using a soft brush or sponge, apply the solution directly to the moldy areas, and let it sit for the recommended duration (usually 10-15 minutes).
- Scrubbing the surface: After the solution has had time to work, use a stiff brush to scrub the wood surface gently. Focus on the moldy areas while being cautious not to damage the wood.
- Rinsing the surface: Use a clean, damp cloth or sponge to remove the solution and dislodged mold from the wood surface. Ensure to rinse the cloth frequently to avoid re-contamination.
• Drying and Final Cleaning
It is essential to thoroughly dry the wood surface after mold removal, as moisture can encourage mold growth. Follow these steps for proper drying and final cleaning:
- Drying the surface: Use clean, dry towels or rags to remove excess moisture from the wood surface. If possible, place a fan or dehumidifier in the area to speed up the drying process.
- Sanding the surface: Once the wood surface is completely dry, sand it gently using fine-grit sandpaper to remove any remaining mold stains and smooth out any raised areas caused by moisture.
• Preventing Mold Re-growth
To protect the wood surface from future mold growth, consider these preventive measures:
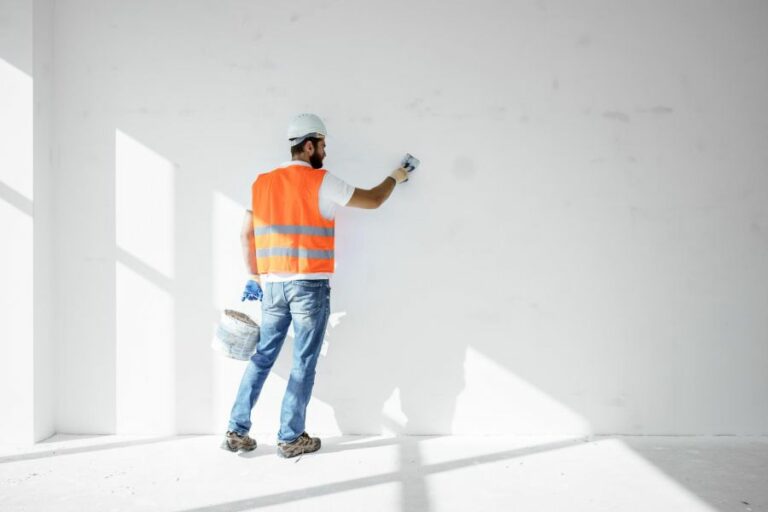
- Sealing the wood: Apply a high-quality sealer or primer to the wood surface before staining. This step helps seal off any remaining spores and provides a protective barrier.
- Controlling moisture: Maintain a proper humidity level in the area (between 30-50%) using a dehumidifier. Keep the area well-ventilated and ensure that any standing water or moisture sources are promptly addressed.
• Staining the Wood Surface
With the mold successfully removed and the wood surface prepared, it is time to apply the stain. Choose a stain that is suitable for the wood type and desired finish. For best results, I recommend following the manufacturer’s instructions for application and drying time.
By following these steps, you can effectively remove mold from wood surfaces before staining and restore the beauty and longevity of the wood surface.
Step | Instructions |
|---|---|
1 | Wear protective gear, including gloves, goggles, and a mask. |
2 | Prepare a solution of 1 part bleach and 3 parts water in a spray bottle or bucket. |
3 | Spray or apply the solution onto the moldy surface and let it sit for at least 10 minutes. |
4 | Use a scrub brush or sponge to scrub the mold and surrounding area. |
5 | Rinse the area with clean water and allow it to dry completely before staining. |
6 | For stubborn mold, consider using a commercial mold remover or repeat the bleach solution application. |
7 | Ensure the surface is free of mold and completely dry before applying the stain. |
Safety duration post mold cleaning: A guide
Mold infestation is a common problem in many households and commercial properties. It poses serious health risks and can cause severe damage to structures.
As a professional with years of experience in mold remediation, I understand that one of the most common concerns people have is how long after cleaning mold, it is safe to resume normal activities in the affected area.
• Factors That Affect Safety After Mold Cleanup
Before we get into the specifics of how long one should wait before re-entering a space that has just undergone mold remediation, it’s important to understand the factors that affect safety in such situations. Key aspects that influence safety after mold cleanup include:
– The Extent of Mold Infestation
The size and severity of the mold infestation play a significant role in determining how long it may take for an area to be safe post-cleanup. A small, localized mold problem can usually be addressed quickly, and the area can be safely used within a short time.
On the other hand, extensive mold contamination requiring large-scale remediation efforts may necessitate a longer waiting period.
– The Type of Mold
There are various types of mold, and some are more hazardous to human health than others. Black mold (Stachybotrys chartarum), for instance, is known for producing mycotoxins that can cause severe health problems.
Re-entering a space that has been infested with toxic mold should only happen after it has been thoroughly cleaned and tested for the presence of lingering toxins.
– The Remediation Process
The method used in mold remediation will also impact the time it takes for an area to be considered safe after cleaning. For instance, cleaning mold with harsh chemicals may require extra time to allow for these chemicals to dissipate properly.
– The Occupants’ Health Status
Individuals with pre-existing respiratory issues, allergies, or weakened immune systems may need to wait longer after mold has been cleaned to re-enter the affected area safely.
This is because these individuals are more susceptible to the negative effects of mold exposure, and extra precautions should be taken to avoid triggering their health issues.
• General Recommendations for Re-Entry After Mold Cleanup
While specific timelines may vary depending on the factors mentioned above, there are some general guidelines that can help ensure safety upon re-entry:
– Adequate Ventilation
Ensure that the cleaned area is well-ventilated to allow for the proper circulation of fresh air. This will help reduce lingering mold spores and any airborne toxins that may arise from the remediation process. Open windows and doors, and if necessary, use fans or air filtration devices to aid this process.
– Post-Remediation Testing
It is often a good idea to have the space tested by a certified mold inspector or an industrial hygienist to verify that the mold problem has been successfully resolved.
This could involve air sampling, surface sampling, or both, and will provide you with objective data indicating that the risk of mold exposure is minimal.
– Re-Entry Timeline
In most situations, following a successful mold remediation process, it’s generally safe to re-enter the area within 24 to 48 hours. However, as mentioned earlier, this timeline can vary based on factors such as the severity of the infestation, the type of mold, and the remediation process employed.
It’s important to use your discretion and consider whether additional measures may be necessary to ensure the safety of the occupants.
• In Conclusion
Determining the exact time it’s safe to re-enter an area after mold remediation can be tricky, as various factors influence the environment’s safety.
For most cases, waiting for 24 to 48 hours post-cleanup and ensuring that the affected area is well-ventilated and has been tested is a reasonable approach to ensure safety.
However, it’s crucial to assess the specific situation and consider any unique factors to make an informed decision that prioritizes the well-being of those re-entering the space.
Surface | Time Until Safe |
|---|---|
Non-porous surfaces (e.g., tile, glass, metal) | Immediately after cleaning and drying |
Semi-porous surfaces (e.g., wood, unsealed concrete) | 24 hours after cleaning and drying |
Porous materials (e.g., carpet, drywall, insulation) | It may not be safe; consider discarding and replacing |
Methods for effective mold removal from surfaces
Mold is a common problem that can plague homes, businesses, and any areas with excessive moisture. Getting rid of mold on surfaces can be tricky, but with the right knowledge and techniques, you can effectively clean and remove it.
But before we jump into how to clean mold off surfaces, let’s briefly discuss why it is essential to eliminate mold in the first place.
– The Dangers of Mold
Mold is a type of fungi that thrives in damp, humid conditions. Not only does it look unsightly and harm the integrity of various materials, but mold can also pose severe health risks.
People exposed to mold can experience a range of symptoms, including allergic reactions, respiratory problems, and even more severe issues for individuals with compromised immune systems. Altogether, it is crucial to address and eliminate mold growths as soon as they are discovered.
– Identifying Mold on Surfaces
Mold can appear on various surfaces, including walls, ceilings, floors, carpets, fabrics, and furniture. It typically appears as dark or discolored spots, often green or black. If you see or smell any signs of mold, it’s essential to act quickly and begin the cleaning process.
– Step by Step: How to Clean Mold Off Surfaces
1. Gather Necessary Supplies
Before starting the mold-cleaning process, ensure you have the following items: * Protective gloves, goggles, and masks (preferably an N95 respirator) * A brush or scrubbing tool * Bleach, white vinegar, or a mold-removing cleaning solution * A spray bottle * Clean, dry cloths or paper towels
2. Evaluate the Mold Contamination
Examining the extent of mold is crucial to determine if it is manageable to clean on your own. If the mold covers a small area (less than 10 square feet), you can proceed to clean it yourself.
However, if the mold covers a large area or is located inside building systems (such as HVAC), it is highly recommended to enlist the help of a professional mold remediation service.
3. Remove Loose Mold Spores
Before applying any cleaning solution, use a soft brush or cloth to remove loose mold particles from the surface gently. Remember to wear protective gear during this step, as mold spores can easily become airborne and pose respiratory risks.
4. Apply Cleaning Solution
Mix the cleaning solution according to the instructions provided by the manufacturer. If using bleach, a recommended ratio is one part bleach to ten parts water.
White vinegar can also be effective but may leave strong odors. Pour the cleaning solution into a spray bottle and apply it to the affected surface. Allow the solution to soak for at least 10-15 minutes.
5. Scrub the Surface
Using a brush or scrubbing tool, vigorously scrub the moldy surface. The cleaning solution should have loosened the mold, making it easier to remove. Be sure to clean the entire area thoroughly, including any corners or crevices where mold can hide.
6. Rinse and Dry the Surface
Rinse the cleaned surface with clean water and remove any remaining cleaning solution. Dry the area using clean, dry cloths or paper towels. Ensuring the surface is completely dry is vital, as lingering moisture can lead to mold regrowth.
7. Monitor the Area
After removing the mold, keep an eye on the area for any signs of regrowth. If mold problems persist, it may be time to consider calling in professional help, as there may be underlying issues, such as water damage or poor ventilation, that need to be addressed.
– Preventing Mold
To prevent mold growth, proper ventilation and moisture control are essential. This can include utilizing fans in humid areas like bathrooms or kitchens, fixing leaks, and ensuring adequate drainage in basements.
• In Conclusion
Cleaning mold off surfaces is an essential task to maintain a clean and healthy environment. Following the steps outlined above can help you effectively remove mold from various surfaces within your home or building.
Always remember to use proper precautions, including protective gear, and to consult professionals when necessary. Taking action early can save you time, money, and potential health risks associated with mold exposure.
Drying out mold before cleaning: Is it necessary?
• Understanding Mold and Its Dangers
Mold is a type of fungus that can grow practically anywhere, especially in moisture-prone areas. It is commonly found in homes and buildings, especially in areas with high humidity or water damage. Mold can have a serious impact on both your health and the structural integrity of your property.
The health risks associated with mold exposure range from allergies to respiratory issues and even infections. The most common symptoms include sneezing, coughing, and skin irritation.
Moreover, mold can cause structural damage to your home by breaking down your walls, ceilings, and floors, thus making it crucial to remove it promptly and effectively.
Before diving into the process of mold removal and the question of whether to let it dry or not, it is important to understand the difference between active (wet) mold and dormant (dry) mold.
• Active Mold Vs. Dormant Mold
Active mold is characterized by its wet and slimy appearance. This type of mold is often accompanied by a musty odor and is visibly growing on surfaces. Active mold can spread quickly and is more likely to produce harmful spores when disturbed.
On the other hand, dormant mold appears dry and powdery, and its growth has stopped due to a lack of moisture.
While it may seem harmless, dormant mold can become active again with increased levels of moisture. When disturbed, dormant mold can release spores into the air, posing potential health risks.
With these definitions in mind, let’s explore whether drying mold before cleaning is an advisable course of action.
• Drying Mold Before Cleaning: Pros and Cons
– Pros
- Reduced risk of spreading: Drying mold can make it less likely to spread during the cleaning process. Since active mold grows and spreads with moisture, drying it can help prevent further contamination in other areas of your home.
- Easier removal: In some cases, particularly with non-porous surfaces, drying mold can make it easier to remove. Dormant mold can become brittle and easy to wipe or scrub off these surfaces.
– Cons
- Spore release: As mentioned earlier, dormant mold can release its spores when disturbed. This means that drying mold before cleaning could potentially spread spores throughout your home, increasing the risk of health issues or mold regrowth.
- Not effective for porous materials: Drying mold on porous materials such as wood, drywall, or fabrics does not guarantee that it will be easier to remove. Mold can penetrate deep into these surfaces and may require more specialized cleaning methods.
• Recommendations for Mold Removal
Based on the pros and cons outlined above, it becomes clear that there is no one-size-fits-all answer to the question of whether to dry mold before cleaning. Hence, it is essential to understand that the appropriateness of this approach would depend on the specific situation.
Here are some recommendations to guide you through the mold removal process:
- Identify the cause of mold growth: Addressing the source of the moisture problem is crucial before removing mold. This could involve fixing leaks, improving ventilation, or controlling humidity in your home.
- Consider professional assistance: If mold covers a large area (typically more than 10 square feet) or if you suspect it has penetrated deep into porous materials, it is advisable to consult with a professional mold remediation expert.
- Dry mold only when appropriate: If the affected area is non-porous and small-scale, drying mold might make it easier to remove. Ensure proper ventilation and use personal protective equipment (PPE) such as gloves, goggles, and a face mask with a particulate filter to prevent spore inhalation during the cleaning process.
- Use appropriate cleaning solutions: For non-porous surfaces, a detergent and water solution is usually sufficient to remove mold. For porous materials, consider using specialized mold removal products or consult with a professional to assess the extent of the damage and the most suitable cleaning method.
- Discard contaminated materials: In cases of extensive mold infiltration, it might be necessary to dispose of the porous materials altogether, such as carpets, drywall, or furniture, and replace them after the mold removal process is complete.
In conclusion, the decision to dry mold before cleaning depends on the specific circumstances and the type of materials affected.
Understanding the differences between active and dormant mold, along with the risks associated with both, can help guide you toward the most effective mold removal strategy in your particular situation.