Surface Examination Before Preparation. What Pros Say
Before diving into any project, examining the surface on which you plan to work thoroughly is crucial. Whether it’s a construction project, a painting, or a DIY home improvement, surface examination ensures a smooth and successful outcome. With our expert insights and professional techniques, we can guide you through this essential first step, giving you a solid foundation for your project.
Surface examination before preparation:
Surface examination before preparation is crucial in determining the success and longevity of surface treatments such as painting, coating, or adhesion. It assists in selecting the appropriate treatment method and identifying potential defects, contaminants, or irregularities that may cause problems during or after the process.

Curious about surface examination before preparation? You’re in the right place! Dive into this informative piece and uncover the essential steps, techniques, and insights to ensure successful surface inspections. Keep reading to unlock the secrets!
Contents
- 1 Evaluating Surfaces Before Preparation
- 2 Key Stages in Surface Preparation
- 3 Pre-Coating Surface Preparation Guide
- 4 The Crucial Role of Surface Prep in Coating
- 5 Understanding Surface Pretreatment Procedures
Evaluating Surfaces Before Preparation
• The Importance of Surface Examination
The surface examination before preparation is a crucial step that should not be overlooked. This step determines the success and longevity of any surface treatment, such as painting, coating, or adhesion.
Proper examination not only assists in selecting the most suitable surface treatment method but also helps in identifying any potential defects, contaminants, or irregularities that may cause problems during or after the process.
• Common Surface Examination Methods
The following are some of the most widely used surface examination methods:
– Visual Inspection
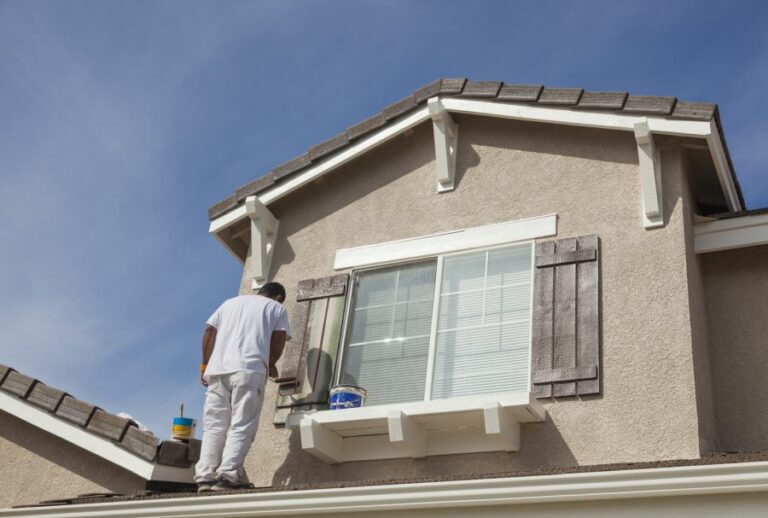
The easiest and most straightforward method of examination is a simple visual inspection. This process involves looking at the surface for any visible defects, inconsistencies, or contaminants.
Use a powerful light source and magnification device, if necessary, to carefully inspect the surface. It is essential to check for any inconsistencies in color, texture, and overall appearance. While this method may not catch microscopic defects or contaminants, it serves as an excellent starting point.
– Tactile Inspection
Feeling the surface with your fingers is another useful inspection method. This method is helpful in detecting rough spots, sharp edges, or other surface inconsistencies that may not be visible to the naked eye.
However, ensure that your hands are clean before performing a tactile inspection to avoid introducing contaminants onto the material surface.
– Microscopic Examination
If detailed and precise examination is required, a microscope can provide in-depth information about a surface. Scanning electron microscopes (SEM) can generate highly detailed images, revealing microscale surface features like scratches or cracks and contaminants like dust or particles.
This method is especially useful for materials like metals, ceramics, and composites.
– Profilometry
A profilometer is a tool that measures the roughness or texture of a surface. This method provides valuable information on the surface’s topography and can reveal hidden defects or irregularities. There are two main types of profilometers: contact and non-contact.
Contact profilometers, like stylus profilometers, physically touch the surface, while non-contact profilometers use methods like optical or laser scanning to measure the surface.
• Factors to Consider During Surface Examination
While performing a surface examination, consider the following factors:
– Material Type
Different materials require varying examination techniques. For example, metals typically need a more in-depth examination as they might have surface issues like corrosion, oxide layers, or micro-cracks.
On the other hand, softer materials like wood or plastics may only require a visual or tactile inspection to reveal any damages or inconsistencies.
– Industry Requirements
Some industries, like aerospace and medical, have stringent requirements for surface preparation and examination. In these cases, it may be necessary to follow specific examination procedures, like using microscopes or performing specific testing to meet industry standards.
– Surface Treatment Method
The chosen surface treatment method also influences the examination process. For example, if you plan to use plasma treatment to clean the surface, you may want to examine the surface for any hydrocarbon contamination.
In contrast, for an adhesive bonding process, you need to ensure that the surface is free of grease, oil, or other contaminants that may impede adhesion.
• Challenges and Solutions in Surface Examination
Some common challenges in surface examination include:
– Inaccessible or Uneven Surfaces
If you are examining a large, curved, or uneven surface, using traditional examination methods like visual inspection or tactile inspection can be difficult. In these cases, consider using non-contact examination methods like optical or laser profilometry to examine hard-to-reach areas accurately.
– Limited Resources
For small-scale projects or low-budget scenarios, purchasing expensive examination equipment might not be feasible. In these cases, focus on utilizing available resources like visual and tactile examination, paying close attention to detail to provide a reasonably comprehensive assessment.
– Time Constraints
A surface examination can be time-consuming, especially for large-scale projects. When under time pressure, focus on the most critical examination aspects, such as identifying obvious defects and removing contaminants.
Delegate the examination tasks among multiple team members to expedite the process, if possible.
• Tips and Recommendations
Based on years of experience in surface examination, I recommend the following tips:
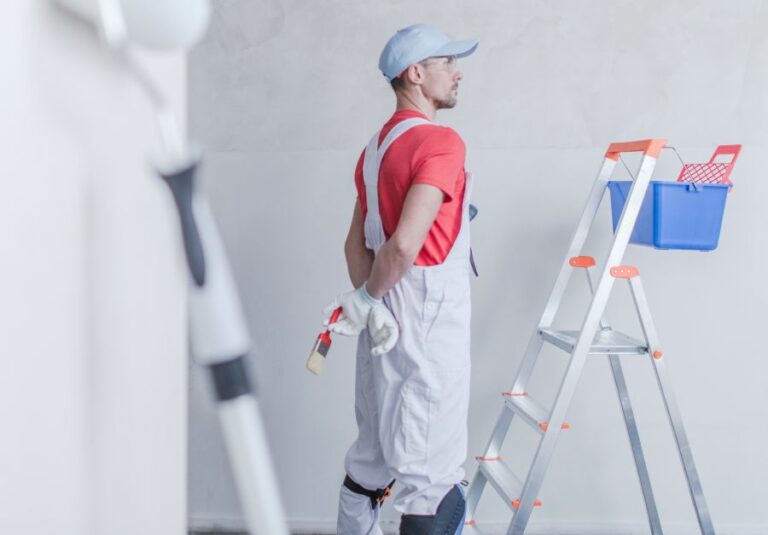
- Always wear protective gloves and eyewear during surface examination and preparation to avoid injury.
- Address any surface defects or contaminants immediately after identifying them during the examination, as it helps save time and ensure surface quality.
- Document the examination results and keep a record for future reference, as it aids in identifying recurring issues or challenges and helps in process optimization.
- Regularly clean and maintain examination tools and equipment to avoid inaccurate measurements or contamination of surfaces.
In conclusion, surface examination before preparation is an essential step that ensures the quality and longevity of surface treatments. By following the guidelines and tips shared in this article, you can effectively examine a variety of materials and surfaces and ensure a successful surface treatment process.
Key Stages in Surface Preparation
Surface preparation is a critical step in any construction, renovation, or maintenance project. The quality of the surface preparation plays a significant role in the success and durability of the applied coatings, such as paint, sealants, or adhesives.
Proper surface preparation ensures excellent adhesion, improved performance, and a longer lifespan for the applied materials.
• Understanding Surface Conditions
Before starting any surface preparation, it’s essential to identify the surface conditions, such as the type of material, structural integrity, and the presence of contaminants. Knowing the surface conditions helps determine the appropriate preparation techniques and the required tools and equipment.
- Concrete: Check for the presence of moisture, oil or grease, and other contaminants. For new concrete surfaces, allow proper curing time before applying any coatings.
- Steel: Inspect for rust, mill scale, and other surface contaminants. Remove any existing coatings if necessary.
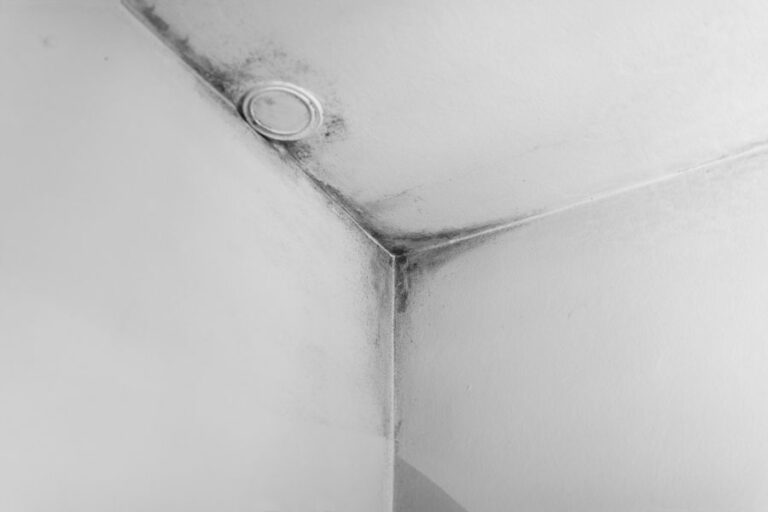
- Wood: Check for knots, cracks, and signs of rot, mold, or mildew. Remove old paint or stain if necessary.
- Plaster or Drywall: Check for cracks, holes, or dents. Remove any loose materials, and ensure the surface is free of dust, dirt, or grease.
For a deeper understanding of surface conditions and their impact on paint adhesion, consult resources such as The Society for Protective Coatings (SSPC) and The American Concrete Institute (ACI).
• Cleaning the Surface
Thoroughly cleaning the surface is crucial in ensuring excellent adhesion and performance of the applied coatings. The following methods are commonly used for cleaning different types of surfaces:
- Scraping and Sanding: Tools such as scrapers, wire brushes, and sanding blocks are used for the manual removal of paint, rust, and other surface contaminants.
- Power Washing: High-pressure water jets are used for cleaning and removing loose materials from surfaces like concrete or brick. Use caution on more delicate surfaces to avoid damage.
- Solvent Cleaning: Suitable solvents or degreasers are used to remove oil, grease, or other contaminants from surfaces. Make sure the chosen solvent or degreaser is compatible with the surface material and the expected coating.
- Vacuuming and Dusting: For removing dust, dirt, and debris from surfaces like plaster or drywall, it is recommended to use a vacuum cleaner or a soft brush to clean the surface gently.
• Surface Repair and Treatment
After cleaning, it’s essential to inspect the surface and conduct necessary repairs or treatments to ensure a smooth and even finish.
- Filling and Patching: Use suitable fillers, patches, or putty to fill any holes, cracks, or dents on surfaces like concrete, wood, or drywall. Sand the repaired areas smooth, matching the surrounding surface.
- Sealing and Priming: Some surfaces may require a sealer or primer to improve adhesion and ensure uniform coverage. Consult the coating manufacturer’s recommendations for the proper sealer or primer to use.
- Rust or Mold Removal: Treat metal surfaces with rust converters or inhibitors and treat wood surfaces with mold, mildew, or rot-resistant products to protect the applied coatings from these common issues.
• Surface Profile and Roughness
To ensure optimal adhesion and performance, it’s essential to achieve the desired surface profile or roughness, depending on the type of material and the expected coating.
- Sanding or Grinding: These techniques are ideal for creating a smooth or roughened surface on materials like wood, concrete, or metal. Use appropriate grit sandpapers, grinding wheels, or abrasive discs, depending on the desired result.
- Etching or Acid Washing: This method is commonly used for preparing concrete surfaces. Chemical etching or acid washing creates a uniform surface profile and removes any latent contaminants from the surface. Ensure proper neutralization and rinsing after etching or acid washing.
- Blasting: Abrasive or shot blasting techniques are ideal for achieving a uniform surface profile or roughness on materials like concrete or steel. Select suitable abrasive media, pressure settings, and equipment based on the surface material and desired profile.
For more information on surface profile and roughness requirements, consult resources such as The National Association of Corrosion Engineers (NACE) and The International Concrete Repair Institute (ICRI).
• Final Inspection and Test
Before applying any coatings, it’s crucial to conduct a final inspection of the prepared surface to ensure it meets the desired quality standards.
- Cleanliness: The surface should be free of dust, dirt, grease, or any other contaminants that could affect the adhesion or performance of the applied coatings.
- Moisture Content: Ensure the surface moisture content is within acceptable limits, as advised by the coating manufacturer’s recommendations.
- Surface Profile and Roughness: Verify the surface profile or roughness meets the specifications required for the expected coating application.
Step | Description |
|---|---|
1. Cleaning | Removing dirt, grease, and other contaminants from the surface. |
2. Degreasing | Applying a suitable degreasing agent to the surface to remove oil and grease. |
3. Abrasive blasting | Using abrasive materials like sand, steel shot, or glass beads to clean and roughen the surface. |
4. Chemical treatments | Applying chemical solutions like etching, pickling or phosphating. |
5. Mechanical roughening | Using tools like sandpaper, wire brushes, or grinding wheels to create a rough texture on the surface. |
6. Priming | Applying a primer coating to ensure proper adhesion of the subsequent coating or paint. |
7. Inspection | Checking the surface for any imperfections or damage that may require repair before applying the final coating. |
Pre-Coating Surface Preparation Guide
Effective surface preparation is integral to the durability of coatings and their adhesion to a surface.
• Understanding Surface Contaminants
Before diving into the actual preparation process, it’s crucial to understand various contaminants that can affect a surface. These contaminants can compromise the quality and effectiveness of the coating. Common surface contaminants include:
- Dirt and dust
- Rust and corrosion
- Grease and oil
- Soluble salts
- Old coatings
To achieve the best results from your coating project, it’s essential to adequately address each contaminant.
• Removal of Dirt and Dust
The first step to prepare any surface is to remove loose dirt and dust. There are different methods of cleaning to remove these contaminants, such as:
– Sweeping and Vacuuming
Simply start by sweeping or vacuuming the surface to remove dust and dirt. Keep in mind that vacuuming is more efficient in capturing the dust particles.
– Compressed Air or Dry Blowing
This method, also known as air blasting, involves using compressed air to blow away dust and dirt from the surface. Compressed air is effective for cleaning small, hard-to-reach areas. Make sure to wear appropriate safety equipment, such as goggles and a dust mask, during this process.
– Power Washing
Power washing, or pressure washing, involves using water at high pressure to remove dirt and debris from the surface. This method is particularly useful for larger areas and serves as a time-efficient way to clean a surface. It’s essential to let the surface dry thoroughly before applying the coating.
• Addressing Rust and Corrosion
Unaddressed rust and corrosion can lead to premature coating failure. To mitigate these issues, remove any rust or corrosion from the surface. You can use various methods, including:
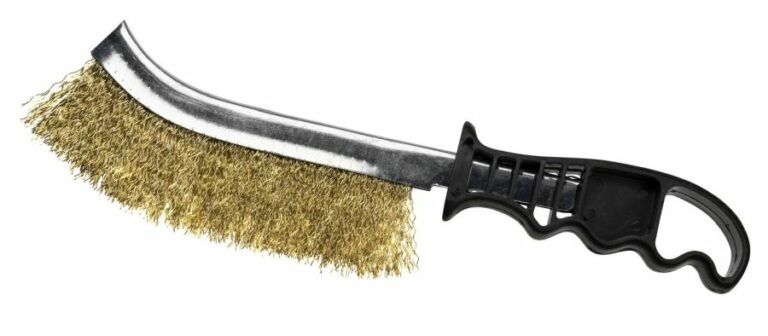
– Wire Brushing
This method involves using a wire brush to scrub away the rust and corrosion. Be sure to get into any crevices or tight spots. A power wire brush attachment for a drill or angle grinder can improve efficiency.
– Sanding
Sanding helps to remove any remaining rust or corrosion after wire brushing. Use a coarse-grit sandpaper for heavily rusted areas and medium-grit sandpaper for less damaged areas.
– Abrasive Blasting
Abrasive blasting, also known as sandblasting, effectively removes rust and corrosion from metal surfaces. This method involves propelling an abrasive material at high pressure against the surface.
Ensure that you follow the appropriate safety procedures and use proper personal protective equipment during abrasive blasting.
• Dealing with Grease and Oil
To remove grease and oil from the surface, use solvents or emulsifying cleaners designed for this purpose.
– Solvents
Solvents, such as mineral spirits or acetone, can effectively dissolve grease and oil. Apply the solvent to a rag and wipe down the surface. After the solvent evaporates, the grease and oil should be gone. Dispose of the used rags properly.
– Emulsifying Cleaners
These water-based cleaners convert grease and oil into a water-soluble form. Apply the cleaner, scrub the surface, then wash it away with water. Ensure the surface dries thoroughly after cleaning.
• Removing Soluble Salts
Soluble salts on a surface can lead to coating failure. To remove salts, thoroughly rinse the surface with fresh water, paying attention to crevices and tight spots.
• Removing Old Coatings
If the surface has an old coating that needs to be removed, you can use methods such as:
– Chemical Stripping
Apply a chemical paint stripper to the surface and let it sit for the recommended time. Once the old coating loosens, you can remove it with a scraper or a similar tool. Make sure to follow the manufacturer’s instructions and safety precautions.
– Mechanical Methods
For removing old coatings from larger surfaces, mechanical methods such as grinding, sanding, or abrasive blasting are preferable.
• Final Surface Inspection
Before applying the coating, inspect the surface for any remaining contaminants, and address them accordingly. Ensure that the surface is clean, dry, and free from rust, grease, and old coatings.
In conclusion, preparing a pre-coating surface involves several crucial steps, including the removal of contaminants such as dirt, rust, grease, and old coatings. Following these recommendations will ensure the surface is ready for a successful coating application.
Step | Description |
|---|---|
1 | Inspect the surface for any defects, damages or foreign materials. |
2 | Clean the surface thoroughly to remove any dirt, grease, oil, or other contaminants. |
3 | Repair any surface defects or damages, such as cracks, holes, or rust spots, using appropriate repair materials and methods. |
4 | Sand or abrade the surface if necessary to achieve the desired level of surface roughness or to remove any existing coatings. |
5 | Wipe or vacuum the surface to remove any dust or debris resulting from sanding or abrasive cleaning. |
6 | Apply a primer or sealer to the surface if required to improve adhesion and sealing properties of the base coating. |
7 | Allow the surface to dry completely before applying the coating as per the manufacturer’s instructions. |
The Crucial Role of Surface Prep in Coating
Surface preparation is a crucial step in the coating process. Proper surface preparation ensures that the coatings are applied to a clean and thoroughly prepared surface, which will extend the life of the coating, thereby protecting the substrate from potential damage or deterioration.
• The Significance of Surface Preparation in Coating
– Achieving Proper Adhesion
The primary reason for the significance of adequate surface preparation lies in ensuring proper adhesion of the coating to the substrate. A coating that fails to adhere properly can result in a range of issues, such as peeling, blistering, or delamination, which may require costly repairs or replacements. Proper surface preparation helps to create the ideal conditions for the applied coating to bond effectively with the substrate.
– Enhanced Durability
A clean and well-prepared surface helps in enhancing the overall durability of the applied coating. Proper surface preparation helps in removing contaminants, such as dirt, oil, and grease, which may interfere with the coating’s performance. Furthermore, it helps in creating a strong bond between the coating and the surface, which contributes to the overall durability of the applied coating.
– Ensuring Consistent Finish
Surface preparation plays a vital role in ensuring that the resulting finish is consistent and uniform. A surface that is not adequately prepared may exhibit inconsistencies, such as uneven coating layers, discolorations, or streaks, which can detract from the overall appearance of the finished product.
– Compliance with Industry Standards
In many industries, particularly those dealing with construction or infrastructure, there are stringent regulations and codes that prescribe the appropriate surface preparation techniques.
Ensuring that these standards are met can help in avoiding potential fines or penalties from regulatory bodies and can also serve as a mark of quality.
• Effective Techniques for Surface Preparation
There are various methods that can be employed in surface preparation, depending on the substrate material and the coating being applied. Some common techniques include the following:
– Mechanical Methods
Mechanical methods involve the use of tools and equipment to prepare the surface. Some common mechanical techniques include:
- Abrasive Blasting: This technique involves the use of compressed air, water, or centrifugal force to project abrasive materials at high velocities toward the surface. Examples of abrasive materials used in this process include sand, steel shot, and garnet.
- Grinding: Grinding utilizes powered tools fitted with abrasive wheels or disks to remove contamination or roughen the surface.
- Wire Brushing: This method uses wire brushes to manually or mechanically abrade the surface, removing rust, scale, and contaminants.
– Chemical Methods
Chemical methods involve the use of solvents or other chemical agents to clean and prepare the surface. Examples of chemical methods include:
- Degreasing: This involves the application of solvents or alkaline cleaners to remove oil, grease, and other contaminants from the surface.
- Acid Etching: This process entails the use of acidic solutions to remove rust, scale, or old coatings and roughen the surface to promote adhesion.
– Other Techniques
Depending on the substrate and coating requirements, other surface preparation techniques may be employed, such as:
- High-Pressure Water Jetting: This method utilizes water at extremely high pressures to clean and prepare the surface.
- Vacuum Blasting: This technique entails abrasive blasting using a closed-loop system where the abrasive material and removed contaminants are contained and collected within the system, minimizing environmental impact.
• Conclusion
In conclusion, proper surface preparation before coating is of utmost importance for achieving proper adhesion, enhancing durability, ensuring a consistent finish, and complying with industry standards.
By employing the appropriate surface preparation techniques, coatings can be applied more effectively and efficiently, ultimately providing superior protection and extending the life of the substrate.
Understanding Surface Pretreatment Procedures
Surface pretreatment is a crucial step in many industrial applications, as it helps improve the adhesion, cleanliness, and longevity of a particular surface.
It involves the modification or preparation of a surface through various techniques, such as cleaning, etching, or applying coatings, to enhance its properties and overall performance.
• Importance of Surface Pretreatment
Surface pretreatment is essential for several reasons, some of which include:
- Adhesion Improvement: Many industrial applications require the bonding of various materials, such as paint, adhesives, or coatings, to a specific surface. Surface pretreatment improves adhesion, resulting in stronger, long-lasting bonds.
- Corrosion Resistance: Pretreatment often provides a protective barrier, increasing a surface’s resistance to corrosion and extending its lifespan.
- Surface Cleaning: Pretreatment can remove contaminants, such as grease, oils, and rust, ensuring that materials adhere properly and perform optimally.
- Control of Surface Properties: Surface pretreatment can modify a surface’s properties, such as its wettability, roughness, and overall appearance.
• Common Surface Pretreatment Techniques
There are numerous pretreatment techniques available, but some of the most common methods include the following:
– Mechanical Methods
- Abrasive Blasting: This technique uses high-pressure air to propel abrasive particles against the surface, removing contaminants and creating a desired surface profile. This method is commonly used for cleaning, rust removal, and preparing surfaces for coatings.
- Grinding and Sanding: These methods involve using abrasive materials, such as grinding wheels and sanding discs, to physically remove material from the surface. These techniques can smooth rough surfaces and remove existing coatings or contaminants.
– Chemical Methods
- Acid Etching: This technique uses acids, such as hydrochloric or sulfuric acid, to dissolve metal ions and remove surface contaminants. It is commonly used for rust removal, surface activation, and surface passivation.
- Alkaline Cleaning: This method employs alkaline solutions, such as sodium hydroxide or potassium hydroxide, to remove oils, greases, and other organic contaminants from the surface. It is widely used to clean metal surfaces before further processing.
- Solvent Cleaning: Organic solvents, such as acetone, alcohol, or hexane, are used to dissolve and remove organic contaminants from the surface. This method is effective in removing oils, greases, and other organic materials, but it may not be suitable for all materials or applications due to potential environmental or safety concerns.
– Coating Methods
- Phosphate Coatings: These coatings consist of metal phosphate layers applied to a surface to improve adhesion, corrosion resistance, and service life. The most common types of phosphate coatings are iron phosphate, zinc phosphate, and manganese phosphate.
- Conversion Coatings: These are chemical treatments that convert the surface material into a thin, protective layer, such as chromate or anodized coatings. They offer enhanced corrosion resistance and improved adhesion of paints or other coatings.
• Factors to Consider When Selecting a Surface Pretreatment Method
When selecting an appropriate surface pretreatment method, consider the following factors:
- Material Compatibility: Ensure the selected pretreatment technique is compatible with the material of the surface, as some methods may cause damage or unwanted reactions.
- Final Application: Consider the end use of the surface and any specific requirements, such as adhesion strength, corrosion resistance, or surface roughness, to guide your choice of pretreatment method.
- Environment and Safety: Some pretreatment methods may involve hazardous chemicals or produce harmful by-products, so it is essential to consider environmental and safety factors when selecting a technique.
- Cost: The cost of various pretreatment methods may vary significantly. Select a method that is both effective and cost-efficient for your specific application.
• Conclusion
Surface pretreatment is an essential step in numerous industrial applications, as it helps improve the adhesion, cleanliness, and general performance of a particular surface. There are a variety of methods available, each with its advantages and limitations.
To select the most appropriate method for your application, consider factors such as material compatibility, end-use requirements, environmental and safety concerns, and cost.
By thoroughly understanding the surface pretreatment process and its various techniques, you can ensure the optimal performance and longevity of your chosen surface.