Eradicating Mold For Surface Readiness. What Pros Say
Eradicating mold for surface readiness is a task that many face, whether in residential or commercial settings. Mold can pose significant health risks and compromise the integrity of various surfaces. Fortunately, we have the knowledge and expertise to help you effectively remove mold and prepare your surfaces for future use.
Eradicating mold for surface readiness:
To eradicate mold and prepare surfaces for repainting or remodeling, first, identify and fix the source of moisture. Next, wearing protective gear, clean the mold with a detergent or cleaning solution designed for mold removal. Ensure the surface is completely dry before repairing any damage, and apply a mold-inhibiting primer before repainting or refinishing. Maintain proper ventilation and address moisture sources to prevent future mold growth.

Preventing mold is essential for maintaining a clean and healthy environment. However, if mold has already taken hold, don’t worry!
Our comprehensive guide covers everything from identifying mold types to effective eradication techniques. Read on as we explore methods that ensure surface readiness and help prevent future mold growth.
Contents
- 1 Eliminating Mold to Prepare Surfaces
- 2 Methods for Surface Mold Remediation
- 3 Effective Solutions for Permanent Mold Removal
- 4 Initial Steps to Prevent Mold Growth Prior to Remediation
- 5 Techniques for Cleaning Inaccessible Mold
Eliminating Mold to Prepare Surfaces
• Introduction
Mold, a type of fungus, can cause numerous health problems if not promptly dealt with. It thrives in moist and warm conditions, making it crucial to address any sources of humidity in a building.
• Identifying Mold
Before you can begin to eradicate mold, you must first identify its presence. Mold can appear in various colors, including black, green, or white, and often has a musty odor. It typically grows on walls, ceilings, wood, or fabrics. Some common indicators of mold presence include:
- Discoloration or staining on surfaces
- A strong, musty smell
- Visible growth on walls, ceilings, or fabrics
If you suspect that your home or building has mold, it is essential to address the problem immediately. Prolonged exposure to mold can cause health issues such as allergies, asthma, and respiratory conditions. You can find more information on mold identification here.
• Ensuring Safety
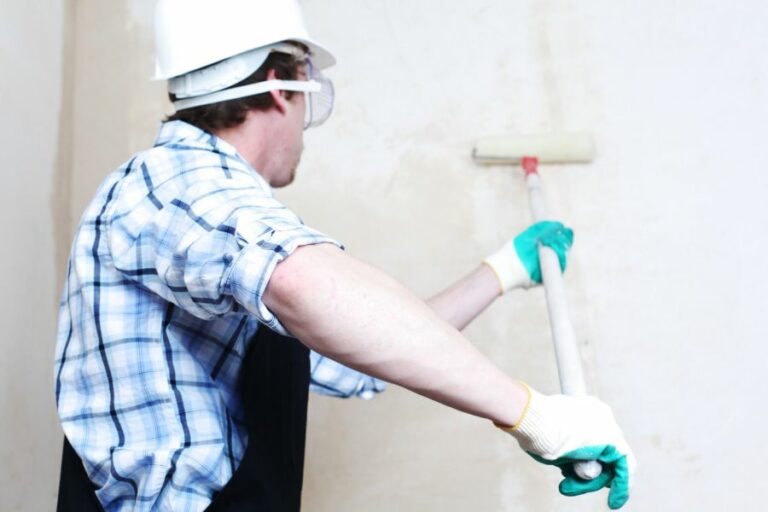
When handling mold removal, it is crucial to take proper safety precautions to avoid harm to your health. The following safety gear is recommended:
- Protective clothing, including long sleeves and pants
- Gloves, preferably made of nitrile or latex
- Eye protection to avoid contact with mold spores
- A respirator mask, such as an N95 or N99 mask, to filter out mold spores
Before starting the mold removal process, ensure that the affected area is well-ventilated to minimize exposure to mold spores. Open windows and doors, or use an exhaust fan.
• Removing Mold
There are several steps involved in effectively removing mold from surfaces:
– Step 1: Assess the Damage
Determine the extent of mold growth and damage to the affected surfaces. If the mold growth is limited to a small area (less than 10 square feet), you can handle the removal yourself.
However, if the mold covers a larger area or has caused significant damage, consider hiring a professional mold remediation service.
– Step 2: Fix the Source of Moisture
Identifying and repairing the source of moisture is crucial to prevent mold from reoccurring. Check for leaks, condensation, or high humidity in the affected area. Possible solutions include:
- Repairing leaks or using a dehumidifier to reduce humidity levels
- Improving ventilation by adding exhaust fans or opening windows
- Installing a vapor barrier to prevent moisture migration
– Step 3: Cleaning the Mold
To clean mold from surfaces, use a detergent or cleaning solution specifically designed for mold removal. Follow these steps for effective cleaning:
- Apply the cleaning solution to affected surfaces using a brush, sponge, or cloth.
- Allow the solution to sit on the surface for the recommended time, as stated on the product.
- Scrub the surface thoroughly to remove mold stains and residues.
- Rinse the area with clean water and let it dry completely before repainting or refinishing.
For larger mold growth or challenging surfaces, consider using specialized mold removal products, such as those containing bleach, hydrogen peroxide, or ammonia. However, these chemicals can be harmful if mishandled, so always read and follow the manufacturer’s instructions.
• Preparing the Surface for Repainting or Refinishing
Once you have successfully removed the mold, the next step is to prepare the surface for repainting or refinishing:
– Step 1: Ensure the Surface is Completely Dry
Before proceeding, make sure the surface is entirely dry. Any remaining moisture can lead to further mold growth, negating your previous efforts. Depending on the surface material and cleaning method used, drying can take anywhere from several hours to a few days.
– Step 2: Repair Damaged Surfaces
Depending on the extent of the mold damage, you may need to repair or replace some surface materials. This can include:
- Patching holes or cracks in walls or ceilings
- Replacing damaged wood or drywall
- Removing and replacing damaged fabrics, such as carpets or upholstery
– Step 3: Apply a Mold-Inhibiting Primer
Before repainting, apply a mold-inhibiting primer to the cleaned surface. This primer provides an additional layer of protection against future mold growth. You can find mold-inhibiting primers at most home improvement stores.
– Step 4: Repaint or Refinish the Surface
Finally, repaint or refinish the surface as desired. Ensure proper ventilation during the painting or finishing process to help prevent the recurrence of mold.
• Conclusion
Eradicating mold is an essential step in maintaining a healthy living environment. By identifying mold, taking proper safety precautions, and following the steps outlined in this article, you can effectively remove mold from surfaces and prepare them for repainting or refinishing.
Remember that prevention is key to avoiding future mold growth, so address any sources of moisture and maintain proper ventilation in your space.
Methods for Surface Mold Remediation
Mold is a common issue that affects many households and can cause health problems if not addressed properly.
• Identifying Surface Mold
Before we delve into the remediation process, it is important to properly identify surface mold. Mold usually appears as black, green, or white patches with a musty odor. It thrives in damp and humid areas such as bathrooms, kitchens, basements, and attics.
To distinguish mold from dirt or mildew, dab a cotton swab dipped in bleach onto the suspect area; if the color lightens or disappears after a minute or two, it is likely mold.
Refer to the Environmental Protection Agency (EPA) for more in-depth information on mold and its various types.
• Method 1: Cleaning with Soap and Water
For small areas of mold on hard surfaces, simply using soap and water is often sufficient.
- Gather the required supplies: a brush or sponge, soap or detergent, and water.
- Scrub the affected area thoroughly with the soap and water mixture.
- Dry the surface completely after cleaning to prevent mold growth.
Using this method is efficient for small mold outbreaks on surfaces like tiles, ceilings, and walls.
• Method 2: Employing Bleach Solution
Bleach can be used for more stubborn mold cases or larger areas of mold growth.
- Dilute one cup of household bleach in one gallon of water.
- Use a brush or sponge to apply the solution on the moldy spots.
- Allow the solution to sit for at least 15 minutes before scrubbing and rinsing off.
- Dry the area completely to eliminate any remaining moisture.
Important note: Do not mix bleach with ammonia or other household cleaners, as this can result in the release of toxic fumes.
• Method 3: Baking Soda and Vinegar Solution
Using natural, non-toxic alternatives like baking soda and vinegar can also be effective in mold remediation.
- Mix equal parts water and vinegar in a spray bottle.
- Spray the mixture onto the moldy surface, let it sit for an hour, then scrub and rinse off.
- Create a paste with a 1:1 ratio of baking soda to water.
- Apply this paste on the mold stains, scrub with a brush, then rinse off and dry.
This method is suitable for sensitive surfaces and for people who prefer eco-friendly solutions.
• Method 4: Professional Mold Remediation
For extensive mold growth or mold within heating and air conditioning systems, it is recommended to seek professional assistance. Professional mold remediators possess the necessary equipment, knowledge, and experience to effectively eliminate mold and prevent future growth.
Remember to hire a reputable company and request an estimate before beginning any work.
Refer to the Institute of Inspection, Cleaning and Restoration Certification (IICRC) for guidance on finding certified professionals.
• Preventing Mold Recurrence
After successfully remediating mold, it is crucial to take preventive measures to avoid future issues. Below are some useful tips:
- Maintain proper ventilation in your home, especially in areas prone to moisture, like bathrooms and kitchens.
- Regularly clean damp areas and surfaces with mold-resistant cleaning products.
- Monitor indoor humidity levels and aim to keep them below 60%.
- Promptly address any water leaks and moisture problems.
- Consider using mold-resistant building materials when renovating or building a new home.
By implementing these preventive measures, you can safeguard your living environment and minimize the risk of future mold problems.
• Conclusion
Surface mold remediation is an essential undertaking to maintain healthy living space. While small-scale mold issues can often be resolved using household cleaning products, more severe cases require professional intervention.
As always, prevention is the best method, and by maintaining a dry, well-ventilated environment, you can keep mold at bay. Keep in mind that if you or your family members experience persistent symptoms associated with mold exposure, it is necessary to consult a healthcare professional.
Step | Description |
|---|---|
1 | Identify mold source and fix any underlying issues, such as water leaks or excess moisture. |
2 | Wear protective gear, such as gloves, goggles, and a mask, to prevent contact with mold spores. |
3 | Use a detergent solution or a mold-killing cleaner to scrub the affected surfaces. |
4 | Rinse the area thoroughly with water to remove all traces of the cleaning solution. |
5 | Dry the surface completely to prevent mold regrowth. |
6 | Dispose of any moldy materials that cannot be salvaged, such as carpets, wallpaper, or drywall. |
7 | Monitor the area for any signs of mold recurrence and take necessary actions to prevent future mold growth. |
Effective Solutions for Permanent Mold Removal
Mold is a common problem in many households and can cause a variety of health issues. Eliminating mold completely and permanently is essential for maintaining a clean and healthy living environment.
• Understanding Mold Growth
Mold is a type of fungus that grows in damp or humid conditions. It can be found both indoors and outdoors, and it thrives in places with high moisture levels such as bathrooms, kitchens, and basements.
The United States Environmental Protection Agency (EPA) provides valuable information on mold growth and how to prevent it.
In order to effectively eliminate mold, it is important to understand the factors that contribute to its growth. These include moisture, temperature, and nutrients (such as cellulose, which is found in many building materials).
Addressing these factors can help to minimize the risk of mold growth and enable a more successful removal process.
• Mold Removal Methods
There are several methods for removing mold, depending on the extent of mold growth and the type of surface it is located on. Some of the most common and effective mold removal methods include:
1. Using Mold Removers
Commercial mold removers, such as bleach and hydrogen peroxide, can effectively kill mold on non-porous surfaces. These chemical solutions are usually applied to the affected area and left to dry, allowing the active ingredients to destroy the mold.
However, using harsh chemicals is not recommended for everyone, as they can cause respiratory issues or skin irritation.
For a more eco-friendly option, white vinegar or tea tree oil can be used to kill mold on non-porous surfaces. Simply apply the solution to the moldy area and let it sit for at least an hour before wiping away the residue.
2. Scrubbing Mold Away
For mold on porous surfaces, such as drywall, wood, or carpet, scrubbing may be necessary to remove the mold. Using a stiff brush, scrub the affected area with detergent and water, then rinse thoroughly.
It is essential to wear protective gloves and a mask during this process to avoid inhaling mold spores or coming into contact with irritants.
3. High-Efficiency Particulate Air (HEPA) Vacuuming
In severe cases of mold growth, using a HEPA vacuum can help to remove mold spores from surfaces and the surrounding air. This type of vacuum is specifically designed to capture small particles, such as mold spores, preventing them from becoming airborne and spreading further.
4. Professional Mold Remediation
In cases where mold growth is extensive or has caused significant damage to building materials, professional mold remediation may be necessary.
A trained expert can assess the severity of the problem and develop a comprehensive plan to effectively remove and permanently eliminate the mold.
• Preventing Mold Growth
Preventing mold growth is key to maintaining a healthy living environment. Here are some expert recommendations for keeping mold at bay:
1. Control Moisture Levels
Mold thrives in moist environments, so controlling the humidity in your home is crucial for preventing mold growth. Using a dehumidifier or air conditioner can help maintain humidity levels below 60%, making it less likely for mold to grow.
2. Proper Ventilation
Ensuring that your home has proper ventilation can help to reduce moisture levels and minimize the risk of mold growth. This includes using exhaust fans in bathrooms and kitchens and ensuring that air ducts are clean and functioning properly.
3. Fix Leaks and Water Damage
Any areas with water damage or leaks should be repaired as soon as possible to prevent mold growth. This includes fixing leaking pipes, addressing water seepage in basements, and repairing damage to roofs and gutters.
4. Keep Surfaces Clean and Dry
Regular cleaning of surfaces, especially in areas prone to mold growth (such as bathrooms and kitchens), can help to prevent the buildup of mold spores. Wipe down countertops, sinks, and showers with a mild detergent and ensure that these areas are kept as dry as possible.
• Final Thoughts
Mold can be a persistent and harmful problem in many households. By understanding the factors that contribute to mold growth, using effective removal methods, and implementing prevention strategies, it is possible to permanently eliminate mold and maintain a clean, healthy living environment.
Remember to consult professional help for severe mold issues, and always prioritize your health and safety when dealing with mold growth.
Initial Steps to Prevent Mold Growth Prior to Remediation
Mold growth can wreak havoc in homes and other indoor environments, causing health risks such as asthma, allergies, and other respiratory problems. Before you can begin the process of mold remediation, it’s crucial to eliminate the primary culprit causing its growth.
• Identifying the Root Cause: Moisture and Humidity
The primary factor that promotes mold growth is moisture. Uncontrolled humidity levels in indoor environments, water leaks, and damp materials create the ideal conditions for mold to thrive. Therefore, the first thing to eliminate or control is moisture.
– Addressing Moisture Sources
There are several ways excessive moisture may enter your home, which needs to be addressed to limit mold growth effectively. Some common sources of moisture include:
- Leaks: Plumbing leaks, roof leaks, and other structural issues can lead to moisture accumulation. Locate and repair any leaks to prevent further water damage and mold growth.
- Condensation: Cold surfaces, such as windows or metal pipes, often result in condensation, promoting mold growth. Insulating these surfaces can help reduce condensation and, in turn, mold formation.
- Poor Ventilation: Inadequate ventilation can trap moisture and create a damp environment. Ensure that areas like bathrooms and kitchens, which tend to have high humidity levels, are properly ventilated.
– Controlling Humidity Levels
Maintaining proper humidity levels is essential for inhibiting mold growth. Here are some steps to help regulate indoor humidity:
- Ventilation: Ensure that your home has sufficient air circulation. Opening windows and using exhaust fans in bathrooms, kitchens, and laundry rooms can greatly help in reducing humidity levels.
- Dehumidifiers: Dehumidifiers can be used to maintain ideal humidity levels, usually between 30-50%. These devices can be particularly helpful during hot and humid months.
- Air Conditioning: Using an air conditioner not only cools your home but also helps reduce humidity levels. Make sure to clean your air conditioner’s filters regularly to ensure optimal performance.
• Assessing the Mold Situation
Once you’ve addressed moisture and humidity issues, it’s crucial to assess the extent of mold growth in your home. This process will help you determine the appropriate remediation steps.
– Visual Inspection
Examine your home for any visible signs of mold. Typically, mold appears as discoloration or fuzzy growth on various surfaces, such as walls, furniture, and fabrics. Mold can have various colors, including black, green, and white. Also, note any musty odors, which can indicate hidden mold growth.
– Professional Mould Inspection
If you’re unsure if your home has a mold problem or if the issue is extensive, it’s best to consult a professional mold inspector. They can accurately assess and identify the type and extent of mold in your home, helping you make informed decisions about the remediation process.
The Environmental Protection Agency (EPA) offers a comprehensive guide on how to select a mold inspection and remediation professional, which can be found here.
• Post-Remediation Recommendations
After you’ve successfully addressed moisture and humidity problems and completed the remediation process, it’s essential to maintain a mold-free environment by following these recommendations:
- Regular Maintenance: Perform regular inspections of your home for moisture and mold issues. This can help detect and prevent potential problems early on.
- Prompt Leak Repair: Fix any leaks as soon as they are detected to prevent water damage and mold growth.
- Proper Cleaning: Regularly clean high-humidity areas in your home, such as bathrooms and kitchens, to make it more difficult for mold to grow on surfaces.
In conclusion, understanding the importance of controlling moisture and humidity in your home is vital for effective mold remediation.
By addressing these factors and following the steps detailed in this article, you can significantly reduce or even eliminate mold growth in your home, ensuring a healthy and safe living environment for you and your loved ones.
Techniques for Cleaning Inaccessible Mold
Mold can be a significant health hazard in any environment, and the presence of mold in difficult-to-reach areas can make cleaning it even more challenging.
• Taking Safety Precautions
When dealing with mold, it is crucial to ensure proper safety precautions are taken. Always wear protective gear, such as gloves, goggles, and a mask, to prevent contact with mold spores. Additionally, ensure proper ventilation in the working area.
• Identifying the Source of Moisture
Before proceeding to remove the mold, it is essential to identify and resolve the source of moisture that is causing the mold growth. Without addressing the moisture problem, the mold will likely return even after cleaning has taken place.
Sources of moisture can range from leaking pipes, damp foundations, or even high indoor humidity levels. If the moisture source cannot be identified or fixed, consult with a professional.
• Cleaning Unreachable Mold: Different Techniques
Depending on where the mold is located, various tools and techniques can help with the cleaning process. Below are some suggestions for tackling mold in hard-to-reach locations.
– Using a Telescope Brush
A telescopic brush with extendable features is an ideal tool for reaching high or tight spaces, such as ceilings or areas behind furniture. These brushes can typically extend up to 3 meters in length, providing sufficient reach for most situations.
Attach a microfiber cloth, sponge, or disposable cloth soaked in a cleaning agent to the end of the telescope brush, then proceed to scrub the mold-infested area.
– Vacuum Cleaning
For mold located in dry, dusty areas such as crawl spaces, a vacuum cleaner with a HEPA filter and a hose attachment can help remove mold spores. HEPA filters are efficient in capturing mold spores and preventing them from becoming airborne during the cleaning process.
After vacuuming the area, follow up with a mold-killing agent to disinfect the area, ensuring the mold is completely removed.
– Aerosol Mold Remover
For hard-to-reach areas such as air vents or spaces where it is difficult to use a scrubbing tool or vacuum, an aerosol mold remover may be considered. These mold removers often come with a hose and nozzle attachment, allowing them to be sprayed directly into tight spaces.
Be sure to follow the manufacturer’s instructions for proper use, as well as ensure proper ventilation during application.
– Steam Cleaning
Steam cleaners can be an effective tool for removing mold from hard-to-reach locations, such as tile grout or behind appliances. The high-temperature steam not only loosens mold but also helps to kill the spores.
Attachments, such as a hose or nozzle, can be used to access tight spaces. After steam cleaning, allow the area to dry thoroughly before using a mold-killing agent to treat any remaining spores.
• Prevention Measures
After the unreachable mold has been effectively cleaned and treated, it is crucial to take steps to prevent future growth. Some measures to consider include the following:
- Maintaining proper indoor humidity levels (between 30-50%, as recommended by the EPA)
- Regularly inspecting and repairing any plumbing leaks or water damage
- Using exhaust fans in kitchens and bathrooms to reduce moisture and increase ventilation
- Using a dehumidifier if necessary to maintain proper humidity levels
• Seeking Professional Services
In some cases, unreachable mold growth may be extensive or severe, requiring the help of professional mold remediation services. Furthermore, certain types of mold, such as black mold, can be highly toxic and should be handled by professionals.
If you are unsure about tackling mold removal on your own or suspect you are dealing with toxic mold, consult with an experienced contractor to assess the situation and provide appropriate remediation services.
In conclusion, effectively cleaning and treating unreachable mold requires a combination of the appropriate tools, techniques, and preventive measures.
Always take safety precautions, address moisture problems, and choose suitable methods to tackle mold growth in various locations. If necessary, don’t hesitate to seek professional assistance to ensure a safe and mold-free environment.
Step | Description |
|---|---|
1. | Inspect the area and identify the location of mold growth. |
2. | Wear proper safety gear, such as gloves, safety goggles, and a face mask. |
3. | Create a cleaning solution. Mix one part bleach with three parts water in a spray bottle or bucket. |
4. | If possible, use a long-handled brush or extendable cleaning tool to reach the moldy area. |
5. | Spray or apply the cleaning solution to the moldy area. Let it sit for a few minutes to allow the solution to penetrate the mold. |
6. | Scrub the moldy area with the brush or cleaning tool until the mold is removed. |
7. | Rinse the area with clean water using a clean rag, sponge, or cloth. |
8. | Use a fan or dehumidifier to help dry the area thoroughly. |
9. | Monitor the area for any signs of regrowth and re-clean as needed. |

