Applying Primers On Different Materials: Tips and Tricks
Are you struggling to apply primers on different materials and achieve that perfect finish for your project? No need to worry because we’ve got you covered. With our carefully curated tips, you can unlock the secret to ensuring your primer adheres to various surfaces like a pro.
Applying primers on different materials: tips:
When applying primers on various materials, choose the right primer for the specific surface (wood, metal, plastic, or concrete/masonry). Clean and prepare the surface by sanding or cleaning, and apply the primer in thin, even coats. Follow the manufacturer’s instructions, and allow adequate drying time for a long-lasting, professional finish.

Interested in achieving a flawless finish on various materials? Our guide on applying primers will reveal expert tips and techniques to ensure a strong, lasting bond. Read on and paint like a pro!
Contents
- 1 Tips for Applying Primers on Various Material Types
- 2 Can Primer Smooth Out Uneven Surfaces?
- 3 Expert Advice on Spray Application of Primer
- 3.1 • Understanding the Importance of Primer
- 3.2 • Choosing the Right Primer
- 3.3 • Essential Tools for Spraying Primer
- 3.4 • Preparing the Surface for Primer Application
- 3.5 • Setting Up the Sprayer Equipment
- 3.6 • Tips for Spraying Primer Effectively
- 3.7 • Drying and Inspecting the Primed Surface
- 3.8 • Cleaning Up and Proper Maintenance
- 4 Spraying Primer with a 1.4 Tip: Is it Possible?
- 5 Importance of Even Primer Application: Guide
Tips for Applying Primers on Various Material Types
Priming surfaces before painting, gluing, or finishing is a critical step that ensures the adhesion and longevity of the final finish. Each material may require a different approach, and understanding the correct priming technique for each surface can save time, money, and frustration.
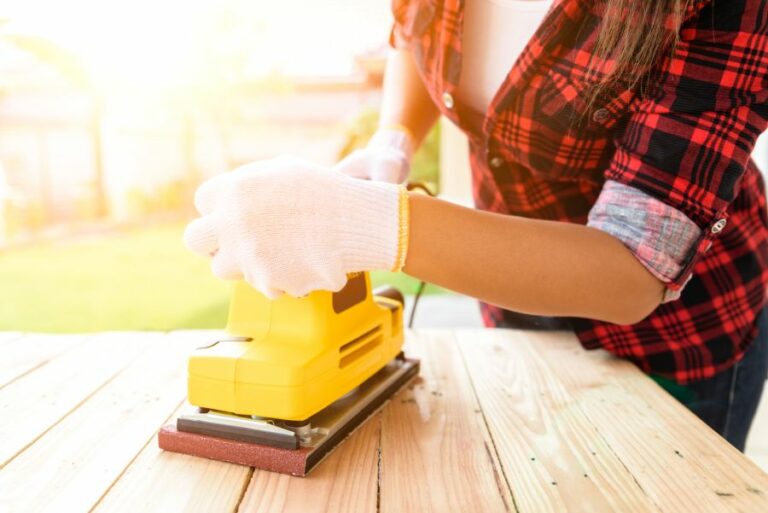
• Priming Wood Surfaces
Wood is a porous material that absorbs moisture, and priming helps seal and protect it. When working with wood surfaces, the following tips can help ensure a flawless finish:
- Choose the right primer: Oil-based primers are best for wood surfaces that will be exposed to high humidity or exterior elements. For interior wood, a water-based primer is a suitable option.
- Sand the surface: Before applying the primer, sand the wood surface with medium-grit sandpaper to remove any defects and create a smooth surface.
- Remove dust and debris: Use a tack cloth or vacuum to eliminate any dust from the sanding process.
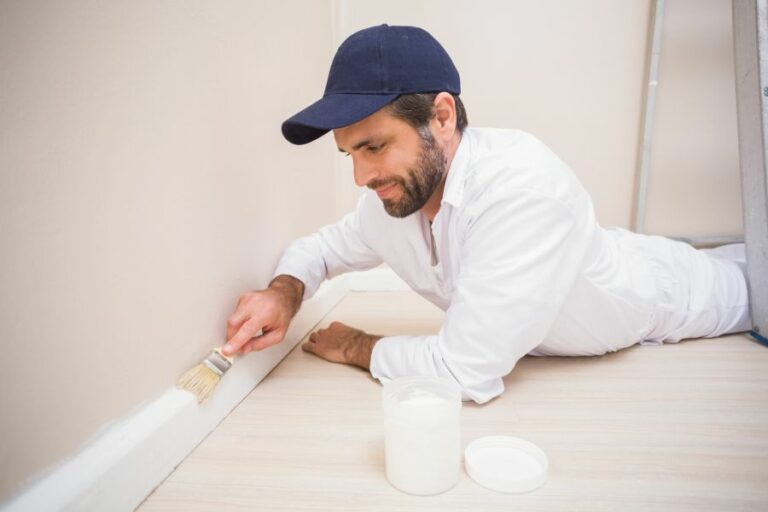
- Apply primer: Follow the manufacturer’s instructions for dilution and application of the primer. It is essential to apply the primer in thin, even coats, using a brush or roller. Allow the primer to dry according to the specified time on the product label.
- Sand between coats: After the primer is dry, lightly sand the surface with fine-grit sandpaper to create a smooth and even base for paint or finish. Wipe away any dust with a tack cloth or vacuum.
• Priming Metal Surfaces
Metal surfaces require a primer that prevents rust and corrosion while promoting the adhesion of the finish. When working with metal surfaces, consider the following:
- Choose the right primer: Select a primer specifically designed for metal surfaces, such as an etch primer or rust-inhibiting primer.
- Clean the surface: Make sure the metal surface is free of any oils, dirt, and debris. Use a metal cleaner or degreaser to thoroughly clean the surface.
- Remove rust: If the metal is rusty, use a wire brush, sandpaper, or a rust remover to eliminate any rust and create a smooth base for the primer.
- Apply primer: Apply the metal primer in thin, even coats using a brush or roller. Allow the primer to dry based on the manufacturer’s instructions.
• Priming Plastic Surfaces
Plastic surfaces can be challenging to paint due to their smooth and potentially oily nature. To prime plastic:
- Choose the right primer: Look for primers designed specifically for plastic surfaces or those labeled as “adhesion promoters.”
- Clean the surface: Use a mild soap and water solution to clean the plastic surface. Wipe it dry with a lint-free cloth.
- Lightly scuff: For better adhesion, lightly scuff the surface with a fine-grit sandpaper or abrasive pad.
- Apply primer: Apply the plastic primer in thin, even coats, allowing it to dry based on the manufacturer’s instructions.
• Priming Concrete and Masonry Surfaces
Priming concrete and masonry surfaces helps to seal out moisture, protect from stains, and provide an even base for the final finish. To prime these surfaces:
- Choose the right primer: Select a masonry or concrete primer or a water-based acrylic primer designed for porous surfaces.
- Clean the surface: Remove any dirt, debris, and loose or peeling paint. Use a pressure washer or a wire brush to clean the surface thoroughly.
- Repair surface: Fill any cracks, holes, or imperfections with a patching compound designed for concrete or masonry surfaces.
- Apply primer: Apply the primer using a brush or roller, following the manufacturer’s application instructions. Allow the primer to dry according to the product label.
• Conclusion
Primers play a vital role in preparing surfaces for paint and other finishes by providing a surface profile that promotes adhesion, sealing, and protection.
With the guidelines and tips provided in this article, you can confidently tackle any project that involves priming wood, metal, plastic, concrete, or masonry surfaces.
Always follow the primer manufacturer’s instructions and allow adequate drying time to ensure a long-lasting and professional-looking finish.
Can Primer Smooth Out Uneven Surfaces?
• The Role of Primer
Primer is an essential component in every painting or refinishing project. It serves as the base coat for the paint and offers various benefits.
Primer ensures better adhesion of paint to the surface, increases the durability of the paint, and provides protection to the surface being painted.
In essence, a good-quality primer acts as a barrier between the underlying surface and the paint, preventing any reactions that may cause undesired results. But does primer fill in uneven surfaces?
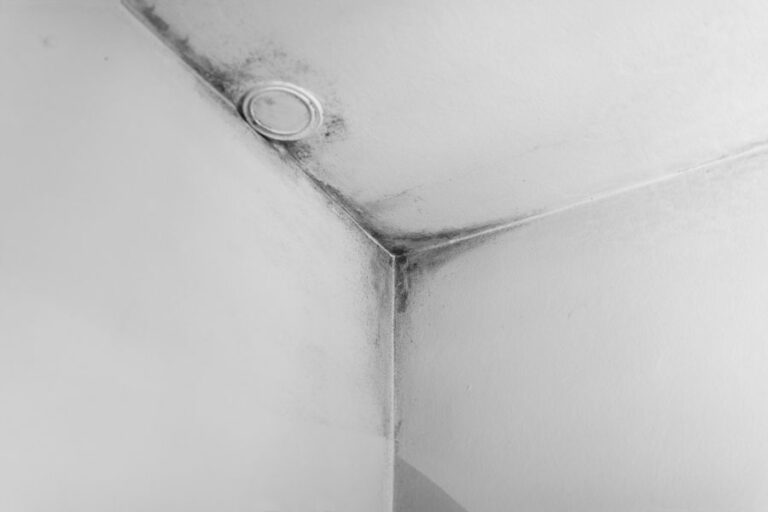
• Primer as a Filler for Uneven Surfaces
The answer to this question depends on the type of primer used and the surface’s degree of unevenness. Some primers are explicitly formulated to fill minor gaps and small imperfections on surfaces.
These primers, known as high-build primers, tend to be thicker and more viscous than regular primers, enabling them to fill small indentations and create a smoother surface before paint application.
However, it is important to note that primer is not a substitute for proper surface preparation. Although high-build primers can help even out minor imperfections, it is still crucial to repair any significant cracks, holes, or damaged areas before priming.
– High-Build Primer
High-build primers are specifically designed to deal with minor imperfections in the surface. They contain more solid particles than regular primers, which allows for better filling and leveling capabilities. As a result, high-build primers can produce a smoother, more even finish on uneven or textured surfaces.
I recommend using a high-build primer for surfaces with minor defects, such as small nail holes and slight unevenness. This type of primer can be applied with a brush, roller, or spray equipment. However, their thicker consistency may require multiple coats to achieve the desired level of smoothness.
Keep in mind that although a high-build primer can help hide minor surface imperfections, it will not fix any structural damage, large cracks, or holes in the surface. It is essential to address these issues before applying any primer product.
– Regular Primer
Regular primers, on the other hand, have a thinner consistency and are less effective at filling uneven surfaces. These primers are typically used for surfaces that are already mostly smooth or have been adequately prepared, and only minor imperfections remain.
In cases where you are dealing with surfaces that have substantial unevenness or require more extensive repair, it is best to address these issues first. This may involve sanding, patching, or applying a specialized filler for larger imperfections.
• Prepping Uneven Surfaces
As mentioned earlier, proper surface preparation is crucial to achieving a smooth and even finish when painting. Here are some steps to follow before applying primer to uneven surfaces:
- Clean the surface: Remove any dirt, dust, or debris to create a clean surface for the primer application. Doing so helps the primer adhere more effectively and ensures a proper bond between the primer, paint, and the surface.
- Repair any major imperfections: Fill large holes, cracks, or damaged areas with an appropriate filler or patching compound. Sand the repaired areas to create a smooth, even surface.
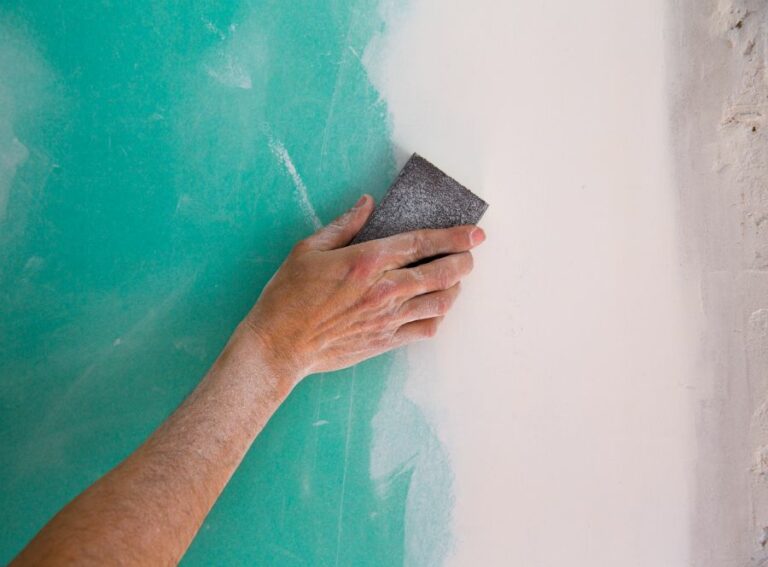
- Sand the surface: For severely uneven surfaces, use a sanding block or power sander to smooth out any bumps, ridges, or high spots. This step creates a more even surface, allowing the primer and paint to adhere better.
- Wipe down the surface: After sanding, use a damp cloth to remove any remaining dust, ensuring a clean surface for primer application.
• Conclusion
In closing, primers can help fill uneven surfaces to a certain extent, especially when you use a high-build primer specifically designed for this purpose. However, it is crucial to keep in mind that primer should not serve as a substitute for proper surface preparation.
Always repair significant imperfections and ensure the surface is clean and smooth before applying primer for optimal results when painting or refinishing.
Expert Advice on Spray Application of Primer
• Understanding the Importance of Primer
Before diving into the tips for spraying primer, it’s essential to understand the purpose of primer and why using it is important.
Primer is a coating applied to an unprepared surface to increase the adhesion and durability of the paint. It also helps seal porous surfaces and block stains from bleeding through the paint. Ultimately, using primer can vastly improve your painting project’s final appearance and longevity.
• Choosing the Right Primer
Selecting the right primer is crucial to achieving the best results in your painting project. Here are a few tips to consider when selecting a primer:
- Surface material: Choose a primer appropriate for the surface you’ll be working on (e.g., wood, metal, or drywall).
- Location: Consider whether your project is indoor or outdoor, as this will influence the primer you select.
- Paint type: Ensure your primer is compatible with the type of paint you plan on using (e.g., water-based or oil-based).
• Essential Tools for Spraying Primer
Gather the necessary equipment for spraying primer to ensure a smooth and efficient process. Some essential tools include:
- Airless paint sprayer or HVLP (High Volume Low Pressure) spray gun
- Respirator
- Safety goggles
- Protective gloves
- Paint stirrer
- Strainer
- Clean rags
• Preparing the Surface for Primer Application
To achieve an outstanding primer application, follow these essential steps:
- Cleaning the surface: Remove dust, dirt, and grease from the surface being painted to ensure proper adhesion of the primer.
- Masking and protecting nearby areas: Use masking tape and drop cloths to safeguard surrounding areas that you don’t want to prime.
- Sanding: Lightly sand the surface if recommended by the primer manufacturer or if the surface is rough.
• Setting Up the Sprayer Equipment
Before beginning the spraying process, follow these steps to ensure your equipment is set up correctly:
- Reading the manufacturer’s instructions: Review your specific sprayer model’s instructions to familiarize yourself with the equipment.
- Assembling the sprayer: Follow the manufacturer’s guidelines for putting your equipment together.
- Testing the sprayer: Perform a test spray to ensure the equipment is functioning properly.
• Tips for Spraying Primer Effectively
Now that everything is prepared, here are some expert tips to help you spray primer like a pro:
- Mixing the primer: Stir the primer thoroughly and strain it to prevent clogs in your sprayer.
- Applying the primer in thin coats: Lightly apply each coat of primer, avoiding heavy applications that may lead to drips and uneven surfaces.
- Maintaining a consistent spraying pattern: Move the sprayer in a smooth, horizontal, or vertical motion, overlapping each pass by about 50% to ensure even coverage.
- Keeping the right spraying distance: Hold the sprayer approximately 10-12 inches from the surface to achieve the best result.
- Taking breaks and cleaning the equipment: Periodically clean the sprayer nozzle to ensure consistent spray patterns and prevent clogs.
- Adjusting the pressure settings if necessary: If using an airless paint sprayer, adjust the pressure settings according to the primer manufacturer’s recommendations.
• Drying and Inspecting the Primed Surface
Allow the primer to dry according to the manufacturer’s instructions. Once it’s dry, inspect the surface to ensure even coverage and a smooth finish. If necessary, apply an additional coat of primer or lightly sand any rough areas.
• Cleaning Up and Proper Maintenance
Properly cleaning your equipment and work area will prolong the life of your tools and help ensure a successful next project. Here are some tips for cleanup and maintenance:
- Cleaning the sprayer: Follow the manufacturer’s guidelines for cleaning your specific equipment.
- Disassembling and storing the sprayer: After cleaning, disassemble your sprayer and store it in a safe place.
- Properly disposing of materials: Dispose of leftover primer and cleaning materials according to local regulations.
By following these expert tips, you can achieve professional results when spraying primer on any surface. Take the time to prepare, use the right tools, and follow the best practices to ensure a smooth, durable finish that will serve as the perfect base for the final paint application.
| Tip |
|---|
| Always work in a well-ventilated area to reduce the risk of inhaling harmful primer fumes. |
| Wear proper safety gear, such as goggles, gloves, and a respirator, to protect yourself from harmful chemicals. |
| Ensure the surface to be primed is clean and free of dust, dirt, and debris for maximum adhesion. |
| Use a high-quality primer specifically designed for the material you are working with. |
| Apply thin, even coats of primer to avoid drips and runs, allowing each coat to dry according to the manufacturer’s guidelines before applying the next one. |
| Hold the spray gun at a consistent distance from the surface and move it in a smooth, sweeping motion. |
| Maintain a consistent spray pattern and overlap each pass by approximately 50% to ensure proper coverage. |
| Adjust the spray gun settings, such as fluid output and airflow, according to the primer and surface, ensuring an even and consistent application. |
Spraying Primer with a 1.4 Tip: Is it Possible?
When it comes to spraying primer, the size of the spray gun tip is crucial. The wrong size can lead to imperfections, runs, and wasted paint. A common question in the automotive painting world is, “Can you spray primer with a 1.4 tip?”
• Understanding Tip Sizes and Their Functions
First, let’s clarify that a spray gun tip consists of a fluid nozzle and an air cap. The size of the fluid nozzle determines the amount of paint to be sprayed. This size is measured in millimeters (mm) and typically ranges from 1.0mm to 2.2mm. The lower the number, the smaller the tip size, and vice versa.
– 1.4mm Spray Gun Tips
A 1.4mm tip is considered a versatile size, commonly used for both basecoats and clearcoats in automotive painting. Although it’s a smaller size, it can still achieve an even and smooth finish with reduced overspray, which is ideal for metallic and pearl paints.
The smaller size allows for the fine atomization of the paint, resulting in a high-quality finish.
– Larger Spray Gun Tips
Larger tips like 1.6mm, 1.8mm, and 2.0mm are primarily used for spraying high-build primers, thicker materials, and some specialized coatings. These sizes enable the spray gun to produce enough material coverage for an adequate layer of primer on a surface.
A larger tip size will provide a thicker coat, which is essential for filling any surface imperfections, such as scratches and dents, while also ensuring proper adhesion between the surface and following paint layers.
• Can You Spray Primer with a 1.4 Tip?
In short, yes, you can spray primer with a 1.4mm tip. However, it’s worth noting that it might not be the most efficient way to do so. As mentioned earlier, larger tips are more suitable for high-build primers and thicker materials.
That said, a 1.4mm tip can still be used for spraying primer, especially if you’re working with a thinner primer or a small-scale project.
For instance, using a 1.4mm tip for a spot repair, such as a single dent or scratch on a vehicle, is acceptable because you don’t require a large quantity of material.
However, when spraying primer over an entire vehicle or a large area, you should consider using a larger tip to speed up the process and save time.
• Expert Recommendations for Spraying Primer
From an expert perspective, my recommendations for spraying primer are as follows:
- Choose the right tip size: For spraying high-build primers, I recommend using a tip size between 1.6mm to 2.0mm, depending on the primer’s thickness and your specific project requirements.
- Adjust your spray gun settings: Skipping proper spray gun setup and adjustment can lead to various issues, such as excessive overspray or uneven coverage. Adjust the air pressure, fan width, and material flow rate according to the primer and spray gun manufacturer’s guidelines.
- Prepare the surface: Proper surface preparation is crucial before applying primer. Clean and degrease the area to be primed, and then sand the surface with the appropriate grit sandpaper. This process ensures a smooth surface and promotes adhesion between the primer and the surface.
- Apply multiple coats: For best results, apply multiple thin coats of primer, allowing each coat to dry before applying the next coat. This process prevents runs and sagging while providing adequate coverage and filling imperfections.
- Seek professional advice: If you’re unsure about the right spray gun tip size or specific primer requirements for your project, consult a professional painter, or reach out to the manufacturer for advice.
• Additional Resources
For more information on proper spray gun tips and techniques, the Automotive Paint Handbook from Sherwin Williams provides a wealth of knowledge from an industry-leading manufacturer.
In conclusion, while it is possible to spray primer with a 1.4mm tip, it may not be the most efficient method. Choosing the right tip size based on the primer’s thickness and your project requirements will help produce a smoother finish and better adhesion for your paint layers.
By following expert recommendations and leveraging available resources, you can achieve professional results on your painting projects.
Question | Answer |
|---|---|
Can you spray primer with a 1.4 tip? | Yes, you can spray primer with a 1.4 tip, but it may not be ideal for all types of primers. Thicker primers might require a larger tip size, such as a 1.8 or 2.0, for a smoother spray. It is essential to check the primer’s recommended tip size and adjust accordingly. |
Importance of Even Primer Application: Guide
Primer is a foundational layer of paint that prepares surfaces for an even, beautiful finish. It smooths the surface, covers imperfections, ensures optimal adhesion of the topcoat, and enhances the durability of the paint. Its importance cannot be overstated.
Given its critical role, it’s essential to apply the primer evenly for the best possible results.
• Importance of Even Primer Application
Achieving consistency and evenness in the primer application is critical for several reasons:
– Enhanced Visual Appeal
An unevenly applied primer can create an unattractive appearance with visible ridges, roller marks, brush strokes, or uneven thickness. These flaws will be magnified when the finish paint is applied, as the topcoat will follow the contours laid down by the primer.
– Improved Durability
An even coat of primer ensures proper adhesion, providing better resistance to peeling, chipping, and wearing of the paint. Uneven primer application may lead to weak spots, affecting the longevity of the paint job.
– Better Topcoat Performance
An even primer coat allows for a uniform surface for the main paint to adhere to, allowing the topcoat to do its job with optimal efficiency. If the primer coat is not applied evenly, it can compromise the performance and coverage of the topcoat.
• Tips for Applying Primer Evenly
To achieve an even primer application, follow these best practices:
– Choose the Right Tools
Select quality paintbrushes, rollers, or sprayers designed for primer application. Investing in good-quality tools ensures even coverage and reduces the likelihood of leaving behind bristle or roller marks.
– Prepare the Surface
Before applying primer, properly prepare the surface by cleaning, degreasing, sanding, and repairing any imperfections. A well-prepared surface allows for better adhesion and even distribution of the primer.
– Use the Appropriate Primer
Choose the correct primer for your desired surface and topcoat. Different surfaces and paint types may require specific primers for optimal adhesion and coverage. Always read the manufacturer’s instructions for guidance.
– Apply the Primer in Thin, Even Coats
Rather than trying to cover everything in one thick coat, apply multiple thin coats, allowing each to dry before reapplying. This prevents an uneven buildup of primer and allows for better overall coverage.
– Maintain a Consistent Technique
For brush or roller application, use long, even strokes, overlapping each previous stroke slightly to ensure proper coverage. This helps to eliminate visible brush or roller marks. For spray application, keep the sprayer at a consistent distance from the surface and move in straight lines with a slight overlap.
• Recommendations Based on Personal Experience
From my own experience, I recommend the following strategies for achieving an even primer application:
- Practice your technique: Before starting the actual project, practice your technique on a spare piece of material or a hidden area. This helps you become more comfortable and proficient with your tools and application method.
- Inspect your work: Regularly inspect the primer application as you work to ensure even coverage, maintain the proper thickness, and correct any visible imperfections.
- Take breaks: Make sure you take regular breaks to prevent fatigue, which can lead to uneven application.
- Work in proper lighting: Adequate lighting allows you to see and correct any inconsistencies or unevenness in your primer application more easily.
In conclusion, applying primer evenly is critical to achieving a visually appealing, durable, and high-performing paint job.
By following the best practices and recommendations outlined in this article, you can ensure your primer application is as even and consistent as possible, resulting in a stunning and long-lasting finish.