Preparing Wood, Metal, And Masonry For Painting
Are you planning on giving a fresh coat of paint to your wood, metal, or masonry surfaces? Fear not, as we are here to guide you step-by-step in preparing these materials for a flawless paint job. With our expertise and tips, you can be sure that your paint will adhere properly and remain durable over time.
Preparing wood, metal, and masonry for painting:
Preparing wood, metal, and masonry for painting involves cleaning the surface, repairing any imperfections, and applying a primer. These steps ensure proper adhesion, a smooth finish, and a long-lasting paint job. For each material, use specific primers and follow manufacturer instructions.
Want to ensure a flawless paint job for wood, metal, or masonry surfaces? Proper preparation is key. Delve into our comprehensive guide on cleaning, repairing, and priming these materials for a sleek, long-lasting finish. Read on for expert tips and techniques that will elevate your painting projects.
Contents
- 1 Prepping Wood, Metal, & Masonry for Painting
- 2 Achieving a Metallic Finish on Wood Surfaces
- 3 Applying a Metal Coating on Wooden Material
- 4 Creating a Wood Grain Effect on Metal Surfaces
- 5 Top Degreasers for Metal Pre-Paint Cleaning
- 6 Ideal Metal Preparation Techniques Before Painting
- 7 Preparing Wooden Surfaces: Best Practices
Prepping Wood, Metal, & Masonry for Painting
• Introduction
Preparing different surfaces for painting ensures a clean canvas for a smooth finish. Whether you are painting wood, metal, or masonry, proper preparation is crucial for a long-lasting paint job.
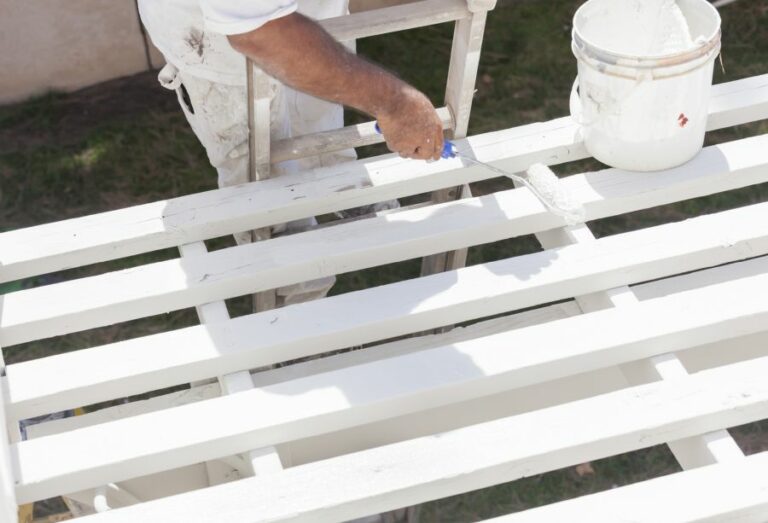
• Wood Surface Preparation
– Cleaning
Before painting wood surfaces, it is essential to remove dirt, dust, and mildew. This can prevent adhesion issues and help the paint last longer. Clean the wood using a mix of water, mild soap, and a scrub brush or sponge. Rinse thoroughly and let it dry completely before moving on to the next step.
– Sanding
Sanding wood surfaces is necessary to eliminate imperfections and provide a smooth surface for paint. For best results, use a sanding block or an orbital sander with medium-grit (80-120 grit) sandpaper.
Sand along the wood grain, and pay special attention to rough or uneven areas. After sanding, clean the wood with a tack cloth or vacuum to remove any residual dust.
Repair and Fill
Inspect the wood for any cracks, holes, or imperfections that should be repaired before painting. Use wood filler or wood putty to fill these areas, following the manufacturer’s instructions.
After the filler dries, sand the surface smooth, and clean with a tack cloth or vacuum.
– Priming
A wood primer is essential to create a proper base for paint. This helps create better adhesion and prolongs the paint’s life. Choose a primer specific for wood surfaces, and follow the manufacturer’s instructions for application. Let the primer dry thoroughly before proceeding to paint.
• Metal Surface Preparation
– Cleaning
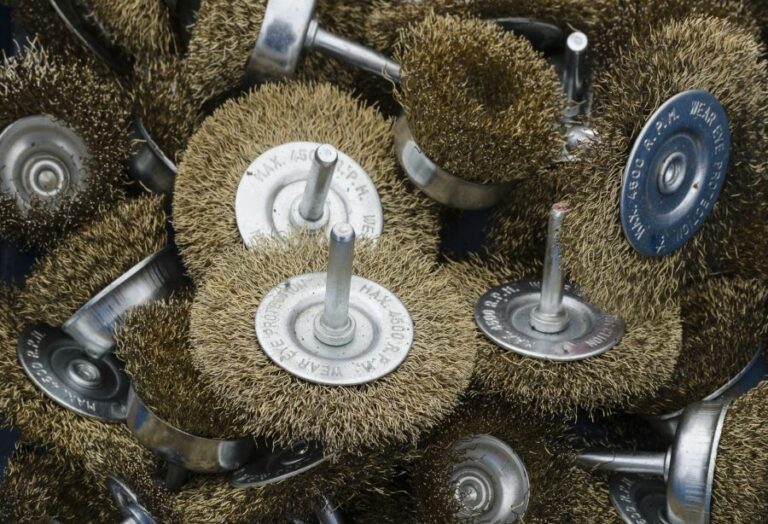
When preparing metal surfaces for painting, it is essential to remove dirt, grease, and any existing paint. Use a degreasing cleaner or detergent to remove contaminants. For removing loose or peeling paint, use a scraper, wire brush, or sandpaper. After cleaning, rinse the surface thoroughly and let it dry completely.
– Rust Treatment
If your metal surface has rust spots, it is crucial to treat them before painting. Use a rust converter or rust remover to chemically react with the rust and convert it to a stable surface that can be painted. Follow the product instructions carefully, and allow the surface to cure as directed.
– Sanding & Etching
For smooth and shiny metal surfaces, lightly sanding or etching may be necessary to promote paint adhesion. Use fine-grit sandpaper or steel wool to create a lightly abraded surface. Afterward, clean the surface with a damp cloth to remove any dust.
– Priming
Priming is essential for metal surfaces to prevent rust and provide a stable base for paint. Choose a primer specifically designed for metal. Two common types are rust-preventative primers and self-etching primers. Follow the manufacturer’s instructions to apply the primer and allow it to dry before painting.
• Masonry Surface Preparation
– Cleaning
The first step in preparing masonry surfaces for painting is to clean the surface. Remove dirt, dust, and debris by using a brush or vacuum. For stubborn stains, use a mix of water and mild detergent to scrub the surface. Rinse thoroughly and let it dry before moving on to the next step.
– Repair
Examine your masonry surface for cracks, holes, or other imperfections that require repair. Use a masonry patching compound or mortar to fill and repair these areas, following the manufacturer’s instructions. Allow the repaired areas to cure as directed before proceeding.
– Remove Efflorescence
Efflorescence is a white, powdery deposit that can form on masonry surfaces due to water-soluble salts. To remove efflorescence, use a stiff brush and a 5%-15% solution of muriatic acid or vinegar in water.
Apply the solution, scrub the surface, and rinse thoroughly. Allow the surface to dry completely before proceeding.
– Priming
Masonry surfaces should be primed with a suitable masonry primer to ensure proper adhesion and a smooth finish. Follow the manufacturer’s instructions for application, and let the primer dry before painting.
• Conclusion
Proper surface preparation is essential for a successful paint job on wood, metal, or masonry. By cleaning, repairing, and priming each surface thoroughly, you will create a solid foundation for a long-lasting and attractive paint finish.
Achieving a Metallic Finish on Wood Surfaces
Creating a metallic finish on wood surfaces can significantly enhance their appearance and give a unique, industrial vibe to any room.
• Prepare the Wood Surface
Before starting the metallic transformation, it is crucial to properly prepare the wood surface. This often involves the following steps:
– Sanding
Begin by sanding the wood surface to create a smooth, even finish. Starting with a coarse grit sandpaper (around 80 grit), gradually progress through to a finer grit (around 220 grit) for a smooth finish. Remember to always sand with the grain of the wood.
– Cleaning
After sanding, thoroughly clean the surface to remove any dust and debris. This can be done by using a vacuum cleaner with a brush attachment or a tack cloth. Not only will this create a better working environment, but it will also aid in achieving a clean, professional-looking finish.
– Priming
Apply a suitable primer to the wood surface. Primers help to seal the wood and create a smooth base for the metallic paint to adhere to.
A high-quality oil-based primer is typically recommended for this process. Ensure to follow the manufacturer’s instructions and allow the primer to dry fully before proceeding.
• Choose Your Metallic Paint
The type of metallic paint chosen will significantly impact the final appearance of the wood surface.
There is a variety of metallic paint options available in the market, so it is essential to choose one that suits your desired look and is compatible with your wood surface. Some popular options include:
– Metallic Spray Paint
Metallic spray paints offer a convenient and easily accessible option for creating a metallic finish on wood. They provide a smooth, even coverage and are available in various metallic shades. Ensure to select a paint suitable for use on wood surfaces.
– Metallic Acrylic Paint
Metallic acrylic paints are another popular choice for achieving a metallic finish on wood. These water-based paints offer a more controlled application method compared to spray paints and can be easily layered to achieve the desired intensity.
– Metallic Paint Additives
Metallic paint additives are another option for finishing wood to look like metal. These additives can be mixed into a base paint of your choice to create a custom metallic finish.
This option allows for greater control over the final appearance, as well as the ability to create unique color combinations.
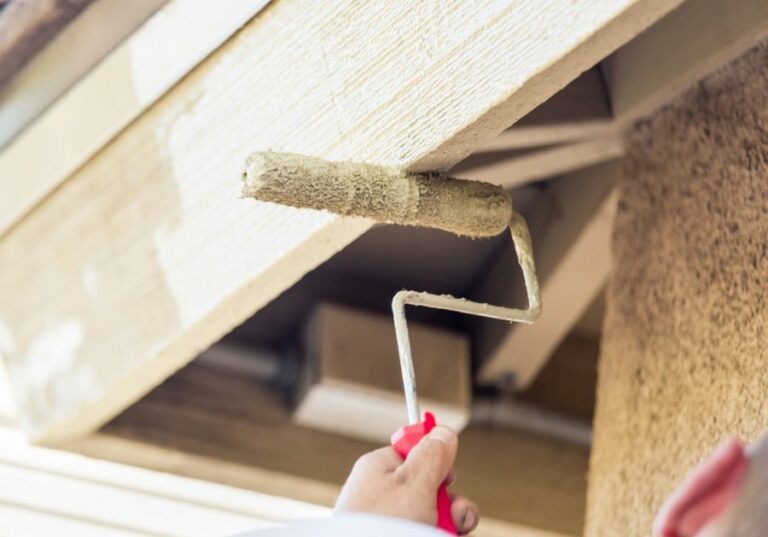
• Application Techniques
There are various techniques for applying metallic paint to a wood surface, each of which can produce a different final appearance. Some popular methods include:
– Brush Application
Using a high-quality brush, apply the metallic paint in smooth, even strokes along the grain of the wood.
For a more authentic metallic appearance, consider using multiple thin layers and allowing each layer to dry fully before applying the next.
– Sponge Application
A sponge can be used to dab metallic paint onto the wood surface, creating a textured and varied finish. This technique can be particularly effective when using multiple metallic shades, as it can mimic the natural variations found in metal surfaces.
– Dry Brush Technique
The dry brush technique involves lightly brushing the metallic paint over the wood surface with minimal paint on the brush.
This method can create a more subtle, aged metallic appearance and is often used in conjunction with other application techniques for added depth and dimension.
– Spray Application
Using metallic spray paint, apply thin, even coats to the wood surface, holding the spray can at a consistent distance to ensure a uniform finish. This technique is generally quicker than brush application methods but may require additional ventilation precautions.
• Add Depth and Dimension
To further enhance the metallic appearance of your wood surface, consider incorporating additional techniques that add depth and dimension, such as:
– Glazing
Glazing involves applying a thin, semi-transparent layer of colored paint over the metallic base. This can add depth and richness to the finish, as well as create the appearance of a patina. Ensure to use a compatible glaze product with your chosen metallic paint.
– Highlighting
Highlighting involves using a lighter metallic shade to accentuate specific areas of the wood surface, creating an aged or worn appearance. This can be achieved using a small, detail brush, or by using the dry brush technique mentioned earlier.
– Clear Coating
After completing the metallic finish, it is essential to protect your work with a clear coat. A clear coat will safeguard against scratches, wear, and damage, ensuring the longevity of your metallic finish.
It is important to select a clear coat compatible with your chosen metallic paint and to follow the manufacturer’s instructions for application and drying times.
• Conclusion
By following the steps and recommendations outlined in this article, transforming a wood surface to resemble metal can be a straightforward and rewarding process.
From preparing the wood surface, selecting the appropriate metallic paint and application techniques, to adding depth and dimension, you can achieve a metallic finish that enhances the overall appearance of any room.
For further information and tips, consider exploring Finishing Wood – FineWoodworking, a comprehensive resource on wood finishing techniques.
Step | Description |
|---|---|
1 | Prepare the wood surface by sanding it smooth. |
2 | Apply a layer of primer to the wood surface. |
3 | Choose a metallic paint or finish, such as silver, gold, or bronze. |
4 | Apply the metallic paint or finish to the wood surface using a brush or sponge. |
5 | Let the paint dry completely, then apply additional layers if necessary to achieve the desired metallic look. |
6 | Add an aging effect, if desired, by applying a dark glaze or wax over the metallic paint and wiping away the excess. |
7 | Protect the finished surface with a clear topcoat or sealer. |
Applying a Metal Coating on Wooden Material
Coating wood with metal can enhance the durability, appearance, and functionality of wooden products. This process, known as metallizing, adds a layer of metal onto the wood surface. It can help protect against wear and tear, resist moisture, and control insects and fungus.
• Methods of Coating Wood with Metal
There are several techniques for applying a metal coating to wood. Each method has its advantages and drawbacks, and the best choice will depend on factors such as the desired effect, budget, and level of expertise.
– Electroplating
Electroplating is a well-established method for depositing a thin layer of metal onto a conductive surface. To coat wood with metal using this process, the wood must first be made conductive by applying a conductive primer or coating.
The wood piece is then submerged in a solution containing metal ions, and an electric current is introduced. The metal ions bond to the wood’s surface, forming a continuous layer.
Electroplating allows for a high level of control over the thickness and quality of the metal layer. However, this process can be complex and may require specialized equipment and knowledge.
Additionally, some electroplating processes may involve toxic chemicals, so proper safety precautions must be observed.
Learn more about the electroplating process from the Electroplating & Electroforming Division of WasteCare Corporation.
– Metal Leafing
Metal leafing or gilding is a centuries-old technique for applying a thin layer of metal, such as gold or silver, onto a surface.
This method involves attaching the metal leaf to the wood surface using an adhesive. Once the adhesive is dry, the metal leaf is burnished to remove any wrinkles and create a smooth finish.
Although metal leafing is a time-consuming and delicate process, the results can be stunning. This method is particularly suitable for decorative applications or when a luxury finish is desired.
For a detailed guide on metal leafing, check out the Society of Gilders’ comprehensive resources.
– Spray Metallizing
Spray metallizing is a popular and cost-effective method for coating wood with metal. In this process, the metal is atomized or vaporized and applied to the wood surface using a spray gun. The metal solidifies upon contact, forming a thin, continuous coating.
The spray metallizing process is less time-consuming than electroplating or metal leafing, and it can be easily scaled to various project sizes.
Additionally, spray metallizing may be more environmentally friendly, as it typically does not require toxic chemicals or significant waste disposal.
However, the metal coating may be less durable than electroplating, and achieving a smooth and even finish may be more challenging.
– Powder Coating
Powder coating is a method for applying a protective and decorative coating of metal or plastic to a surface. In this case, the wood must first be treated with a heat-sensitive adhesive.
Then, a specially formulated metal or plastic powder is applied to the wood surface using a spray gun. The wood is then heated, causing the powder to melt and fuse into a continuous, durable coating.
This method is particularly suitable for outdoor applications, such as playground equipment or outdoor furniture, as it provides excellent protection against the elements. However, powder coating can be more expensive and may require specialized equipment and expertise.
• Factors to Consider When Coating Wood with Metal
– Wood Type
The type of wood being coated can impact the success of the metallizing process. Dense or oily woods may require special preparation to ensure proper adhesion of the metal coating.
It is essential to consult specific instructions for the wood type and chosen metallizing method to avoid complications and achieve optimal results.
– Surface Preparation
Proper surface preparation is critical for achieving a successful metal coating. The wood surface should be clean, dry, and free of any dirt, oils, or other contaminants. The wood may also need to be sanded or otherwise treated to ensure proper adhesion of the metal coating.
– Environmental Conditions
Humidity, temperature, and other environmental factors can impact the metal coating process’s success. It is essential to follow the recommended guidelines for each method and ensure appropriate conditions throughout the application process.
• Conclusion
Coating wood with metal is achievable through several methods, each with its advantages and drawbacks.
With careful consideration of factors such as wood type, surface preparation, and environmental conditions, it is possible to achieve a durable, attractive, and functional metal-coated wood product.
By selecting the appropriate technique and following best practices, anyone can unlock the benefits and enhanced qualities of metallized wood.
Method | Description | Advantages | Disadvantages |
|---|---|---|---|
Metal Leafing | Applying thin sheets of metal (gold, silver, copper, etc.) to the wood using adhesive. | Visually appealing, real metal finish, various metal options available. | Delicate process, not ideal for high-wear surfaces, requires sealant to protect the finish. |
Metal-Infused Paint | Applying paint infused with metal particles to cover the wood surface. | Easier application, various metal options, can be used on most surfaces, additional layers can create a more authentic metallic appearance. | Not real metal, may not be as visually appealing as metal leafing, can wear off over time. |
Electroplating | Using an electric current to deposit a thin layer of metal onto the wood surface. The wood needs to be coated with a conductive layer before the process. | Durable metal finish, suitable for small decorative items. | Complex process, not suitable for large wood pieces, requires special equipment and chemicals. |
Creating a Wood Grain Effect on Metal Surfaces
Creating a wood effect on metal is a popular way to mimic the warmth and texture of natural wood while enjoying the benefits of metal’s durability and low maintenance.
• Method 1: Faux Painting
Faux painting is a technique that involves applying paint to create the appearance of a different material, such as wood. This method is cost-effective and can be done with readily available materials. Follow these steps to create a faux wood effect using paint:
– Step 1: Prepare the Metal Surface
Before you begin, ensure the metal surface is clean and free of any rust or grease. You can use a degreaser to clean the surface, followed by a thorough wipe-down with a clean cloth. If there are any areas with rust, you can use a wire brush or sandpaper to remove it.
– Step 2: Prime the Surface
To ensure the paint adheres well to the metal, apply a high-quality primer specifically designed for metal surfaces. Follow the manufacturer’s instructions for drying time.
– Step 3: Choose Your Paint Colors
To create a realistic wood effect, you will need at least two paint colors, one for the base coat and one for the grain.
The base color should be a lighter shade to represent the lighter areas of the wood, while the grain color should be a darker shade, giving the appearance of the natural wood grain.
– Step 4: Apply the Base Coat
Using a brush or roller, apply the lighter base color paint to the entire metal surface. Be sure to use even strokes and cover the entire area. Allow the base coat to dry according to the manufacturer’s instructions.
– Step 5: Create the Wood Grain Effect
To create the wood grain effect, you can use various tools such as a graining tool, a paintbrush, or a sponge. Dip your chosen tool into the darker grain color and begin to create small, wavy lines on the metal surface.
Use a light touch and experiment with different brush or sponge strokes to achieve the desired wood grain appearance.
– Step 6: Apply a Protective Finish
Once your faux wood painting is complete and fully dry, seal the surface with a clear protective finish. This will help protect the paint and add a layer of durability to your metal surface.
• Method 2: Wood-Grain Vinyl Wrap
Another option for achieving a wood effect on metal is the use of vinyl wraps. These adhesive-backed sheets can be cut and applied directly to metal surfaces, offering a realistic wood texture and color.
– Step 1: Measure and Cut the Vinyl Wrap
Measure the metal surface to determine the size of the vinyl wrap needed. Cut the wrap to size, leaving a small excess to wrap around any edges if necessary.
– Step 2: Clean the Metal Surface
Ensure the metal surface is clean and dry, free of any grease or dirt. Use a degreaser and wipe down the surface with a clean cloth to ensure proper adhesion of the vinyl wrap.
– Step 3: Apply the Wood-Grain Vinyl Wrap
Remove the backing from the vinyl wrap and carefully align it on the metal surface. Press down firmly, using a squeegee, straight edge, or credit card to smooth out any air bubbles or creases as you apply the wrap. Work from the center outwards, ensuring the wrap fully adheres to the surface.
– Step 4: Trim the Excess
Once the wrap is properly applied, use a sharp knife or blade to trim any excess around the edges.
• Recommendations for Achieving the Best Results
Based on personal experience, here are some recommendations for achieving the best wood effect on metal:
- Practice your faux painting technique on a smaller, less conspicuous surface before tackling larger projects.
- Invest in high-quality paint products to ensure optimal adhesion and longevity.
- Take your time when applying vinyl wraps, as rushing can lead to air bubbles or misalignments.
- Consult online tutorials and resources to further refine your techniques and learn new methods to achieve the perfect wood effect.
In conclusion, achieving a wood effect on metal is a versatile and creative way to enhance the appearance of various metal surfaces. Whether you opt for faux painting or wood-grain vinyl wraps, the key to success lies in careful preparation, attention to detail, and patience.
With practice and the right tools, you’ll be able to create a realistic wood effect on metal that adds warmth and character to any project.
Step | Description |
|---|---|
1 | Clean the metal surface to remove any dirt, grease, or debris. |
2 | Apply a base coat of paint, typically a brown shade that mimics the color of wood. |
3 | Use a wood grain tool, a brush, or a combination of both to create wood grain patterns on the painted surface by dragging or rocking the tool through the wet paint. |
4 | Allow the base coat and wood grain pattern to dry completely. |
5 | Use a paintbrush to apply a clear glaze or topcoat to the painted surface to seal the wood grain pattern and give the piece a glossy finish. |
6 | Allow the glaze or topcoat to dry completely before using the piece. |
Top Degreasers for Metal Pre-Paint Cleaning
In order to achieve a professional and long-lasting paint job on metal surfaces, proper surface preparation is crucial.
One essential step in the preparation process is removing all dirt, grease, and oil from the surface. To do that, you’ll need to use a degreaser.
• Why Degreasing Metal Surfaces Is Important
Grease and oil can prevent the paint from adhering properly to the metal surface, leading to peeling and premature failure of the paint job.
A well-degreased surface not only ensures improved paint adhesion but also prevents rust formation and promotes a smooth, clean finish.
• Recommended Degreasers for Painting Metal Surfaces
1. TSP (Trisodium Phosphate)
TSP is a heavy-duty cleaner that effectively removes grease, grime, and dirt from metal surfaces. It is a widely used and trusted degreaser among professionals due to its high efficiency and low cost.
However, TSP should be used with caution, as it is a strong chemical that can cause skin and eye irritation. Always wear proper protective gear when using TSP and follow the manufacturer’s instructions.
To use TSP as a degreaser, mix it with water according to the directions on the package. Apply the solution to the metal surface with a sponge or brush, scrubbing thoroughly, and then rinse it off with clean water. Allow the surface to dry completely before painting.
2. Acetone
Acetone is an organic solvent that works well as a degreaser for metal surfaces. It evaporates quickly, leaving no residue behind, making it an excellent choice for degreasing before painting.
Acetone is safe to use on most metals but can be harmful to some types of plastic or rubber, so it’s essential to test it on a small, inconspicuous area before applying it to the entire surface.
To degrease a metal surface with acetone, soak a clean cloth or sponge in the solvent and thoroughly wipe the metal to remove any grease or oil. Allow the acetone to evaporate completely before applying paint.
3. Denatured Alcohol
Denatured alcohol is another effective solvent-based degreaser suitable for metal surfaces. It is particularly beneficial for sensitive or delicate metals that might be damaged by harsher chemicals like TSP.
Denatured alcohol works by dissolving grease and oil, making them easy to wipe away with a clean cloth.
When using denatured alcohol, wear appropriate protective gear and use it in a well-ventilated area. Apply the alcohol to a clean cloth, and rub the metal surface thoroughly, removing all traces of grease and oil. Allow the alcohol to evaporate entirely before proceeding with painting.
4. Commercial Degreasers
A wide range of commercial degreasers specifically designed for metal surfaces is available on the market. These degreasers come in various strengths and formulations, making it easy for you to find one that suits your needs.
In general, always follow the manufacturer’s instructions when using a commercial degreaser and take the necessary safety precautions.
Some popular commercial degreasers include KRUD KUTTER, Simple Green, and Purple Power.
• Tips for Choosing the Right Degreaser
When selecting a degreaser for painting metal surfaces, consider the following factors:
- The type of metal being painted Some metals are sensitive to specific chemicals and may require a milder degreaser.
- The level of grease and grime on the surface Choose a degreaser with a strength appropriate for the degree of contamination.
- The type of paint being used Some paints may react with specific degreasers, causing compatibility issues.
- Environmental concerns Some degreasers are eco-friendlier than others. If this is important to you, look for biodegradable or non-toxic options.
• A Final Word
Degreasing a metal surface may seem like an insignificant step in the painting process, but it is crucial for ensuring a high-quality, long-lasting result. By selecting the best degreaser for your project and following the proper application methods, you’ll enhance the durability and appearance of your painted metal surfaces.
For more information on degreasing metal surfaces and other surface preparation techniques, consult resources like the American Galvanizers Association and the National Association of Corrosion Engineers.
Degreaser | Description |
|---|---|
TSP (Trisodium Phosphate) | A powerful cleaner that removes grease, dirt, and grime without damaging the metal surface. |
Acetone | A strong and fast-evaporating solvent that can effectively remove grease, oil, and other contaminants. |
Denatured Alcohol | An effective degreaser for light to moderate contamination, it evaporates quickly and leaves no residue behind. |
Mineral Spirits | Also known as paint thinner, mineral spirits can effectively remove grease and other contaminants without affecting the metal or paint adhesion. |
Simple Green | A biodegradable, non-toxic cleaner that can effectively remove grease, oil, and grime from metal surfaces. |
Ideal Metal Preparation Techniques Before Painting
A well-prepared metal surface can significantly enhance the durability and appearance of paint jobs. Proper preparation of metal surfaces prior to painting is crucial for achieving optimal results.
• Cleaning Metal Surfaces
Before any paint can be applied effectively, it’s essential to thoroughly clean the metal surface. This step will remove any dirt, grease, or other contaminants that may have accumulated on the surface, which will help to promote better adhesion and longevity of the paint job.
– Degreasing
A clean surface is crucial for proper paint adhesion. Begin by using a degreasing agent or a mild detergent to remove dirt, oils, and other contaminants from the metal’s surface. Trisodium phosphate (TSP) is an effective cleaning agent for this purpose and can be found at most hardware stores.
To use, mix the TSP with warm water, as instructed on the packaging, and apply the solution to the metal surface using a cloth, sponge, or brush.
Afterward, rinse the surface with clean water and allow it to dry completely. For further information regarding trisodium phosphate and its uses, visit the United States Environmental Protection Agency website.
– Removing Dust
Once the surface is free of grease and dirt, use a clean, dry cloth or industrial vacuum to remove any remaining dust or debris. It’s crucial to ensure the metal is completely clean and dry before moving on to the next step.
• Removing Rust and Old Paint
Preparing a metal surface for painting also entails the removal of rust and old paint. These imperfections can hinder proper paint adhesion and compromise the integrity of the paint job, leading to chipping or peeling over time.
– Sanding
When removing old paint or rust from metal, sanding is a highly effective method. Use coarse-grit sandpaper (around 80-grit) to begin sanding the surface, and then progress to finer-grit sandpaper (around 220-grit) for a smoother finish.
For larger areas or tougher rust and paint removal jobs, consider using a power sander or angle grinder with a wire brush attachment. Remember to always wear proper safety gear, such as goggles and a dust mask, when sanding or grinding metal surfaces.
– Chemical Removal
Another option for removing old paint and rust is chemical paint strippers and rust removers. These products can be found at local hardware stores and come in various formats, such as liquid, gel, or aerosol spray.
Be sure to read and follow the manufacturers’ instructions carefully when using these products, as some chemicals may be hazardous. In addition, always work in a well-ventilated area and wear appropriate protective gear, including gloves and goggles.
• Priming Metal Surfaces
Priming is an essential step in preparing a metal surface for painting. Applying a primer serves as a barrier between the bare metal and the paint, helping to prevent rust, increase paint adhesion, and enhance the paint’s overall durability and appearance.
– Choosing the Right Primer
When selecting a primer, opt for a high-quality metal primer compatible with the type of paint you’ll be using.
Primers come in various formulations, such as oil-based, latex, and epoxy-based, so be sure to choose a primer designed for the specific type of metal and paint you will be using. For example, when painting galvanized metal, it’s best to use a latex primer specifically designed for galvanized surfaces.
– Applying the Primer
Before applying the primer, ensure the metal surface is clean, dry, and free of any remaining dust, rust, or old paint.
Use a paintbrush, roller, or spray gun to apply a thin, even coat of primer to the metal surface, and allow it to dry thoroughly, as recommended by the manufacturer’s instructions. In some cases, a second coat of primer may be necessary to ensure proper coverage and optimal paint performance.
• Conclusion
In summary, proper preparation of metal surfaces before painting is crucial for achieving a durable and professional-looking paint job. By thoroughly cleaning, removing rust and old paint, and applying a suitable primer, you can ensure long-lasting paint adhesion and a visually appealing outcome.
For more information about metal surface preparation and painting techniques, consult resources from well-established institutions such as the American Galvanizers Association.
Steps | Description |
|---|---|
1. Cleaning | Remove dirt, grease, and other contaminants from the surface using a suitable solvent or cleaner. |
2. Degreasing | Use a commercial degreaser to thoroughly clean the metal surface and remove any oil or grease residue. |
3. Rust removal | Remove any visible rust or corrosion using sandpaper, a wire brush, or a rust removal solution. |
4. Sanding | Sand the metal surface with fine-grit sandpaper to create a slightly roughened surface for optimal paint adhesion. |
5. Priming | Apply a metal primer, which helps prevent rust and corrosion while promoting the adhesion of the topcoat. |
6. Painting | Apply the paint (preferably specifically designed for metal surfaces) in thin, even coats, following the manufacturer’s instructions. |
7. Sealing | For additional protection, apply a clear sealer/topcoat once the paint is dry, as per the manufacturer’s instructions. |
Preparing Wooden Surfaces: Best Practices
Wood is a versatile and aesthetically pleasing material used in various applications such as furniture, cabinetry, flooring, and woodworking projects. To achieve the best results in any wood-based endeavor, proper preparation of the wood surface is crucial.
• Cleaning the Wood Surface
Whether you are working with new or old wood, it is essential to start by thoroughly cleaning the surface. Removing dirt, grease, and other contaminants will help to ensure a smooth and even finish.
Recommended Cleaning Process:
- Remove Dust and Debris: Use a dry, soft-bristle brush to sweep away loose dust and debris from the wood surface. If necessary, you can also vacuum the surface with a brush attachment.
- Apply a Wood Cleaner: Choose a cleaner specifically designed for wood surfaces, like trisodium phosphate or a mild detergent mixed with water. Follow the manufacturer’s instructions and gently clean the surface with a soft cloth, sponge, or brush.
- Rinse the Surface: Wipe the wood surface with a clean, damp cloth to remove any residue left behind by the cleaner. Allow it to dry thoroughly before proceeding to the next steps.
• Evaluating & Repairing Wood Imperfections
Inspect the wood surface for any imperfections like dents, scratches, or gouges that need repair. Properly addressing these issues ensures a smooth, flawless finish.
Types of Wood Repairs:
- Fill Small Dents and Scratches: For minor dents and scratches, use a wood filler or putty that matches the color of the wood. Apply the filler with a putty knife and allow it to dry according to the manufacturer’s instructions.
- Repair Gouges and Large Dents: Larger imperfections often require more extensive repairs using wood epoxy. Apply the epoxy to the damaged area and shape it to match the surrounding wood texture. Allow it to dry and harden before proceeding.
- Replace Damaged Wood: In severe cases, when the wood is split or rotted, it’s best to replace the damaged section with a new piece of wood. This will provide a long-term solution and ensure a professional finish.
• Sanding the Wood Surface
Sanding is a critical step in the wood preparation process, serving to smooth the surface and remove any remaining imperfections. Proper sanding will enhance the wood’s ability to absorb finishes with consistency.
Sanding Guidelines:
- Choose the Correct Sandpaper: Start with coarse-grit sandpaper (80-100 grit) to remove major imperfections and gradually progress to finer-grit sandpaper (150-220 grit) for a smooth finish.
- Sand With the Grain: Always sand in the direction of the wood grain. This will minimize scratches and help to blend the wood fibers, ensuring an even finish.
- Vacuum the Surface: After each round of sanding, remove wood dust and debris with a brush or vacuum. This will help to achieve a smooth surface and prevent contamination of the wood finish.
For more tips and information on proper sanding techniques, visit this link from Fine Woodworking.
• Sealing the Wood Surface
The last step in wood preparation is applying a wood sealer. Wood sealers protect the wood by sealing its pores and providing a barrier against moisture and other contaminants. They also enhance wood’s natural beauty and help achieve a consistent finish.
Types of Wood Sealers:
- Oil-Based Sealers: Penetrating oils such as Danish oil, linseed oil, and tung oil provide a natural-looking finish and protect the wood without forming a surface film.
- Water-Based Sealers: These sealers provide a clear, non-yellowing protective barrier that dries quickly and is easy to clean. They’re eco-friendly and emit fewer volatile organic compounds (VOCs) compared to oil-based sealers.
- Shellac and Lacquer: Shellac and lacquer are film-forming sealers, providing a high-gloss finish that enhances wood’s natural character. They dry quickly, but their application requires more skill and specific tools.
It is essential to select the appropriate sealer based on your wood type and project requirements. Always follow the manufacturer’s instructions when applying wood sealer to ensure desired results.
• In Conclusion
Wood preparation is vital to achieving a professional, long-lasting finish for any woodworking project.
By thoroughly cleaning, repairing, sanding, and sealing the wood surface, you lay the foundation for a successful project. Your efforts will be rewarded with a beautiful, durable, and satisfying result.
Prep Method | Description |
|---|---|
Sanding | Remove rough edges and smooth the surface of the wood with sandpaper or a power sander. |
Cleaning | Use a tack cloth or a slightly damp cloth to remove dust and debris from the surface of the wood. |
Conditioning | Apply a pre-stain wood conditioner to help ensure even absorption of stain and a more uniform finish. |
Priming | Apply a primer to the surface of the wood, especially if you plan to paint it or use a solid-color stain. |
Filling | Fill any holes, dents or imperfections with wood filler and sand smooth before applying any stain or paint. |