Painting Prep: Clean And Degrease Surface Tips
When it comes to achieving a flawless finish with your paint job, proper surface preparation is crucial. That’s why it’s essential to know the best techniques for cleaning and degreasing surfaces, and you’ve come to the right place! In this discussion, we will share some of our favorite tips on effectively cleaning and degreasing various surfaces to ensure your painting project is a success.
Painting prep: clean and degrease surface tips:
To prepare a surface for painting, clean and degrease the area using all-purpose cleaners like TSP, ammonia for dirt and grime, or dedicated degreasers, such as Krud Kutter or Simple Green, for oily surfaces. Techniques include sweeping, scrubbing, rinsing, and drying surfaces thoroughly to ensure paint adheres well for a lasting, smooth finish.

Unlock the secret to a flawless paint job with our expert tips on cleaning and degreasing surfaces. Dive in to discover the best techniques, products, and tools that will make your next painting project a breeze. Keep reading for a splash of knowledge!
Contents
- 1 Preparing to Paint: Tips for Cleaning and Degreasing Surfaces
- 2 Best Practices for Pre-Painting Surface Cleaning
- 3 Importance of Surface Cleaning Prior to Painting
- 4 Utilizing Degreasers for Effective Paint Preparation
Preparing to Paint: Tips for Cleaning and Degreasing Surfaces
• Importance of Cleaning and Degreasing
Before starting any painting project, whether it’s a small touch-up job or a major renovation, it’s crucial to thoroughly clean and degrease the surface that you plan to paint. This is because paint adheres best to a clean, dirt-free surface, which ensures a long-lasting smooth finish.
Moreover, not properly preparing a surface can lead to peeling or flaking paint soon after the job is completed. In order to avoid wasting time, effort, and resources, follow these expert tips on how to properly prepare a surface for painting.
• Choosing the Right Cleaning and Degreasing Products
– All-Purpose Cleaners
These versatile cleaning solutions work on various surfaces and can help remove dirt, grime, and mild stains. However, they might not be as effective at removing heavy grease or oil. Some popular options include:
- TSP (Trisodium Phosphate): A heavy-duty cleaning agent, TSP works well at removing tough stains, mold, and mildew. It can be purchased in powdered form, which needs to be mixed with water, or as a premixed liquid. Remember to wear gloves and eye protection while using TSP.
- Ammonia: A powerful and affordable cleaner, ammonia removes dirt and grime effectively. However, it can leave a strong odor and requires proper ventilation during use. Ensure it’s diluted, and never mix it with bleach, as it will produce toxic fumes.
– Degreasers
If your painting surface is particularly oily or greasy, invest in a dedicated degreasing solution. These are specially formulated to cut through and remove such contaminants effectively. Some popular options include:
- Krud Kutter: A biodegradable, non-toxic degreaser, Krud Kutter works on various surfaces and is particularly effective at removing grease, oil, tar, and adhesive residue.
- Simple Green: A versatile degreaser, Simple Green safely breaks down and removes oil, grime, and dirt from various surfaces. It’s non-toxic and biodegradable, making it a safer option for eco-conscious users.
• Cleaning and Degreasing Techniques
– Cleaning Techniques
- Sweep or vacuum: Start by removing dust, loose dirt, and debris from the surface with a broom or vacuum cleaner. This will make cleaning with a liquid solution more effective.
- Wash with an all-purpose cleaner: Work in sections, and apply your chosen cleaning solution using a sponge or cloth. Ensure the entire surface is covered, then use a clean cloth or sponge soaked in water to rinse it away.
- Scrub stubborn spots: Use a brush or scrubber to tackle tough stains or spots that weren’t removed by the initial washing. This is especially important for mold or mildew, which can cause paint to peel if not removed.
- Rinse thoroughly: Rinse the surface with clean water to remove any residue from the cleaning solution. This will ensure a clean, residue-free surface for the paint to adhere to.
- Dry the surface: Use a clean cloth or towel to dry the surface completely before proceeding to degrease or paint.
– Degreasing Techniques
- Apply degreaser: Pour some degreasing solution on a cloth or sponge and apply it to the surface in a circular motion, covering the entire area.
- Allow soaking time: Most degreasers need some time to break down the grease, so let the product sit for a few minutes, especially if dealing with heavy grease buildup.
- Scrub if necessary: If there’s stubborn oil or grease, use a brush or scrubber to agitate the surface and help break up the residue.
- Rinse thoroughly: After scrubbing, rinse the surface with clean water, ensuring all the degreaser and residue are removed.
- Dry the surface: Once again, thoroughly dry the surface with a clean cloth or towel before proceeding to paint.
• Final Thoughts
Taking the time to properly clean and degrease a surface before painting will ensure a long-lasting, smooth finish that looks professionally done. A well-prepared surface will also make the painting process easier and more efficient.
By following these expert tips and using the right products, your painting project will be set up for success.
Not only will you enjoy the satisfaction of a job well done, but you’ll also save yourself the time and expense of correcting any issues that could have been easily avoided by proper preparation.
Best Practices for Pre-Painting Surface Cleaning
A flawless paint job starts with meticulous preparation. Proper cleaning and prepping provide a smooth surface, ensuring a high-quality and long-lasting finish.
• Selecting the Right Cleaning Supplies and Tools
To clean surfaces effectively, you’ll need the following supplies and tools:
- Mild detergent or a TSP (Trisodium Phosphate) substitute
- Warm water
- Sponge or soft cloth
- Rubber gloves
- Safety goggles
- Bucket
- Drop cloths or plastic sheeting
- Painter’s tape
- Sandpaper or sanding sponge
- A good-quality primer
• Safety Precautions
Before starting the cleaning process, protect yourself by wearing rubber gloves, safety goggles, and a mask to prevent inhaling dust or harmful fumes. Always work in a well-ventilated area and follow the manufacturer’s instructions for cleaning products.
• Step 1: Surface Inspection and Repair
Begin by inspecting the surface for grease, dirt, mildew, and peeling or cracked paint. Repair any visible cracks, holes, or dents using an appropriate filler, such as spackling paste for drywalls or wood filler for wooden surfaces. Allow the filler to dry and sand it down to achieve an even finish.
Follow these guidelines to address specific concerns:
– Removing Old Paint and Mildew
If you find peeling or cracked paint, use a scraper or sandpaper to remove it. In cases of severe paint damage, consider using a paint remover, following the product’s instructions.
For mildew, the Environmental Protection Agency recommends using a mixture of water and mild detergent or a TSP substitute. Scrub the affected area with the solution, rinse, and let it dry before painting.
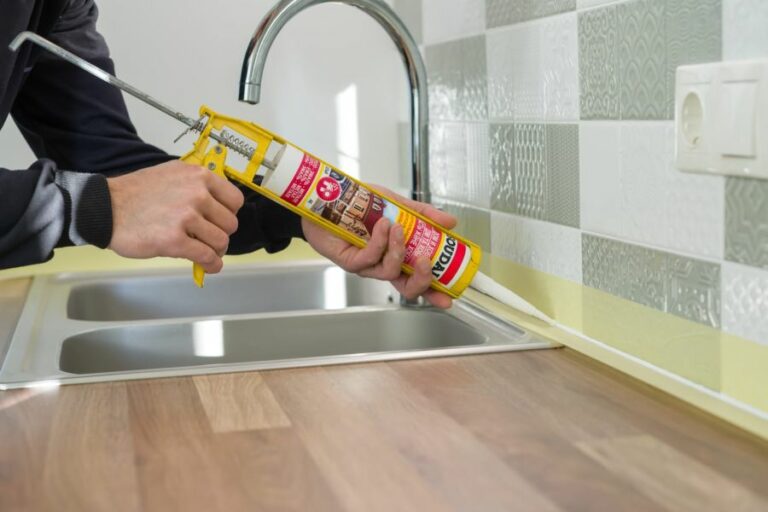
– Cleaning Greasy Surfaces
Kitchens and other areas prone to grease accumulation require thorough cleaning before painting. Use a TSP substitute or a degreasing product to remove oils and ensure paint adhesion.
• Step 2: Cleaning the Surface
Mix mild detergent or TSP substitute with warm water according to the product’s instructions. Apply the solution to the surface with a sponge or soft cloth, starting at the top and working your way down. Work in sections, wiping down each area with clean water to remove the cleaning solution. Allow the surface to dry completely before proceeding to the next step.
• Step 3: Sanding the Surface
Sanding is crucial to remove any remaining dirt, debris, or old paint and to create a smooth, even surface for the new paint to adhere. Use sandpaper or a sanding sponge with an appropriate grit for the surface material. Start with a coarser grit (e.g., 80-100 grit) and finish with a finer grit (e.g., 180-220 grit). Always sand in the direction of the surface grain to avoid scratches.
After sanding the entire surface, use a damp cloth or a tack cloth to remove dust particles.
• Step 4: Protecting the Surrounding Area
Before painting, protect the surrounding area with drop cloths or plastic sheeting. Use painter’s tape to mask off baseboards, trim, outlets, switches, and window and door frames.
• Step 5: Applying Primer
Applying a good-quality primer is essential for optimal paint adhesion and durability. Choose a primer suitable for the surface material and follow the manufacturer’s instructions for application. Allow the primer to dry completely as per the recommended drying time.
• Step 6: Painting
Once the surface is clean, repaired, sanded, and primed, it’s ready for painting. Choose a high-quality paint and use the appropriate technique and tools for your desired finish.
• Conclusion
Cleaning and prepping before painting are crucial steps to achieve a professional, long-lasting paint job. Taking the time to inspect, repair, and carefully prepare surfaces will save you from future issues and ensure your paint looks great for years to come.
Step | Description |
|---|---|
1. Prepare the area | Remove all furniture and decorations and cover the floor with a drop cloth. |
2. Clean the surface | Use a mild detergent, warm water, and a sponge or soft cloth to clean the surface thoroughly. Remove any dirt, dust, and grease. |
3. Repair any damage | Fill any cracks, holes, or dents with an appropriate filler. Allow the filler to dry completely and sand it smooth. |
4. Sand the surface | Use 120 to 150-grit sandpaper to lightly sand the surface, followed by a finer 220-grit if necessary. This will provide a smooth and even surface for the paint to adhere to. |
5. Clean off dust | Use a damp cloth or sponge to carefully wipe away any dust from sanding. Allow the surface to dry completely before moving on to the next step. |
6. Apply a primer | If necessary, apply a coat of primer to the surface, ensuring even coverage. Allow the primer to dry completely according to the manufacturer’s instructions. |
7. Paint the surface | Apply the desired paint to the prepped surface, using a brush or roller for even coverage. Allow the paint to dry completely before adding any additional coats or removing any coverings from the area. |
Importance of Surface Cleaning Prior to Painting
Cleaning the surface before painting is an essential step in achieving a professional and long-lasting finish. Proper surface preparation not only provides aesthetic benefits but also ensures proper adhesion and prevents premature paint failure.
• Importance of Cleaning the Surface
A clean surface is crucial for proper paint adhesion. It removes dirt, grease, and other contaminants that can cause the paint to peel, blister, or flake, leading to a subpar finish and potentially costly rework.
In addition to adhesion, cleaning the surface before painting can reveal any underlying issues, such as rotten wood, rust, or mold, which should be addressed before applying new paint.
• General Tips for Surface Cleaning
Here are some general tips to follow when cleaning the surface before painting:
- Always start with a clean, dry surface: Ensure that there is no standing water or residual moisture on the surface to minimize the risk of paint failure or discoloration.
- Use a mild detergent: A mild detergent can effectively remove dirt, grease, and other surface contaminants without damaging the surface material or causing unnecessary chemical reactions with the new paint.
- Rinse thoroughly: Rinsing the surface after applying cleaning agents ensures that all residue is removed and minimizes the risk of paint adhesion issues.
- Use a lint-free cloth or rag: When wiping down surfaces, use a lint-free cloth or rag to prevent leftover fibers or debris from becoming trapped under the newly-applied paint.
- Allow sufficient drying time: After cleaning and rinsing the surface, give it ample time to dry before applying paint. This can vary depending on the surface material and local weather conditions.
• Cleaning Agents and Methods for Different Surfaces
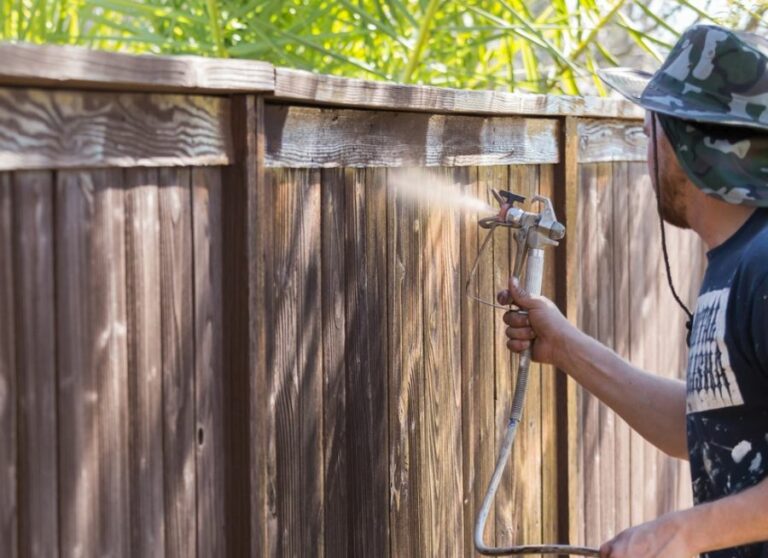
– Wood Surfaces
Dirt and mildew are common culprits on wooden surfaces that require cleaning before painting. Use a mild detergent mixed with water to clean the surface, then rinse thoroughly with clean water.
For stubborn stains or paint chalking, a soft brush can help gently remove these contaminants without causing damage.
– Metal Surfaces
On metal surfaces, rust, and oxidation are common problems that require special attention. Begin by using a wire brush, steel wool, or sandpaper to remove loose rust or paint, then clean the surface with mineral spirits or a dedicated metal cleaner.
For stainless steel surfaces, avoid using abrasive materials that can scratch the surface and instead use a mild detergent with water, followed by thorough rinsing with clean water.
– Concrete Surfaces
Concrete surfaces can collect dirt, mold, and algae, especially in outdoor settings. A pressure washer is an effective tool for cleaning these surfaces, as it both removes debris and rinses the surface simultaneously.
When using a pressure washer, test a small area first to ensure that it does not cause damage to the concrete. Alternatively, a mixture of trisodium phosphate (TSP) and water can be used to manually clean and degrease concrete surfaces.
– Drywall Surfaces
Cleaning drywall surfaces is usually less intensive than other materials, as they are often new and not exposed to the same contaminants. A simple wipe-down with a damp cloth or sponge is sufficient to remove dust and other potential obstacles to adhesion.
For stains or grease, a mild detergent solution can be used, followed by thorough rinsing with clean water.
• In Conclusion
Cleaning the surface is a vital step in ensuring a professional and long-lasting paint job. It promotes proper adhesion, prevents paint failure, and allows for the identification of potential issues that need to be addressed before applying new paint.
By following the tips and recommendations in this article, you can achieve a clean surface that is ready for new paint, enhancing the beauty and longevity of your project.
Utilizing Degreasers for Effective Paint Preparation
Using a degreaser for paint preparation is an essential step to ensure proper adhesion of the new paint to the surface. Degreasers effectively remove dirt, oil, and other contaminants, providing a clean surface for paint application.
• Importance of Degreasers in Paint Prep
Paint cannot properly adhere to a dirty or oily surface. As a result, the paint can peel, chip, or bubble post-application, leading to poor aesthetics and durability. To avoid these issues, preparing the surface with a degreaser is required before applying paint.
Degreasers are specifically formulated to remove grease, oil, and dirt, allowing for a clean surface on which to apply paint. A clean surface ensures maximum adhesion, resulting in a longer-lasting paint job.
Furthermore, removing dirt and other contaminants reduces the possibility of paint defects, such as fish eyes, that can be caused by surface contaminants.
• Types of Degreasers
There are various types of degreasers available, and the choice depends on your specific application requirements. Here are some popular options:
– Water-Based Degreasers
These degreasers are eco-friendly, safe to use, and do not contain harsh chemicals that can damage the surface. They effectively remove grease, oil, and dirt and are typically suitable for general paint preparation tasks. Examples of water-based degreasers include Simple Green and Krud Kutter.
– Solvent-Based Degreasers
Solvent-based degreasers are often more powerful than water-based options, making them suitable for heavy-duty paint preparation tasks where stubborn contaminants are an issue.
These degreasers may contain harsh chemicals, so proper care and ventilation are required during application. Examples of solvent-based degreasers include acetone and mineral spirits.
– Automotive Degreasers
Automotive degreasers are specifically formulated for the automotive industry and are ideal for paint preparation on vehicles.
They effectively remove contaminants while maintaining the condition of the surface, ensuring proper paint adhesion. Examples of automotive degreasers include 3M Adhesive Remover and Goo Gone Automotive.
• Proper Application of Degreasers
Follow these steps to correctly apply a degreaser for paint prep:
- Choose the appropriate degreaser. As mentioned earlier, select a degreaser based on your requirements and the type of surface you’re working with.
- Apply the degreaser. Working in small sections, spray or wipe the degreaser onto the surface. Make sure to follow the manufacturer’s instructions for proper application.
- Allow the degreaser to work. Let the degreaser sit on the surface for the recommended time as per the manufacturer’s instructions. This allows the product to penetrate and break down the contaminants effectively.
- Clean the surface. Use a clean, lint-free cloth or a soft brush to scrub away the contaminants. Afterward, rinse the surface with water (if applicable) to remove any residue.
- Dry the surface. Use an air blower or a clean, lint-free cloth to dry the surface completely. Ensure the area is free of moisture before applying paint.
- Inspect the surface. Check for any remaining contaminants or residue. If necessary, repeat the process until the surface is clean and ready for paint application.
• Personal Recommendations and Considerations
As someone with experience in paint preparation, I recommend using water-based degreasers for general applications, especially on surfaces that are sensitive to harsh chemicals, as they are environmentally friendly and safe to use.
For heavy-duty cleaning tasks or stubborn contaminants, solvent-based degreasers may be necessary. However, make sure to follow proper safety precautions, such as wearing gloves and using adequate ventilation.
When selecting a degreaser, read the manufacturer’s instructions for compatibility, use, and safety precautions. This ensures the safe and effective application of the product.
| Can you use a degreaser for paint prep? |
|---|
| Yes, using a degreaser is an essential step in paint preparation, as it helps to remove dirt, grease, and other contaminants from the surface, ensuring a smooth and long-lasting finish. |