Surface Preparation With Paint Removers. What Pros Say
Surface preparation is vital before painting, and using the right paint remover is crucial in ensuring success. Don’t worry. We are here to share our expertise and guide you through this process with the top paint removal techniques, creating the perfect surface for your next painting project.
Surface preparation with paint removers:
Surface preparation is crucial for paint durability, longevity, and appearance. Effective paint stripping methods include solvent-based, bio-based, caustic-based, and mechanical removers. Choose the appropriate remover based on paint type, surface material, and condition. Follow proper application techniques and safety precautions when using paint removers for optimal results.
Interested in learning more about surface preparation with paint removers? We’ve got you covered! Discover the best techniques and products for a flawless finish. Keep reading to become a pro!
Contents
- 1 Effective Paint Stripping: Surface Prep Techniques
- 2 Post-Paint Remover Application: Next Steps
- 3 Exploring Surface Cleansing & Paint Elimination
- 4 Diverse Approaches to Surface Prep: A Guide
- 5 Fundamentals of Surface Preparation for Painting
- 6 Optimal Paint Remover Dwell Time: When to Rinse
- 7 Cleaning Techniques for Surfaces Post-Paint Removal
Effective Paint Stripping: Surface Prep Techniques
Surface preparation is a crucial step in the painting process. Proper surface preparation ensures the durability, longevity, and appearance of the paint job. One of the effective ways to achieve this is using paint removers to strip away old paint layers.
• Types of Paint Removers
1. Solvent-Based Removers
Solvent-based paint removers contain chemicals that dissolve the paint layers, making it easier to remove. These removers are fast-acting and come in liquid or gel forms. Common ingredients used in solvent-based removers include methylene chloride, toluene, and acetone.
2. Bio-Based Removers
Bio-based paint removers use natural components derived from plants or other renewable resources. These removers typically have a lower environmental impact and are less toxic than their solvent-based counterparts.
Some common ingredients found in bio-based removers include orange oil and soy-based derivatives.
3. Caustic-Based Removers
Caustic-based paint removers use alkaline chemicals, such as sodium hydroxide, to break down the paint layers. These removers are best suited for removing oil-based paints. They are quicker in action than bio-based removers, but they may be more toxic.
4. Mechanical Removers
Mechanical paint removers involve physically scraping or sanding the paint off the surface. This method provides additional benefits, such as surface profiling, which creates a rough surface for better paint adhesion.
• Choosing the Right Remover
Selecting the right paint remover depends on factors such as the type of paint, surface material, and the condition of the underlying surface. Some important points to consider are as follows:
- For oil-based paints, caustic-based removers are effective.
- Eco-friendly options like bio-based removers are suitable for delicate surfaces.
- Solvent-based removers are recommended for heavily coated surfaces.
Refer to product labels and consult manufacturer guidelines to determine the right remover for your project.
• Application Techniques
Depending on the paint remover type and the surface to be treated, different application techniques are recommended:
1. Brush Application
Brush application is suitable for both liquid and gel removers. With a suitable brush, apply a generous layer of paint remover to the surface and let it dwell for the recommended time. Once the paint has softened, remove it using a scraping tool or a scrubbing pad.
2. Spraying
Spraying is particularly effective for larger surfaces or hard-to-reach areas. For solvent-based removers, use an airless or HVLP paint sprayer. Avoid using this method for caustic-based removers, as their high pH can damage the sprayer components.
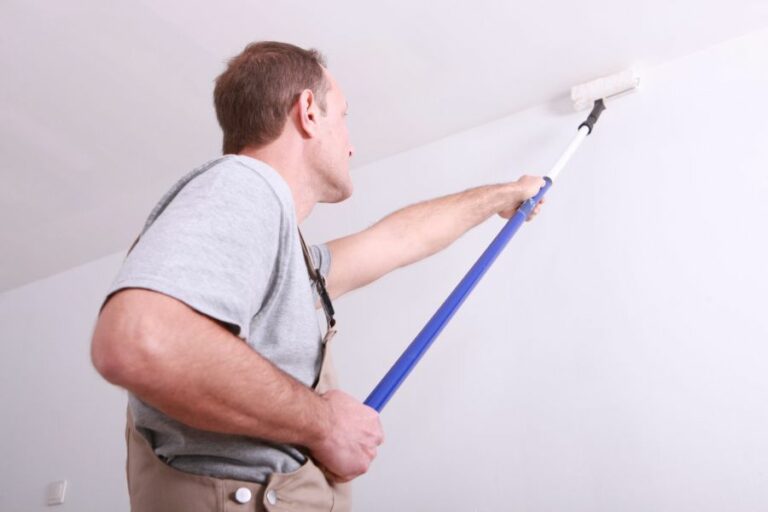
3. Roller Application
Roller application is ideal for large, flat surfaces. This method requires minimal equipment and can cover a large surface area quickly. Simply pour the paint remover into a paint tray and use a roller to apply it evenly.
• Safety Precautions
Safety is a top priority when using paint removers. Some general safety tips include:
- Wear appropriate protective gear, such as gloves, goggles, and masks.
- Ensure proper ventilation in the working area.
- Keep the remover away from heat sources or open flames.
- Dispose of any waste and paint residue responsibly, following local regulations.
For more information on paint removal safety, consult guidelines from reliable sources such as OSHA (Occupational Safety and Health Administration) and EPA (Environmental Protection Agency).
• Conclusion
Proper surface preparation is essential for a successful painting project. By understanding the different paint remover types, their properties, and application techniques, you can select the appropriate product and method for your specific project needs.
Always keep safety in mind and consult manufacturer guidelines to ensure proper usage. Following these steps will result in a durable, long-lasting, and visually appealing paint job.
Post-Paint Remover Application: Next Steps
When you have successfully removed paint from a surface using paint remover, it’s essential to know what to do next. The steps you take after removing the paint will determine the quality of the final finish.
• Neutralize the Surface
After removing paint from a surface, it’s crucial to neutralize it, especially if you’ve used a chemical paint remover. Neutralizing the surface will remove any remaining residue, ensuring a clean surface for further work.
– Use Water and Baking Soda Solution
To neutralize a surface treated with a chemical paint remover, mix water, and baking soda to create a solution. The ideal ratio is one part baking soda to 10 parts water.
Use a sponge or cloth to apply the mixture generously on the surface, followed by rinsing with clean water. This step will help neutralize any remaining chemicals and prevent any negative effects on future finishes.
– Rubbing Alcohol for Water-Based Paint Removers
If you’ve used a water-based paint remover, you can use rubbing alcohol to neutralize the surface. Simply dampen a cloth with rubbing alcohol and wipe the surface thoroughly, ensuring that any remaining residue is removed.
• Cleaning the Surface
Once the surface has been neutralized, it’s essential to clean it thoroughly. This will remove any remaining residue and prepare the surface for future finishes.
– Use a Brush or Bristle Pad
Using a brush or bristle pad, gently scrub the surface to remove any remaining paint or paint remover residue. Be careful not to damage the surface, and always scrub in the direction of the grain for wood surfaces.
– Clean with Water and Dish Soap
After scrubbing the surface, mix water and dish soap in a bucket and use a sponge or cloth to clean the surface. Rinse the surface thoroughly with clean water, and use a clean cloth to remove any excess water.
– Dry the Surface
Allow the surface to air dry completely before moving on to the next step. Drying time may vary depending on the material and environmental conditions.
• Sanding the Surface
Following cleaning, sand the surface to achieve a smooth finish and remove any remaining imperfections. The goal is to create an even, level surface for future finishing applications.
– Choose the Right Sandpaper Grit
Start with coarser grit sandpaper (such as 80 or 100 grit) and work your way up to finer grits (such as 180 or 220 grit). By gradually increasing the grit size, you’ll achieve a smoother surface.
– Sanding Techniques
When sanding, use consistent pressure and move in the direction of the grain for wood surfaces. Ensure that you cover the entire surface evenly. After each sanding session, wipe down the surface with a tack cloth or damp cloth to remove any dust.
• Applying a Finish
Once the surface is clean, neutralized, and sanded, you can apply a finish to protect it and improve its appearance.
– Choose a Finish
Depending on your desired look and the intended use of the surface, you may choose from a variety of finishes, including:
- Oil-based finishes, such as polyurethane or tung oil
- Water-based finishes, such as water-based polyurethane or acrylics
- Paint or stain, depending on the material and desired appearance
– Prepare the Surface
Before applying your chosen finish, ensure that the surface is clean and free of dust. Use a tack cloth or damp cloth to remove any dust from the sanding.
– Apply the Finish
Follow the manufacturer’s instructions for your chosen finish, using a brush, roller, or sprayer as appropriate. You may need to apply multiple coats, allowing each coat to dry according to the manufacturer’s recommendations.
– Sand Between Coats
For optimal results, sand the surface lightly between coats using fine-grit sandpaper (such as 320 or 400 grit). This will help to achieve a smooth, even finish.
– Protect the Finish
After the final coat is dry, consider applying a protective topcoat to seal and protect the finish. This can be especially important for surfaces that will be exposed to water or heavy use.
By following these steps and using the appropriate products after using paint remover, you can achieve a professional-looking, long-lasting finish for your project.
Exploring Surface Cleansing & Paint Elimination
Surface cleaning and paint removal are essential procedures for maintaining and restoring various items, including buildings, vehicles, furniture, and art pieces.
These processes aim to remove dirt, grime, paint layers, or other pollutants from the surface, not only giving items an aesthetic appeal but also promoting their longevity.
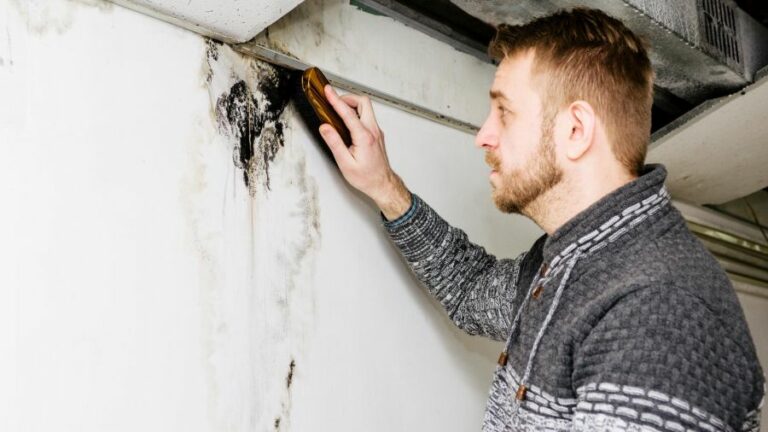
• Importance of Surface Cleaning and Paint Removal
A regular and thorough cleaning regimen ensures that surfaces retain their original appearance and structural integrity. This not only improves the overall aesthetics but also prevents potential health risks caused by accumulated dirt, mold, and bacteria.
Similarly, paint removal is crucial in preserving and restoring the original paint layers while maintaining the characteristics and historic value of various surfaces. Additionally, it is a vital preparation step for painting and finishing tasks.
• Techniques in Surface Cleaning
There are numerous methods and tools available for surface cleaning, depending on the type of material, the extent of dirt, and the desired results. Some of the widely used techniques are discussed below.
– Manual Cleaning
Manual cleaning entails using brushes, sponges, or cloths along with water, soap, or other cleaning agents to wipe surfaces clean.
This method is suitable for simple tasks and delicate surfaces, where more aggressive techniques may cause damage. However, it may not always be efficient for large-scale jobs or stubborn stains.
– Vacuum Cleaning
As the name suggests, vacuum cleaning involves a vacuum cleaner to suck dirt and debris from surfaces. This method is especially effective for surfaces with loose dirt, dust, or particulate matter. It is often used as a preliminary step before applying other cleaning techniques.
– Steam Cleaning
Steam cleaning, also known as hot water extraction, involves the use of pressurized hot water to dislodge and wash away dirt and grime.
By adjusting the pressure settings, this method can effectively clean multiple surface types, from delicate fabrics to concrete. Steam cleaning is an eco-friendly alternative, as it eliminates the need for harsh chemicals.
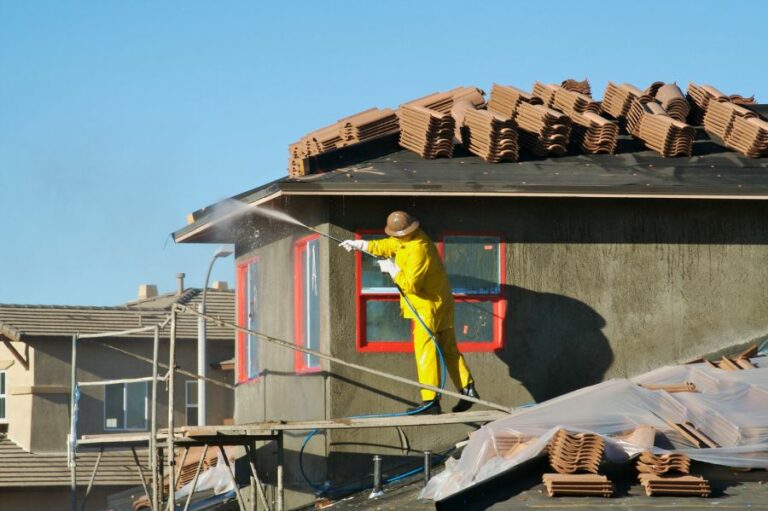
– Pressure Washing
Pressure washing employs high-pressure water sprays to dislodge and wash away dirt, grime, and pollutants. This method is especially effective on hard surfaces like concrete, brick, and stone.
However, care should be exercised when using pressure washing on delicate or porous surfaces, as it may cause damage.
– Sandblasting
Sandblasting, also called abrasive blasting, is a process that involves propelling abrasive media at high velocity to clean or modify a surface.
It is highly effective in removing paint, rust, and other coatings from metal or stone surfaces. The type of abrasive used may vary depending on the material being cleaned and the desired effect.
• Methods of Paint Removal
Like cleaning techniques, various methods can be employed to remove paint from surfaces, some of which are:
– Chemical Strippers
Chemical paint strippers are specially formulated products that soften, dissolve, or break the bond between the paint and the surface.
Depending on the type of paint and surface, different strippers may be utilized, such as solvent-based, caustic-based, or bio-friendly products.
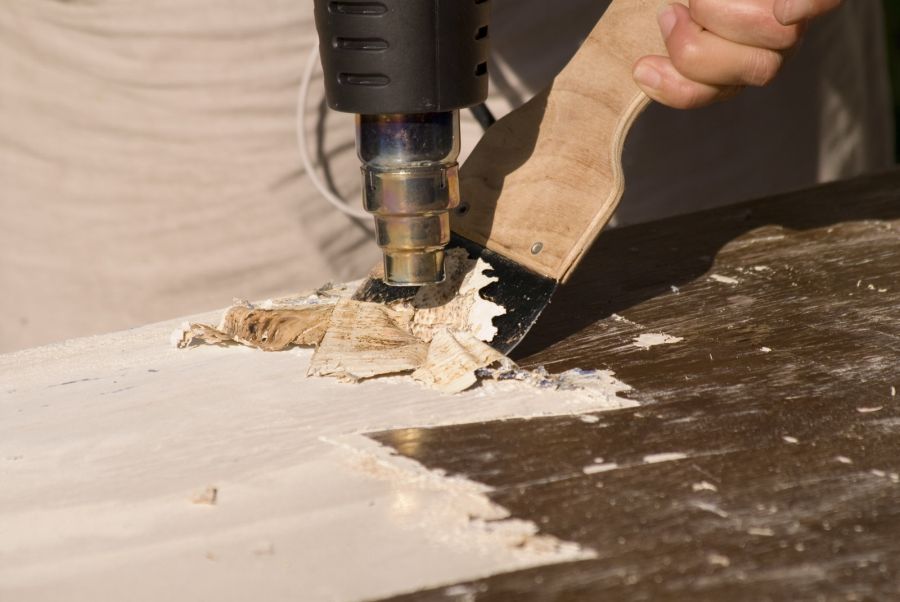
– Heat Guns
Heat guns are electric devices that produce a stream of hot air, which softens the paint for easy removal using a scraper.
It is a popular choice for paint removal on wood surfaces, as it is less likely to cause damage compared to abrasive or chemical methods.
– Infrared Paint Strippers
Infrared paint strippers use infrared heat to soften paint layers, similar to heat guns. However, these devices generate less surface heat, making them a gentler alternative for delicate or historic surfaces. This method is best for latex or oil-based paints on wooden surfaces.
– Scraping and Sanding
Scraping and sanding involve the use of hand tools or power tools to mechanically remove paint layers. While these methods are labor-intensive and time-consuming, they are also highly effective in removing aged, chipped, or peeling paint.
Care should be taken to ensure the surface does not get damaged during the process.
– Laser Ablation
Laser ablation is a highly precise method that uses lasers to remove paint layers. It is excellent for removing paint from delicate or historic surfaces, such as sculptures and artifacts, without causing any harm.
The method is relatively new and costly, but its accuracy and effectiveness make it an ideal choice for specific projects.
• Tips for Successful Surface Cleaning and Paint Removal
- Always assess the surface and the type of dirt or paint before choosing a cleaning or paint-removal method. Use the least aggressive approach that will achieve the desired results.
- When using chemicals, carefully read and follow the manufacturer’s instructions for optimal results and safety precautions.
- Always wear appropriate protective gear when performing these tasks, such as gloves, goggles, and masks.
- For large-scale or complex jobs, consider hiring professionals who have the training, experience, and specialized equipment to complete the work safely and efficiently.
In conclusion, surface cleaning and paint removal are crucial aspects of preserving and maintaining various items effectively.
By understanding the different techniques and methods available and choosing the most suitable option, you can ensure that surfaces maintain their appearance and structural integrity for a long time.
For more information and best practices, visit the National Park Service’s page on Removing Graffiti from Historic Masonry.
Diverse Approaches to Surface Prep: A Guide
Surface preparation is an essential process before painting, coating, or bonding various materials. Proper surface preparation is crucial to ensure a strong bond between the surface and the coating or adhesive.
A well-prepared surface helps to improve the performance, appearance, and longevity of the coated or bonded materials.
• Mechanical Surface Preparation
This category of surface preparation involves removing contaminants and altering the surface profile using mechanical force. Some of the commonly used mechanical surface preparation methods are:
– Abrasive Blasting
Abrasive blasting is a process that utilizes sand, grit, or other abrasive materials to clean or modify the surface profile. Pressurized air, water, or high-speed wheels propel the abrasive particles against the surface to remove contaminants, corrosion, or coatings.
There are different types of abrasive blasting methods, including:
- Dry abrasive blasting: Commonly known as sandblasting, dry abrasive blasting uses pressurized air to propel abrasive particles against the surface. This method is suitable for large surface areas and can achieve varying degrees of surface profiles.
- Wet abrasive blasting: Instead of using pressurized air, wet abrasive blasting uses water mixed with abrasive particles. This method is generally used to minimize dust production and is suitable for sensitive environments.
The choice of abrasive material and the size, hardness, and shape of the particles can significantly impact the effectiveness of the process.
– Grinding
Grinding is the use of an abrasive wheel or disc to remove material and achieve the desired surface profile. This method is particularly effective for removing coatings and leveling irregular surfaces.
Grinding can be done using either handheld tools or specialized grinding machines. Always choose the appropriate grinding wheel or disc for the material being prepared to achieve optimal results.
– Shot Peening
Shot peening is a process where small, spherical metal or ceramic particles (called “shot”) are propelled at the surface. The impact energy creates a thin layer of compressive stress on the surface, modifying the surface profile and increasing fatigue life.
This method is commonly used for surface preparation of metal components in the aerospace and automotive industries to enhance their resistance to fatigue, stress corrosion cracking, and fretting wear.
• Chemical Surface Preparation
Chemical preparation involves the use of chemicals to remove contaminants, corrosion, or coatings from the surface. Some of these methods include:
– Solvent Cleaning
Solvent cleaning involves the use of organic solvents, such as acetone or toluene, to remove contaminants like grease, oil, or dirt from the surface.
Solvent cleaning is most effective when the solvent is applied using a clean cloth, and the process is repeated until the cloth remains clean after a single wipe.
– Acid Etching
Acid etching is a process in which an acidic solution, such as hydrochloric or phosphoric acid, is applied to the surface. Reactions between the acid and the surface dissolve contaminants and create a roughened profile.
Acid etching is commonly used for surface preparation of concrete substrates before applying coatings or adhesives.
– Alkaline Cleaning
Alkaline cleaning involves the use of strong alkalis, like sodium or potassium hydroxide, to remove rust, mill scale, or other contaminants from the surface.
This method is more aggressive compared to solvent cleaning and is effective on more complex materials, such as stainless steel or aluminum.
• Thermal Surface Preparation
Thermal surface preparation methods utilize heat to remove contaminants or coatings from the surface. Some common thermal surface preparation techniques are:
– Flame Cleaning
Flame cleaning involves using a high-temperature flame to burn off contaminants, such as rust, mill scale, or paint. The surface is then cooled down rapidly, resulting in the contaminants flaking off into easily removable ash.
– Laser Ablation
Laser ablation uses high-powered lasers to heat the surface rapidly, causing contaminants and coatings to vaporize. The vaporized material is then removed using a vacuum or by manual wiping.
This method is best suited for precision applications and situations where minimal surface damage is desired.
• Conclusion
The appropriate surface preparation method depends on the material, the type of contaminants to be removed, and the desired surface profile.
Understanding the various methods of surface preparation and their use cases is critical to achieving a properly prepared surface that maximizes the performance and longevity of the applied coatings or adhesives.
Method | Description |
|---|---|
Cleaning | Removal of dirt, contaminants, and loose material from the surface. |
Grinding | Using abrasive tools to mechanically remove surface imperfections and create a smooth finish. |
Blasting | Using high-pressure air, water, or other media to propel abrasive particles against the surface. |
Acid etching | Applying acid solutions to the surface to chemically remove contaminants and create a rough texture. |
Scrubbing and polishing | Using abrasive pads or brushes to manually abrade the surface. |
Priming | Adding a layer of primer to the surface to improve the adhesion of the subsequent layers |
Chemical treatments | Applying chemical compounds to modify the surface. |
Fundamentals of Surface Preparation for Painting
Surface preparation for paint is a crucial step in ensuring a high-quality finish. It involves cleaning, repairing, and preparing surfaces so that paint adheres properly, lasts longer, and looks better.
• The Importance of Surface Preparation
The foundation of any paint job, be it interior or exterior, lies in proper surface preparation. Inadequate preparation can lead to a host of issues, including uneven paint coverage, premature paint failure, and poor adhesion. Proper surface preparation ensures that the paint:
- Adheres well to the surface
- Provides a uniform and smooth appearance
- Protects the substrate from damage
- Increases the durability and lifespan of the paint job
• Types of Surfaces and Their Preparation
Different surfaces require different preparation methods. Some common categories include:
1. Wood Surfaces
Wooden surfaces should be clean, dry, and sanded smooth before painting. Here are the steps involved in prepping wood surfaces:
Cleaning:
Remove any dirt, dust, or debris from the surface. If the surface has grease or oil, clean it with a degreasing cleaner or mineral spirits.
Sanding:
Sand the surface with 120-150 grit sandpaper to remove any imperfections and create a smooth finish. After sanding, wipe the surface with a damp cloth to remove any dust.
Filling and Repairing:
Fill any cracks, holes, or gouges with wood filler. Once the filler has dried, sand it smooth and remove any excess dust. If the wood has knots, seal them with a knot sealer to prevent resin from seeping through the paint.
Priming:
Apply a quality wood primer to ensure proper adhesion and seal any stains or tannins.
2. Metal Surfaces
Painting on metal requires meticulous preparation to prevent corrosion and ensure proper adhesion. Here are the steps to effectively prepare metal surfaces for painting:
Cleaning:
Clean the metal surface with a degreasing solvent, such as mineral spirits or denatured alcohol, to remove any dirt, oil, or grease.
Rust Removal:
If rust is present, use a wire brush or sandpaper to remove it. For heavily rusted surfaces, consider using a chemical rust remover.
Sanding:
Lightly sand the surface with fine-grit sandpaper to promote paint adhesion.
Priming:
Prime the surface with a metal primer to prevent rust and improve paint adhesion.
3. Masonry Surfaces
Masonry surfaces, including brick, concrete, and stucco, require proper preparation to ensure a long-lasting, durable paint job. Follow these steps to prepare masonry surfaces for painting:
Cleaning:
Remove any dirt, dust, and debris using a brush or vacuum. If the surface is stained, use a masonry cleaner to remove stains.
Repairing:
Fill any cracks or holes with a masonry repair compound. Once the compound dries, sand it smooth.
Sealing:
If the surface is porous, apply a masonry sealer to prevent paint from soaking in and to ensure even coverage.
Priming:
Apply a masonry primer to improve adhesion and reduce the overall amount of paint required.
• Tips for a Successful Surface Preparation
Here are some expert recommendations to help you achieve the best results in your surface preparation efforts:
- Always start with a clean surface. Omitting this step can cause paint to flake or peel due to poor adhesion.
- Allow surfaces to dry thoroughly after cleaning or repairing. Painting on wet or damp surfaces can lead to paint failure.
- Wear proper personal protective equipment (PPE), such as gloves, goggles, and a dust mask, when sanding, cleaning, or applying chemicals.
- Invest in quality materials, including primers and fillers. High-quality products will ensure better adhesion, coverage, and overall durability of your paint job.
- Read and follow the manufacturer’s instructions on all products used during surface preparation. This will help you achieve the best results and avoid potential issues.
In conclusion, proper surface preparation is essential for a successful paint job. By following the guidelines outlined in this article and investing time and effort in this crucial step, you can ensure that your painting project has a professional, durable, and aesthetically pleasing finish.
Optimal Paint Remover Dwell Time: When to Rinse
Understanding the proper application and removal process of paint removers is crucial in order to achieve successful and efficient paint stripping outcomes.
• Factors Affecting Paint Remover Dwell Time
– Type of Paint Remover
There is a wide range of paint remover products available in the market, each with differing compositions and reaction times.
While some formulations may work rapidly to dissolve paint layers within a few minutes, others may require hours or even overnight for effective penetration and removal.
Always consult the manufacturer’s instructions on your specific paint remover product for information on the ideal duration to achieve satisfactory results.
– Paint Layers and Thickness
The number of paint layers and the thickness of each layer on the surface will significantly affect the dwell time for paint removers.
Thicker layers or surfaces coated with multiple layers of paint may necessitate longer reaction times for the paint stripper to fully penetrate and soften the paint, facilitating easier removal.
– Type of Paint
Different types of paints require varying treatment durations and paint removal techniques. For example, water-based or latex paints can often be removed more quickly than oil-based or epoxy paints, which might call for longer or repeated applications of paint remover products.
– Ambient Temperature and Humidity
Environmental conditions, such as temperature and humidity, can have a significant impact on the effectiveness and duration of paint remover applications. Warmer temperatures tend to accelerate the action of paint removers, whereas colder temperatures may impede their performance.
Similarly, higher humidity levels can prolong drying times or hinder the paint remover’s ability to function efficiently.
• Recommendations for Effective Paint Removal
– Test a Small Area First
To determine the appropriate dwell time for your specific paint removal project, I recommend conducting a test on a small, inconspicuous area of the surface.
Apply the paint remover as per the manufacturer’s guidelines and closely monitor the reaction time, adjusting the wait time accordingly before proceeding with the full-scale removal process.
– Ensure Adequate Ventilation and Safety Precautions
When working with paint removal products, it is essential to provide proper ventilation in your workspace, as many paint removers contain hazardous chemicals that may pose health risks if inhaled.
Additionally, appropriate protective gear, such as gloves, goggles, and long sleeves, should be worn while handling paint removers.
– Follow the Manufacturer’s Instructions
As mentioned earlier, always adhere to the instructions provided by the paint remover manufacturer for the optimal application, dwell time, and removal process. Each product has its specific set of instructions that considers its unique formulation and effectiveness.
– Proper Disposal
After the paint removal process, make sure to dispose of the resulting waste material and use paint remover solutions according to your local regulations and guidelines. Improper disposal may be hazardous to the environment and pose potential health risks.
• Seeking Professional Assistance
In some cases, such as large-scale projects, antique furniture restoration, or delicate surfaces, it might be helpful to consult a professional paint removal service for their expertise and specialized equipment.
The EPA’s Lead Paint Program provides resources on finding certified professionals for lead-based paint removal projects.
• In Conclusion
Determining the appropriate duration for paint remover applications is a crucial aspect of the paint removal process. It is influenced by factors such as the type of paint remover, the number of paint layers, and environmental conditions.
To ensure a safe and effective paint removal experience, carefully follow the manufacturer’s instructions, test a small area before proceeding, and always take necessary safety precautions whenever handling paint removal products.
Type of Paint Remover | Recommended Time on Surface |
|---|---|
Caustic Paint Remover | 30 minutes – 24 hours |
Bio-based Paint Remover | 1 – 8 hours |
Solvent-based Paint Remover | 15 minutes – 24 hours |
Cleaning Techniques for Surfaces Post-Paint Removal
If you’ve recently stripped paint from a surface, it’s essential to properly clean and prepare the area before repainting or applying a new finish.
While surface preparation may seem like a trivial task, it is a critical step in ensuring that your new paint adheres properly and lasts for years to come.
• Remove Residue and Debris
After you’ve stripped the paint, there might be residue and debris left on the surface. This can include dust, chipped paint, or small pieces of the stripping agent used. Don’t let these remain on the surface, as they can cause your new paint to fail.
– Tools and Materials Needed
- A vacuum cleaner with a brush attachment
- A stiff brush or broom
- A paint scraper or putty knife
- Soft, lint-free cloths or rags
- Warm water and detergent
– Step-by-Step Process
- Use the vacuum cleaner with a brush attachment to remove dust and small debris from the surface. This helps ensure that you don’t spread debris during the cleaning process.
- Use a stiff brush or broom to sweep away larger debris and loosen any stubborn residue.
- Use a paint scraper or putty knife to carefully remove any remaining residue or chipped paint. Be careful not to damage the surface during this process.
- Mix warm water and detergent to create a cleaning solution. Dampen a soft, lint-free cloth with soapy water and wipe down the surface, paying particular attention to any spots with remaining residue.
- Rinse the surface with clean water to remove any soap residue. It’s essential that the surface is free of any soap, as it can interfere with the new paint’s adhesion.
I recommend using a mild detergent that’s designed for cleaning surfaces after stripping paint. These products typically have a low-VOC formula, making them safer to use and less likely to cause damage to the surface.
• Sand and Smooth the Surface
After removing residue and debris, it’s time to sand and smooth the surface. This step helps promote paint adhesion and creates an even surface for the new coat.
– Tools and Materials Needed
- Sandpaper (different grits depending on the surface)
- A sanding block or electric sander
- A tack cloth or damp rag
– Step-by-Step Process
- Start by sanding the entire surface with medium-grit sandpaper, such as 120 or 150-grit. This helps to remove any remaining residue and rough spots that may not be visible to the naked eye.
- Move on to finer grit sandpaper, such as 180 or 220-grit, to smooth and refine the surface. Depending on the surface material and the desired finish, you may need to move through multiple grits during this process.
- Frequently wipe the surface with a tack cloth or damp rag to remove sanding dust. This helps to prevent the dust from building up and interfering with the new paint.
- Inspect the surface for any remaining rough spots, discolorations, or other imperfections. If needed, repeat the sanding process with a finer grit sandpaper to achieve the desired level of smoothness.
• Final Preparation and Tips
After sanding and smoothing the surface, there are a few final steps to take before applying your new finish.
- Wipe down the entire surface with a tack cloth or damp rag to remove any lingering dust or debris.
- Ensure that the surface is completely dry before moving on to the next step. Any moisture present can cause issues with paint adhesion or create bubbles in the new paint.
- Apply any necessary primers, sealers, or other surface preparation products according to the manufacturer’s instructions. Proper surface preparation is key to a successful paint job, so make sure to follow all recommended steps.
By taking the time to thoroughly clean and prepare surfaces after stripping paint, you can ensure a smooth and durable finish that lasts for years.
Keep in mind that patience and attention to detail during this process will pay off in the final result. Take your time, follow the steps outlined in this guide, and your newly painted surface will look like a professional did the job.
Step | Description |
|---|---|
1 | Remove any remaining paint particles with a scraper or putty knife. |
2 | Vacuum the surface to remove dust and debris. |
3 | Wipe the surface with a damp cloth to remove any remaining residue. |
4 | Clean the surface with a solution of warm water and mild detergent using a soft cloth or sponge. |
5 | Rinse the surface thoroughly with clean water and a clean cloth, making sure to remove all soap residue. |
6 | Allow the surface to dry completely before painting or applying any finishes. |