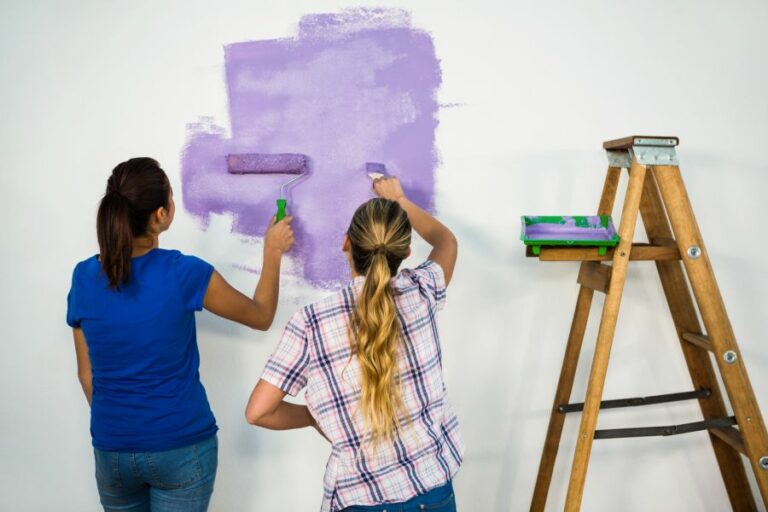
Surface Preparation: The Key To Lasting Paint. What Pros Say
Are you tired of your paint chipping, peeling, or fading away? Worried about wasting time, effort, and money on repainting projects that just don’t last as long as they should? Worry no more, as we’ve got the perfect solution for you! By focusing on surface preparation, you will unlock the secret to a long-lasting and stunning paint job.
Surface preparation: the key to lasting paint:
Surface preparation is crucial for a lasting, professional paint finish as it directly impacts the appearance and longevity of the paint job. Proper assessment, cleaning, and treatment of the surface, along with using high-quality products, ensure effective adhesion and prevent early paint failure, saving time and money on costly repairs.

Discover the secret to a long-lasting, professional-looking paint job surface preparation. Uncover expert tips, techniques, and insights to ensure your paint remains vibrant and intact for years to come. Read on to transform your painting projects into masterpieces.
Contents
- 1 Surface Prep: The Essential Secret to Durable Paint
- 2 Optimal Techniques for Surface Preparation Before Painting
- 3 The Crucial Role of Surface Prep in the Painting Process
- 4 Understanding the Standards of Paint Surface Preparation
- 5 Maritime Surface Preparation Guide for Quality Painting
Surface Prep: The Essential Secret to Durable Paint
• The Importance of Surface Preparation
Proper surface preparation is an essential aspect of any painting project. It directly influences the appearance and longevity of the final paint job.
A poorly prepared surface can lead to early paint failure, unwanted adhesion issues, and even costly, time-consuming repairs. Therefore, to achieve a lasting and professional-looking paint finish, investing time and effort into this crucial step is a must.
Before beginning any painting project, make sure you have the necessary equipment and materials. These may include:
- Cleaning supplies (soap, water, rags, brushes)
- Protective gear (goggles, gloves, masks)
- Paint removal tools (scrapers, sandpaper, chemical removers)
- Primers and sealers
- High-quality paint
• Assessing the Surface Condition
Before determining the appropriate preparation method, evaluate the surface’s condition carefully. Check for issues like:
– Paint Flaking or Peeling
Existing paint may be peeling or flaking off, indicating poor adhesion or exposure to moisture. In this case, remove the loose paint using a scraper, followed by sanding to ensure a smooth surface for repainting.
– Mold and Mildew Growth
Mold and mildew thrive in humid environments and can cause paint to peel or discolor. Treat affected areas with a mold-killing solution and allow the surface to dry thoroughly before applying a mold-resistant primer.
– Grease and Dirt Build-up
Grease and dirt can prevent paint from adhering to the surface properly. Clean the area using a sponge or brush and warm, soapy water. Rinse and allow the surface to dry completely before moving on.
– Chalky Residue
Chalky residue on exterior surfaces often results from weathering over time. Clean the surface using a brush or power washer, and apply a high-quality primer to prevent further chalking.
• Preparing Different Surfaces
Different surfaces require specific approaches to ensure proper adhesion and long-lasting results:
– Wood Surfaces
- Remove loose paint and debris using a scraper or wire brush.
- Repair any holes, gouges, or cracks with wood filler, and sand the area smooth.
- Sand any remaining glossy paint to a dull finish.
- Prime bare wood with a quality primer to ensure even absorption of the paint.
- Apply the paint in multiple thin layers, ensuring adequate dry time between coats.
– Metal Surfaces
- Remove any loose or flaking paint using a scraper or wire brush.
- Sand the surface to remove rust or corrosion and create a smooth finish.
- Clean the surface with a degreaser to remove oils and contaminants.
- Apply a rust-inhibiting primer to protect the metal from further corrosion.
- Finish with high-quality metal paint, following the manufacturer’s directions for application and dry time.
– Drywall and Plaster Surfaces
- Repair any cracks, holes, or dents with a patching compound, and sand the area smooth.
- Remove dust and debris with a damp cloth or vacuum.
- Apply a stain-blocking primer to cover any discolored areas or water stains.
- Finish with high-quality interior paint, using a brush or roller for even coverage.
– Masonry and Concrete Surfaces
- Remove dust, dirt, and debris with a brush or vacuum.
- Repair any cracks or damaged areas with a masonry patching compound.
- Allow surfaces to dry thoroughly, as moisture in the substrate can cause paint failure.
- Apply a masonry sealer or primer for added protection and adhesion.
- Finish with high-quality masonry paint in the desired color and finish.
• Best Practice Recommendations
- Always allow surfaces to dry thoroughly after cleaning or treating them with chemicals.
- Follow manufacturer guidelines for drying times and application of primers, sealers, and paint.
- Use high-quality products and tools to ensure the best results and reduce the risk of paint failure.
- Perform regular maintenance checks and quickly address issues to avoid costly repairs and further deterioration.
• Conclusion
Investing time and effort into proper surface preparation is the key to achieving a professional, long-lasting paint finish.
By carefully assessing the surface’s condition, choosing the right preparation method, and following best practices, you can ensure a successful painting project and protect your investment for years to come.
Optimal Techniques for Surface Preparation Before Painting
As an experienced professional in the painting industry, I understand the importance of properly prepping surfaces before applying paint. In this comprehensive guide, I will share my knowledge and recommendations on the best way to prepare various surfaces for paint.
• Cleaning the Surface
Before applying any paint, it is essential to start with a clean surface. Dirt, dust, and other debris can negatively impact the final appearance and adhesion of your paint.
- For Non-Porous Surfaces: Use a damp cloth or sponge with mild detergent to remove dirt and grease. Rinse the surface with clean water and allow it to dry completely.
- For Porous Surfaces: Use a vacuum or soft brush to remove dust and debris. For stubborn dirt or stains, use a mild detergent or wood cleaner and a soft sponge or cloth.
• Repairing Damages
Any surface damage, such as cracks, holes, or peeling paint, should be addressed before applying new paint. Here are some tips on how to repair various types of damage:
- Cracks and Holes: Use a high-quality filler or spackle to fill in any cracks or holes. Once the filler has dried, sand it smooth and wipe away any dust.
- Peeling Paint: Remove any loose paint by scraping or sanding the affected area. If the peeling is extensive, it may be necessary to remove all the paint and start fresh.
- Water or Smoke Damage: For surfaces with water or smoke damage, it is essential to use a stain-blocking primer to prevent the damage from bleeding through the new paint.
• Sanding and Scuffing
Sanding is an essential step in preparing surfaces for paint, as it helps ensure proper adhesion, removes any existing glossy finish, and creates a smooth surface. Here are some recommendations for sanding various surfaces:
- For Wood Surfaces: Use medium-grit sandpaper (80-120 grit) to sand the surface, then finish with fine-grit sandpaper (180-240 grit) for a smooth finish. Always sand in the direction of the wood grain.
- For Metal Surfaces: Lightly sand using fine-grit sandpaper or a sanding sponge (240-320 grit) to remove any rust and rough spots.
- For Previously Painted Surfaces: Lightly sand the surface with fine-grit sandpaper (180-240 grit) to remove any gloss and create a scuffed surface for the new paint to adhere to.
After sanding, wipe down the surface with a damp cloth or tack cloth to remove any dust or debris.
• Priming the Surface
Using a high-quality primer is essential for achieving a long-lasting, professional-looking paint job. Priming helps ensure proper adhesion, evens out the surface texture, and provides a base layer that prevents stains and other imperfections from showing through the paint.
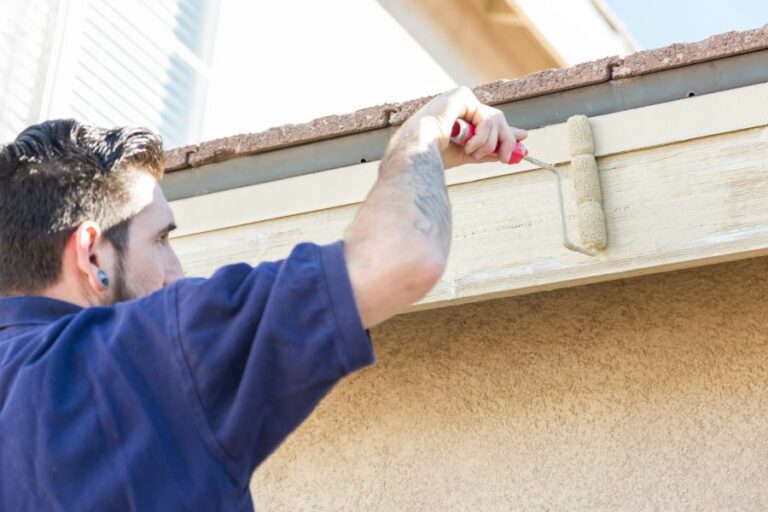
- For Unpainted Wood Surfaces: Use an oil-based or latex primer designed for wood, applying it evenly with a brush or roller.
- For Metal Surfaces: Use a rust-inhibiting primer, ensuring to apply it evenly across the entire surface.
- For Previously Painted Surfaces: Use a latex or oil-based primer that matches the type of paint you plan to use. This will ensure compatibility and proper adhesion.
Allow the primer to dry for the recommended amount of time as specified on the product.
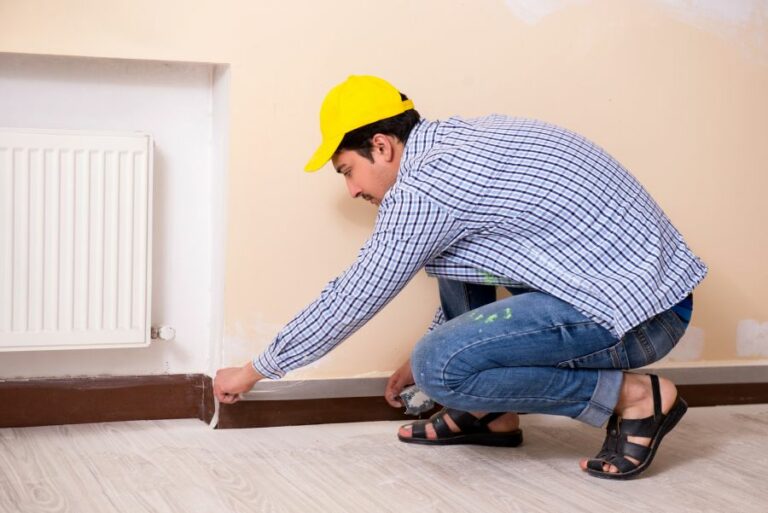
• Masking and Protecting Surrounding Areas
Before painting, it is crucial to protect surrounding surfaces and features, such as trim, hardware, and flooring, from paint splatters and drips. Here are some recommendations:
- Use Painter’s Tape: Apply painter’s tape to any edges, trim, hardware, or other features that you do not want to be painted. Ensure to press the tape firmly to create a tight seal, preventing paint from seeping underneath.
- Use Drop Cloths or Plastic Sheeting: To protect flooring or furniture, use drop cloths or plastic sheeting, securing it with painter’s tape if necessary.
By following these comprehensive steps and recommendations, you can ensure a successful, professional-quality paint job that will last for years to come. Proper surface preparation is the key to achieving the best possible results when painting any surface.
The Crucial Role of Surface Prep in the Painting Process
• Introduction to Surface Preparation
Surface preparation is a key step in the painting process that must be properly executed to ensure the successful adhesion, durability, and appearance of the finished paint job. Failure to do so could lead to issues such as peeling, blistering, or faster degradation of the painted surface.
• The Purpose of Surface Preparation
– Ensuring Adhesion
One of the primary goals of surface preparation is to ensure optimal adhesion between the paint and the substrate. The bond between a coating and the surface it’s applied to plays a crucial role in the longevity and appearance of the paint job.
When the surface is not properly prepared, it can hinder the paint from creating a strong bond, which may subsequently result in premature failure of the coating.
– Achieving a Smooth Appearance
Another vital aspect of surface preparation is the creation of a smooth and even canvas for the paint to adhere to. A well-prepared substrate will facilitate an even application of the paint, ensuring a consistent finish.
Conversely, a poorly prepared surface can cause visible imperfections on the painted surface, such as uneven sheens, dimples, or runs.
– Removing Contaminants
Surface contaminants can drastically affect the adhesion and durability of paint films. By methodically cleaning and preparing the surface, you are effectively removing dirt, oil, and other contaminants that can adversely impact the performance and longevity of the paint job.
• Steps Involved in Surface Preparation
– Cleaning the Surface
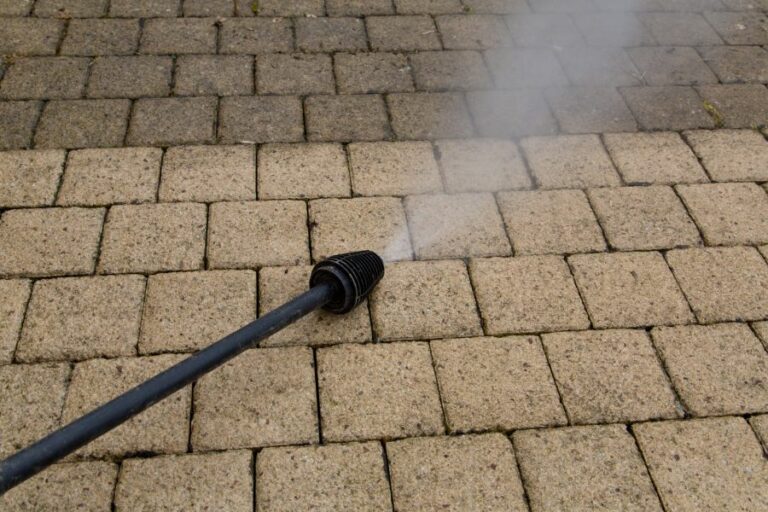
The initial step in surface preparation is to thoroughly clean the area to be painted. This typically involves the use of a pressure washer, steam cleaner, or other suitable equipment to remove stubborn dirt, grime, and loose particles that can potentially compromise the paint adhesion.
For interior surfaces, a damp cloth or sponge can also be used to remove dust and dirt.
– Removing Old Paint
If the existing paint is peeling or flaking, it should be removed before applying new paint. This can be done using a combination of scraping, sanding, or even chemical paint strippers. When removing old paint, it’s important to wear protective gear, as some paint types can release harmful substances as they are stripped away (e.g., lead-based paint).
– Addressing Damaged Areas
It’s crucial to examine the surface for any damages, such as cracks, holes, or water damage, that may need repair prior to painting. Filling and sealing these defects with appropriate products can ensure a stable and consistent surface for the paint to adhere to.
– Sanding and Smoothing
To achieve a smooth surface and to further aid in paint adhesion, sanding is an integral part of the surface preparation process. Using sandpaper or a power sander, the surface should be sanded until it is smooth and free of any irregularities.
Once sanded, the surface should be wiped clean with a damp cloth or tack cloth to remove any residual dust.
– Priming
Applying an appropriate primer is an essential step in the surface preparation process, as it provides a base for the paint to adhere to and helps ensure a smooth, even finish.
Different surface types may require different primers, and it’s important to follow manufacturer recommendations when selecting the appropriate product.
• The Role of Tools and Equipment
Utilizing the correct tools and equipment is crucial for successful surface preparation. From pressure washers and sanders to scrapers and putty knives, having the right tools on hand will not only make the job easier but will also ensure professional results.
In addition to standard tools, safety equipment should not be overlooked when undertaking surface preparation tasks. Protective gear such as safety goggles, masks, and gloves can help prevent injuries during the process.
• A Worthwhile Investment
By dedicating the time and effort required to adequately prepare a surface prior to painting, you can ensure a longer-lasting, professional-quality finish. The investment in proper preparation will pay off in the long run by reducing the likelihood of paint failures or the need for frequent repaints.
As a resource for more in-depth information on surface preparation, the Painting and Decorating Contractors of America (PDCA) offers guidelines and standards for proper surface preparation techniques.
Understanding the Standards of Paint Surface Preparation
Painting surfaces is a crucial part of any painting project, as it helps ensure that the final result is smooth and professional. To achieve this, you must adhere to a certain set of preparation standards to ensure that your surface is ready to receive the paint.
• Surface Cleaning and Inspection
Before any painting work can begin, it’s essential to clean the surface thoroughly. This includes removing any dirt, grease, or other contaminants that may interfere with paint adhesion. I recommend using a mild detergent and water mixture or a specific cleaner meant for the surface you plan to paint.
For example, The United States Environmental Protection Agency (EPA) has guidelines for dealing with lead-based paint that you should follow if you’re working on an older structure.
After cleaning the surface, inspect it carefully for any damage, cracks, or defects that could negatively impact your final result. If you find any problems, take the time to repair them before proceeding with your paint job.
• Surface Repairs and Sanding
If your surface has any cracks, dents, or imperfections, you must repair these before applying new paint. Patching materials such as spackle or wood filler should be applied as necessary, following the manufacturer’s instructions.
Once the patching compound has dried, sand the repaired areas until they are level with the surrounding surface.
Sanding is not only necessary for repairing defects; it also helps create a smoother surface for the paint to adhere to.
Begin by sanding the entire surface using medium-grit sandpaper, then work your way up to a finer grit. Be sure to remove any dust created during this process by vacuuming or using a tack cloth.
• Priming
Priming is an essential step in the painting surface preparation process. Primer serves several purposes:
- It seals porous surfaces, ensuring that the paint doesn’t absorb unevenly.
- It provides a uniform base for the paint to adhere to.
- It can block stains and prevent them from bleeding through the new paint job.
I recommend applying one or two coats of primer, depending on the surface and paint you’re using. Always follow the manufacturer’s instructions for the best results.
• Caulking
Caulking is often overlooked in the painting preparation process, but it’s an essential step for achieving a professional-looking finish. Use a paintable caulk to fill gaps and seams around windows, doors, trim, and other areas where air or water could penetrate.
This step not only improves the appearance of your paint job but also helps protect your home from drafts and moisture.
• Masking
Before you begin painting, it’s essential to protect adjacent surfaces from paint splatters and overspray. You can achieve this by using painter’s tape, plastic sheeting, or drop cloths to cover surfaces that are not being painted.
Ensure that the tape is secure and flush against the surface, with no gaps or bubbles, to prevent paint from seeping underneath. In addition, when using drop cloths or protective sheeting, make sure that they are adequately secured to prevent tripping hazards.
• Surface Preparation Recommendations
- Always work in a well-ventilated area to protect yourself from potentially harmful fumes or dust.
- Wear appropriate safety gear, such as gloves, eye protection, and a dust mask.
- Take your time during each step of the surface preparation process, as rushing can lead to mistakes that may compromise your final result.
- Always follow the manufacturers’ guidelines for paint, primer, and other products to ensure optimal performance and compatibility.
In conclusion, following the painting surface preparation standard is crucial for achieving a professional-looking paint job. By putting in the time and effort to properly clean, inspect, repair, sand, prime, caulk, and mask your surfaces, you’ll be well on your way to a beautiful and long-lasting result.
Remember to always work safely and follow the recommendations and guidelines provided by manufacturers and industry experts.
Maritime Surface Preparation Guide for Quality Painting
• Introduction
Painting a ship is an important maintenance task, as it not only gives the vessel a fresh appearance but also provides protection against the harsh marine environment. Before applying a coat of paint, the surface of the ship must be prepared correctly.
This is a crucial step, as improper surface preparation could lead to poor paint adhesion, which can cause the paint to fail prematurely.
• Assessing the Surface Condition
Before commencing any surface preparation, it is essential to assess the current condition of the ship’s surface. This involves inspecting the surface for any defects, such as rust, corrosion, or any other damages.
After assessing the surface condition, determine the extent of the preparation required. This can range from minor touch-ups to complete stripping and repainting of the ship’s surface.
• Removing Previous Coatings and Contaminants
– Stripping Old Paint
If the existing paint is in poor condition, it is advisable to remove it before applying a new coat. There are several methods for stripping old paint, including the following:
- Mechanical Methods: These involve using tools such as sanders, grinders, or needle guns to remove the old paint. Use caution with these methods, as they can cause damage to the ship’s surface if not used properly.
- Chemical Methods: Paint strippers and removers can be applied to the old paint, causing it to soften and peel away. Follow the manufacturer’s instructions and take necessary precautions when handling these chemicals, as they can be hazardous.
– Removing Rust and Corrosion
Rust and corrosion are common issues on ships and must be addressed before applying new paint. There are several methods for removing rust and corrosion, including:
- Hand Tools: Wire brushes and sandpaper can be used manually to remove corrosion and rust from the surface.
- Power Tools: Wire brush attachments for power tools such as angle grinders can make the rust and corrosion removal process more efficient.
- Blast Cleaning: Sandblasting or grit blasting involves using compressed air to propel abrasive particles against the surface. This method can effectively remove rust, corrosion, and old paint, but it requires specialized equipment and should only be performed by trained professionals.
– Cleaning the Surface
After removing the old paint and rust, the surface must be cleaned to remove any remaining contaminants, such as grease, oil, or salts. Solvents, such as acetone or mineral spirits, can be used to clean the surface. Additionally, a pressure washer can be used to help remove stubborn contaminants.
• Preparing the Surface for Painting
– Smoothing and Fairing
For a smooth and even paint finish, any imperfections, such as dents or scratches, must be addressed before applying the paint. A fairing compound can be used to fill in the imperfections and create a smoother surface. After applying the compound, sand the area to ensure it is smooth and even with the rest of the surface.
– Priming
Priming is an essential step in preparing a ship’s surface for painting, as it promotes better adhesion of the paint and provides additional protection against corrosion. When selecting a primer, it is important to choose one that is compatible with the type of paint that will be used.
Some common types of primers for ships include epoxy primers and zinc-rich primers. It is advisable to follow the manufacturer’s recommendations for the application of the primer to ensure the best results.
– Masking and Taping
To protect areas that should not be painted, such as windows, portholes, and fittings, apply masking tape and plastic sheeting. This will help to prevent overspray and make the painting process more efficient and accurate.
• Final Thoughts
Proper surface preparation is crucial for achieving a high-quality and long-lasting paint finish on a ship. By following the appropriate steps for assessing the surface condition, removing old paint and contaminants, and preparing the surface for new paint, ship owners can help to ensure that their vessel remains well-protected and looks its best.
Step | Description |
|---|---|
1 | Inspect the surface to determine the type of preparation needed |
2 | Remove any loose paint, dirt, rust, or other contaminants using a scraper, wire brush, or sandpaper |
3 | Repair any surface defects, such as dents, holes, or cracks, with an appropriate filler or sealant |
4 | Clean the surface with a mild detergent solution to remove grease, oil, and salt residue, and then rinse with fresh water |
5 | Allow the surface to dry completely |
6 | Apply a suitable primer to the surface to improve adhesion of the paint and prevent corrosion |
7 | Allow the primer to dry according to the manufacturer’s directions |
8 | Lightly sand the primed surface to create a smooth, even surface for paint application |
9 | Wipe the surface with a tack cloth to remove any dust or debris |
10 | Apply the paint according to the manufacturer’s instructions, using appropriate tools such as brushes, rollers, or sprayers |