Surface Preparation Tips For Various Materials
When it comes to achieving the perfect finish on various materials, surface preparation is key. But how do you ensure a clean, smooth, and uniform surface every time? Don’t worry- we’ve got you covered. With our experience and expertise in handling numerous materials, we confidently offer you essential tips and tricks that cater to different surfaces, ensuring a professional result every time.
Surface preparation tips for various materials:
For optimal results, prepare surfaces as follows: wood – clean, remove paint, sand, vacuum, use a tack cloth, and prime; metal – remove rust, degrease, etch, sand, and prime; concrete – clean, cure, repair, profile, and prime; plastic – clean, wipe down, sand, and prime; glass – clean, degrease, texture (if needed), and prime. Proper preparation promotes durability and professional appearance.

Discover expert tips on preparing a range of materials for optimal adhesion and finishing. Learn the techniques to achieve a flawless surface, from metals and plastics to wood and concrete. Read on for more!
Contents
Tips for Preparing Surfaces of Different Materials
Proper surface preparation is essential for achieving optimal results when painting, coating, or bonding various materials. This comprehensive guide will provide you with valuable tips and recommendations for preparing different surfaces to ensure your projects look professional and last longer.
• Wood Surface Preparation
When working with wood, it is crucial that you follow these steps to achieve the best results:
- Clean the surface: Remove dust, dirt, and grime by wiping down the wood with a damp cloth, followed by a thorough dry wipe.
- Remove paint: If the wood is painted, you must strip away the paint sequentially using a paint remover or sander.
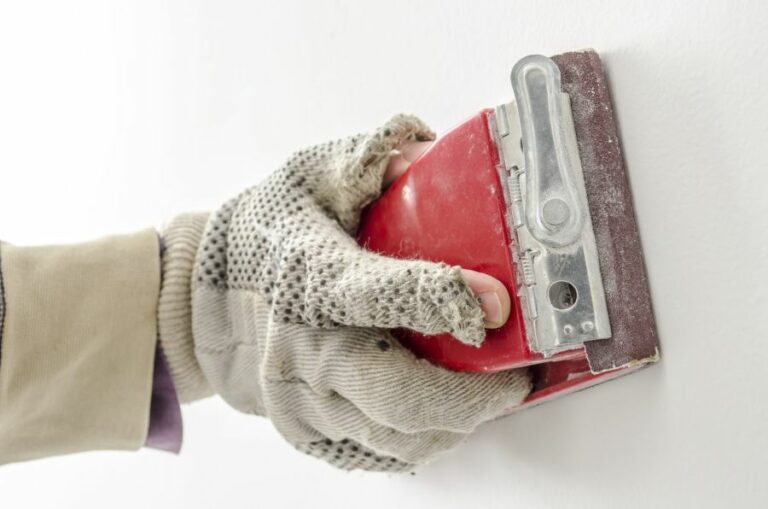
- Sanding: Use sandpaper (80-120 grit) to smooth out the wood surface and remove any imperfections. Start with a low grit and progress to a higher one for a smoother finish.
- Vacuum: Vacuum the area to remove any dust and debris left after sanding.
- Tack cloth: Wipe down the wood with a tack cloth to remove any remaining dust particles.
- Priming: Apply a wood primer to ensure proper adhesion of the paint or coating.
• Metal Surface Preparation
Preparing metal surfaces can be challenging. Follow these surface preparation tips for optimal results:
- Remove rust: Use a wire brush or a sandblaster to eliminate any rust on the surface.
- Degreasing: Thoroughly clean the metal surface with a suitable degreaser to remove oil and grease.
- Etching: Etch the metal with an acid solution, like phosphoric or muriatic acid, to ensure better adhesion of the coating. Follow the manufacturer’s instructions for proper use and handling.
- Sanding: Sand the surface with sandpaper (80-120 grit) to remove any bumps, scratches, or other imperfections.
- Priming: Apply a corrosion-resistant primer to protect and enhance the metal’s adherence to paint or coating.
• Concrete Surface Preparation
Here are some tips for preparing a concrete surface:
- Cleaning: Remove dirt, grease, and oil using a power washer or a degreaser, followed by a thorough rinse.
- Curing: Ensure the concrete is fully cured, as freshly-poured concrete is not suitable for coatings or paints.
- Repair: Fill any cracks or holes using a suitable concrete patching product.
- Profiling: Achieve the proper surface profile by acid etching or grinding to promote the adhesion of coatings or overlays.
- Priming: Use a concrete primer designed for the specific coating or overlay application.
• Plastic Surface Preparation
Preparing plastic surfaces can be challenging due to their slick surface. Here are some steps to follow for better results:
- Cleaning: Use mild soap and water to clean the surface, then rinse with clean water and dry thoroughly.
- Wipe down: Use a lint-free cloth saturated with isopropyl alcohol to remove any remaining dirt or grease.
- Sanding: Lightly sand the plastic with fine-grit sandpaper (220-320 grit) to create a roughened surface for better adhesion.
- Priming: Apply a primer specifically designed for use on plastic surfaces to promote paint adhesion and durability.
• Glass Surface Preparation
Preparing glass surfaces requires careful attention to ensure a properly adhering coating. Follow these tips for success:
- Cleaning: Use a glass cleaner to remove dirt and grime, then dry the surface with a lint-free cloth.
- Degreasing: Wipe down the glass with isopropyl alcohol to remove any remaining oils and contaminants.
- Texturing: For some applications, glass surfaces may require texturing to improve adhesion. This can be achieved by sandblasting or chemical etching.
- Priming: If necessary, use a primer specifically designed for glass surfaces to ensure better adhesion.
• Final Thoughts
Thorough and proper surface preparation is crucial for a successful project. Each material type requires specific steps to ensure a long-lasting and professional-looking result. Always follow the recommendations of the paint or coating manufacturer, and never skip any steps in the prep process.
By investing time and effort in proper surface preparation, you will save both time and money in the long run by avoiding potential issues such as peeling, blistering, or poor adhesion.
The 8 Essential Stages of Surface Preparation
Surface preparation is a crucial part of the painting or coating application process. It ensures that the material applied to a surface adheres well and lasts for a long time.
• 1. Assess the Surface Condition
The first step is to evaluate the condition of the surface to identify what type of cleaning and preparation methods will be suitable.
Look for signs of dirt, grease, oil, paint peeling, rust, and other contaminants, as well as any structural damage, such as cracks or holes. This will help you decide on the most effective cleaning methods and materials.
• 2. Remove Loose Material and Debris
Before starting the cleaning process, remove any loose material, such as peeling paint, rust, or debris, from the surface. This can be done using a scraper, wire brush, or a pressure washer. Be thorough, as any remaining loose material may affect the adhesion of the applied coating.
• 3. Clean the Surface
To ensure a successful application, it is essential to clean the surface thoroughly. There are several cleaning methods to choose from, depending on the type and level of contamination. Some of these methods include:
- Water washing: Useful for removing dirt, dust, and mildew from surfaces. It can be done using a garden hose, pressure washer, or even a bucket and sponge.
- Solvent cleaning: Ideal for removing grease, oil, and other solvent-soluble contaminants. Use a solvent recommended by the coating manufacturer for the best results.
- Detergent cleaning: Use a mild detergent mixed with water to clean surfaces with light contamination, such as fingerprints or light dirt.
- Abrasive cleaning: For heavily contaminated or corroded surfaces, abrasive blasting using a sandblaster or a grinder may be necessary. This method effectively removes rust, old coatings, and other stubborn contaminants.
Remember to follow the safety precautions mentioned in the product guidelines when handling solvents or abrasive cleaning tools.
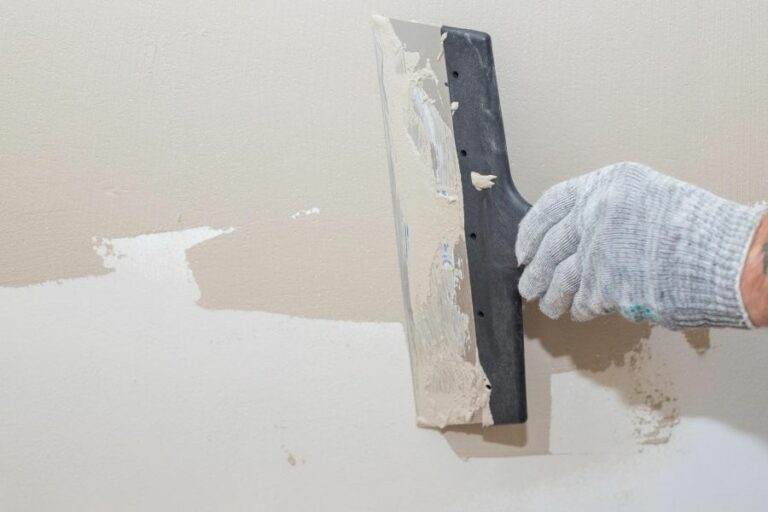
• 4. Prepare the Surface for Repairs
Once the surface is thoroughly cleaned, identify and prepare areas that need structural repairs. This may include filling in cracks and holes or sealing gaps in joints. Use the appropriate repair materials, such as putty, caulk, or epoxy filler, depending on the substrate and coating to be applied.
• 5. Sand the Surface
Sanding is a critical step to improve adhesion and achieve a smooth finish. Use sandpaper or an electric sander to scuff the surface, removing any remaining irregularities and roughening it up for better adhesion. For large surfaces or hard-to-reach areas, consider using a sanding pole or an extension.
• 6. Clean and Rinse After Sanding
After sanding, thoroughly wipe down and rinse the surface with clean water to remove any residual dust, dirt, or debris. Inspect the surface for any missed spots in the cleaning process, and if necessary, repeat the earlier steps.
• 7. Apply a Primer (If Required)
A primer helps improve adhesion, ensures an even coating, and enhances durability. Depending on the coating material and the substrate, a primer may or may not be required. Consult the data sheet provided by the coating manufacturer for the right primer and its application instructions.
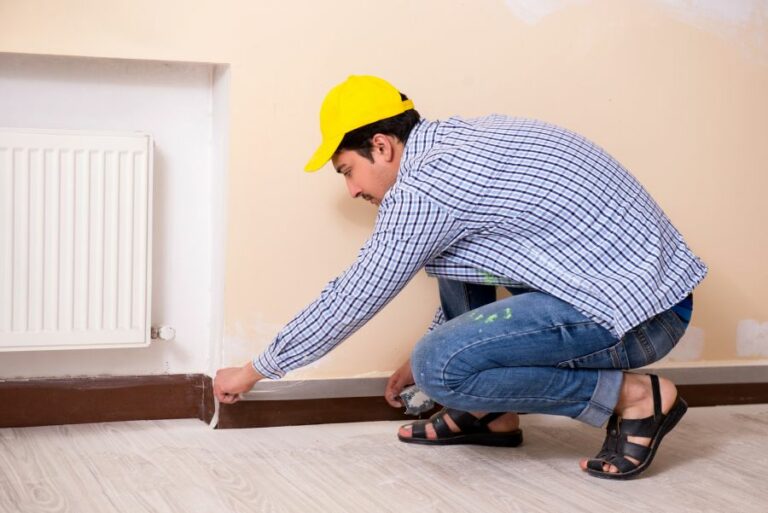
• 8. Protect and Mask Surrounding Areas
Lastly, protect and mask areas near the surface, including adjacent walls, floors, and furniture. Use painter’s tape, plastic sheets, or drop cloths to cover these areas, ensuring that they do not get damaged during the application process.
By following these eight steps of surface preparation, you can expect a successful and durable paint or coating application.
For further information on surface preparation, you can refer to guidelines provided by reputable organizations, such as SSPC: The Society for Protective Coatings or NACE International.
Proper preparation not only ensures the best results but also helps prevent future issues, such as coating failures, saving you time and money in the long run.
Step | The 8 Essential Stages of Surface Preparation |
|---|---|
1 | Assess surface condition |
2 | Remove loose or deteriorating materials |
3 | Remove contaminants (such as oil, grease, or dirt) |
4 | Remove rust, oxidation, or old coatings |
5 | Repair surface defects and irregularities |
6 | Apply and smooth surface fillers if needed |
7 | Ensure the surface is clean and dry |
8 | Prime or pre-treat the surface as necessary |
Exploring Various Techniques for Surface Preparation
Surface preparation techniques are essential processes used across various industries, ensuring that materials like metals, concrete, and plastics maintain their durability, lifespan, and optimum performance.
An essential step before painting, coating, or bonding, surface preparation helps create a clean surface that allows for better adhesion and longer-lasting results.
• Abrasive Blasting
One of the most popular surface preparation techniques is abrasive blasting, also known as blast cleaning or sandblasting. This method involves projecting high-pressure air, water, or a mixture of these with an abrasive material (e.g., sand, steel grit, garnet) onto a surface.
Abrasive blasting effectively removes rust, paint, mill scale, and other contaminants from the surface, leaving it clean and ready for subsequent treatments.
Recommendation: Check with local regulations before using abrasive blasting, as specific types, like sandblasting, can be harmful to operators and the environment.
– Wet and Dry Abrasive Blasting
Wet abrasive blasting involves combining water with abrasive materials during the blasting process.
This method reduces dust accumulation, diminishing the need for containment structures, and generates less heat, preventing the warping of the material. Wet abrasive blasting is especially valuable for industries requiring a clean working environment or those dealing with sensitive materials.
On the other hand, dry abrasive blasting is a faster and more aggressive process, ideal for large-scale applications that require quick turnaround times. It is important to be aware of the increased risk of dust generation and heat accumulation when utilizing dry abrasive blasting.
• Chemical Cleaning
Chemical cleaning is the process of using chemical agents to remove contaminants from surfaces. Typically employed on metal surfaces, chemical cleaning processes include pickling, phosphating, and passivation.
– Pickling
Pickling is a chemical cleaning process focusing on removing rust, scale, and other corrosion products from various metals, including steel, stainless steel, and aluminum.
This technique involves immersing the metal in a bath or spraying it with a solution typically containing strong acids, like hydrochloric or sulfuric acid. Pickling leaves the metal surface clean and free of impurities.
Recommendation: Given the hazardous nature of these chemicals, ensure proper safety precautions, like wearing protective gear and goggles, and adequate ventilation, are in place.
– Phosphating
Phosphating involves applying a phosphate conversion coating, which promotes adhesion and corrosion resistance on the metal surface. This technique is commonly used on steel surfaces exposed to harsh environments, or that will serve as substrates for other treatments.
– Passivation
Passivation is a chemical process that improves the corrosion resistance of stainless steel by removing free iron on the surface. This technique involves using an oxidizing acid, like nitric acid or citric acid, to form a passive layer on the surface, which protects the metal from future corrosion.
• Mechanical Cleaning
Mechanical cleaning uses physical processes to remove contaminants from a surface, typically through abrasion or impact. Some commonly used mechanical cleaning methods include:
– Wire Brushing
Wire brushing is a simple and cost-effective mechanical cleaning process where stiff wire bristles manually or mechanically scrub a surface. This method is helpful in removing loose rust or scale from metal surfaces.
– Grinding
Grinding is the process of using a rotating abrasive wheel, disc, or belt to smooth, clean, or remove surface materials. Grinding is often employed on metallic surfaces to remove large amounts of rust, scale, or old coatings.
– Scraping
Scraping is another mechanical technique that involves using a manual or powered tool to scrape foreign materials from a surface. This method can be time-consuming, but it is useful for small-scale applications or hard-to-reach areas.
• Ultrasonic Cleaning
Ultrasonic cleaning uses high-frequency sound waves to create microscopic bubbles that implode on a surface, dislodging contaminants. This process is often combined with a solvent or water, effectively cleaning even the smallest crevices of the material.
Ultrasonic cleaning is an effective method for delicate or intricate surfaces, such as jewelry or electronics.
Recommendation: Ultrasonic cleaning is best paired with other preparatory techniques for large-scale or aggressively contaminated surfaces.
• Conclusion
In summary, surface preparation techniques are critical to promoting adhesion, durability, and optimal performance in a wide variety of industries.
The above methods, including abrasive blasting, chemical cleaning, mechanical cleaning, and ultrasonic cleaning, provide tailored approaches that can be combined or utilized individually, depending on the specific material, contaminants, and desired outcome.
Technique | Techniques for Surface Preparation |
|---|---|
Cleaning | Removal of dirt, grease, oils, and other contaminants from the surface |
Abrasive Blasting | Using high-pressure air to project abrasive particles onto the surface, removing contaminants and creating a rough profile |
Shot Peening | Impacting the surface with steel or glass beads to create a smoother surface and relieve surface stresses |
Chemical Etching | Applying a chemical solution that reacts with and removes unwanted material from the surface |
Electrolytic Etching | Using an electric current and an electrolyte to dissolve and remove unwanted material from the surface |
Electro-polishing | Combining chemical and electrolytic processes to create a smoother and more reflective surface |
Mechanical Abrasion | Sanding, buffing, or grinding the surface to remove contaminants and create a desired surface profile |
Laser Cleaning | Using high-energy pulses of laser light to remove contaminants and any unwanted coating from the surface |
Most Widely Used Method for Surface Preparation
Surface preparation is a crucial step in various industrial processes, including painting, coating, and corrosion protection. It is essential for achieving a high-quality result and ensuring the longevity of the final product.
• What is Abrasive Blasting?
Abrasive blasting, also known as sandblasting, is a process of forcibly propelling a stream of abrasive material against a surface under high pressure to remove contaminants, roughen a smooth surface or smooth a rough surface, and shape surfaces.
It is an effective and efficient method for preparing surfaces in various industrial and commercial applications.
– Types of Abrasive Blasting
There are several types of abrasive blasting, each with its advantages and specific applications. The following list outlines the most common types:
- Dry Abrasive Blasting: This is the most traditional form, which involves propelling dry abrasive particles through a blasting nozzle using pressurized air or mechanical means.
- Wet Abrasive Blasting: This method combines water and abrasive materials, creating a slurry that is then propelled at the surface. Wet blasting is beneficial for reducing dust and preventing heat buildup on sensitive surfaces.
- Vacuum or Dustless Blasting: This technique uses a vacuum system to collect spent abrasives and contaminants, reducing dust and debris while containing hazardous materials.
Each type of abrasive blasting can effectively prepare surfaces depending on the scope and specific requirements of a project. It is essential to evaluate the properties of the surfaces you are working on and the desired end result to choose the most suitable blasting method.
• Factors to Consider When Choosing an Abrasive Blasting Technique
Several factors must be considered when selecting the most appropriate abrasive blasting technique for your specific project. These factors include:
- Surface Material: Consider the type of material and its properties, such as hardness and sensitivity to heat or impact. Some surfaces may not be suitable for certain blasting methods, while others may require specific types of abrasives.
- Surface Contaminants: Evaluate the type and level of contaminants present on the surface, such as rust, paint, or oils. Certain abrasive blasting methods are more effective at removing specific contaminants.
- Environmental Factors: Consider the environmental impact of the blasting process, including dust and waste disposal. Regulatory requirements may dictate the use of specific blasting methods to minimize environmental hazards.
- Project Size and Scope: Consider the size of your project, including the available workspace and the amount of surface area to be prepared. Some techniques may be more efficient for large-scale projects, while others might be better suited for smaller or confined spaces.
• Recommendations for Abrasive Blasting Success
Based on our experience with abrasive blasting, we recommend following these best practices to ensure a successful surface preparation process:
- Choose the Right Abrasive: Carefully select the appropriate abrasive material for your project. Evaluate the properties of the abrasive, including hardness, density, shape, and size, to determine its suitability for the surface material and contaminant type.
- Proper Equipment Maintenance: Regularly inspect and maintain your blasting equipment, including hoses, nozzles, and pressure vessels, for optimal performance and safety during the surface preparation process.
- Adequate Surface Cleanliness: Prior to abrasive blasting, ensure surfaces are clean and free from grease, oils, or other contaminants that can interfere with the blasting process. This helps improve the effectiveness of abrasive blasting and extends the life of your equipment.
- Safety Measures: Follow appropriate safety precautions, including proper personal protective equipment (PPE), and comply with regulatory guidelines to ensure the safety of the blasting operators and the surrounding environment.
We hope this article provides valuable insights into the most common surface preparation technique: abrasive blasting. For more information on abrasive blasting and surface preparation best practices, we recommend checking resources available from NACE International and SSPC.
By understanding the different types of abrasive blasting, assessing project-specific factors, and following best practices, you can achieve optimal surface preparation results and ensure the longevity and success of your industrial projects.
Key Considerations in the Surface Preparation Process
Surface preparation is the process of treating and conditioning a surface before painting, coating, or other types of applications. A properly prepared surface ensures optimal adhesion and prolongs the lifespan of the applied materials.
When preparing a surface, several factors need to be taken into consideration to ensure quality results.
• Surface Type and Condition
The first factor to consider when preparing a surface is its type and condition. Different materials, such as wood, metal, concrete, and plaster, require different methods of surface preparation. Understanding the properties of the surface material is essential for choosing the right approach.
– Wood
Wood surfaces need to be clean, dry, and free from any defects. Any existing coatings, such as paint or varnish, should be removed using a paint remover or by sanding to ensure proper adhesion of the new coating. Knots and resinous areas should be treated with a wood knotting solution.
– Metal
For metals like steel, iron, or aluminum, removing rust, scale, and other contaminants is crucial. Sandblasting, wire brushing, or using a chemical rust converter are common methods used in metal surface preparation.
Priming the surface with an appropriate metal primer is also essential to prevent future rust or corrosion.
– Concrete
Concrete surfaces should be free of any contaminants and laitance, which is a weak, powdery layer often found on newly poured concrete slabs. Mechanical methods, such as grinding or shot-blasting, are effective in removing laitance and creating a suitable profile for new coatings.
– Plaster
New plaster surfaces should be allowed to dry for at least four weeks before painting. Any surface defects, such as cracks or holes, need to be filled using a plaster filler, and the surface should be sanded smooth.
• Surface Cleanliness
The second factor to consider in surface preparation is surface cleanliness. The surface must be free from dirt, dust, grease, oil, and other contaminants that could undermine adhesion or affect the appearance of the applied material.
Various cleaning methods can be used, depending on the specific contaminant and surface type.
For general cleaning of dirt and dust, vacuuming, air blowing, or using a damp cloth can be effective. For greasy or oily surfaces, a degreasing solution or solvent, such as acetone, is recommended.
Surface cleaning should always be done before any other preparation steps, such as sanding, to prevent embedding contaminants into the surface.
• Surface Profile
Another essential factor in surface preparation is the surface profile. Creating the right texture or “profile” on a surface is crucial for proper adhesion and long-lasting results. Various profiles are needed depending on the application, such as smooth for paint, rough for industrial coatings, or somewhere in between for adhesives.
Depending on the surface type, different methods can be used to achieve the desired profile. Sanding, abrasive blasting, grinding, and etching are common techniques employed to create the appropriate surface profile.
For example, when preparing a wooden surface for painting, sanding with appropriate grit sandpaper helps create a smooth and even surface.
In contrast, for industrial coatings on a concrete surface, more aggressive methods like shot-blasting or diamond grinding are needed to create the rough profile required for optimal adhesion.
• Environmental Conditions
Lastly, environmental conditions play an essential role in surface preparation. Factors such as temperature, humidity, and wind can significantly impact the process and the final results.
– Temperature
The temperature affects drying times, curing times, and the viscosity of applied materials. In general, warmer temperatures speed up the drying and curing process, whereas colder temperatures slow it down.
It is essential to follow the manufacturer’s application guidelines regarding temperature ranges to ensure proper performance.
– Humidity
High humidity can prolong drying times and cause issues with some materials, such as water-based paints or coatings.
Condensation can also form on surfaces when the temperature drops overnight, which can lead to poor adhesion and other defects. Ensure environmental conditions meet the manufacturer’s guidelines for the materials being applied.
– Wind
Strong winds can cause dust or debris to be blown onto a freshly prepared surface, creating contamination and adhesion problems. Wind speed should also be considered when using spray application methods, as the wind can create overspray, leading to uneven coverage and wasted material.
Wind barriers or screens can be used to protect the work area in windy conditions, and the timing of the surface preparation and application can be adjusted to avoid periods of high wind.
In conclusion, proper surface preparation is essential to ensure the best results and long-lasting performance of applied materials. Taking into consideration the surface type and condition, surface cleanliness, surface profile, and environmental conditions will significantly impact the success of any painting, coating, or adhesive application project.
For more information and guidance in surface preparation, consult publications provided by organizations like the Society for Protective Coatings (SSPC) or the International Concrete Repair Institute (ICRI).