Using Paint Strippers For Best Results. What Pros Say
If you’re looking for the secret to using paint strippers effectively, you’ve come to the right place. Our expertise in this area will ensure you achieve the best results with ease and efficiency. By understanding the proper techniques and safety precautions, you can confidently tackle any paint-stripping project. We’re excited to guide you through the process and share our tried-and-true tips for success.
Using paint strippers for best results:
To achieve optimal results with paint strippers, choose the right type based on paint, surface material, and desired finish. Prepare the surface by cleaning and protecting surrounding areas. Apply the stripper in thin layers, wait for the paint to soften, and then remove it gently with a scraper. Clean and neutralize the surface if necessary, repeating the process as needed. Always prioritize safety and follow product recommendations.

Uncover the secret to effortlessly removing old paint and varnish using paint strippers! Read on to discover expert-approved methods, safety tips, and techniques to achieve the best results without damaging surfaces. You don’t want to miss this!
Contents
- 1 Achieving Optimal Results with Paint Strippers
- 2 Discover the Most Efficient Paint Removal Method
- 3 Duration for Effective Paint Remover Application
Achieving Optimal Results with Paint Strippers
• Choosing the Right Paint Stripper
When working with paint strippers, selecting the right product for your project is essential. Various types of paint strippers are available, and choosing the appropriate one involves considering factors such as the type of paint, the surface material, and the desired finish.
– Solvent-Based Strippers
These are effective on most types of paint and are especially useful for removing multiple layers of paint. However, they can be harmful if not used properly. Always follow the manufacturer’s instructions and take necessary safety precautions when working with solvent-based strippers.
– Bio-Based Strippers
Eco-friendly options such as bio-based paint strippers use natural ingredients to break down paint. They are an excellent choice for those seeking a more environmentally friendly option. However, their effectiveness may vary depending on the paint and surface.
– Caustic Strippers
Caustic paint strippers contain alkaline chemicals that work well for removing oil-based and latex paints. They are typically used on projects involving metal or masonry surfaces. Keep in mind that caustic strippers can cause damage to delicate surfaces, so use them with caution.
– Mechanical Stripping
For some projects, mechanical stripping methods such as sanding or scraping may be the best choice. These methods can be time-consuming but are often effective and generally have a lower risk of causing damage to the surface.
• Preparing the Surface
Before applying the paint stripper, it is essential to prepare the surface. Clean the surface thoroughly to remove dirt, grease, and other contaminants that may hinder the effectiveness of the stripper.
– Protect Surrounding Areas
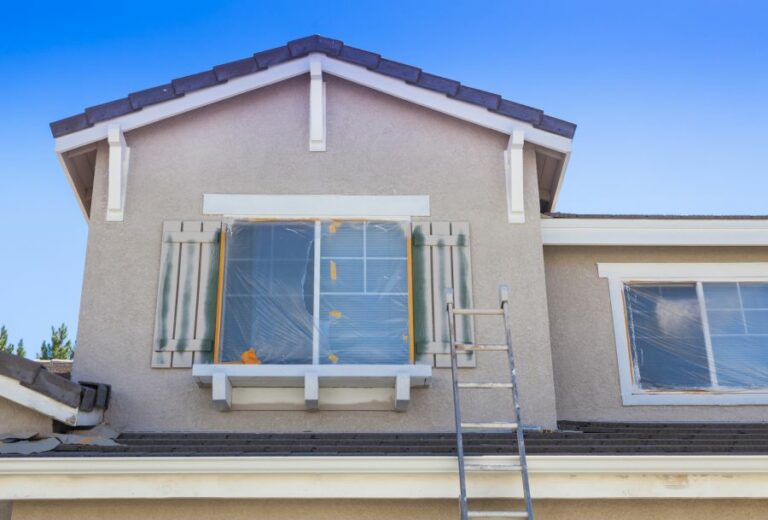
Cover nearby items and surfaces with plastic sheeting to protect them from drips of the stripper. To avoid unintentional damage, remove any nearby hardware or trim.
– Safety Precautions
- Wear appropriate protective gear, including gloves, goggles, and a mask with an appropriate filter for the type of stripper you use.
- Work in a well-ventilated area to reduce the risk of inhaling harmful fumes.
- Follow the manufacturer’s instructions for proper application and disposal.
• Applying the Paint Stripper
Once the surface is prepared, it’s time to apply the paint stripper. Each product will have its recommended application method, including the use of a brush, roller, or spray.
– Apply in Thin Layers
Thin, even layers of paint stripper will provide the best results, allowing the product to penetrate fully and act on the paint. It’s often better to apply multiple thin layers than a single thick layer.
– Wait for the Paint to Soften
Patience is crucial when using paint strippers. Allow the product to work its magic according to the manufacturer’s recommended wait times, which can range from a few minutes to several hours.
– Test for Readiness
Monitor the paint’s response to the stripper. The paint should begin to bubble, lift, or wrinkle, indicating that it is ready for removal.
• Removing the Paint
– Use a Scraper
When the paint is soft and ready, use a scraper to gently remove it from the surface. Apply consistent pressure and keep the scraper at a shallow angle to minimize surface damage.
– Clean the Surface
After the bulk of the paint has been removed, clean the surface using a brush or cloth to remove any residue. For heavily textured surfaces, a stiff-bristle brush may be necessary to reach all crevices.
– Neutralize the Surface (If Required)
Some paint strippers, particularly caustic types, require neutralization after use. Following the manufacturer’s guidelines, use a neutralizing solution to counteract the stripper and prevent damage to the surface.
• Finishing Touches
Inspect the surface for any remaining paint or residue. If necessary, repeat the process until the desired level of paint removal is achieved.
Once the surface is clean, it’s ready for the next steps in your project, whether that includes repainting or refinishing.
By following these expert tips in using paint strippers, you’ll see professional results in your paint removal projects. Remember to always prioritize safety and follow product recommendations for the best outcome.
Step | Description |
|---|---|
1 | Choose the right paint stripper for your project (e.g., solvent-based, bio-based, or caustic-based). |
2 | Ensure proper ventilation and wear proper safety gear, such as gloves, goggles, and a respirator. |
3 | Apply the paint stripper according to the manufacturer’s instructions, often with a brush or roller. |
4 | Let the paint stripper sit for the recommended time, allowing it to penetrate and loosen the paint. |
5 | Gently scrape or scrub off the loosened paint, avoiding damage to the underlying surface. |
6 | Neutralize the surface or clean it as per the manufacturer’s instructions, to remove any residual paint stripper. |
7 | Once the surface dries, it’s ready for repainting or refinishing as desired. |
Discover the Most Efficient Paint Removal Method
Whether you are a DIY enthusiast, a professional painter, or simply looking to give your home a makeover, knowing the most effective way to remove paint is crucial. This comprehensive guide will provide you with the information necessary to accomplish your paint removal project, including methods for various surfaces, safety precautions, and valuable tips from personal experience.
• Different Methods for Effective Paint Removal
– Chemical Paint Strippers
Chemical paint strippers are widely considered the most effective and efficient method for removing paint. These products come in different forms, including liquid, gel, and aerosol, and work by softening and dissolving the paint, allowing it to be scraped off easily.
When using a chemical paint stripper, follow these steps:
- Apply the stripper generously and evenly to the paint surface.
- Leave it to penetrate the paint layers according to the manufacturer’s instructions.
- Scrape off the softened paint using a paint scraper or a plastic scraper.
Recommendation: I recommend using a gel-based stripper for vertical surfaces, as they are thicker and less likely to run, providing better coverage and control.
– Heat Guns
Heat guns are another effective method for removing paint, particularly on wood surfaces. By applying heat directly to the paint, the paint layers soften, allowing them to be easily scraped off.
- Aim the heat gun at the painted surface, keeping it a few inches away.
- Move it slowly and evenly, softening the paint as you go.
- Use a scraper to remove the softened paint.
Note: When using a heat gun, work in small sections to prevent damaging the surface or the wood beneath the paint.
– Mechanical Methods
Mechanical methods involve using tools to physically strip the paint away from surfaces. These methods are particularly effective for large, flat areas where power sanders, grinding wheels, or wire brushes can be used.
- Choose the appropriate tool for the type of surface and paint being removed.
- Begin by applying light pressure to avoid damage to the underlying surface.
- Gradually increase pressure as needed while also monitoring the surface for any signs of damage.
Recommendation: I recommend using a power sander with fine-grit sandpaper to remove paint gently and evenly from wood surfaces. For metal surfaces, use a wire brush attachment on a power drill.
• Safety Precautions for Paint Removal
Before starting any paint removal project, it is essential to take proper safety precautions. These include:
- Wearing gloves, safety goggles, and a properly rated respirator to protect against chemical fumes, dust, and paint particles.
- Working in a well-ventilated area to minimize the risks associated with inhaling toxic fumes.
- Following the manufacturer’s instructions when using chemical paint strippers and other products.
Recommendation: The U.S. Environmental Protection Agency (EPA) guidelines for lead-based paint provides valuable information on safety precautions when dealing with potentially harmful substances in paint.
• Tips for Successful Paint Removal
- Always test the paint removal method on a small, inconspicuous area before tackling the entire surface.
- When using chemical paint strippers, ensure that the surrounding area is protected from accidental spills or splashes. This can be done with drop cloths or plastic sheeting.
- Be patient during the paint removal process, as rushing can lead to damage or incomplete paint removal.
- Clean the surface thoroughly after paint removal, allowing it to dry completely before applying any new paint or finish.
• Conclusion
There are several effective methods for paint removal, each with its own set of advantages and disadvantages. Ultimately, the most effective way to remove paint depends on the specific surface, the type of paint, and the time and effort required.
By following the guidelines provided in this comprehensive guide, you will have the information and confidence needed to tackle your paint removal project successfully.
With proper safety precautions, patience, and a bit of elbow grease, you can achieve professional-looking results that will enhance the beauty and value of your property.
Duration for Effective Paint Remover Application
While tackling a paint stripping project, one of the most important questions to consider is how long you should let the paint remover sit. This guide provides a thorough analysis of the factors that influence the appropriate duration for different types of paint removers and surfaces.
With this information, you can confidently tackle your paint removal projects.
• Understanding Types of Paint Removers
First, it’s important to understand that there are various types of paint removers available in the market, each with different applications and wait times. Some common types of paint removers include:
1. Solvent-Based Removers
Solvent-based paint removers are formulated with strong chemicals, which can dissolve multiple layers of paint quickly. These removers are highly effective but can be toxic and require proper ventilation during use. Typical waiting time for solvent-based removers ranges from 30 minutes to several hours.
2. Bio-Based Removers
Bio-based paint removers, also known as eco-friendly or green removers, use natural ingredients to remove paint. They tend to be a safer alternative to solvent-based removers and have less odor.
However, the waiting time for bio-based removers is usually longer, often requiring several hours or even overnight to be effective.
3. Caustic-Based Removers
Caustic-based paint removers contain alkaline chemicals that react with paint, loosening its hold on the surface. They are typically less toxic than solvent-based removers but can be harmful to some surfaces like wood or aluminum.
The waiting time for caustic-based removers ranges between 30 minutes to a few hours.
• Factors Affecting Paint Remover Sitting Time
There are a few key factors that affect the duration for which you should let a paint remover sit on the surface. These include:
1. Type of Paint
Different paints require different amounts of time to be dissolved or softened by paint removers.
- Latex or Acrylic Paints: As water-based paints, latex and acrylic paints usually soften more quickly, allowing for shorter waiting times.
- Oil-based or Alkyd Paints: These paints are more resistant to removal and may require a longer sitting time.
2. Number of Layers
The number of paint layers you’re removing also impacts the waiting time. The more layers, the longer it will take for the remover to penetrate and soften the paint.
3. Surface Material
The type of surface on which the paint is applied can also influence the waiting time.
- Wood: Since wood is porous, the paint penetrates more deeply into the surface and may require a longer sitting time.
- Metal: Metal surfaces often require a shorter waiting time since the paint cannot penetrate as deeply.
4. Temperature and Humidity
Both temperature and humidity can affect the performance of paint removers. Higher temperatures and lower humidity levels generally speed up the stripping process, while colder temperatures and higher humidity can slow it down.
• Recommendations and Best Practices
Here are some recommendations and best practices based on my personal experience when using paint removers:
- Always read and follow the manufacturer’s instructions, as they provide specific information about the required sitting time for the particular product.
- Test a small, inconspicuous area before applying the paint remover to the entire surface. This allows you to ensure the remover works effectively and doesn’t damage the surface.
- It’s best to start with the minimum recommended waiting time and then check the progress. If the paint hasn’t softened sufficiently, reapply the remover and wait longer as needed.
- Ensure proper ventilation and wear safety gear, including gloves and eye protection, when working with paint removers.
In conclusion, knowing how long to let the paint remover sit is crucial for a successful paint-stripping project.
By understanding the factors discussed in this article and following the recommendations provided, you can effectively remove paint from various surfaces without causing damage or compromising your safety.
Paint Remover Type | Wait Time |
|---|---|
Solvent-based | 15 minutes to 24 hours |
Caustic-based | 30 minutes to 12 hours |
Bio-based | 1 to 12 hours (sometimes up to 24 hours) |


