Waterproofing Wood With Paintable PWRP. What Pros Say
Water damage and rotting are common issues that you may face with wooden surfaces and structures, but good news! We have the perfect solution for you! Protecting wood from moisture and its damaging effects can now be achieved by using a paintable, high-quality waterproofing product like PWRP.
Waterproofing wood with paintable PWRP:>
Waterproofing wood with paintable PWRP (Polymer Water Repellent Preservative) involves preparing the wood surface by cleaning, sanding, and removing dust, followed by applying the PWRP solution evenly in multiple coats. PWRP penetrates deep into the wood fibers, forming a barrier against moisture and protecting it from water damage, decay, and fungal growth. Proper application and ongoing maintenance are key to achieving durable, water-resistant wood.

Discover the wonders of paintable PWRP, a waterproofing solution that ensures long-lasting and efficient protection for all kinds of wooden surfaces.
Learn about its application process, benefits, and expert-recommended tips to maximize its performance. Read on to safeguard your wood surfaces like never before!
Contents
- 1 Painting Wood with PWRP for Effective Waterproofing
- 2 Achieving Waterproof Wood through Paint Applications
- 3 Top Waterproof Treatments for Optimal Wood Protection
- 4 Waterproof Wood Solutions: Using Specialized Paint
- 5 Thompson’s Water Seal Compatibility with Painted Wood
Painting Wood with PWRP for Effective Waterproofing
Waterproofing wood is essential to protect it from moisture and potential damage. Let’s discuss how to waterproof wood using paintable PWRP (Polymer Water Repellent Preservative). PWRP is an effective way to shield wood from water penetration, decay, and fungal growth.
Moreover, paintable varieties enable you to add your desired color, enhancing its aesthetic appeal.
• Understanding PWRP
PWRP is a water-based solution that contains an emulsified polymer. When applied to wood, it penetrates deep into the fibers, forming a barrier against moisture. The final result is water-resistant wood that is protected from damage and decay.
• Preparing the Wood Surface
Before applying PWRP, it is crucial to prepare the wood surface thoroughly. Incorrectly prepared surfaces could compromise the effectiveness of the PWRP application.
– Cleaning the Wood
First, ensure the wood surface is clean and free of dirt, dust, and mildew. You can use a mild detergent mixed with water to clean the surface. After cleaning, allow the wood to dry completely before proceeding to the next step.
– Sanding the Wood
Sanding is necessary for creating an even surface and ensuring better adhesion of the PWRP. Start by using medium-grit sandpaper (100-150 grit) and progressively move to finer grits (180-220 grit) until the wood surface feels smooth.
Remember to sand along the wood’s grain direction to maintain consistency.
– Removing Dust
After sanding, it is essential to remove any residual dust from the surface. You can use a microfiber cloth or a vacuum cleaner for an effective cleanup. Dust-free wood is vital for a successful PWRP application.
• Applying the PWRP Solution
With the wood surface cleaned and prepared, you can proceed to apply the paintable PWRP. Follow these steps for the best results:
– Stirring the Solution
Before application, ensure you stir the PWRP solution well. This ensures an even distribution of the polymer particles and pigments, enhancing the effectiveness and aesthetic outcome.
– Selecting the Right Applicator
Choosing the correct applicator is crucial for effective coverage. For small projects, use a brush to apply the PWRP. For larger surfaces, opt for a roller, spray gun, or airless sprayer to give consistent coverage.
– Applying the PWRP
Apply the PWRP evenly across the wood’s surface, ensuring a generous and consistent coat. Pay extra attention to the ends and edges of the wood, as these are more prone to water penetration and damage.
Follow the PWRP manufacturer’s recommended drying time between coats, as this varies among products.
– Applying Multiple Coats
Multiple coats of PWRP are recommended to achieve maximum protection. Apply at least two coats, ensuring the wood is completely dry between applications. Check the wood surface for any uneven or insufficient coverage, and apply additional coats as needed.
• Finishing Touches
Once you have applied the necessary coats and allowed the wood to dry, you can finalize the project with a few finishing touches.
– Sanding Again (Optional)
For a smoother finish, lightly sand the wood with fine-grit sandpaper (320-400 grit) after the final coat of PWRP is completely dry. This step is optional but can help refine the wood’s appearance.
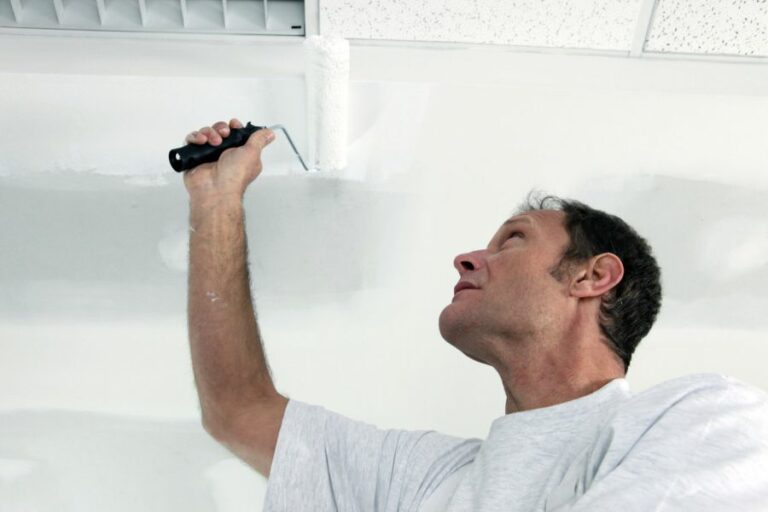
– Applying Paint
If desired, apply your chosen paint or finish over the PWRP. Ensure the wood is entirely dry before painting. Opt for high-quality, water-resistant paint for the best results.
• Maintaining Water-Resistant Wood
Application of paintable PWRP is just the beginning; ongoing maintenance is necessary to ensure the wood remains water-resistant.
- Regularly inspect your wood for signs of damage or decay and take necessary action to prevent further deterioration.
- Clean the wood surfaces periodically, removing dirt and debris that could encourage moisture buildup.
- Check for any paint cracks or peeling and reapply PWRP coats as needed to sustain protection.
In conclusion, paintable PWRP is an effective solution for waterproofing wood and preserving its integrity. Proper surface preparation, correct application, and ongoing maintenance are key to achieving durable, water-resistant wood.
Achieving Waterproof Wood through Paint Applications
Waterproofing wood is a vital task for many projects that involve wooden structures, furniture, or objects exposed to water or moisture. Among the different techniques to waterproof wood, painting is a popular and effective method.
This article examines whether you can make wood waterproof with paint, the advantages of using paint for waterproofing, and how to choose the right paint for your specific project. Additionally, it includes steps for applying paint to wood to ensure a lasting waterproof effect.
• Advantages of Waterproofing Wood with Paint
Using paint to waterproof wood has several advantages:
- Preserves the quality and lifespan of the wood: Waterproofing your wood prevents water damage, rot, mold, and mildew, keeping the wood in good condition for longer.
- Aesthetic appeal: Water-resistant paint products come in various colors and finishes, allowing you to maintain or improve the appearance of your wooden object or structure.
- Economical option: When compared to other waterproofing methods, such as water-repellent treatments or epoxy coating, painting your wood can be a cost-effective alternative.
- Ease of application: Applying paint is a simple process that almost anyone can perform with the proper tools and materials, with many DIY-friendly options available.
• Choosing the Right Waterproofing Paint for Your Wood
When selecting paint to waterproof your wood, consider the following factors:
- Type of paint: Make sure to opt for high-quality waterproof paint products designed specifically for wood. Examples of suitable paint types include acrylic, latex, and oil-based paint. Each of these paint types has its own properties, advantages, and disadvantages. Acrylic and latex paints are water-based, making them easier to clean up and more environmentally friendly, whereas oil-based paint is more durable and long-lasting.
- Resistance to UV radiation: For outdoor wood items exposed to sunlight, choose a waterproof paint product that has UV resistance. This will help in preventing color fading and deterioration due to sun exposure.
- Color and finish options: Consider your desired color and finish when selecting paint. Waterproof wood paint products are available in various colors, so you can find one that matches your preferences and the existing appearance of your wooden structure or object.
- VOC content: Some paint products contain volatile organic compounds (VOCs), which can have negative health impacts. If you want a more environmentally-friendly, non-toxic option, look for low-VOC or no-VOC waterproof paint products. This is particularly important for indoor projects and situations where people will come into close contact with the painted wood.
• Steps to Waterproof Wood with Paint
Below are the steps for waterproofing your wood using paint:
- Clean the wood: Remove any dirt, grease, or loose particles from the surface of the wood. You can use a brush, cloth, or a mild cleaning solution to ensure a clean surface.
- Sand the wood: Sand the wood surface using medium-grit sandpaper to provide an even foundation for the paint. This will help to promote better adhesion of the paint to the wood. Wipe away any dust or debris generated from sanding before proceeding to the next step.
- Apply a primer: A primer prepares the surface of the wood for better paint adhesion and a smoother finish. Choose a water-resistant or waterproof primer specifically designed for wood. Apply a thin coat of the primer using a brush or roller and allow it to dry as specified in the manufacturer’s instructions.
- Paint the wood: Apply a thin, even layer of waterproof paint using a brush, roller, or paint sprayer. Apply additional coats as recommended by the paint manufacturer, allowing the paint to dry between each coat. Typically, two to three coats of paint are sufficient to ensure a durable and effective waterproof barrier. Be sure to follow manufacturer instructions regarding drying times.
- Seal the paint: If desired, you can also apply a clear, waterproof sealant on top of the paint to further enhance its waterproofing capabilities. Choose a sealant specifically designed for your paint type (acrylic, latex, or oil-based) and follow the provided application instructions.
- Inspect your work: After the paint and sealant have dried completely, inspect the wood to ensure there is proper coverage and no visible flaws, cracks, or peeling. If necessary, add additional coats of paint or sealant to address any issues.
By following these steps, you can successfully waterproof your wood with paint, ensuring a long-lasting, durable, and attractive finish. For further information on waterproofing wood, the USDA Forest Service provides helpful details on various waterproofing techniques and materials.
| Can you make wood waterproof with paint? | |
|---|---|
| Question | Can you make wood waterproof with paint? |
| Answer | Yes, applying a waterproof paint or sealant can help make wood more resistant to water damage and protect it from moisture. However, it is essential to properly prepare the wood surface and follow the paint or sealant instructions to ensure maximum effectiveness. |
Top Waterproof Treatments for Optimal Wood Protection
Waterproofing wood is essential for maintaining its durability, appearance, and functionality. Let’s discuss various treatments to waterproof wood effectively and the advantages and disadvantages of each method.
By the end of this read, you will gain a better understanding of how to choose the best treatment for your wooden items.
• Importance of Waterproofing Wood
Waterproofing protects wood from moisture and humidity, which can cause swelling, warping, and eventually rot. When wood is exposed to water or moisture, it can become an ideal breeding ground for fungi and mildew – both of which can weaken the wood and shorten its lifespan.
By waterproofing your wood, you can preserve its integrity and prevent costly replacements or repairs down the line.
• Types of Waterproofing Treatments for Wood
Let’s take a look at the different treatments available for waterproofing wood, along with their benefits and drawbacks.
– Oil-Based Waterproofing Treatments
These treatments, such as tung oil or linseed oil, penetrate the wood fibers and harden to provide a water-resistant seal. They also enhance the wood’s natural beauty and enrich its grain.
Advantages
- Easy to apply
- Preserves and enhances the wood’s appearance
- Allows for simple maintenance (regular reapplication required)
Disadvantages
- Incomplete protection, not entirely waterproof
- Flammable during application
- Can darken the wood’s appearance
– Sealers
Sealers, such as polyurethane, varnish, and lacquer, create a protective barrier on the wood’s surface. They provide an effective shield against water and moisture, making them an excellent option for waterproofing.
Advantages
- Strong protection from water and moisture
- Available in various sheens (matte, satin, or glossy)
- Can be easily applied with a brush or sprayer
Disadvantages
- Susceptible to scratches and damage over time
- May require sanding prior to application
- Not suitable for all wood types
– Stains
Wood stains are pigmented coatings that provide both color and waterproofing. They penetrate the wood surface to offer protection while enhancing its natural appearance.
Advantages
- Enhances wood grain and appearance
- Long-lasting protection
- Available in various colors
Disadvantages
- Can be more difficult to apply evenly
- Some types require reapplication over time
- Stripping and sanding needed for refinishing
– Epoxy Resin
Epoxy resin is a clear, durable, chemical compound that hardens to create a waterproof barrier on the wood surface. It is often used for heavy-duty applications and is a popular choice for woodworking projects such as countertops, tabletops, and river tables.
Advantages
- Exceptional durability and waterproofing
- Resistant to scratches, heat, and chemicals
- Easy to apply with self-leveling properties
Disadvantages
- Expensive compared to other treatments
- Longer curing time
- Can be challenging to remove air bubbles
– Paint
Exterior-grade paint provides a waterproof and protective barrier on the wood surface. It is available in a wide range of colors and finishes, allowing you to customize the appearance of your wooden items.
Advantages
- Versatile color options
- Excellent waterproofing properties
- Affordable and easy to apply
Disadvantages
- Hides wood’s natural beauty and texture
- May require multiple coats
- Can peel or chip over time, requiring maintenance
• Recommendations
Based on the advantages and disadvantages of each treatment, we can offer some recommendations for various applications.
- For indoor furniture or surfaces that need strong protection and durability, consider epoxy resin or a high-quality sealer.
- For outdoor applications, such as decks and fences, a stain would be a suitable option.
- If appearance is the priority, an oil-based treatment will enhance the wood grain and provide decent water resistance.
Make sure to follow the manufacturer’s instructions on the chosen treatment for the best results.
• Final Thoughts
In conclusion, there isn’t a one-size-fits-all answer for the best treatment to waterproof wood. By considering factors such as the wood type, intended use, and desired appearance, you can make an informed decision on which treatment will work best for your specific needs.
Treatment Method | Description | Application |
|---|---|---|
Sealant | A sealant provides a clear, protective finish that prevents water from penetrating the wood. | Apply the sealant evenly with a brush or spray it on the wood surface. Allow it to dry according to the manufacturer’s instructions, and apply multiple coats if needed. |
Wood Stain | A wood stain is another effective waterproofing treatment for wood, and it also provides color to the wood surface. | Apply the stain with a brush or a cloth, wiping off any excess. Allow it to dry according to the manufacturer’s instructions, and apply multiple coats if needed. |
Waterproof Paint | Waterproof paint can provide a solid barrier between the wood and moisture, protecting the wood from decay and damage. | Apply the paint evenly with a brush or a roller. Allow it to dry according to the manufacturer’s instructions, and apply multiple coats if needed. |
Epoxy | Epoxy can provide a strong, waterproof seal for wood, making it an excellent treatment option for specific applications. | Mix the epoxy according to the manufacturer’s instructions and apply it to the wood surface with a brush or a roller. Allow it to dry before using the wood for its intended purpose. |
Waterproof Wood Solutions: Using Specialized Paint
Wood is a versatile and durable material used in countless applications, from furniture and cabinetry to structural building components. However, one of its main drawbacks is its susceptibility to water damage.
• Types of Waterproofing Coatings for Wood
There are several different types of waterproofing coatings that can be applied to protect the wood from moisture, and each one has its own set of advantages and limitations. Understanding these differences can help you select the best option for your specific project.
– Exterior Paint
Exterior paint is a popular choice for waterproofing wood because it provides an attractive and durable finish. High-quality exterior paint can create a strong barrier against moisture ingress, helping to prevent rot and decay.
When selecting exterior paint, it is important to choose one that is specifically designed for use on wood and is rated for exterior applications. Look for products with a reputable brand and those labeled with features such as “water-resistant,” “waterproof,” or “moisture barrier.”
I recommend using high-quality acrylic or latex paint, as these are highly resistant to water and provide excellent adhesion to wood surfaces. Oil-based paints can also be used but may not offer the same level of protection as their acrylic counterparts.
– Wood Stains and Sealers
Wood stains are another option for protecting wood against water damage. While stains primarily serve as a colorant, they can also provide a level of protection against moisture penetration by sealing the wood’s pores.
When selecting a wood stain, opt for a product that also offers a built-in sealer or apply a separate sealant after staining. Many experts recommend water-based stains over oil-based options, as they typically provide better protection against moisture.
Sealers are transparent finishes that are applied on top of wood stains or on untreated wood. They form a protective barrier against moisture, UV rays, and general wear and tear.
Sealers are available in both water-based and oil-based formulas, with water-based options generally being more environmentally friendly and easier to clean up.
– Varnish
Varnish is a clear protective finish that is applied over wood to provide a durable, water-resistant coating. It is available in several types, including polyurethane, spar, marine, and alkyd-based formulas.
Marine-grade varnishes offer the highest level of water resistance and are designed for use in environments with high humidity or frequent exposure to water.
Polyurethane varnishes are a popular choice for wood projects because they provide excellent protection against water and wear. However, they can be more difficult to apply than other varnishes and generally require multiple coats for the best results.
– Epoxy Resin
Epoxy resin is a heavy-duty waterproofing solution that is often used for sealing wooden surfaces. When applied to wood, epoxy creates a thick, clear, and highly resilient layer that is virtually impervious to water.
This makes it an ideal option for applications where maximum waterproofing is required, such as boatbuilding, decking, and outdoor furniture.
However, epoxy can be more difficult to work with than other options and usually requires careful mixing and application to achieve the best results. Additionally, epoxy finishes can turn yellow over time, which may be a concern for some applications.
• Application Tips for Waterproofing Wood
No matter which type of waterproofing coating you choose, proper preparation and application are essential for achieving the best results.
- Clean the Surface: Before applying a waterproofing coating, it is essential to clean the wood surface thoroughly, removing any dirt, dust, or debris that could interfere with the adhesion of the product. Use a stiff brush, warm water, and mild soap if necessary to clean the surface, then allow it to dry completely.
- Sand the Surface: Sanding the wood surface helps promote better adhesion and ensures a smooth, even finish. Use medium-grit sandpaper to smooth out any rough spots or imperfections, then follow up with fine-grit sandpaper for a final pass. After sanding, wipe down the surface with a damp cloth to remove any dust.
- Apply Product According to Directions: Each waterproofing product will have its own set of application instructions, which can vary depending on the product type, brand, and specific formulation. Be sure to follow the manufacturer’s recommended application process for best results.
- Apply Multiple Coats: For optimal waterproofing performance, most products will require multiple coats. Be sure to follow the manufacturer’s recommendations regarding the number of coats and drying time between applications.
- Maintain Waterproofing: Waterproofing solutions are not a one-time application, and wood surfaces should be inspected regularly for signs of wear or damage. Most waterproofing products will require periodic reapplication to maintain their performance.
By choosing the right waterproofing solution and applying it properly, you can help protect your wood surfaces from moisture-related damage, ensuring they remain structurally sound and visually appealing for years to come.
Thompson’s Water Seal Compatibility with Painted Wood
Thompson’s Water Seal is a popular and versatile wood protection solution used by many homeowners and professionals alike for numerous applications. One question that frequently comes up is whether or not it is suitable for use on painted wood surfaces.
• Understanding Thompson’s Water Seal
Before diving into the practicalities of using Thompson’s Water Seal on painted wood, it is essential to have a clear understanding of the product itself.
Thompson’s Water Seal is a specially formulated liquid sealant that offers protection to wood surfaces from external elements like water, UV rays, and mildew. It is specifically designed for use on uncoated, natural wood surfaces to help maintain their structural integrity and appearance.
– Types of Thompson’s Water Seal
There are primarily three types of Thompson’s Water Seal products available:
- Clear Formula: This formula offers basic protection to the wood surface without changing its natural appearance. It is ideal for preserving the natural look of the wood.
- Tinted Formula: This formula provides the same benefits as the clear formula but with added color tints for enhanced visual appeal. It is ideal for those who want to add a subtle shade or refresh the wood’s color.
- Advanced Formula: This formula is an upgraded version of the clear formula, offering enhanced protection and durability. It forms a thicker, more robust barrier, making it suitable for use in areas exposed to extreme weather conditions.
• Using Thompson’s Water Seal on Painted Wood: Compatibility Issues
While Thompson’s Water Seal is primarily designed for use on uncoated, natural wood surfaces, its compatibility with painted wood is an important aspect to consider. In most cases, it is not advisable to use Thompson’s Water Seal on painted wood, as it can lead to several issues.
– Peeling and Flaking
One of the primary reasons for avoiding the use of Thompson’s Water Seal on painted wood is the risk of peeling and flaking.
Since the sealant forms a protective barrier over the wood surface, it potentially compromises the adhesion of the paint to the wood. This can result in the paint lifting or peeling off over time.
– Discoloration
Using Thompson’s Water Seal on painted wood can also lead to discoloration. The sealant may react with the paint pigments or solvents, causing the color to fade, darken, or change over time. This can leave the painted surface looking patchy and uneven.
– Ineffective Protection
Moreover, applying Thompson’s Water Seal on top of the paint might not provide the desired level of protection to the wood. The paint layer could hinder the penetration of the sealant into the wood fibers, reducing its overall effectiveness.
In such cases, the sealant may not adequately protect the wood from external elements like water, UV rays, and mildew, compromising its durability and structural integrity.
• Expert Recommendations for Water Sealing Painted Wood
For those who want to offer reliable protection to painted wood surfaces without compromising the paint’s appearance and longevity, it is essential to choose the right approach.
As an experienced professional, I recommend the following alternatives to using Thompson’s Water Seal on painted wood:
– Opt for Paints with Built-in Protection
Instead of applying Thompson’s Water Seal, you can use high-quality paints with built-in protection for wooden surfaces.
These paints are formulated to offer excellent resistance to water, UV rays, mildew, and other external elements. They are an ideal choice for exterior wooden surfaces, ensuring long-lasting durability and protection.
– Select a Versatile Sealant Suitable for Painted Wood
Consider using a versatile sealant specifically designed for use on painted wood surfaces. One such option is a water-based polyurethane sealant, which forms a durable, clear protective film over the painted surface.
It offers protection from water, UV rays, and scratches without causing any discoloration or peeling problems. Always ensure to follow the manufacturer’s instructions when selecting and applying a sealant for painted wood surfaces.
• To Sum It Up
In conclusion, while Thompson’s Water Seal is a popular and effective wood protection solution, it is generally not recommended for use on painted wood surfaces. Instead, opt for high-quality paints with built-in protection or versatile sealants specifically designed for painted wood.
These alternatives will ensure long-lasting durability and protection for your painted wood surfaces without compromising their appearance and integrity.