DIY Water-Resistant Wood Treatment. What Pros Say
Does the thought of water damage on your beautiful wooden furniture or deck make you cringe? Worry no more, as we’ve got the perfect DIY water-resistant wood treatment to solve your problems. We’ve extensively researched and tested different solutions to come up with the most effective and affordable solution for you.
Diy water-resistant wood treatment:
DIY water-resistant wood treatments include oil-based treatments (linseed, tung, and Danish oil), varnishes and lacquers (polyurethane), and sealing paints (marine grade). Choose the treatment based on wood type, application, and desired finish. Ensure proper application techniques and safety precautions for best results and longevity.

Interested in protecting your wooden surfaces from water damage? We have some great DIY water-resistant wood treatment solutions lined up for you! Read on to discover cost-effective methods to preserve the life of your wood projects and keep them looking their best.
Contents
- 1 Homemade Water-Resistant Wood Treatment Guide
- 2 Techniques for Waterproofing Wood Effectively
- 3 Steps to Seal Wood and Avoid Water Damage
- 4 Linseed Oil’s Effect on Wood Waterproofing
- 5 Natural Methods for Sealing Wood Safely
Homemade Water-Resistant Wood Treatment Guide
Maintaining the natural beauty and durability of wood can be a challenge, especially in wet or humid environments. One of the solutions to this problem is treating the wood with a water-resistant finish.
• The Importance of Water Resistance
Water can be highly detrimental to wood, causing it to rot, swell, and weaken over time. Properly treating wood with a water-resistant finish will not only protect it from moisture damage but also extend its lifespan.
From outdoor furniture to wooden structures, a water-resistant treatment can make a significant difference in the longevity and appearance of your wood.
• Types of Water Resistant Treatments
There are numerous options available when it comes to water-resistant wood treatments. Some of the most popular methods include:
– Oil-Based Treatments
Oil-based treatments, such as linseed oil, tung oil, and Danish oil, are an excellent choice for providing water-resistant protection. They penetrate deep into the wood, sealing it against moisture while leaving a natural, low-luster finish.
For best results, apply several coats, allowing each layer to dry completely before moving on to the next.
– Varnishes and Lacquers
Varnishes and lacquers create a hard, protective film on the surface of the wood, offering a more robust and long-lasting defense against moisture. While these treatments are generally more durable than oil-based options, they can be more challenging to apply and may give a glossier finish.
Polyurethane is a popular choice for varnishes, as it offers excellent water resistance and durability.
– Sealing Paints
Sealing paints, such as water-resistant or marine-grade paints, provide a thick, protective barrier on the wood’s surface. These treatments are ideal for outdoor applications where maximum protection is needed.
However, they often cover up the natural beauty of the wood and may require periodic reapplication.
• Choosing the Right Treatment for Your Wood
When deciding on the best water-resistant wood treatment, consider the following factors:
- Wood type: Different types of wood respond differently to various treatments. Hardwoods tend to require oil-based treatments, while softwoods often benefit from varnishes or paints.
- Application: Consider the item’s intended use and exposure to moisture. Outdoor furniture, decking, and fences may require a heavy-duty sealing paint, while interior wood surfaces or furniture pieces may be better suited to an oil-based treatment or varnish.
- Desired finish: Some people prefer a natural-looking finish, while others opt for a glossy or colorful finish. Keep your personal preferences in mind when selecting a treatment.
• Tips for Successful Application
To achieve the best results, follow these tips and recommendations for applying water-resistant treatments to your wood:
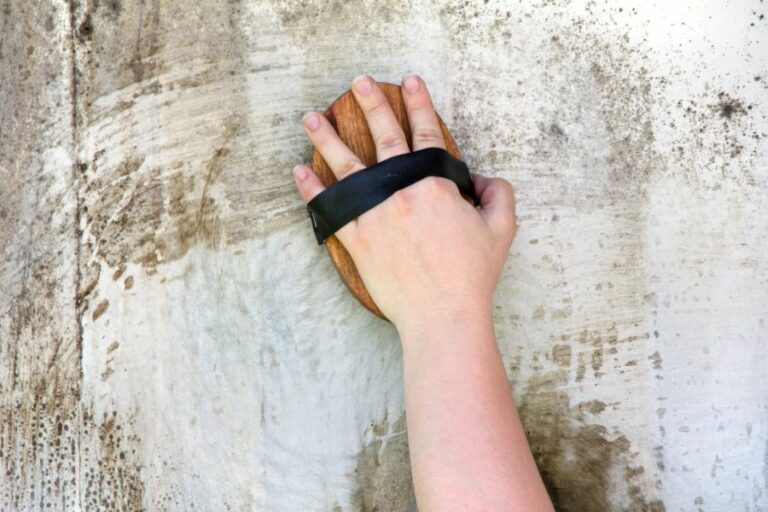
- Clean the surface: Before applying any treatment, ensure the wood’s surface is clean and dry. Sand any rough patches, remove dirt or dust and wipe down with a damp cloth to remove residue.
- Apply in thin coats: When applying oil-based treatments or varnishes, use a brush or cloth to apply thin, even coats. This enables the wood to absorb the treatment and reduce the risk of pooling or uneven application.
- Allow for drying time: Each treatment will have a specified drying time before additional coats or use. Ensure you follow these recommendations to achieve maximum protection.
- Maintenance: Regularly check and maintain your treated wood surfaces. This may involve reapplying the treatment, particularly for outdoor applications exposed to the elements.
• Safety Considerations
Some water-resistant treatments contain chemicals that can be hazardous if not handled correctly. To protect yourself and the environment, follow these safety precautions:
- Work in a well-ventilated area: This will reduce the risk of inhaling harmful fumes from the treatment.
- Wear protective gear: Wear gloves, goggles, and old clothing to minimize skin contact and exposure.
- Dispose of waste correctly: Consult your local guidelines for proper disposal of used brushes, cloths, or any treatment residues.
For more information on wood preservation and treatment, consult resources such as the USDA Forest Service, which offers numerous publications and guidance on wood protection and utilization.
In conclusion, applying a water-resistant wood treatment is essential for maintaining the integrity, durability, and appearance of your wood surfaces.
By carefully selecting the appropriate treatment and following proper application techniques, you can extend your wood’s lifespan and prevent future problems caused by moisture damage.
Techniques for Waterproofing Wood Effectively
Wood has been a popular choice for construction, furniture, and many other applications for centuries due to its durability, beauty, and workability. However, one major drawback of using wood is its inability to withstand water exposure, which can lead to rot, warping, and other damage.
• Why Is Waterproofing Wood Important?
Water is by far the most common cause of damage to wood. When exposed to moisture, wood can quickly rot or decay, leading to structural instability, unpleasant odors, and an unsightly appearance.
Moreover, damp and wet environments can also create a breeding ground for mold and mildew, which can be hazardous to human health. Waterproofing wood can thus significantly extend its lifespan and maintain its structural integrity and aesthetic appeal.
• Waterproofing Methods: Surface Sealers
Surface sealers are perhaps the most common method for treating wood to make it waterproof. These are coatings, available in various types, that form a barrier on the surface of the wood to keep water from infiltrating the material.
– Polyurethane
Polyurethane is a synthetic material that creates a durable and flexible protective layer over the wood. It is available in oil-based and water-based formulas, with the former offering better water resistance and a higher sheen.
Applying two to three coats of polyurethane to a properly prepared wood surface can provide a waterproof finish. For optimum protection, I recommend using a high-quality, marine-grade polyurethane for exterior applications or areas exposed to high levels of humidity.
– Varnish
Varnish is a blend of resins, solvents, and other additives that creates a hard, transparent finish when applied to wood. It can be oil-based or water-based, with the former offering better water resistance. Multiple coats of varnish are usually required to achieve a fully waterproof finish, and I recommend using a marine-grade varnish for exterior applications or locations with high humidity.
– Epoxy Sealer
Epoxy sealers are liquid sealants that create a strong, water-resistant bond with the wood surface. When mixed and applied correctly, the epoxy cures to form a very durable and waterproof finish.
Epoxies are especially recommended for wood that will be submerged in water, like boats and docks, or for sealing wooden countertops and similar applications in wet environments.
• Waterproofing Methods: Penetrating Sealers
Penetrating sealers are absorbed into the wood, where they provide protection from within by preventing moisture from entering the wood fibers.
– Linseed Oil and Tung Oil
Linseed oil and tung oil are natural plant-based oils that can impart some water resistance to wood. They penetrate the wood fibers and harden over time. However, to achieve adequate waterproofing, the oils must be applied in multiple coats, allowing each coat to dry thoroughly.
While tung oil provides a slightly more water-resistant finish, linseed oil has the advantage of being more widely available and usually less expensive.
– Wood Preservatives
Wood preservatives are chemicals applied to the wood to prevent decay and insect damage. While they may not provide the same level of waterproofing as surface sealers, they can improve the wood’s overall resistance to moisture.
The most effective wood preservatives are copper-based, like copper naphthenate or copper-azole. I recommend the use of wood preservatives for exterior applications, particularly in conjunction with a surface sealer for added protection against water damage.
• Tips for Effective Waterproofing
- Before treating the wood, ensure it is clean, dry, and free of contaminants, such as dirt, oil, or previous finishes. Sand the surface with progressively finer grits of sandpaper until it is smooth, and then remove any residual dust with a tack cloth.
- Apply the chosen waterproofing product according to the manufacturer’s instructions, using a brush, roller, or sprayer, as appropriate. Be sure to follow the recommended number of coats for optimal protection.
- For surface sealers, allowing each coat to dry completely and lightly sanding between coats is crucial for a high-quality finish.
- Ensure proper ventilation and protection when working with chemicals, especially when using oil-based products or wood preservatives.
- Regular inspection and maintenance are essential for keeping the wood waterproof over time. Reapply the waterproofing product as necessary, following the manufacturer’s guidelines.
• Conclusion
In conclusion, it is possible to treat wood to make it waterproof by using various methods, such as surface sealers and penetrating sealers. The choice of treatment will depend on the intended application and the desired level of protection.
With the proper selection and application of waterproofing products, wood can be protected against water damage and maintain its structural integrity and aesthetic appeal for years to come.
For more information about wood protection, consider visiting the USDA Forest Service website or contacting a specialist in your area.
S.No. | Method | Description |
|---|---|---|
1 | Sealing | Applying a waterproof sealer to the surface of the wood helps prevent water from penetrating into the pores of the wood. |
2 | Staining | A waterproofing wood stain will add color to the wood while also providing a layer of protection against water damage. |
3 | Painting | Using a water resistant paint can help to create a barrier between the wood and moisture, preventing water damage. |
4 | Preservatives | Wood preservatives will help to prevent decay and rot caused by moisture, helping to maintain the strength and integrity of the wood. |
5 | Oils | Applying a wood oil, such as linseed oil or tung oil, can help to repel water and prevent the wood from absorbing moisture. |
6 | Epoxy | An epoxy coating can create a waterproof barrier on the surface of the wood, preventing water penetration and damage. |
Steps to Seal Wood and Avoid Water Damage
Wood, being a porous and natural material, is prone to water damage. Water can cause wood to warp, rot, or develop mold, which can compromise the structural integrity of wood furniture, fixtures, and surfaces. Sealing wood effectively can prolong its life and maintain its appearance for years to come.
• Importance of Sealing Wood
Sealing wood surfaces provides a protective barrier that prevents moisture from penetrating the wood fibers. Wood that is left untreated can absorb water, leading to swelling, splitting, and eventual decay.
Additionally, sealing wood can enhance its appearance and make it easier to clean, while reducing the need for regular maintenance.
• Materials for Sealing Wood
There are several types of sealants available on the market, each with its own advantages and disadvantages. Some of the most common wood sealants include:
- Polyurethane: Polyurethane sealants form a durable, waterproof finish and are available in water-based and oil-based formulas. They offer excellent protection against water damage and have a high resistance to scratches, abrasion, and chemicals. Water-based polyurethane has a low odor and dries more quickly than oil-based polyurethane but may require multiple coats for maximum protection.
- Varnish: Varnish is a traditional wood sealant that provides a clear and glossy finish. It is usually oil-based and offers good protection against water damage, as well as UV radiation. Varnish can be more difficult to apply, particularly in humid conditions or when working with large surfaces.
- Lacquer: Lacquer is another classic wood sealant which dries rapidly and can be sprayed or brushed on. It provides a high-gloss, durable finish and is resistant to water, alcohol, and acids. Lacquer can be more challenging to work with for inexperienced woodworkers, as it requires correct application techniques and specific environmental conditions.
- Wood Stain: Wood stains are formulated to penetrate wood fibers and enhance or alter the wood’s natural color while providing a degree of sealing against water damage. Stains may not be as effective as other sealants in preventing water damage, but they can be used in conjunction with other sealants for added protection.
For additional information on wood sealants, consult resources such as the USDA Forest Service or Wood Handbook – Wood as an Engineering Material.
• Tools Needed for Sealing Wood
To effectively seal wood, you will need the following tools and supplies:
- Sandpaper to prepare the wood surface before sealing
- Tack cloth to remove dust and debris after sanding
- Brushes or rollers for applying the sealant
- Paint tray or container for holding the sealant during application
- Drop cloth or plastic sheeting to protect surrounding surfaces
- Painter’s tape to mask off areas that should not be sealed
• Preparing the Wood Surface
Before sealing, it is essential to prepare the wood surface properly. This ensures optimal adhesion of the sealant and prevents defects in the final finish.
- Cleaning: Clean the wood surface thoroughly, removing any dirt, grease, or debris. A mild soap solution and a damp cloth should suffice. Rinse with clean water and allow the wood to dry completely.
- Sanding: Sand the wood surface using a fine-grit sandpaper (150-220 grit) in the direction of the wood grain to smooth out any rough areas and remove surface imperfections. This also allows the sealant to adhere better to the wood surface.
- Dust Removal: After sanding, wipe the wood with a tack cloth to remove all dust and debris, ensuring a clean surface for sealant application.
• Applying the Sealant
The application process will vary depending on the type of sealant being used. Always read and follow the manufacturer’s instructions for optimal results. However, the following general steps can be used as a guide:
- Masking: Use painter’s tape to mask off any areas that should not be sealed, such as adjacent surfaces or hardware.
- Mixing: Stir the sealant gently (do not shake) until it is uniform in consistency, being careful to avoid introducing air bubbles.
- Application: Apply the sealant using a brush or roller in even strokes, working in the direction of the wood grain. Ensure complete and uniform coverage, paying attention to end grains and joints where moisture penetration is more likely.
- Drying: Allow the sealant to dry according to the manufacturer’s instructions. This may vary depending on the type of sealant, humidity, and temperature.
- Sanding: If necessary, lightly sand the sealed surface with fine-grit sandpaper (220-320 grit) to remove any imperfections or bubbles in the finish. Wipe clean with a tack cloth.
- Additional Coats: Repeat the application process for additional coats, as recommended by the manufacturer. Multiple coats may be necessary for maximum water protection and durability.
- Curing: Allow the final coat of sealant to cure completely, as specified by the manufacturer, before using the sealed wood surface.
• Maintaining Sealed Wood
Sealed wood surfaces should be regularly inspected for any signs of water damage or wear. Periodically clean with a damp cloth, avoiding harsh chemicals or abrasive materials that could damage the sealant.
Depending on the type of sealant used and exposure to environmental conditions, resealing may be necessary over time to maintain optimal water protection.
By following the proper steps for sealing the wood and choosing the appropriate materials, you can effectively prevent water damage and preserve the beauty and functionality of your wood surfaces for years to come.
Step | Description |
|---|---|
1 | Clean the wood surface to remove dirt, debris, and mildew. |
2 | Allow the wood to dry completely. This usually takes 24-48 hours, depending on the wood and environmental conditions. |
3 | Apply a wood water repellent or sealant, such as a water-based polyurethane or a waterproofing wood finish, using a paintbrush or roller. Make sure the product is specifically designed for wood protection against water damage. |
4 | Allow the first coat to dry according to the manufacturer’s instructions, then apply a second coat for maximum protection. |
5 | Monitor the wood for signs of water damage, such as discoloration or warping, and reapply the sealant as needed over time to maintain its effectiveness. |
Linseed Oil’s Effect on Wood Waterproofing
• The properties of linseed oil and waterproofing
Linseed oil, derived from the seeds of the flax plant, is a popular wood finish known for its beneficial properties in preserving and maintaining the beauty of wood. One of the essential qualities of linseed oil that makes it a staple in woodworking is its ability to waterproof wood.
However, it is crucial to understand the extent of waterproofing provided by linseed oil and the factors that affect its efficacy.
– Linseed oil and water resistance
When linseed oil is applied to wood, it penetrates the wood fibers and hardens, forming a seal that keeps out moisture. This protective layer offers a level of water resistance, making it less susceptible to water and humidity.
Linseed oil repels water but does not make wood entirely waterproof. The wood remains breathable, allowing moisture to evaporate and preventing excessive swelling.
For wood that is constantly exposed to water, adding a top coat of a high-quality varnish or sealant is recommended to provide additional water resistance. Varnish and sealant provide a better level of protection against water ingress than linseed oil alone.
– Types of linseed oil
There are two main types of linseed oil: raw and boiled. Raw linseed oil is the natural oil extracted from flax seeds, while boiled linseed oil has been treated with additives to speed up its drying time.
Boiled linseed oil provides better water resistance than raw linseed oil due to its higher viscosity and faster drying time. It cures faster, delivering a thicker protective layer and improving wood’s water resistance.
Universities and wood experts recommend boiled linseed oil over raw linseed oil for most wood finishing applications due to its better water resistance and ease of application.
• Factors affecting linseed oil waterproofing
To get the best results from linseed oil when waterproofing wood, consider the following factors:
– Wood type
The wood’s type and density play a significant role in the effectiveness of the waterproofing. Softer woods, like pine or cedar, absorb more linseed oil, resulting in better water resistance. Hardwoods such as oak or maple require more coats of linseed oil to offer comparable water resistance.
– Application method
The method of applying linseed oil also influences its waterproofing ability. Apply oil with a clean cloth or brush, ensuring a thin and even coat. Too thick a coat may result in an uneven finish and poor water resistance.
Allow the first layer to dry fully before applying additional coats, wiping across the wood grain to minimize streaking.
– Maintenance
Wood treated with linseed oil requires regular maintenance to maintain its water resistance. Reapply linseed oil every 1-2 years, or when the wood starts to look dry or lose its sheen. Proper maintenance prolongs the service life of the wood and ensures optimal water resistance.
– Environmental conditions
The environmental conditions during the application and drying of linseed oil impact its efficacy as a waterproofing agent. Apply linseed oil in a well-ventilated area with a low humidity level and a temperature between 60-75F (15-24C) to achieve the best results.
• Advantages of using linseed oil for wood waterproofing
In addition to its water resistance properties, linseed oil has other benefits, making it an attractive choice for wood finishing:
- Linseed oil is a natural product, making it an environmentally friendly option compared to synthetic alternatives.
- It enhances the natural beauty of wood and adds a rich, warm finish without obscuring the grain.
- It allows the wood to breathe, reducing the risk of trapped moisture and rot.
- Linseed oil prevents wood from cracking or splitting due to drying and exposure to the elements.
• Conclusion
While linseed oil provides a level of water resistance to wood, it is essential to remember that it does not make wood entirely waterproof. Wood treated with linseed oil remains breathable, allowing it to resist moisture but not completely block water ingress.
Optimal water resistance can be achieved through proper application, regular maintenance, and, if necessary, the addition of a high-quality varnish or sealant.
By considering the type of wood, application method, environmental conditions, and maintenance, linseed oil may provide an effective, natural solution to protecting and preserving the beauty of wood.
Natural Methods for Sealing Wood Safely
When it comes to preserving the beauty and functionality of wood, sealing plays a crucial role in protecting it from moisture, pests, and the elements. Many commercial wood sealants are available in the market, but often, individuals prefer using natural, chemical-free alternatives.
• Beeswax: A Time-Tested Natural Sealer
Beeswax has been used for centuries as a wood sealer and remains popular due to its effectiveness and eco-friendliness. It imparts a subtle sheen to the wood and offers protection from moisture and scratches.
How to Use Beeswax to Seal Wood:
- Clean the surface of the wood properly, ensuring it’s free of dust and dirt.
- Melt the beeswax in a double boiler until it becomes liquid.
- Apply a thin layer of melted beeswax on the wood surface using a soft cloth or brush.
- Allow the wax to cool down and solidify on the wood for a few minutes.
- Buff using a clean cloth to remove any excess wax and create a sheen.
Beeswax is best suited for smaller wooden items like furniture and decorative elements. However, for exterior wood surfaces exposed to harsh weather conditions, it might not provide adequate protection.
• Raw Linseed Oil: An All-Natural Wood Preservative
Raw linseed oil, extracted from flaxseed, is a popular option for naturally sealing wood. It penetrates deep into the wood fibers, offering excellent moisture protection and enhancing the wood’s natural colors.
How to Apply Raw Linseed Oil to Wood:
- Ensure a clean and dust-free wood surface.
- Apply a generous amount of raw linseed oil using a cloth or brush.
- Allow it to soak into the wood for about 30 minutes.
- Wipe off any excess oil.
- Leave the wood to dry for at least 24 hours.
While linseed oil is an excellent choice for indoor furniture, it does have a long drying time. Additionally, it may darken the wood slightly, so consider this effect before applying.
• An Effective Blend: Mixing Beeswax and Linseed Oil
For better protection and added benefits, a combination of beeswax and linseed oil can be an ideal natural wood sealer.
How to Prepare and Apply a Beeswax-Linseed Oil Blend:
- Mix equal parts of beeswax and linseed oil in a container.
- Heat the mixture in a double boiler until the beeswax melts and combines with the oil.
- Allow the blend to cool down until it has a creamy consistency.
- Apply a thin layer on the wood surface using a clean cloth.
- Allow it to sit for about 15 minutes, then remove excess and buff with a clean cloth.
• Tung Oil: A Durable and Environmentally Friendly Option
Tung oil, extracted from the nuts of the tung tree, is another excellent natural wood sealer. It provides a durable and water-resistant finish, making it suitable for both indoor and outdoor use.
How to Apply Tung Oil to Wood:
- Prepare a clean, dust-free wood surface.
- Apply a liberal amount of tung oil using a brush or cloth, following the wood grain.
- Allow it to penetrate the wood for 15-30 minutes.
- Wipe off excess oil using a clean cloth.
- Give the oil at least 24 hours to dry before applying any additional coats.
Generally, 2-3 coats of tung oil are recommended for optimal protection. Keep in mind that tung oil is slow to dry and slightly darkens the wood.
• Shellac: A Natural Resin for Wood Finish
Shellac, a resin derived from the secretions of the lac bug, offers a natural, glossy finish to wood. It has been widely used for centuries and is suitable for both decorative purposes and sealing wood surfaces.
How to Apply Shellac on Wood:
- Prepare shellac by dissolving it in denatured alcohol (typically a 3-4 lb. cut) and mix well.
- Make sure the wood surface is clean and free of dust.
- Apply a thin layer of shellac using a brush or cloth.
- Allow it to dry for 1-2 hours.
- For additional coats, lightly sand the surface with fine-grit sandpaper and clean off any dust.
- Apply as many coats as desired, allowing each coat to dry before applying the next.
Although shellac imparts a beautiful finish to wood, it can be sensitive to heat and moisture, which makes it less suitable for outdoor wood surfaces or high-traffic areas.
• Conclusion
When it comes to sealing wood naturally, there are several tried-and-true options available. Beeswax, raw linseed oil, tung oil, and shellac all provide natural and eco-friendly ways to protect wood surfaces. Carefully consider your project requirements and the pros and cons of each method before choosing an appropriate natural wood sealer.
With the right choice and proper application, you can preserve the beauty and longevity of your wood pieces while staying environmentally conscious.
Step | Instructions |
|---|---|
1 | Clean the wood surface to remove any dust, dirt, or debris. |
2 | Choose a natural wood sealer, such as linseed oil, tung oil, or walnut oil. |
3 | Apply a thin coat of the chosen oil to the wood surface using a clean cloth or brush, following the grain of the wood. |
4 | Allow the oil to soak into the wood for the recommended amount of time according to the product’s instructions. |
5 | Wipe off any excess oil with a clean cloth, again following the grain of the wood. |
6 | Allow the wood to dry, usually for 24 hours, or according to the product’s instructions. |
7 | Apply additional coats of oil, allowing each coat to dry before applying the next, until the desired level of protection is achieved. |
8 | After the final coat has dried, buff the wood surface with a clean cloth for a smooth finish. |