Prep Steps For Special Finish Techniques, What Pros Say
Are you ready to take your painting project to the next level with special finish techniques? Look no further, as we have compiled the essential prep steps to ensure a flawless application and impressive results. With our guidance and your creativity, your space will be transformed into a work of art.
Prep steps for special finish techniques:
To achieve unique finishes on painting projects, follow these preparation steps: choose the right painting tools, assess and prep the surface, prime the surface, practice the technique, select the appropriate paint and finish, work in sections, follow the manufacturer’s instructions and drying times, and protect your work with a clear sealant or topcoat.

Ready to level up your painting skills with special finish techniques? We’ve got you covered! Dive in as we explore essential prep steps and unleash your creative side. Trust us; you don’t want to miss this!
Contents
- 1 Essential Preparation Steps for Unique Finishing Techniques
- 2 Understanding Preparatory Finishes in Detail
- 3 Exploring Different Garment Finishing Methods
- 4 Key Processes in Garment Finishing Explained
- 5 Crucial Fabric Preparation Steps During Processing
Essential Preparation Steps for Unique Finishing Techniques
Achieving a flawless and unique finish on your painting projects requires adequate preparation and the mastery of special finish techniques.
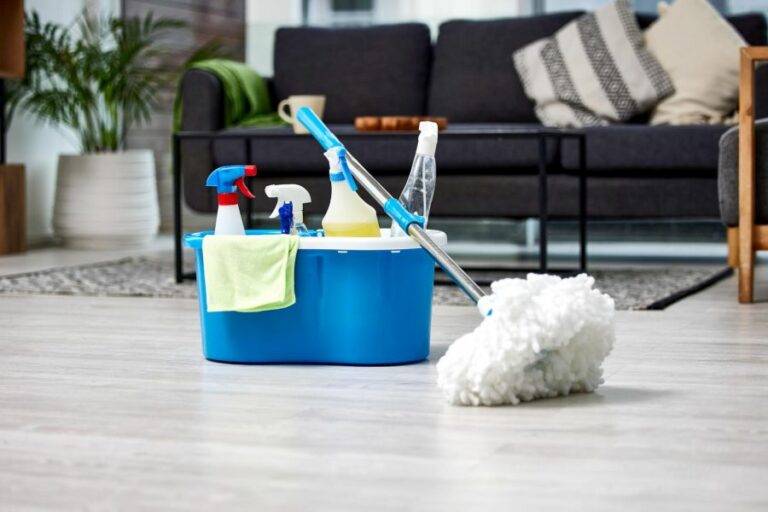
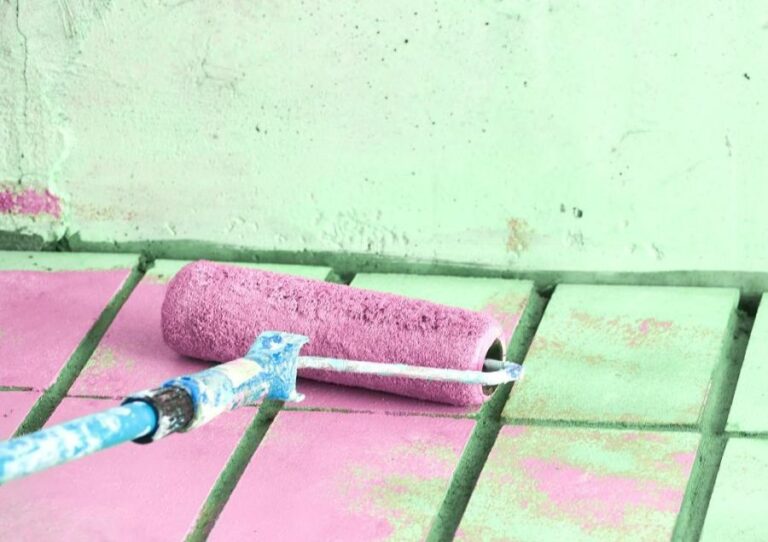
• Choose the Right Painting Tools
To achieve a special finish, you need the right painting tools. These include:
- Paintbrushes: Invest in high-quality paintbrushes that are designed for creating special finishes, such as angled brushes and fan brushes.
- Paint rollers: There are textured paint rollers available that can help create a variety of special finishes. Choose the appropriate roller based on your desired finish.
- Trowels and Scrapers: For techniques like Venetian plaster, use a trowel or a scraper to apply and shape the plaster.
- Paint trays and liners: Using a paint tray and liner makes it easy to manage your paint and makes cleaning up simpler.
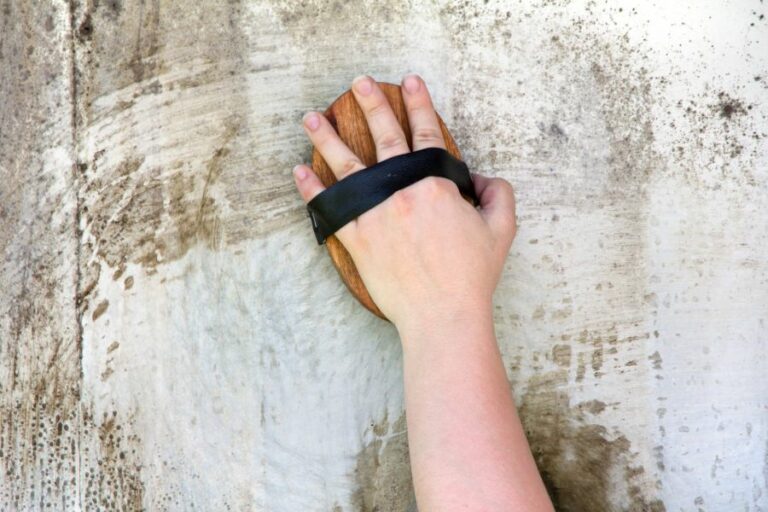
• Assess, Prep, and Prime the Surface
Before starting any special finish, ensure that the surface you are working with is properly assessed, prepped, and primed.
– Assess the Surface
Inspect the surface for any damages, such as cracks, dents, peeling paint, or moisture issues. These problems may affect the final outcome of your project.
– Surface Preparation
Properly prepare your surfaces by completing the following steps:
- Clean the surface with a mild detergent and water to remove dirt, grease, and grime. Rinse the surface and allow it to dry completely.
- Sand the surface with appropriate grit sandpaper. This opens up the pores of the surface, allowing for better adhesion of your primer and paint.
- Fill in any cracks, dents, or holes with spackling compound or a suitable filler. Smooth the surface and allow the filler to dry.
- Re-sand the surface after applying the filler to create a smooth and even canvas to work on.
– Priming the Surface
Priming is a critical step in achieving a professional-looking finish. A high-quality primer will:
- Provide better adhesion for the topcoat
- Help resolve any surface irregularities
- Seal porous surfaces to prevent uneven paint absorption
- Block stains and discolorations
Apply the primer according to the manufacturer’s instructions and allow it to dry completely before proceeding with your special finish technique.
• Practice Your Technique
Before applying any special finish, practice your technique on a sample board or a hidden area of your project. This will help you gain experience and confidence in your abilities, ensuring that the final product meets your expectations.
• Choose the Right Paint and Finish
Select the paint and finish that best suits your desired outcome. There are many options available, including flat, matte, eggshell, satin, semi-gloss, and gloss finishes. Each finish has a different level of sheen and durability, which will impact the overall look and maintenance of your project.
Some techniques, such as glazing or Venetian plaster, may also require the use of specific products or additives. Consult the manufacturer’s instructions or seek expert advice to ensure you have the right materials for your chosen technique.
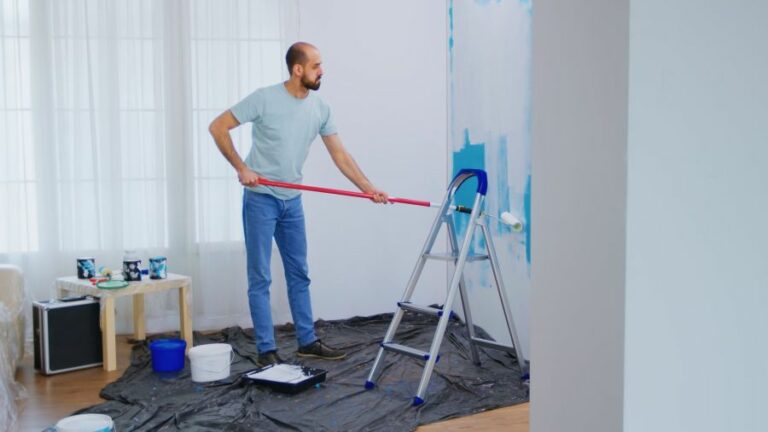
• Tackle Your Project in Sections
When applying a special finish, work on one section of your project at a time. This allows you to focus on the details and avoid mistakes or inconsistencies that may arise from rushing or improper drying times.
• Follow the Manufacturer’s Instructions and Recommended Drying Times
Following the manufacturer’s instructions for your chosen paint or finish material is crucial for achieving a professional and long-lasting result. Be sure to adhere to the recommended drying times between coats and follow any specific application instructions provided.
• Protect Your Work
After completing your project, protect your work by applying a clear sealant or a topcoat. This will enhance the durability and longevity of your special finish. Be sure to choose a compatible product for your specific technique and follow the manufacturer’s instructions for proper application.
• Conclusion
By following these expert prep steps for special finish techniques, you can create professional and unique finishes on your painting projects. Adequate preparation, practice, and attention to detail will ensure that your project turns out as envisioned and continues to impress for years to come.
Understanding Preparatory Finishes in Detail
Preparatory finishes are an essential component in the overall process of surface treatments, specifically in applications such as painting and coating.
These finishes help in providing the best possible outcome when applying surface treatments by ensuring surfaces are adequately prepared and primed for final finishes.
• Types of Preparatory Finishes
Preparatory finishes can be broadly classified into four main categories. These include:
1. Cleaning
Cleaning involves the removal of dirt, grease, and other contaminants present on the surface. This can be done through various methods such as brushing, washing, solvent cleaning, or even using high-pressure water jetting.
Proper cleaning ensures a smooth and clean surface for the final finish and helps increase the adhesion between the surface and the final coating.
A popular cleaning technique used in industrial settings is abrasive blasting, which involves the use of high-pressure air to propel abrasive particles against the surface.
This helps remove any debris, rust, and existing coatings, making it ideal for metal surfaces that require a new layer of protective coating.
2. Surface Preparation
Surface preparation is a crucial step to ensure that the substrate is ready to receive the desired coating without any hindrances. Different methods of surface preparation can be employed, such as sanding, etching, or grinding.
The chosen method will depend on the type of surface, the expected outcome, and the compatibility with the final finish.
For instance, surfaces made of wood may need sanding to smoothen and level the surface before applying varnish or paint. In contrast, concrete surfaces may require etching to create a rough surface that can bond well with the final coating.
3. Priming
Priming is the application of a primer coat, which is a preparatory layer used to enhance the adhesion of the main paint or coating on the surface. Primers come in various formulations, depending on the substrate and the desired outcome.
They are specifically designed to address issues such as corrosion, staining, alkalinity, and efflorescence in materials like metal, wood, and concrete.
Primers can be classified into two major categories:
- Barrier Primers: These are used to block the surface and prevent any contaminants from migrating and affecting the topcoat. They are particularly useful when dealing with surfaces that might release harmful chemicals, like lead or asbestos.
- Adhesion Primers: These improve the adhesion between the surface and the final coating, ensuring a durable finish. They are especially helpful when trying to apply paint to slick surfaces like glossy plastics or metals.
I recommend using a dedicated primer that suits your specific application to achieve the best possible outcome in terms of adhesion and durability.
4. Sealing
Sealing is the process of applying a sealer, which is a transparent or slightly pigmented coating formulated to protect the surface from moisture, stains, and other potential damages.
Sealers are typically used on porous surfaces like wood, concrete, and natural stone to inhibit the penetration of water, oil, and other liquids. Some sealers also act as a primer, enhancing the adhesion of the final coating to the substrate.
In addition to these primary preparatory finishes, other specialty finishes may be used to address specific concerns or meet certain requirements, such as flame retardants, anti-static coatings, or anti-fouling treatments.
• Benefits of Preparatory Finishes
There are several advantages to using preparatory finishes in your surface treatment process:
– Improved Adhesion
A well-prepared surface ensures that the final coating adheres strongly, reducing the chances of premature failure due to peeling, cracking, or blistering.
– Enhanced Durability
By addressing potential issues such as moisture, corrosion, and staining, preparatory finishes help extend the service life of the final coating and protect the underlying substrate.
– Better Aesthetics
Preparatory finishes help create a uniform and smooth surface, which translates to a more visually appealing final finish.
– Cost-Effectiveness
While investing time and resources in preparatory finishes might seem like an added burden, it can save long-term costs by reducing the need for frequent recoating and maintenance due to poor adhesion and premature wear and tear.
• Conclusion
Preparatory finishes play a crucial role in achieving a high-quality and long-lasting finish in surface treatments. By preparing surfaces effectively and using appropriate primers, sealers, or other specialized coatings, you can ensure better adhesion, improved durability, and a flawless final finish.
Therefore, it is essential to select the right combination of preparatory finishes based on the substrate, intended use, and desired outcome, further improving the longevity and performance of your surface treatments.
Preparatory Finish Type | Description |
|---|---|
Singed finish | A process that burns off protruding fibers from the fabric surface, creating a smoother finish. |
Desizing | The removal of size materials applied during the weaving process to improve fabric handle, appearance and facilitate further finishing processes. |
Scouring | A cleaning treatment that removes impurities, such as natural waxes, pectins, and fats, to prepare the fabric for dyeing and printing. |
Bleaching | A chemical treatment that removes natural color or impurities, giving the fabric a white appearance and preparing it for dyeing or printing. |
Mercerizing | A treatment that increases the fabric’s luster, strength, and dye affinity by applying an alkali solution to the fabric under tension. |
Sanforizing | A pre-shrinking treatment that reduces fabric shrinkage in later washes, improving the fabric’s dimensional stability. |
Tentering | A process that sets the fabric width and maintains its dimensional stability by applying heat and tension. |
Exploring Different Garment Finishing Methods
Finishing techniques are methods employed to enhance the aesthetic appearance and functional properties of materials or surfaces. These methods are typically employed on wood, metal, plastic, textiles, and other materials.
• Surface Finishing Techniques
– Sanding
Sanding is the process of smoothing a surface by rubbing it with an abrasive material, typically sandpaper. This is often done to prepare wood surfaces for staining or painting. Sanding can be done manually or with power tools, such as a belt sander or an orbital sander.
I recommend starting with a coarse-grit sandpaper and working your way to a finer grit for the best results.
– Polishing
Polishing involves the use of a soft, abrasive material to create a smooth and shiny surface on materials such as metal, wood, or plastic. Polishing compounds, such as compounds for metal polishing, are often used with a buffing wheel or a cloth to achieve the desired finish.
– Buffing
Buffing is a process similar to polishing that uses a soft, non-abrasive material to smooth and shine surfaces. Buffing is typically done after polishing to enhance the shine and give a surface a mirror-like finish. Common buffing tools include buffing wheels, pads, or cloths.
– Burnishing
Burnishing is a friction-based finishing technique where a hard, smooth object is pressed against a surface to create a polished, mirror-like finish. This technique is often used to finish metals, such as gold, silver, and copper.
– Deburring
Deburring is the process of removing rough edges, burrs, or protrusions from a surface. This can be done manually with deburring tools or by using machines such as vibratory tumblers, which use abrasive media to smooth surfaces.
It is essential to deburr surfaces to ensure proper assembly, smooth operation, and to prevent injury.
• Coating and Film Techniques
– Painting
Painting is the application of a liquid or powder coating material, such as paint, lacquer, or varnish, to a surface. This is one of the most common finishing techniques, as it can be applied to a wide range of materials.
Painting not only enhances the appearance but can also provide protection against moisture, corrosion, and UV damage.
– Electroplating
Electroplating is a process where a thin coat of metal is deposited onto a surface through an electrochemical process.
This technique is used to apply coatings such as chrome, gold, or silver to metal surfaces or plastic components. Electroplating can improve a surface’s appearance, corrosion resistance, and overall durability.
– Anodizing
Anodizing is an electrochemical process that forms a protective oxide layer on a metal surface, typically aluminum. This layer improves corrosion resistance and durability and can also be dyed to create a wide range of color finishes.
– Powder Coating
Powder coating is a finishing technique that involves the application of dry, powdered paint to a surface, which is then heated to cure the paint onto the material.
Powder coating provides an even, durable, and attractive finish to a wide variety of materials, from metals to plastics.
– Lamination
Lamination is the process of applying a protective plastic film or layer to a surface, typically paper, textiles, or other materials. Lamination can enhance the appearance, provide UV protection, and improve the resistance to moisture and wear.
• Textile Finishing Techniques
– Dyeing
Dyeing is the process of adding color to textiles using dyes or pigments. This can be done through various methods, such as immersion dyeing, direct application, or resist techniques. Dyeing can create vibrant, long-lasting colors and patterns on textiles.
– Printing
Printing is another method used to add color or designs to textiles. Various printing techniques include screen printing, block printing, and digital printing. Textile printing allows for the creation of intricate patterns and designs on fabric surfaces.
– Embroidery
Embroidery involves the use of thread or yarn to create designs on textiles through stitching. This textile finishing technique can be done by hand or using embroidery machines.
Embroidery creates an attractive, dimensional finish to textiles and can enhance the appearance of clothing, linens, and other items.
• Conclusion
Finishing techniques are essential to improving various materials and surfaces’ appearance and functional properties. The right finishing technique can enhance products’ longevity, durability, and aesthetic appeal, from metals to textiles.
By understanding the different finishing techniques available, you can make informed decisions that enhance the quality and appearance of your projects.
Finishing Technique | Description |
|---|---|
Painting | Applying a layer of paint to a surface to protect and enhance its appearance. |
Staining | Applying a pigmented finish to a surface, which enhances the natural appearance of the material and offers some protection against wear and tear. |
Varnishing | Applying a clear protective finish to a surface, providing durability and resistance to damage from moisture and UV rays. |
Lacquering | A process that involves applying a clear or colored coating to a surface, creating a high-gloss, durable finish. |
Polishing | Using abrasive materials and/or chemicals to create a smooth, shiny surface on materials such as metal, stone, or wood. |
Buffing | Finishing technique that uses a rotating cloth wheel, often combined with a polishing compound, to create a smooth, shiny surface on metal, plastic, or other materials. |
Waxing | Applying a layer of wax to a surface, providing a protective coating and a shiny finish. |
Distressing | Using a variety of methods to artificially age a surface, creating the appearance of wear and tear or a weathered, rustic look. |
Glazing | Applying a transparent or semi-transparent layer of color or a specialized finishing solution to a surface, often over a painted or stained base, to create depth and visual interest. |
Key Processes in Garment Finishing Explained
The process of finishing a garment not only adds the final touches but also ensures that the final product is of the highest quality. As a garment industry professional, I recommend following these essential steps to ensure a well-finished product.
• Pre-Shrinking
Pre-shrinking is a crucial step that is sometimes overlooked in the finishing process. It involves washing and drying the fabric to minimize shrinkage before cutting and sewing. This step prevents the garment from losing its shape and fits after the first wash.
• Cutting and Sewing
The cutting and sewing stages of garment production are arguably the most important. Precise cutting ensures accuracy in size, shape, and design. Sewing brings the cut fabric pieces together to give the desired shape and fit. The quality of the stitching determines the garment’s strength and durability.
– Notches and Grading
Another essential aspect of garment finishing is the creation of notches and grading. Notches guide the sewing process by indicating which pieces need to be matched together.
Grading is the process of creating different sizes for a garment based on the original pattern. Both notches and grading help ensure consistency and accuracy across different sizes in the final product.
• Pressing and Steaming
Pressing and steaming are essential steps to give the garment a clean, crisp finish. Pressing involves applying pressure on the seams and using an iron to flatten them. Steaming is used to remove wrinkles and give the garment a smooth, professional appearance.
• Trimming and Cleaning
The next step in the finishing process is to trim and clean the garment. Trimming involves cutting away any excess material or thread from the fabric’s edges.
Cleaning refers to the removal of any dirt, stains, or marks that may have accumulated during the manufacturing process.
• Quality Control and Inspection
A thorough quality control and inspection process ensure that the garment meets the highest standards. This step includes checking for any defects in stitching, fabric quality, and overall finishing. Any issues identified during the inspection must be rectified before the garment is considered complete.
• Garment Washing and Dyeing
Depending on the desired look and feel of the final product, additional washing and dyeing procedures may be required.
Garment washing can involve various processes, such as enzyme washing, stone washing, or bleach washing, to give the fabric a specific finish. Dyeing processes, on the other hand, can be used to add or enhance the color of the garment.
• Adding Embellishments
Embellishments such as buttons, zippers, and embroidery add style, value, and functionality to the garment. These trimmings and accessories should be carefully selected and attached to align with the design specifications.
• Folding and Packaging
The final steps in the garment finishing process involve folding and packaging. Folding the garment is essential to maintain its shape and minimize any potential damage during storage and transportation.
Packaging protects the garment, presents it in an appealing manner, and provides the necessary information about the product to the end consumer.
In conclusion, a well-executed garment finishing process is crucial in creating a high-quality product. By following these essential steps, manufacturers can ensure they produce a garment that meets and exceeds their customer’s expectations.
With attention to detail and a focus on quality, the finishing process contributes significantly to the overall success of a garment in the competitive fashion industry.
| Processes Involved in Finishing a Garment |
|---|
| 1. Thread trimming |
| 2. Pressing and ironing |
| 3. Button and snap fastener attachment |
| 4. Quality inspection and defect correction |
| 5. Folding and packing |
| 6. Label and tag attachment |
| 7. Garment washing and dyeing |
| 8. Embroidery and printing |
| 9. Final quality control check |
Crucial Fabric Preparation Steps During Processing
• Dyeing and Printing Preparation
Before dyeing or printing, fabrics must undergo a series of preparations to ensure uniformity and even color distribution. These processes remove impurities, enhance the fabric’s appearance, and also improve dye fixation. The preparation stage includes:
– Singeing
Singeing is the process of burning off the protruding surface fibers from the fabric’s surface, creating a smoother, cleaner surface. It enhances the appearance, improves the adhesion of dyes and print pastes, and reduces pilling.
– Desizing
It is crucial to remove the size agents applied to warp yarns during weaving, as they can interfere with the dyeing and finishing processes. Desizing processes include:
- Enzymatic desizing: Using enzymes to break down the size material.
- Oxidative desizing: Using oxidative chemicals to remove size materials.
- Acid or alkali desizing: Using acidic or alkaline solutions to dissolve size materials.
– Scouring
Scouring removes natural impurities, such as wax, pectin, and oil residues, from the fabric. These impurities can affect the evenness of dye absorption and cause uneven shading. It usually involves an alkali, surfactant, and water at a high temperature.
– Bleaching
Bleaching is sometimes necessary to achieve a high level of whiteness or to prepare the fabric for dyeing light shades. The process is carried out using either hydrogen peroxide or sodium hypochlorite as the bleaching agent.
• Dyeing and Printing Processes
Dyeing and printing processes depend on the fabric type, desired color, and end-use of the product. Some common techniques include:
– Direct Dyeing
Direct dyeing (also known as exhaust dyeing) involves immersing the fabric in a dye bath containing the dye and chemicals that facilitate dye fixation. This process is suitable for cellulosic fibers like cotton and viscose.
– Reactive Dyeing
Reactive dyeing is widely used for cellulosic fibers due to the excellent colorfastness and bright shades it imparts. In this technique, dyes form a chemical bond with the fiber, ensuring a high level of fixation.
– Acid Dyeing
Acid dyeing is primarily used for protein fibers such as wool and silk. In this process, acid dyes with a high affinity for these fibers form strong ionic bonds, resulting in good colorfastness.
– Disperse Dyeing
Disperse dyes are essential for dyeing synthetic fibers like polyester. The process requires high temperatures and pressure to ensure proper absorption and dispersion of the dye.
– Pigment Printing
Pigment printing involves applying pigments directly to the fabric surface using a binder. The process is versatile and can be used for many fabric types but may have poor colorfastness compared to dyeing methods.
• Finishing Processes
Finishing processes enhance the appearance, feel, and performance of the fabric. Some common finishing methods include:
– Calendering
Calendering involves passing the fabric through a series of heated rollers to impart a smooth, glossy surface. It improves the fabric’s hand feel and appearance.
– Softening
Softening treatments improve the fabric’s hand feel and drapeability. Softeners can be natural, synthetic, or silicone-based and are applied either by exhaustion or padding.
– Stiffening/Resin Finishing
Stiffeners or resins improve the fabric’s body, stiffness, and wrinkle resistance. This treatment is particularly important for home textiles, such as curtains and table linens, that require a specific feel and appearance.
– Water and Oil Repellent Finishing
Water and oil repellent finishes improve the fabric’s resistance to water, oil, and dirt absorption. This treatment is essential for performance wear and outdoor fabrics.
– Flame Retardant Finishing
Flame retardant finishes are critical for fabrics used in specific applications, such as public transport, hotels or theaters, where strict fire safety regulations apply. These finishes can be either durable or temporary, depending on the requirements.
• Quality Control and Inspection
After completing all processes, a thorough quality control inspection is crucial to ensure the fabric meets the desired specifications. This step involves checking the fabric’s color, hand feel, appearance, and performance properties before dispatching it to customers.
In conclusion, fabric processing encompasses various stages, from preparation to finishing, ensuring optimal appearance, feel, and performance. Understanding these processes and their impact on the fabric’s final quality is essential for achieving desired end-use outcomes.
Stage | Description |
|---|---|
Singeing | Removal of protruding hair fibers to create a smoother surface. |
Desizing | Removal of size material (e.g., starch) applied to the fabric during weaving for easier processing. |
Scouring | Washing and cleaning of the fabric to remove dirt, grease, and other impurities to prepare it for further processing. |
Bleaching | Application of bleaching agents to remove natural color and any remaining impurities, making the fabric uniformly white. |
Merchandising | Arrange and evaluate the fabric to ensure consistency and quality, including color, weight, width, etc. |
Dyeing | Application of color to the fabric via dyeing or printing techniques. |
Finishing | Application of various treatments to improve the fabric’s appearance, texture, and performance, such as sizing, coating, or calendaring. |
Inspection and Quality Control | Final inspection of the fabric to ensure it meets required standards and specifications. This may involve testing for colorfastness, shrinkage, and other performance attributes. |