Mastering Surface Preparation: Exploring Abrasives
Are you struggling to find the perfect abrasive for your surface preparation needs? Look no further as we’ve got you covered on mastering surface preparation and exploring the world of abrasives. With our extensive knowledge and experience in the field, we’re here to guide you through selecting and utilizing the most suitable abrasives to achieve excellent results on any surface.
Mastering surface preparation: exploring abrasives:
Surface preparation is crucial for various projects, and selecting the right abrasive material is essential for optimal results. Common abrasives include aluminum oxide, silicon carbide, garnet, steel shot and grit, ceramic media, and diamond. Key factors to consider when choosing an abrasive are the material type, desired finish, cost, and health/environmental impact. Proper usage and safety precautions enhance efficiency and effectiveness.

Dive deeper into the world of surface preparation as we explore various abrasives and their applications. Unearth the secrets to mastering surface prep and achieving optimal results. Read on to discover more invaluable tips and tricks!
Contents
- 1 Expert Guide: A Deep Dive into Abrasives for Surface Preparation
- 2 The 8 Essential Steps for Effective Surface Preparation
- 3 Key Phases Involved in the Surface Preparation Process
- 4 Uncovering the Top Technique for Surface Preparation
- 5 Understanding SA 2.5 Standard in Surface Preparation
- 6 Exploring Various Methods of Surface Preparation
Expert Guide: A Deep Dive into Abrasives for Surface Preparation
Surface preparation is essential for a variety of projects, from painting and coating to cleaning and finishing. The choice of the right abrasive material can have a significant impact on the quality and efficiency of the process.
• Understanding Abrasives
Abrasives are materials used to remove a thin layer of a surface, which can include paint, rust, or other contaminants.
They work by grinding or wearing away the surface material, thus preparing it for further treatments or finishes. Abrasives can be classified based on their form, hardness, and the material they are made of.
– Types of Abrasives
There are numerous abrasive materials, but some of the most commonly used include:
- Aluminum Oxide: A synthetic, durable abrasive used for both grinding and finishing applications. Ideal for use on ferrous metals, wood, and composites.
- Silicon Carbide: Another synthetic abrasive, known for its extreme hardness and sharpness. It is ideal for processing materials like glass, stone, ceramics, and some non-ferrous metals.
- Garnet: A natural abrasive mineral, commonly used for wood sanding and finishing purposes. It is an eco-friendly alternative to synthetic abrasives.
- Steel Shot and Grit: Steel shot is spherical while grit is angular, both are used for blast media in cleaning and preparation of metal surfaces.
- Ceramic Media: Often used in vibratory finishing processes or shot peening, ceramic media is a durable abrasive that provides consistent and uniform surface finishes.
- Diamond: The hardest known abrasive material, diamonds are used for precision grinding and polishing applications in various industries, including aerospace and automotive.
• Applications of Abrasives
Abrasives are employed in a wide range of surface preparation tasks, including:
- Removing rust, paint, and other coatings from surfaces
- Grinding or sharpening tools and cutting edges
- Surface cleaning and decontamination
- Deburring or smoothing rough edges and burrs
- Polishing and buffing to achieve high gloss or mirror-like finishes
• Selection Criteria for Abrasives
When choosing the appropriate abrasive for a specific task, it is necessary to consider the following factors:
– Material Type
The hardness and the nature of the material being treated determine the suitable abrasive. For instance, aluminum oxide is effective for ferrous metals, while silicon carbide works well on non-ferrous metals, glass, and ceramics.
– Desired Finish
The choice of abrasive can influence the final appearance of the surface. For example, steel shot provides a smooth, polished finish, while steel grit produces a rough profile suitable for better paint adhesion.
– Cost
Both the initial cost of the abrasive and its reusability should be considered in determining the overall expense. While some abrasives are more expensive, they may offer greater longevity and therefore might be the most cost-effective choice in the long run.
– Health and Environmental Impact
The selection of abrasives should also consider the impact on worker health and the environment. For instance, silica sand is hazardous when inhaled and is being replaced by safer alternatives. Garnet, as a natural abrasive, can be a more eco-friendly option.
• Tips for Effective Abrasive Usage
Based on my experience, here are some recommendations to make the most of your chosen abrasive:
- Match the abrasive to the task: Ensure that the abrasive you select is suitable for the material and provides the desired surface finish.
- Proper personal protective equipment: Make sure to wear protective gear such as gloves, goggles, and a dust mask or respirator when working with abrasives.
- Achieve uniformity: Apply even pressure and consistently move the abrasive across the surface for a uniform finish.
- Monitor progress: Inspect the surface regularly to determine when the desired level of surface preparation has been achieved.
This OSHA Guide on Abrasive Blasting provides valuable information on the safe use of abrasives in various applications.
In conclusion, understanding the properties and applications of different abrasives is crucial for successful surface preparation.
Additionally, choosing the right abrasive, following safety precautions, and using the material effectively will lead to high-quality and cost-efficient results.
The 8 Essential Steps for Effective Surface Preparation
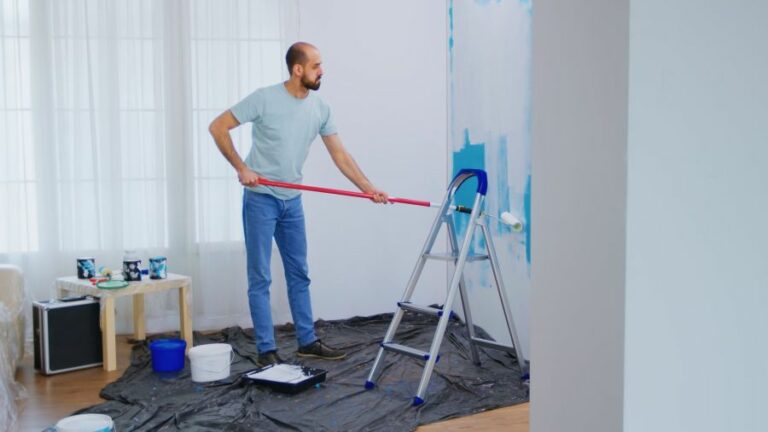
Proper surface preparation is a critical part of any painting or coating project. This helps ensure that the paint or coating adheres properly, provides better resistance against future wear and tear, and contributes to a longer-lasting, high-quality final result.
As an experienced professional, I highly recommend following these eight essential steps in your next surface preparation project.
• Step 1: Assess the Surface Condition
Start by inspecting the surface condition to identify potential issues, such as cracks, dents, or irregularities. This will give you a clearer idea of the extent of repairs and cleaning required.
If possible, consult a professional or refer to resources such as NACE International and SSPC (ASTM International) for in-depth guidance on assessing specific materials and substrates.
• Step 2: Repair Surface Damage
Once you have identified any structural or cosmetic defects, proceed to repair them accordingly. For instance, fill cracks and dents with appropriate fillers, patch or replace damaged areas, and smooth out any rough surfaces.
Always ensure the repairs are compatible with the material of the surface, and let them dry or cure completely as per the manufacturer’s recommendations.
• Step 3: Degrease the Surface
Cleaning the surface from contamination, such as grease, oils, and dirt, is critical to achieve proper adhesion of the paint or coating. Use a degreasing agent or solvent suitable for the specific substrate involved.
Wipe, spray, or brush the degreaser on the surface, then rinse it thoroughly with clean water. Allow the surface to dry before proceeding to the next step.
• Step 4: Remove Loose Paint and Rust
Whether you are dealing with old paint, rust, or any other deteriorating material, it is vital to remove these before moving forward. Use a combination of scraping, sanding, and wire brushing to effectively remove these materials from the surface.
For larger areas or extreme cases, consider using power tools or abrasive blasting methods. However, always follow safety guidelines and regulations when performing such tasks.
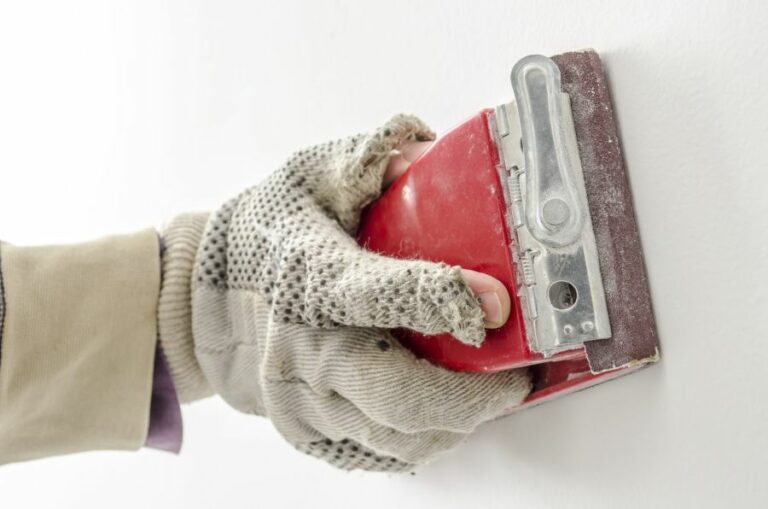
• Step 5: Sanding and Smoothing
After addressing paint and rust issues, sand the surface to smoothen it and promote better adhesion of the new paint or coating. Sandpaper or abrasive pads can be used for smaller projects, while larger ones may require power tools such as sanders or grinders.
Be sure to select the appropriate abrasive type and grit size for your specific material and finish requirements.
• Step 6: Dust and Debris Removal
Following sanding, it’s crucial to remove all dust and debris from the surface, as these can significantly affect the bonding of the paint or coating. Use a vacuum cleaner, compressed air, or a combination of both to ensure thorough removal of particulates.
In some cases, a tack cloth or damp rag can be used to remove finer dust that may be left behind after vacuuming.
• Step 7: Solvent Wipe
A solvent wipe is an optional but highly recommended step to ensure that any remaining contaminants are removed from the surface. Use clean rags dampened with an appropriate solvent, then wipe the surface thoroughly.
Be sure to use a clean rag for each area to avoid spreading contaminants. Allow the solvent to evaporate before proceeding to the next step.
• Step 8: Primer and/or Sealer Application
Finally, depending on the specifics of your project, apply a primer and/or sealer to the surface before applying the final paint or coating. This crucial step ensures better adhesion and increased durability while also providing a uniform appearance.
Be sure to select a product that is compatible with both the substrate and the final paint or coating, and follow the manufacturer’s directions regarding application methods and drying times.
By diligently following these eight essential steps of surface preparation, you can greatly improve the quality, longevity, and appearance of your painting or coating project. Always adhere to best practices, industry standards, and manufacturer’s recommendations to achieve optimal results.
And remember, thorough surface preparation is just as important as the quality of the paint or coating you choose!
Key Phases Involved in the Surface Preparation Process
Surface preparation is a crucial step in achieving a high-quality, long-lasting finish in painting, coating, or any other surface treatment process. It is essential to understand the various stages involved in surface preparation to ensure a successful project outcome.
• Importance of Surface Preparation
Surface preparation is vital for several reasons:
- It ensures proper adhesion of the coating or paint.
- It enhances the durability of the coating or paint.
- It reduces the likelihood of coating failure due to surface irregularities.
- It improves the aesthetic appearance of the finished surface.
• Stage 1: Assessment and Evaluation
The first step in surface preparation is to assess and evaluate the existing surface conditions. This includes identifying the type of substrate (surface material), the current coating or paint (if any), and any defects or irregularities present on the surface.
The assessment will help determine the appropriate surface preparation method, the required level of cleanliness, and the potential challenges that may arise during the process.
A thorough evaluation is essential to ensure proper adhesion of the new coating or paint and to achieve the desired outcome.
• Stage 2: Cleaning and Degreasing
Cleaning and degreasing the surface is essential to remove contaminants such as dirt, grease, oil, and other substances that can affect the adhesion and efficiency of the coating or paint.
Cleaning can be done using various methods, such as brushing, wiping, or vacuuming the surface, while degreasing typically involves using water or solvents to dissolve and remove oil-based contaminants.
One common recommendation in this stage is to use a high-quality degreaser and to follow the manufacturer’s instructions carefully, ensuring proper dilution and application of the degreaser.
Emphasis should also be placed on proper rinsing with water after degreasing to remove any residue left on the surface.
• Stage 3: Stripping and Removal of Old Coatings
If the surface has an existing coating or paint that needs to be removed, it must be stripped off by using chemical strippers or mechanical methods such as scraping, sanding, or abrasive blasting.
The choice of the stripping method will depend on the type of substrate, the existing coating, and the desired outcome.
Abrasive blasting is a popular method for removing old coatings from surfaces such as metal, concrete, and masonry. It involves projecting abrasive particles onto the surface at high velocities to strip off the existing coatings and clean the surface simultaneously.
When using abrasive blasting for surface preparation, it is essential to select the right type and size of abrasive particles, follow all safety protocols, and ensure proper waste disposal.
• Stage 4: Surface Profiling
Surface profiling refers to creating an appropriate surface roughness or texture required for the new coating or paint to adhere effectively.
This can be done using mechanical or chemical methods. Mechanical methods include abrasive blasting, sanding, grinding, or scarifying, while chemical methods involve using acid etching or other chemical agents.
Experts recommend using a surface profile comparator or a replica tape to measure the surface roughness accurately, following the appropriate industry standards.
It is essential to achieve the correct surface profile corresponding to the coating or paint manufacturer’s guidelines to ensure optimal adhesion and performance.
• Stage 5: Repairing Surface Defects
After the initial cleaning, stripping, and profiling, it is crucial to identify and repair any surface defects such as cracks, holes, or dents. Repairing these defects is necessary to provide a smooth, uniform surface for the new coating or paint.
For most substrates, a surface repair can be done using patching compounds, caulking, or sealants specifically designed for the substrate material.
• Stage 6: Final Cleaning and Inspection
The last stage of surface preparation involves a thorough final cleaning to remove any remaining dirt, dust, or debris from the surface. It can be done using compressed air, vacuuming, or wiping with a lint-free cloth.
Once the surface is clean, it should be inspected to ensure that it meets the required cleanliness and surface profile standards, as specified by the coating or paint manufacturer.
In conclusion, surface preparation is an essential part of any painting or coating project, and paying attention to each stage will help ensure a successful outcome.
From assessing the surface conditions to cleaning, stripping, profiling, repairing defects, and inspecting the surface, meticulous attention to detail and adherence to industry standards is crucial.
Following the expert recommendations outlined in this article will go a long way toward achieving the desired finish, enhanced durability, and superior performance in your surface treatment projects.
Stage | Description |
|---|---|
1. Cleaning | Remove dust, dirt, oil, grease, and other contaminants from the surface. |
2. Degreasing | Use appropriate solvents or cleaners to remove grease, oil, and other similar contaminants. |
3. Abrasion | Create a rough surface to improve the adhesion of coatings by sanding, grinding, or using other abrasive methods. |
4. Chemical Treatment | Apply chemical treatments such as etching, phosphating, or passivation to modify the surface properties and improve adhesion. |
5. Priming | Apply primer or other preparatory coatings to establish a foundation for topcoat application. |
Uncovering the Top Technique for Surface Preparation
Organizations and professionals in various industries, such as automotive, construction, and marine, employ surface preparation techniques to ensure the adhesion, protection, and longevity of coatings and finishes on various substrates.
Among these techniques, abrasive blasting is considered the most common and versatile method used by experts worldwide.
• Understanding Abrasive Blasting
Abrasive blasting, also known as sandblasting or grit blasting, is a technique that involves projecting a high-velocity stream of abrasive media onto the surface to remove contaminants, such as rust, paint, or oil.
This process smoothens or roughens the surface as required, rendering it suitable for the application of paints, coatings, and other treatments.
– Types of Abrasive Blasting
Abrasive blasting consists of various types, differing in the choice of abrasive media, force, and equipment. Here are the most widely-used types:
- Dry abrasive blasting: This method employs dry media (e.g., sand, crushed glass, or steel shots) and compressed air to clean and prepare the surface.
- Wet abrasive blasting: Water is mixed with the abrasive media to reduce dust and provide a more gentle surface treatment, ideal for delicate or composite materials.
- Vapor abrasive blasting: This technique employs water vapor and abrasive media to minimize dust and reduce media consumption, making it an eco-friendly option.
- Bead blasting: This method uses small, round beads made of glass, ceramic, or plastic to clean and polish surfaces without causing significant material removal.
• Benefits of Abrasive Blasting: Why Experts Recommend It
Several reasons make abrasive blasting the go-to technique for a vast majority of professionals:
– Versatility
Abrasive blasting works on various surfaces, including metal, wood, concrete, and plastic. By choosing the right abrasive media and technique, experts can safely and effectively remove contaminants and achieve the desired surface profile.
– Efficiency
Abrasive blasting allows for faster surface preparation compared to manual techniques, such as sanding or scraping. It can cover large areas in a short amount of time, thus significantly reducing project completion times and labor costs.
– Uniformity
By employing the appropriate blast pattern and technique, professionals can achieve a consistent surface profile across the entire treated area. This uniformity is essential for the effective bonding of coatings and finishes, improving their performance and durability.
– Environmentally Friendly
Modern abrasive blasting methods, such as vapor blasting and wet blasting, have been developed to reduce dust emissions and media consumption. By using eco-friendly abrasives (e.g., crushed glass or organic material), professionals can minimize their environmental impact.
• Selecting the Right Abrasive Media
To ensure the success of an abrasive blasting project, it’s crucial to choose the proper media for the specific surface and the desired outcome. Factors to consider include:
- Material: The media should be compatible with the surface to prevent damage or adverse reactions.
- Size and shape: The size and shape of the granules will determine the aggressiveness and cleaning rate of the process.
- Hardness: Harder media are more effective for aggressive material removal, while softer abrasives work well for polishing or fine finishing.
Choosing the right media ensures the desired surface finish while preventing damage or excess material removal.
• Precautions and Safety Measures
Given the high velocity and abrasive nature of the process, strict safety measures must be observed during abrasive blasting operations. Some essential precautions include:
- Ensuring proper ventilation to prevent the accumulation of dust and debris.
- Wearing appropriate personal protective equipment (PPE), such as goggles, gloves, and respirators.
- Using equipment with proper safety features, such as remote controls and dead-man switches.
Moreover, professional abrasive blasting service providers must adhere to the regulations and guidelines set forth by organizations such as OSHA and NIOSH.
In conclusion, abrasive blasting stands out as the most common and versatile surface preparation technique, offering efficiency, versatility, and adaptability for various substrates and applications.
By selecting the appropriate media, technique, and safety measures, professionals can achieve optimal surface profiles and coatings, ensuring the longevity and protection of the treated materials.
Understanding SA 2.5 Standard in Surface Preparation
• Introduction
SA 2.5 surface preparation refers to a standardized level of surface cleanliness and roughness for various materials, primarily steel, before different types of protective coatings are applied.
The term “SA 2.5” derives from the Swedish Standard SIS 05 59 00, a comprehensive international benchmark. This standard outlines the requirements for surface preparation and provides a systematic methodology to achieve the desired level of cleanliness and roughness.
Proper surface preparation is vital for enhancing corrosion resistance, adhesion, and the longevity of the applied coatings.
• Importance of Surface Preparation
Surface preparation is a crucial step in the coating process, as it directly affects the coating’s performance and durability. Regardless of the type of coating chosen, proper surface preparation ensures:
- Enhanced adhesion between the coating and substrate
- Improved corrosion resistance
- Increased coating lifespan
- Reduced chances of premature coating failure
Additionally, implementing adequate surface preparation practices can save cost, effort, and resources in the long run by minimizing maintenance and re-coating requirements.
• SA 2.5 Surface Preparation Methods
Several techniques can be employed to achieve SA 2.5 surface preparation, including:
– Dry Abrasive Blasting
Dry abrasive blasting is a common method for achieving SA 2.5 surface cleanliness. This process entails the high-velocity impact of abrasive materials on the steel surface, efficiently removing rust, scale, and other contaminants.
In this process, compressed air propels the abrasive material or grit, typically steel grit, steel shot, or other specialized abrasive agents.
– Wet Abrasive Blasting
Wet abrasive blasting, also known as slurry blasting, water blasting, or hydro-blasting, combines water and abrasive material to clean surfaces with high efficiency.
This method has the advantage of reducing dust emissions during the operation and is more suitable for delicate or intricate surfaces.
– Hand Tool and Power Tool Cleaning
Although relatively less effective in achieving the desired SA 2.5 cleanliness level, hand and power tool cleaning methods can be employed when abrasive blasting is not possible or feasible.
This technique involves using handheld tools, such as wire brushes, scrapers, sanders, and grinding wheels, to remove loose rust, mill scale, and other contaminants from the surface.
It is essential to note that the optimal surface preparation method depends on various factors, such as the type of substrate, amount of contamination, and project-specific requirements.
• Surface Profile for SA 2.5
A measurable and consistent surface profile is a vital aspect of SA 2.5 surface preparation. The profile ensures that the coating adheres strongly to the surface by providing an increased surface area and encouraging mechanical adhesion.
The surface profile for SA 2.5 usually ranges between 50 and 100 microns, though it may vary depending on the specific coating application.
• Assessing SA 2.5 Prepared Surfaces
After completing the surface preparation process, there are several methods available to verify the cleanliness and roughness level visually and quantitatively.
– Visual Inspection
Visual inspection can be performed to ensure the cleanliness of prepared surfaces following ISO 8501-1 or other similar standards.
It’s essential to observe the surface in proper lighting conditions and compare it with the relevant visual reference photographs provided in the standard.
– Surface Comparator
A surface comparator, such as a SSPC-VIS 1 Rust Grade Book, which contains sets of pre-prepared steel surfaces, can be placed next to the prepared surface for comparison. This allows for a standardized and consistent evaluation of the prepared surface.
– Surface Roughness Measurements
Profilometers or other similar tools can be used to measure the surface profile or roughness quantitatively. These measurements help in evaluating the surface’s roughness and ensure that it is within the specified range.
• Conclusion
Achieving SA 2.5 surface preparation is crucial for the optimal performance and longevity of the applied protective coatings on different materials, primarily steel.
The preparation process involves selecting suitable techniques, such as abrasive blasting or hand/power tool cleaning, to attain the desired level of cleanliness and roughness.
Following the preparation, the assessment of the prepared surfaces should be done using visual inspection, surface comparators, and quantitative measurements to verify that the desired SA 2.5 standard has been achieved.
By implementing proper SA 2.5 surface preparation practices, one can ensure a high-quality and long-lasting coating application.
Exploring Various Methods of Surface Preparation
Surface preparation is a critical step in many sectors, including industrial, marine, and building construction. Proper surface preparation ensures that coatings and treatments adhere properly, resulting in longer-lasting, more effective solutions.
• Abrasive Blast Cleaning
Abrasive blast cleaning, often known as sandblasting, is a highly effective surface preparation method that involves propelling abrasive materials at high velocity onto a surface.
This process removes contaminants, such as rust and old paint, and creates a rough texture that improves the adhesion of coatings.
– Dry Abrasive Blasting
Dry abrasive blasting is the most prevalent form of abrasive blast cleaning. It utilizes a variety of abrasive materials, including sand, glass beads, steel grit, and crushed walnut shells.
In general, dry abrasive blasting is suitable for the majority of surface cleaning applications, such as automotive restoration or preparing metal surfaces for painting. Keep in mind that the appropriate abrasive material and blasting equipment will depend on the specific requirements of the project.
– Wet Abrasive Blasting
Wet abrasive blasting, also known as slurry blasting, mixes water with the abrasive material to create a slurry that is then propelled at the surface.
This surface preparation method has several benefits over dry blasting, including reduced dust generation and a milder impact on the surface, making it suitable for delicate materials like concrete or natural stone.
In addition, wet abrasive blasting is often faster and more efficient than its dry counterpart due to the added weight of the water.
• Chemical Surface Preparation
Chemical surface preparation methods utilize chemicals and solvents to remove contaminants or alter the surface’s chemistry in a way that promotes adhesion. Common applications for chemical surface preparation include paint stripping, rust removal, and etching.
– Acid Etching
Acid etching is a widely used chemical surface preparation method involving the application of a dilute acid solution to remove surface contaminants and create a rough surface profile.
In particular, acid etching is frequently used to prepare concrete surfaces prior to the application of resins or coatings.
However, it should be noted that acid etching requires proper neutralization and waste disposal to ensure safety and environmental compliance.
– Solvent Cleaning
Solvent cleaning is another widely used chemical surface preparation technique that involves the use of solvents, such as acetone, xylene, or mineral spirits, to remove grease, oil, or other organic contaminants from a surface.
This method is particularly useful for metal surfaces, as it avoids introducing water that could cause rust formation. When using solvents for surface preparation, ensure proper ventilation and follow safety guidelines in handling these substances.
• Mechanical Surface Preparation
Mechanical surface preparation methods involve using physical tools to clean or alter a surface. These methods can range from simple hand tools like wire brushes to more advanced equipment like grinders or shot blasters.
– Hand and Power Tool Cleaning
Hand and power tool cleaning are an accessible and widely used surface preparation method. Wire brushes, scrapers, and power tools like needle guns or grinders can effectively remove rust, scale, or old paint from a surface.
However, hand and power tool cleaning is often labor-intensive and may not achieve the same depth of surface profile as abrasive blast cleaning.
– Shot Blasting
Shot blasting is a powerful mechanical surface preparation method that involves propelling hardened steel pellets at the surface to remove contaminants and create a rough surface profile.
Shot blasting is particularly useful for concrete or more durable surfaces that can withstand the impact of the steel shot. This method is efficient and has the added benefit of being a dry process that generates minimal dust.
• Ultrasonic Surface Preparation
Ultrasonic surface preparation uses ultrasound technology to generate microscopic cavitation bubbles on a surface, dislodging contaminants and promoting adhesion.
Though primarily used for small-scale applications or surfaces with tight tolerances, like electronics or semiconductor fabrication, ultrasonic surface preparation is growing in popularity for its precision and ability to clean without causing damage or altering the surface significantly.
In conclusion, several surface preparation methods cater to different materials and applications. The choice of method will depend on project requirements, environmental and safety concerns, and desired outcomes.
By understanding the options available and their respective advantages, industry professionals can make more informed decisions and ensure the correct method is employed for successful results.
Type | Description |
|---|---|
Cleaning and Degreasing | Removal of dirt, oil, grease, and contaminants from the surface. |
Hand and Power Tool Cleaning | Use of hand and power tools like wire brushes or sandpaper to remove loose paint, rust, and other debris from the surface. |
Abrasive Blasting | High-pressure blasting of abrasive materials like sand, steel grit, or glass beads to clean and profile the surface for better adhesion. |
Waterjetting | High-pressure or ultra-high-pressure water jets to remove surface contaminants, coatings, and lightly abrade the surface for improved adhesion. |
Chemical Cleaning | Application of chemical stripping agents and solvents to remove paint, coatings, or contaminants from the surface. |
Acid Etching | Treating the surface with acids to create a roughness and improve adhesion for coatings. |
Flame Cleaning | Use of an oxy-acetylene torch to quickly heat and burn off surface contaminants. |
Grinding and Polishing | Mechanical removal of surface contaminants, paint or coatings by grinding, buffing or polishing the surface to a desired finish. |