Preparing Surfaces For Lasting Paintwork
When it comes to achieving a professional and lasting paint job, the secret lies in proper surface preparation. With our expert tips, you can confidently tackle this crucial step and achieve a smooth, long-lasting finish on any surface. So let’s dive in and explore the most effective methods to prepare different surfaces for a paint job that will stand the test of time.
Preparing surfaces for lasting paintwork:
To achieve lasting and professional paintwork results, properly prepare surfaces by assessing their condition, addressing any damage like cracks or holes, removing loose paint and sanding, and cleaning the surface thoroughly. Then, prime the surface with a compatible primer, choose the right paint, apply at least two coats with a quality brush or roller, and maintain the paintwork to extend its durability and appearance.

Discover the secrets to ensuring a smooth, lasting paint job for any surface! Our comprehensive guide covers essential tips for proper preparation, materials, and techniques. Keep reading to take your paintwork to the next level and achieve professional results.
Contents
- 1 Ensuring Durable Paintwork with Proper Surface Preparation
- 2 Steps to Ready Your Home Surfaces for a Fresh Coat of Paint
- 3 The Importance of Surface Preparation Prior to Painting
- 4 Achieving Long-Lasting Paint by Following Key Techniques
- 5 The Proper Method for Cleaning Surfaces Before Applying Paint
Ensuring Durable Paintwork with Proper Surface Preparation
A well-prepared surface is the key to achieving lasting and professional paintwork results.
• Assessing the Surface Condition
Before proceeding with the preparation process, it is essential to assess the condition of the surface you plan to paint. Look out for any damage, such as cracks, holes, and peeling or flaking paint.
These issues should be addressed before you start, as they can lead to an uneven finish and compromise the durability of the paintwork.
– Addressing Cracks and Holes
Cracks and holes can be filled using an appropriate filler or putty, depending on the type and size of the damage. From my experience, I recommend using a lightweight filling compound for small cracks and holes, as it dries quickly and sands smoothly.
For larger damage, a two-component epoxy filler will provide a more durable and waterproof repair. Allow the filler to dry fully, as recommended by the manufacturer, before sanding the area smoothly.
– Dealing with Peeling and Flaking Paint
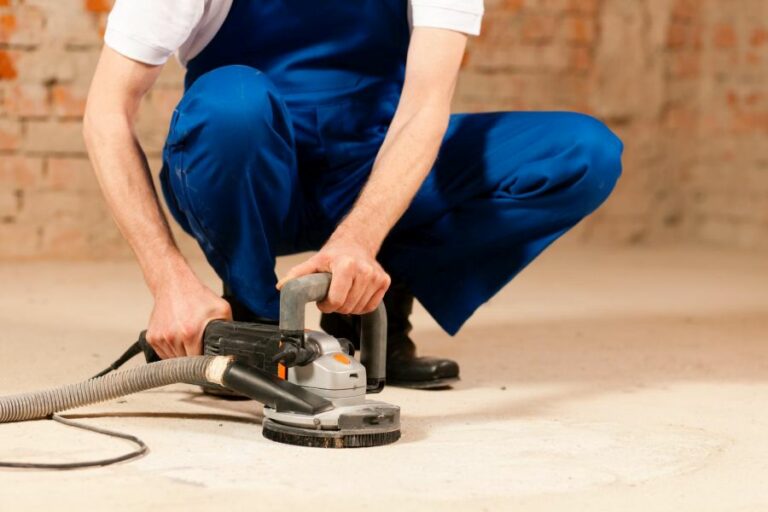
Peeling and flaking paint will need to be removed, as applying new paint over unstable areas will result in a short-lived finish. A combination of manual scraping, using a paint scraper, and power sanding with a random orbital sander can effectively remove loose and flaking paint.
Take care not to damage the underlying surface while removing the paint.
• Cleaning the Surface
A clean surface is critical for paint adhesion and overall finish quality. Start by sweeping or vacuuming any loose debris, such as dust and cobwebs, from the surface. Proceed to wash the surface with soapy water using a sponge or soft cloth.
For surfaces with stubborn dirt, grease, or mold, a suitable cleaning solution, such as a TSP (trisodium phosphate) substitute, can be used. It is important to rinse the surface thoroughly with clean water after using any cleaning chemicals, ensuring no residues are left behind.
– Removing Loose Paint and Sanding
Once the surface has been cleaned and repaired, it’s time to give it a thorough sanding. Sanding the surface will smooth out any imperfections, improve paint adhesion, and ensure an even finish.
Begin with medium-grit sandpaper (around 100-120 grit) and sand the entire surface, paying extra attention to areas that were filled or repaired. Finish by sanding with fine-grit sandpaper (180-220 grit) for a smooth and even surface.
Be sure to wipe the surface clean with a damp cloth or tack cloth to remove any residual dust after sanding.
• Priming the Surface
Priming the surface is a crucial step in ensuring a durable paint finish. A primer not only improves the adhesion of the paint to the surface but also provides a uniform base for the paint, enhancing the appearance and ensuring consistent color coverage.
Choose a primer that is compatible with the type of paint you plan to use (water-based or oil-based). I recommend using a quality acrylic primer for most indoor applications, as they dry quickly and emit fewer odors than oil-based primers.
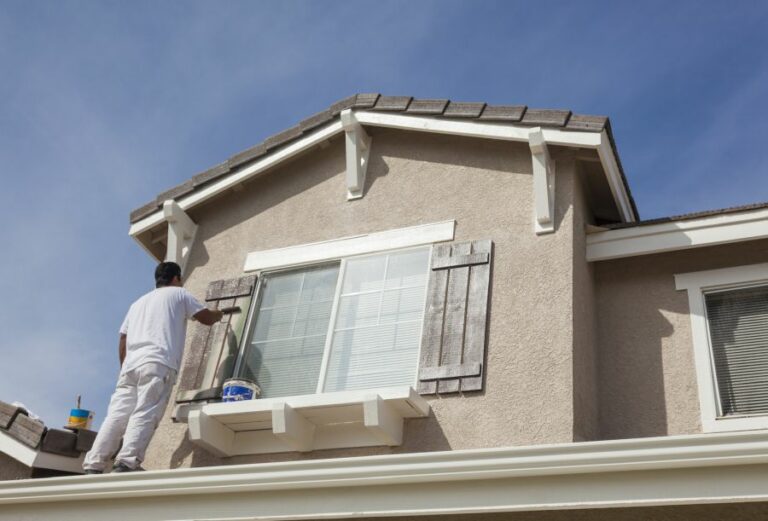
For external surfaces or surfaces with a history of paint problems, a high-quality oil-based primer may be more appropriate.
Apply the primer using a roller or brush, ensuring smooth and even coverage. Allow the primer to dry fully, as specified by the manufacturer’s instructions, before proceeding with the painting.
• Choosing the Right Paint
Selecting the right paint for your surface is essential for achieving lasting results. Consider factors such as the surface material and its location (interior or exterior), as well as any specialized requirements, such as moisture resistance or low VOC content.
• Applying the Paint
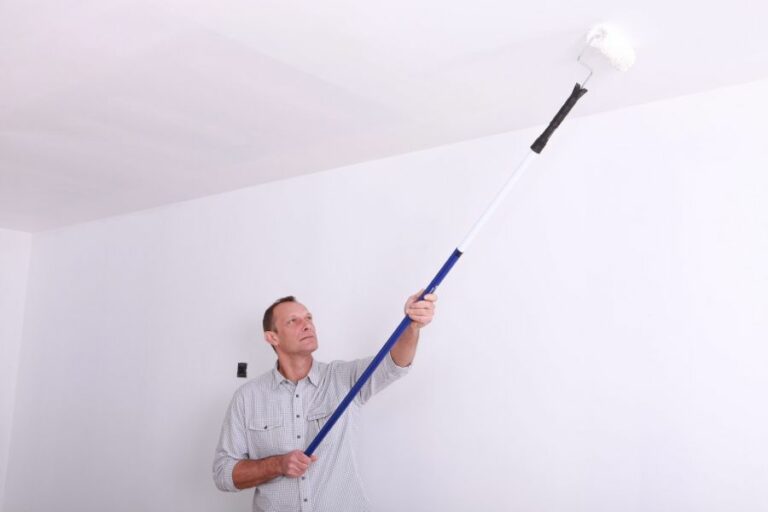
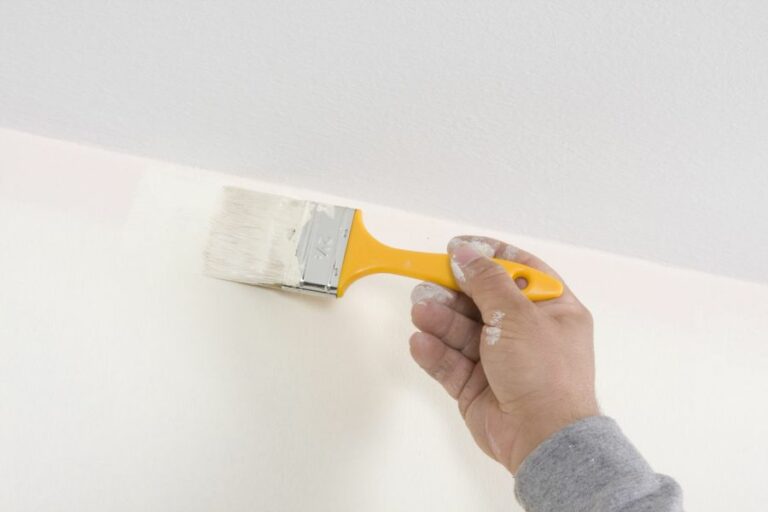
With the surface properly prepared, you can now proceed with the paint application. For professional results, it is important to apply at least two coats of paint, allowing each layer to dry completely before applying the next.
Use a quality brush or roller, ensuring even coverage and avoiding excessive paint build-up.
• Maintaining Your Paintwork
Properly maintaining your newly painted surface will help extend the durability and appearance of the paintwork.
Keep surfaces clean by regularly dusting and washing as needed. Avoid exposing the paint to extreme temperature fluctuations or prolonged moisture exposure, which may cause premature paint failure.
By following these steps, you will achieve lasting and professional paintwork results that will stand the test of time.
Steps to Ready Your Home Surfaces for a Fresh Coat of Paint
Repainting your home can be an exciting and transformative project. However, proper preparation is essential to ensure a durable and long-lasting paint job. One of the most critical steps in this process is preparing the surfaces to be painted.
• Assessing the Surface Condition
Before starting your repainting project, it’s essential to assess the condition of the surfaces to be painted. Look for any signs of damage, such as cracks, holes, and peeling or flaking paint. Addressing these issues first will help the new coat of paint adhere better and last longer.
– Repairing Cracks and Holes
To repair cracks and small holes in walls, you will need a putty knife and a patching compound. Apply the compound to the affected area, then use the putty knife to smooth the surface. Allow it to dry before sanding the area for a smooth finish.
For larger holes or dents, you may need to use a pre-made patch or a piece of drywall cut to size.
– Dealing with Peeling and Flaking Paint
For surfaces with peeling or flaking paint, remove loose paint using a scraper, wire brush, or paint remover. Apply a primer to any bare spots to ensure that the new paint adheres properly.
• Cleaning the Surfaces
Cleaning is a crucial step in preparing surfaces for repainting. Dirt, dust, and other contaminants may interfere with paint adhesion and lessen the lifespan of the new paint.
– Interior Surfaces
To clean interior surfaces, use a mild detergent, warm water, and a sponge or cloth. Work in sections, rinsing the surface with clean water after cleaning. For surfaces with mildew or mold, use a diluted bleach solution following the manufacturer’s instructions.
Allow the surfaces to dry completely before proceeding.
– Exterior Surfaces
For exterior surfaces, a pressure washer is an effective way to remove dirt and debris. Be sure to use a low-pressure setting when washing to avoid damaging the surface. If you don’t have access to a pressure washer, use a hose with a spray nozzle and a scrub brush.
Be cautious when using any cleaning chemicals, as they can damage vegetation or harm the environment.
• Sanding the Surfaces
Sanding is essential for achieving a smooth surface and ensuring proper paint adhesion. Using the appropriate sandpaper grit, lightly sand the surface to remove any imperfections and create a better surface for the new paint to stick to.
– Choosing the Right Sandpaper
Selecting the right sandpaper grit is crucial for achieving a smooth finish. Lower grit numbers indicate coarser sandpaper, while higher grit numbers are finer. For rough surfaces, use a coarse grit (like 60 or 80), while smoother surfaces may need a finer grit (such as 150 or 220).
– Sanding Techniques
For small areas or uneven surfaces, use a sanding block or sponge. For large, flat surfaces, an electric sander can save time and effort. Always follow the wood grain when sanding, and avoid applying too much pressure, as this can create gouges on the surface.
• Caulking and Sealing
Caulking and sealing gaps and cracks around doors, windows, and trim will not only improve the appearance of the paint job but also help with energy efficiency and prevent moisture penetration. Use a paintable caulk and a caulking gun for the best results.
– Applying Caulk
Cut the tip of the caulk tube at a 45-degree angle, then insert it into the caulking gun. Apply a bead of caulk to the gap or crack, ensuring that it fully fills the space. Smooth the caulk with a wet finger or a caulking tool for a clean finish.
• Taping and Masking
Protecting areas not to be painted with masking tape and drop cloths is essential in achieving a professional-looking paint job. Apply masking tape along edges where different colors meet, around fixtures such as light switches and outlets, and on trim or baseboards.
Always use painter’s tape to avoid damaging the surfaces or leaving residue.
– Laying Drop Cloths
Place drop cloths on floors, furniture, and landscaping to protect them from paint drips and spills. Choose heavy-duty canvas drop cloths for better protection, as plastic sheeting can be slippery and less durable.
With these steps, your home surfaces should now be well-prepared for repainting. Remember that proper surface preparation is essential for a professional-looking, long-lasting paint job. The time and effort spent in this process will be well worth it when you see the final results.
The Importance of Surface Preparation Prior to Painting
Surface preparation before painting is a crucial step in the painting process that ensures the longevity and quality of the paint job.
It involves thoroughly cleaning, repairing, and preparing the surface to create a strong bond between the paint and the substrate, thereby preventing paint failure, uneven surfaces, and other issues.
• Importance of Surface Preparation
Surface preparation is essential for a successful paint job for several reasons:
- Adhesion: A clean, well-prepared surface allows the paint to adhere more strongly to the substrate, preventing issues like peeling, flaking, and cracking.
- Durability: Properly preparing the surface ensures that the paint coating will be more durable, able to withstand wear and tear, and require less maintenance over time.
- Appearance: A smooth, even surface creates a more visually appealing and professional finish on the painted surface.
- Cost-effectiveness: Taking the time to properly prepare the surface before painting reduces the need for frequent repainting, touch-ups, and maintenance, saving money in the long run.
• Methods of Surface Preparation
There are various methods for surface preparation, depending on the type and condition of the surface you are working with. Some of the most common methods include:
– Cleaning
Cleaning is the first step in any surface preparation process. It involves removing dirt, grease, oil, and other contaminants from the surface. This can be done using soap and water, solvents, degreasers, or pressure washing, depending on the substrate.
– Sanding
Sanding smoothens the surface and removes any loose paint, making it easier for the new paint to adhere. It can be done manually using sandpaper or with power tools like orbital sanders and sandblasting machines.
For wood surfaces, start with coarse-grit sandpaper and progress to finer grits for a smooth finish.
– Scraping
Scraping is used to remove loose, peeling, or flaking paint. A putty knife, scraper, or wire brush can be used to carefully remove the old paint without damaging the substrate.
– Patching and Repairing
Before painting, any cracks, holes, or defects in the surface should be repaired. This can involve patching with a filler, such as wood putty, spackling compound, or epoxy, and then sanding it smooth once it has dried.
– Chemical Stripping
For surfaces with heavy or stubborn layers of paint, chemical paint strippers can be used to effectively remove the old paint. Whether using solvents, caustic, or bio-based paint strippers, always follow the manufacturer’s instructions and safety precautions.
– Priming
Applying a primer before painting can improve adhesion and overall durability. Primer can help seal porous surfaces, create a uniform base, and block stains from bleeding through the paint. Some paints are self-priming, eliminating the need for a separate primer.
• Factors to Consider in Surface Preparation
Several factors need to be taken into account when preparing a surface for painting, including:
– Surface Type
Different substrates (wood, metal, concrete, etc.) require different preparation methods and materials. Ensuring you use appropriate methods for the specific surface will lead to better results.
– Existing Finish
The condition and type of the existing finish (paint, varnish, stain, etc.) will dictate the proper surface preparation techniques, such as sanding or chemical stripping.
– Environmental Factors
Humidity, temperature, and other environmental factors can impact the effectiveness of preparation methods, as well as the drying and curing times of the paint. Always follow the paint manufacturer’s recommendations for optimal environmental conditions during application.
– Safety Precautions
When working with chemicals, power tools, or other potentially hazardous materials and equipment, ensure you take proper safety precautions. Wear appropriate protective equipment, work in well-ventilated areas, and follow product instructions and guidelines.
• Conclusion
In conclusion, surface preparation before painting is a critical aspect of a successful painting project. By properly cleaning, repairing, and preparing the surface, you can achieve a professional, long-lasting paint job that will improve the appearance and durability of the painted surface.
Always consider the type of surface, existing finish, environmental factors, and safety precautions when undertaking a surface preparation project.
Achieving Long-Lasting Paint by Following Key Techniques
The durability and longevity of any paint job depend on various factors, such as paint quality, surface preparation, and application techniques. With proper care and attention, it’s possible to extend the life of your paint, both indoors and out.
• Choosing the Right Paint for the Surface
To maximize durability, choose paint designed specifically for the surface you’re painting. For example, masonry paint is formulated for brick and concrete surfaces, while wood paint is better suited for wooden surfaces like doors and trim.
Always opt for a high-quality paint that’s resistant to fading, chipping, and peeling. Additionally, consider the paint’s finish: semi-gloss and gloss paints are more durable than matte or flat finishes.
• Proper Surface Preparation is Key
The longevity of your paint can be negatively impacted if the surface is not correctly prepared. For proper adhesion and durability of the paint, follow these recommendations:
– Cleaning the Surface
- Remove dirt, dust, and grease from the surface using water and mild detergent.
- Allow the surface to dry completely before moving on to the next step.
– Removing Old Paint
- Scrape off any loose, flaking, or peeling paint using a paint scraper.
- Sand the surface using fine-grit sandpaper to create a smooth and even surface for the new paint to adhere to.
- Wipe off any sanding dust with a damp cloth.
– Repairing Damage and Imperfections
- Fill any cracks or holes with an appropriate filler, such as caulk for small gaps or wood filler for larger holes.
- Sand the filled areas to ensure a smooth finish.
- Prime the repaired areas with a suitable primer to promote paint adhesion and prevent discoloration.
• Priming Before Painting
Priming is an essential step that helps paint adhere better, improves the color vibrancy, and increases paint durability. By using a quality primer, you create a uniform surface that ensures a consistent paint finish.
Choose a primer that’s compatible with both the paint type and the surface to be painted. For example, use an oil-based primer with oil-based paint and a latex primer with latex paint.
In addition, pay attention to any special needs, such as using a mold-resistant primer in damp areas or blocking stains with a stain-blocking primer.
• Applying the Paint: Techniques Matter
How you apply the paint can significantly impact its longevity. To achieve the best results, follow these tips:
– Use the Right Tools
- Choose high-quality brushes or rollers that hold paint well and provide smooth, even coverage.
- Use the correct brush or roller for your paint type (e.g., natural bristles for oil-based paint, synthetic bristles for latex paint).
– Apply Multiple Coats
- Applying multiple thin coats of paint, allowing each coat to dry fully between applications, will produce a more durable, even finish.
- Always follow the paint manufacturer’s recommendations for the appropriate number of coats and drying time.
– Be Mindful of Weather Conditions
- When painting outdoors, pay attention to the weather. Low temperatures, high humidity, and direct sunlight can negatively impact paint’s drying time and durability.
- Refer to the paint manufacturer’s guidelines for the ideal temperature and humidity range for optimal paint performance.
• Regular Maintenance for Long-Lasting Paint
Regular maintenance can significantly extend the life of your paint job, protecting your investment in time and materials. To maintain your paintwork:
- Routinely inspect painted surfaces for signs of wear, such as chipping, peeling, and fading.
- Clean the painted surfaces regularly, more frequently, if they are exposed to harsh environments, using mild soap and water to remove dirt and contaminants.
- Address any damage or issues, such as moisture or mold problems, as soon as possible to prevent further deterioration of the paint.
- Recoat or touch-up as necessary to keep the paint looking fresh and protect the surface from damage.
By following these expert tips, you can ensure your paint job stands the test of time. Proper surface preparation, choosing the right paint and primer, correct application techniques, and regular maintenance all contribute to long-lasting, durable paintwork.
Step | Description |
|---|---|
1 | Store paint in a cool, dry place away from direct sunlight and extreme temperatures |
2 | Keep the paint cans tightly sealed to avoid air exposure |
3 | Use the right type of paint for the specific surface and application |
4 | Prepare the surface properly by cleaning and priming it before painting |
5 | Apply the paint in thin, even layers to achieve a more durable finish |
6 | Allow the paint to dry completely between coats and follow the recommended drying time on the paint can |
7 | Do not dilute the paint with water or other substances unless the manufacturer’s instructions say so |
The Proper Method for Cleaning Surfaces Before Applying Paint
As an expert in surface coatings, I’ve learned that proper surface preparation is crucial for achieving excellent results.
• Identifying Contaminants and Choosing Cleaning Methods
The first step in surface preparation is identifying the contaminants on the surface. Common contaminants include dust, grease, oil, rust, and paint flakes. Contaminants can result in poor adhesion and uneven coatings, leading to decreased durability and longevity.
Depending on the type of contaminant, you can choose from the following cleaning methods:
- Mechanical Cleaning: This method involves removing contaminants by physically abrading the surface. Techniques include sanding, scraping, and wire brushing.
- Chemical Cleaning: Involves using solvents, detergents, or acids to dissolve or break down contaminants. These cleaners are often used for removing grease, oil, or rust.
- Water-Based Cleaning: As the name implies, water is used as the primary cleaning agent. Pressure washing, steam cleaning, and simple wiping down with a damp cloth fall under this category.
• Dealing with Metal Surfaces
Preparing metal surfaces for a coating can be challenging, as metals are often susceptible to rust and oxidation. Here are some recommendations for cleaning metal surfaces:
- Removal of Rust and Oxidation: If you’re dealing with rusty surfaces, consider using a wire brush or abrasive pad to remove the rust. A chemical rust converter can also be an excellent choice for more severe cases. These products typically contain phosphoric acid, which turns rust into a more stable, paintable surface.
- Degreasing Metal Surfaces: Oils and greases should be removed using a solvent-based or water-based degreaser. Be cautious to avoid cross-contamination. Always use a clean cloth when wiping down the surface.
- Light Abrasion: I recommend giving metal surfaces light sanding before applying a coating. This will promote better adhesion and help achieve a smoother finish.
Note: When working with aluminum, the surface may require special treatment with an etching primer or an etching solution.
• Cleaning Wood Surfaces
Wood surfaces have their unique challenges, mainly due to their porous nature. Here’s how to clean them effectively:
- Remove Dust and Debris: Start by wiping the wood with a lightly damp cloth to remove any dirt or dust. You can also use a vacuum with a brush attachment to get into nooks and crannies.
- Remove Old Paint or Stain: For wooden surfaces with old paint or stain, I recommend using a chemical paint stripper. Carefully follow the directions on the product and allow the appropriate dwell time for the best results.
- Sanding: After the surface is clean, use sandpaper to remove any rough spots, scratches, or uneven areas. Start with a coarser grit (e.g., 80-grit) and work your way up to finer grits (e.g., 180-grit).
- Vacuum and Tack Cloth: Once the wood is sanded, vacuum any remaining debris and use a tack cloth to remove fine dust.
• Preparing Concrete and Masonry Surfaces
Concrete and masonry surfaces can be prone to moisture, cracks, and efflorescence. Here’s how to tackle these challenges:
- Remove Efflorescence and Mold: For efflorescence (white, chalky deposits) or mold, use a stiff brush and a solution of water and trisodium phosphate (TSP). Rinse thoroughly with clean water once done.
- Filling Cracks and Holes: Fill any cracks and holes in the concrete or masonry using a suitable patching compound. Allow it to cure according to the manufacturer’s recommendations.
- Cleaning the Surface: Pressure washing can be a particularly effective cleaning method for concrete and masonry surfaces. Alternatively, vigorously scrub the surface with a stiff brush and a TSP solution, followed by thorough rinsing.
- Allow to Dry: It’s essential to let the surface dry before applying any coating, as moisture can lead to adhesion problems.
• Final Inspection and Preparation
Before applying the coating, it’s crucial to inspect the surface one last time. Make sure to look for any remaining contaminants or defects that may affect the coating’s performance.
Once the surface is deemed clean, make sure to tape off any areas that you don’t want to be coated and lay drop cloths to protect the surrounding area from accidental drips or spills.
• Conclusion
Proper surface cleaning and preparation are vital for a successful coating application. Dedicate time and effort to understand and address the unique challenges presented by the specific material you’re working with. Following these tips and consulting the coating manufacturer’s guidelines will significantly improve the quality and longevity of your coating.
Step | Description |
|---|---|
1 | Remove any loose dirt or debris from the surface using a brush or cloth. |
2 | Wash the surface with a mild soap and water solution to remove grime and contaminants. |
3 | Rinse thoroughly with clean water to remove any soap residue. |
4 | Dry the surface completely using a clean cloth or air drying. |
5 | For more stubborn stains or contaminants, use a cleaner specifically designed for the surface material (e.g., metal, wood). |
6 | Lightly sand the surface if necessary to remove any remaining stains or rough patches. |
7 | Wipe the surface with a tack cloth to remove any dust or particles before applying the coating. |