Step-By-Step Textured Wall Paint Prep. What Pros Say
When creating a beautiful and striking textured wall, the key lies in proper preparation and execution of the painting process. Luckily, we have you covered with a thorough step-by-step guide to ensure a successful and long-lasting textured wall paint. With our expertise and experience, you can be confident in achieving the perfect look while avoiding common pitfalls.
Step-by-step textured wall paint prep:
First, to prepare a wall for textured paint, assess the wall’s surface for damage, cracks, and absorbency. Gather tools like sandpaper, utility knives, joint compound, taping knives, primer, and paintbrushes. Repair any cracks and holes using a premixed joint compound. Lightly sand smooth drywall surfaces and areas with joint compound. Clean the wall with a damp cloth, then apply a primer coat to ensure proper adhesion. Before applying textured paint, practice your technique on a scrap surface.

Get ready to transform your walls with an eye-catching textured paint look! In this guide, we’ll share expert tips on how to properly prepare your walls, from choosing the right tools and materials to following a step-by-step process that ensures a flawless result. Read on to make your walls truly unique!
Contents
- 1 Comprehensive Guide: Preparing Walls for Textured Paint
- 2 Techniques for Applying Textured Paint on Walls
- 3 Primer: Essential for Textured Wall Painting?
- 4 Sanding Textured Walls Prior to Painting: Is it Necessary?
- 5 Top Methods for Using Textured Paint Effectively
Comprehensive Guide: Preparing Walls for Textured Paint
• Assess the Wall Surface
Before you start preparing your wall for textured paint, it’s crucial to examine the surface and determine the amount and type of damage. If you notice any uneven surfaces, cracks, or holes, take note to address them during the prep process.
If you have a smooth drywall surface, you will need to lightly sand it before applying textured paint. Consider the level of absorbency of the wall surface, as this will determine the primer’s absorption rate and the quantity of textured paint required.
• Gather Necessary Tools and Materials
To properly prepare your wall for textured paint, gather the following tools and materials:
- Sandpaper (120-grit)
- Utility knives
- Premixed joint compound
- Taping knives (6-inch and 12-inch)
- Primer (oil-based or latex)
- Paint roller with an extension pole
- Paintbrushes
- Drop cloths or plastic sheeting
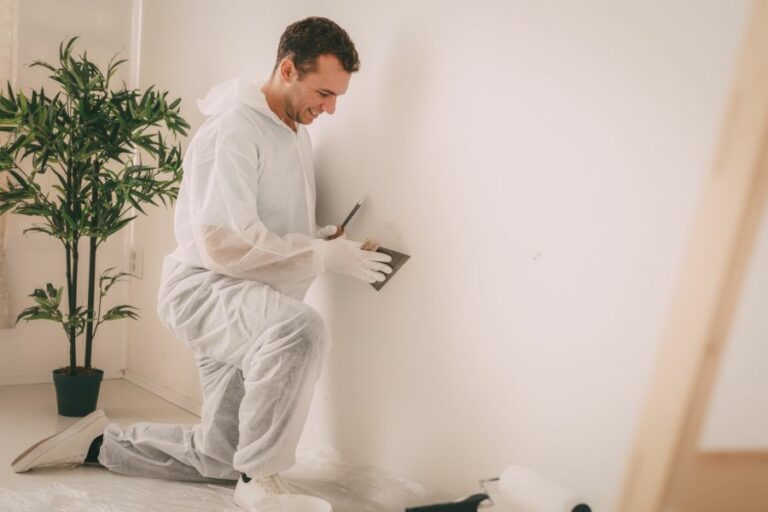
• Repair Cracks and Holes
Before going ahead with the actual textured paint application, fix any cracks or holes in the wall surface. Remove any loose debris using a utility knife, widen the crack if necessary, and apply a generous amount of premixed joint compound using a taping knife.
As recommended by Family Handyman, use a 6-inch taping knife for smaller holes and a 12-inch taping knife for larger holes. Allow the joint compound to dry completely and repeat the process if the area has shrunk or is not level with the surrounding wall.
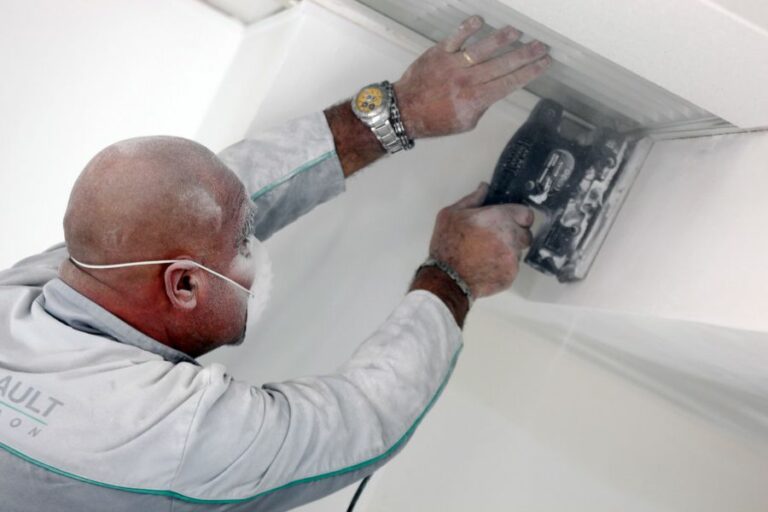
• Sanding and Cleaning
Once you have addressed all the damaged areas on your wall, it’s time to sand the surface. If you have a smooth drywall surface, lightly sand it using 120-grit sandpaper to ensure better adhesion of textured paint.
For areas where you applied joint compound, sand the surface until it is smooth and even with the surrounding walls.
After sanding, thoroughly clean the wall surface to remove any dust or debris. Use a damp cloth or sponge to wipe the surface and allow it to air-dry completely. Make sure to cover all baseboards, electrical outlets, and other room fixtures to prevent the textured paint from getting on them.
• Priming the Surface
Applying a primer coat to your wall is crucial to ensure proper adhesion of textured paint. Choose an oil-based or latex primer, depending on the type of textured paint product you plan to use.
If you are uncertain about the type of primer to use, consult the manufacturer’s instructions or consult with a knowledgeable professional at your local paint store.
Using a high-quality paint roller with an extension pole, apply the primer evenly to your wall. Use a paintbrush for areas that the roller cannot reach, such as edges and corners.
Typically, one coat of primer is sufficient, but if the wall is still showing through or if you have a highly absorbent wall surface, consider applying a second coat.
Allow the primer to dry completely before proceeding to the textured paint application. This drying time can vary depending on temperature and humidity, so check the product instructions for a recommendation on wait times.
• Practice Your Technique
Before applying textured paint to your walls, practice your technique on a piece of scrap drywall or other disposable surfaces.
This will allow you to get the hang of handling the tools and materials, especially if you are using a specific type of texture, such as a knockdown or popcorn effect. Practicing beforehand will help ensure a professional-looking result on your walls.
• Final Thoughts
By thoroughly preparing your wall surface, you will significantly improve the outcome of your textured paint project. Proper wall repair, sanding, and priming lead to better adhesion of textured paint and a more durable final result.
Remember, the key to a successful project is patience and attention to detail, so take your time and carefully follow these steps for a professional-looking textured wall paint finish.
Techniques for Applying Textured Paint on Walls
• Choosing the Right Textured Paint
Before starting your painting project, you must choose the right textured paint for your wall. There are various types of textured paint available in the market, such as sand-textured, popcorn-textured, or Venetian plaster.
Each type provides a unique finish and requires different application techniques. Select the one that best suits your wall and the desired result you want to achieve.
To assist you in choosing the right paint, visit a local paint store or seek advice from home improvement websites, such as BobVila.com.
• Preparing Your Wall for Textured Paint Application
– Cleaning the Wall
Start by thoroughly cleaning the wall you want to paint. Remove dust, dirt, and any other debris that may be present. This ensures a smooth application of the textured paint.
– Repairing Holes and Cracks
Examine the wall for any holes or cracks that need to be repaired before applying the textured paint. Use a putty knife and patching compound to fill the holes and cracks. Allow the compound to dry completely before sanding the patched areas to create a smooth surface.
– Applying a Primer
The application of primer is essential for textured paint jobs. This step allows the textured paint to adhere to the wall properly and helps to achieve a consistent finish.
Choose a primer specifically designed for textured surfaces and apply it evenly to the entire wall. Allow the primer to dry completely before moving on to the textured paint application.
• Gather Necessary Tools and Materials
Before you begin painting, gather all the necessary tools and materials. Here’s a list of items you’ll need for a successful textured paint job:
- Textured paint
- Paint roller or brush, depending on the desired texture
- Paint tray
- Tarp or drop cloth
- Painter’s tape
- Ladder
- Putty knife (if a specialized technique is needed)
• Applying the Textured Paint
– Mixing the Paint
Textured paint often needs to be mixed before application. Carefully read and follow the manufacturer’s instructions on how to mix your chosen textured paint. Proper mixing ensures an even, consistent finish.
– Applying the Base Coat
If you’re working with a two-step paint, apply the base coat before adding the textured paint. This base coat is usually a flat or semi-gloss paint that complements the color of the textured paint. Apply the base coat evenly to the entire wall, and allow it to dry completely before moving on to the textured coat.
– Adding Texture
There are several techniques to apply textured paint, depending on the type of paint you’re using and the desired effect. Here are some recommended methods for the most common types of textured paint:
- Sand-textured paint: Apply the paint with a roller, then use a wide paintbrush to create light, even strokes. This will create a subtle, sand-like texture on your wall.
- Popcorn-textured paint: For this type of paint, use a long-nap roller to apply the paint in a thick, even layer. Gently dab the roller onto the wall to create a popcorn-like texture.
- Venetian plaster: This plaster is applied with a putty knife or trowel in thin, overlapping layers. Build up the layers of plaster to create the desired depth and texture, allowing each layer to dry between applications.
– Drying Time and Maintenance
Once you’ve finished applying the textured paint, allow it to dry according to the manufacturer’s instructions, which can vary depending on the type of paint and desired texture. After the paint has dried completely, your new textured wall is finished and ready for use.
To maintain your textured wall, clean it gently using a soft sponge or cloth and a mild detergent. Avoid scrubbing or using harsh chemicals, as these can damage the texture.
• Final Thoughts
Painting a wall with textured paint can create an intriguing and stylish look for any room in your home. By following the steps outlined above, you can achieve professional-looking results with minimal effort.
Proper preparation, choice of appropriate paint, and correct application are essential to producing a stunning textured wall that will enhance your living space.
Step | Description |
|---|---|
1 | Choose the appropriate textured paint and gather necessary tools such as a roller, brush, paint tray, and drop cloth. |
2 | Prepare the surface by cleaning it, removing any dirt, dust, or grease. Fill any cracks or holes with a suitable filler and allow it to dry. |
3 | Apply a primer to improve paint adhesion, if necessary. Allow primer to dry thoroughly before applying textured paint. |
4 | Stir the textured paint well and pour it into the paint tray. Make sure to follow the manufacturer’s instructions for the appropriate application method. |
5 | Using the roller, brush, or other recommended tool, apply the textured paint onto the wall in thin, even coats. Work in small sections to ensure even coverage and texture. |
6 | Allow the paint to dry for the recommended time between coats, as indicated by the manufacturer’s instructions. Apply additional coats as needed to achieve the desired texture. |
7 | Once the final coat of textured paint has dried, clean up any drips or spills and dispose of used materials properly. |
Primer: Essential for Textured Wall Painting?
Priming textured walls before painting is an essential step that should not be skipped.
• Why is Priming Necessary?
Priming is an important part of the painting process because it creates a barrier between the wall and the paint, which helps prevent peeling, cracking, and other damage.
Additionally, primer promotes better adhesion, making paint application smoother and more even. This ensures a professional-looking result that will last much longer than paint applied without a primer.
When it comes to textured walls, priming is especially critical. The uneven surface can cause paint to be absorbed unevenly, leading to an irregular and inconsistent finish.
Primer helps create a more uniform surface, allowing the paint to go on smoothly and preventing problems such as patchiness and blotchiness.
• Types of Primers for Textured Walls
There are various types of primers available on the market, but not all are suitable for textured walls. When selecting a primer for your project, consider the following:
– Oil-Based Primers
Oil-based primers are an excellent choice for textured walls because they provide excellent adhesion and penetrate deep into the surface. They are ideal for surfaces with significant texture or porous materials like wood or concrete.
However, oil-based primers may produce strong odors during the application process. Therefore, adequate ventilation is essential when using these primers indoors.
Additionally, oil-based primers may not be compatible with all paint types, so be sure to read product labels carefully before purchase.
– Acrylic Latex Primers
Acrylic latex primers are a versatile and popular choice for many painting projects, including textured walls. They are water-based, so they are easier to clean up and have less odor compared to oil-based primers.
These primers are suitable for use with most paint types, including latex and acrylic paints. They also provide good adhesion and a smooth base for paint application.
– High-Build Primers
High-build primers, sometimes called surfacers, are specifically designed for textured surfaces. These primers are thicker than standard primers, allowing them to fill in small gaps and irregularities on the wall.
High-build primers can be oil-based or water-based, and they create a uniform surface for paint, ensuring a smooth and even finish. These primers are particularly useful when dealing with heavy textures or when trying to smooth out a wall before painting.
• Best Practices for Priming Textured Walls
A successful painting project starts with proper preparation. When preparing to prime and paint textured walls, consider the following best practices:
– Clean the Surface
Before applying primer, it’s important to clean the wall thoroughly. Dust, dirt, and grease can interfere with primer adhesion and negatively affect the final outcome.
Use a vacuum with a brush attachment to remove any loose debris, and then wipe down the wall with a damp cloth or sponge to eliminate finer particles. For particularly dirty surfaces, mild soap and water may be necessary.
– Repair Any Damage
Minor damage, such as small cracks or holes, should be repaired before priming. Use the appropriate filler or patching compound, and allow it to dry completely before proceeding. This will help prevent imperfections from showing through the paint and ensure a smooth, professional finish.
– Apply the Primer
When applying primer to a textured wall, use a roller with a thick nap (at least inch) to ensure good coverage. This will help the primer reach into all the nooks and crannies of the textured surface.
Work in small sections, using a brush to cut in around edges and corners, followed by a roller for the main surface. Allow the primer to dry completely, according to the manufacturer’s instructions, before applying paint.
– Use Quality Paint
After priming, it’s crucial to use high-quality paint for the best possible results. Cheap paints may have poor coverage, requiring additional coats, or they may not adhere well to the primed surface.
Invest in a paint that is known for its durability and coverage. This will not only produce a better-looking result but will also save time and money in the long run.
• In Conclusion
Priming textured walls before painting is crucial to achieving a professional and long-lasting finish. By following these guidelines and using the appropriate products for your project, you can enjoy beautiful, painted, textured walls that will stand the test of time.
| Do you have to prime the textured wall before painting? | |
|---|---|
| Textured wall | Priming required? |
| Yes | It is recommended to prime the textured wall before painting, as it helps to ensure proper adhesion of the paint, as well as to improve the overall appearance and durability of the painted surface. |
Sanding Textured Walls Prior to Painting: Is it Necessary?
• Importance of Surface Preparation
Preparing walls for painting is the key to achieving professional-looking results. One crucial aspect of surface preparation is sanding – particularly when dealing with textured walls. The need to sand textured walls before painting is a topic that can stir up differing opinions among experts.
– When Sanding is Essential
Sanding textured walls is typically considered necessary when:
- Imperfections or damage are present: If there are areas with dents, cracks, or unevenness, sanding is required to smooth out these imperfections and provide a uniform surface for painting.
- Changing the wall texture: If you want to modify or remove the current texture of your walls, sanding is crucial to achieving a clean, smooth surface. This will ensure the new texture or paint adheres correctly and creates a pleasing final result.
- Paint adhesion issues: The existing texture may have problems with paint peeling, chipping, or flaking. In such cases, sanding will help create a surface that ensures better adhesion of the new paint.
– When Sanding May Not Be Necessary
In certain cases, sanding textured walls before painting may not be required:
- Newly installed drywall: If your textured wall is on newly installed drywall, the surface will already be smooth and free of imperfections. In this situation, thorough cleaning and priming should be sufficient preparation.
- Previously painted textured walls: If the existing paint is in good shape without any visible damage or wear, sanding may not be necessary. Instead, proper cleaning, de-glossing, and priming should suffice.
However, it’s important to note that even when sanding is not strictly necessary, it can still provide benefits such as a smoother surface and improved paint adhesion. So, it’s worth considering if you’re aiming for the best possible results.
• The Sanding Process
– Selecting the Right Sandpaper
Choose a medium-grit (80-120 grit) sandpaper for sanding textured walls. Coarser grits may cause damage, while finer grits may not provide the desired level of smoothness.
– Proper Sanding Techniques
- Wear safety gear: Always wear a dust mask and goggles to protect yourself from dust and debris.
- Use a sanding block: Wrap your sandpaper around a sanding block for better control and consistent pressure.
- Sand in a circular motion: Move your sanding block in small, circular motions, applying consistent pressure across the surface.
- Check your progress: Frequently examine your work to ensure the surface is smooth and free of imperfections. Touch up any remaining uneven areas.
- Clean up: When you’re satisfied with the results, use a vacuum and damp cloth to remove all sanding debris from the wall.
• Post-Sanding Steps
– Repairing Damage
Inspect the sanded surface for any damage or imperfections, such as dents, cracks, or holes. Depending on the severity of the damage, you may need to apply drywall compound or patching material before painting. Allow any repairs to dry completely and lightly sand them to achieve a smooth finish.
– Priming
Applying primer is essential after sanding, as it prepares the wall for paint adhesion. Use a high-quality primer designed for textured surfaces with a roller cover made for rough surfaces. Apply primer in a thin, even layer and allow it to dry thoroughly according to the manufacturer’s instructions.
– Painting
Once the primer has dried, you’re ready to apply paint. Use a roller cover designed for textured surfaces to ensure proper paint application. Apply the paint in thin, even layers, allowing each coat to dry thoroughly before applying the next.
• Final Thoughts
While sanding textured walls before painting may not always be necessary, it can play a vital role in achieving a professional and long-lasting finish. By taking the time to properly sand, repair, prime, and paint your walls, you can transform your space and enjoy beautiful results for years to come.
If you’d like to learn more about wall preparation techniques, the Painting and Decorating Contractors of America (PDCA) provides valuable resources and information on their website (pdca.org).
Textured Walls Type | Sanding Necessary? |
|---|---|
Light Texture | Not required, but can be done to ensure a smooth paint finish |
Medium Texture | Recommended to lightly sand for better paint adhesion |
Heavy Texture | Required to sand to create an even surface for painting |
Uneven or Damaged Texture | Required to sand and may need patching or re-texturing before painting |
Top Methods for Using Textured Paint Effectively
Textured paint can give your walls a unique, eye-catching appearance. It is not only an excellent technique to add personality to your space but also a practical solution to conceal imperfections on your walls. However, painting with textured paint requires careful planning and execution.
The following guide offers expert tips and recommendations to help you achieve stunning results.
• Choose the Right Type of Textured Paint
Textured paint is available in various formulations, each suited for different applications. The first step in painting with textured paint is to choose the right type. Here are the most common types available in the market and their characteristics:
- Premixed Texture Paint: Ideal for beginners, this paint contains sand-like particles that offer a gritty finish. It comes ready to use and generally requires no additional preparation, making it convenient for small DIY projects.
- Smooth Texture Paint: Unlike premixed texture paint, smooth texture paint has a more subtle finish. It requires a special application technique to achieve the desired texture but results in a sophisticated, professional look. This type of paint is well-suited for larger surfaces or areas where you want a more refined appearance.
- Self-Mixing Texture Paint: This option allows you to mix your preferred texture medium (like sand, perlite, or silica) into a regular paint. You can control the texture by adjusting the amount of medium added to the paint. This is an excellent choice if you need a specific texture for your project.
• Prepare the Surface
Proper surface preparation is crucial for successful textured paint application. Follow these steps to ensure your walls are ready for painting:
- Clean the Surface: Remove dust, grease, and dirt using mild detergent and warm water. Rinse the surface with clean water and let it dry completely.
- Repair Damaged Areas: Inspect the walls for cracks, peeling paint, or holes, and repair them using the appropriate materials like patching compound or caulk.
- Prime the Surface: To ensure proper adhesion and a consistent finish, apply a high-quality primer to the surface. Allow the primer to dry completely before proceeding with the textured paint application.
• Gather the Necessary Tools and Materials
Having the right tools at hand is essential for a successful textured paint application. Depending on the type of textured paint you choose and the desired finish, you might need some or all of the following tools:
- Paint roller
- Deep nap roller cover
- Paintbrush
- Trowel
- Hawk
- Paint tray
- Stir stick
- Drop cloths or tarps
- Painter’s tape
- Ladder
You can consult the manufacturer’s instructions on your chosen textured paint, or check reputable sources like Bob Vila for more information on the necessary tools for various techniques.
• Apply the Textured Paint
With the surface prepared and all the necessary tools at hand, you can now proceed with the actual application of textured paint. Here are some general tips to follow:
- Protect Surrounding Areas: Use drop cloths or tarps to protect your floors and furniture. Also, apply painter’s tape to trim, baseboards, and other areas where you don’t want the textured paint to seep.
- Stir the Paint Thoroughly: Before painting, stir the textured paint thoroughly to ensure the texture particles are evenly distributed. If you are using self-mixing texture paint, mix your texture medium with the paint according to the manufacturer’s instructions.
- Use the Right Application Technique: Depending on the desired finish, you can apply textured paint using a roller, brush, trowel, or a combination of tools. For less textured finishes, use a deep nap roller cover and apply the paint in a “W” or “M” pattern. For more textured finishes, you might need to apply the paint with a trowel, creating patterns like swirls, stipples, or knockdowns. Remember to practice your chosen technique on a sample board before applying it to your walls.
- Apply Multiple Coats if Necessary: Some textured paint finishes may require multiple coats to achieve the desired result. Allow each coat to dry completely before applying the next one, and ensure that you maintain a consistent application technique throughout the process.
• Finishing Touches
Once your textured paint has dried, you can complement it with a complementary or contrasting trim color, adorn your walls with artwork or photographs, and enjoy the unique ambiance created by your freshly painted space.
Keep in mind that textured paint surfaces might require special care when cleaning or repainting, so ensure that you consult the manufacturer’s recommendations or sources like Family Handyman to maintain your beautiful textured walls in excellent condition.
With proper planning, preparation, and application techniques, you can create stunning walls using textured paint. Follow these expert recommendations, and let your creativity shine through with a unique and appealing wall finish.
Step | Description |
|---|---|
1. | Choose the right textured paint: Consider factors such as the type of surface you’re painting and the desired texture effect. |
2. | Prep the surface: Clean the surface to remove dirt, grease, or dust. If necessary, patch and repair any damages or cracks. |
3. | Apply a primer: Use a high-quality primer and let it dry according to the manufacturer’s instructions. |
4. | Choose the right tools: Brushes, rollers, and special texture tools contribute to the final appearance of your textured paint. |
5. | Start painting: Apply the textured paint in a consistent pattern, working in small sections to maintain control over the texture. |
6. | Create the desired texture: Use the chosen tools and techniques to create the texture effect you want, whether it’s stippling, sanding, or other methods. |
7. | Allow the paint to dry: Allow the textured paint to dry completely according to the manufacturer’s instructions. |