Surface Quality Assessment Before Prep. What Pros Say
One of the most critical aspects of any painting or coating project is ensuring that the surface is properly prepared before application. But how can you be confident that the surface quality is up to par? Worry no more. Our team of experts has put together an efficient and reliable method to assess the surfaces before you begin the preparation process.
Surface quality assessment before prep:
Surface quality assessment before preparation is crucial to ensure the durability and reliability of the final product. It identifies potential issues such as surface defects, contamination, or imperfections. Employing appropriate inspection techniques, maintaining surface cleanliness, and following best practices during the preparation process can significantly improve product performance and reduce failure risks.

Dive into our comprehensive guide on the surface quality assessment before preparation. Uncover expert tips, techniques, and best practices to ensure impeccable results every time. Don’t miss out. Read on and elevate your skills to new heights.
Contents
- 1 Evaluating Surface Quality Prior to Preparation
- 2 Methods for Assessing Surface Readiness Before Painting
- 3 Essential Steps in the Surface Preparation Process
- 4 Importance of Surface Preparation Prior to Coating
- 5 Final Stage in Surface Prep Before Coating Application
Evaluating Surface Quality Prior to Preparation
Surface quality assessment is an essential part of many industrial processes, such as painting and coating, welding, and non-destructive testing. It helps to ensure the durability and reliability of the final product, affecting both its performance and aesthetic appeal.
• Importance of Surface Quality Assessment
The primary goal of checking the surface quality before preparation is to identify any potential issues that may be present, such as surface defects, contamination, and other imperfections. Failure to perform this step can lead to several problems, such as:
- Poor adhesion of coatings, leading to peeling or delamination
- Formation of bubbles or blisters during the coating process
- Reduced corrosion resistance
- Weakening of welded joints or bonds between materials
- Increased likelihood of voids, inclusions, or other defects in non-destructive testing
In short, ensuring adequate surface quality before proceeding with any form of preparation or processing is crucial in obtaining a high-quality final product and minimizing the risk of product failure or reduced performance.
• Techniques for Identifying Surface Defects
Several common methods for surface quality assessment are available, with each offering its own unique benefits and limitations. Some of the most widely used techniques include:
– Visual Inspection
Visual inspection is often the first step in the assessment process and involves simply examining the surface using the naked eye or magnification tools such as magnifying glasses or stereo microscopes.
While this method is the least costly and most straightforward, it heavily depends on the inspector’s experience and skill and may be less suitable for detecting more minor defects.
– Liquid Penetrant Inspection
Liquid penetrant inspection (LPI), also known as dye penetrant inspection or penetrant testing, is a non-destructive testing technique that uses a liquid with visible or fluorescent dye to detect surface discontinuities.
This technique is highly sensitive and relatively simple, making it ideal for detecting small defects such as cracks, discontinuities, or porosity in non-porous materials.
– Magnetic Particle Testing
Magnetic particle testing (MPT) is another non-destructive testing method used to detect surface and near-surface discontinuities in ferromagnetic materials. It involves magnetizing the test object and then applying fine magnetic particles, which will accumulate around any areas where there is a discontinuity.
This method is particularly useful for detecting surface defects in materials that can be magnetized.
– Ultrasonic Testing
Ultrasonic testing (UT) uses high-frequency sound waves to identify spacing, discontinuities, and defects in materials by measuring variations in the sound waves reflection and transmission.
This method can detect both surface and subsurface defects and is useful for assessing the quality of welds, composite materials, and a wide range of other applications.
• Ensuring Proper Surface Cleanliness
Besides detecting physical defects, it is also essential to evaluate the surface’s cleanliness prior to the preparation process. Contamination with grease, oil, dirt, and other substances may affect the adhesion properties of coatings, lead to defects in welding, and affect the accuracy of non-destructive testing results.
To ensure proper surface cleanliness, the following steps are recommended:
- Perform initial cleaning using a degreasing solvent or cleaner, such as acetone or alcohol, to remove oils, grease, and other contaminants.
- Apply additional cleaning, such as high-pressure water jet or abrasive blasting, to remove any remaining dirt, rust, or scale from the surface.
- Conduct a rinse with a suitable solvent or deionized water to remove any residues or contaminants.
- Verify the cleanliness of the surface using inspection techniques such as water break tests or contamination detection instruments that measure the presence of residual contaminants.
• Conclusion
Surface quality assessment before preparation plays a significant role in obtaining a high-quality final product and minimizing various risks associated with inadequate surface quality.
By employing the appropriate methods for detecting surface defects, ensuring surface cleanliness, and following best practices during the preparation process, significant improvements in product durability, reliability, and performance can be achieved.
Methods for Assessing Surface Readiness Before Painting
Proper surface preparation is crucial for achieving a long-lasting, high-quality paint job. Without thorough preparation, paint is more likely to peel, crack, or fade prematurely. In this comprehensive guide, we will discuss the steps necessary to check surface preparation before painting.
• Assessing the Surface Condition
Before you begin any surface preparation, you need to assess the condition of the surface to determine the necessary steps for proper preparation.
– Checking for Dirt and Dust
Dirt and dust can lead to poor paint adhesion and prevent the paint from properly bonding to the surface. To check for dirt and dust:
- Run your hand over the surface to feel for any rough or gritty areas.
- Visually inspect the surface for any visible dirt, dust, or debris.
If you find dirt and dust, clean the surface using a brush or vacuum, followed by a damp cloth or sponge to remove any remaining residue.
– Identifying Cracks, Holes, and Defects
Cracks, holes, and other defects can compromise the integrity of the paint job and allow moisture to penetrate the surface. To identify these issues:
- Examine the surface closely for any visible cracks, holes, or defects.
- If you find any, you will need to repair these areas before proceeding.
Fill small cracks and holes with a suitable filler, such as wood filler for wood surfaces or plaster for walls. For larger defects, follow the appropriate procedure for the specific material. For instance, for damaged drywall, use a patch and repair kit.
– Surface Types and Treatments
Different surfaces require different preparation techniques to ensure proper paint adhesion. Some common surface types and their respective treatments include:
- Wood: Sand the surface to remove any old paint and create a smooth surface for painting. Prime the wood with a suitable primer to seal the surface and prevent moisture penetration.
- Metal: Remove any rust using a wire brush or sandpaper, and prime the surface with a corrosion-resistant primer.
- Masonry or concrete: Clean any efflorescence (white, powdery substance) using a wire brush or masonry cleaner. Repair any cracks or holes with a masonry patching compound. Prime the surface with a masonry primer to ensure proper paint adhesion.
- Wallpapered or textured surfaces: Remove the wallpaper or texture, if possible. If not, prime the surface with an appropriate primer to create a smooth, even base for painting.
• Testing Surface Cleanliness
Once you have addressed any issues found during the initial surface assessment, you will need to test the cleanliness of the surface to ensure it is free from contaminants that may interfere with paint adhesion.
– Water Break Test
The water break test involves spraying the surface with water and observing how the water behaves. If the water sheets off or drains evenly, the surface is clean. If the water beads or separates, there may be contaminants present, and further cleaning is required.
– Adhesion Test
An adhesion test involves applying a small patch of paint to the prepared surface and allowing it to dry. After approximately 24 hours, use a scraper or similar tool to attempt to remove the paint. If the paint adheres well and does not scrape off easily, the surface is clean and ready for painting.
If the paint comes off easily, further cleaning and preparation may be required.
– Surface Contaminant Detection
In some cases, it may be necessary to perform more advanced testing to detect the presence of specific contaminants, such as salts or oils. Various test kits are available to detect these contaminants and provide recommendations for their removal.
• Preparing the Surface for Painting
Once you have verified that the surface is clean and free from defects or contaminants, you can begin the final preparation steps before painting.
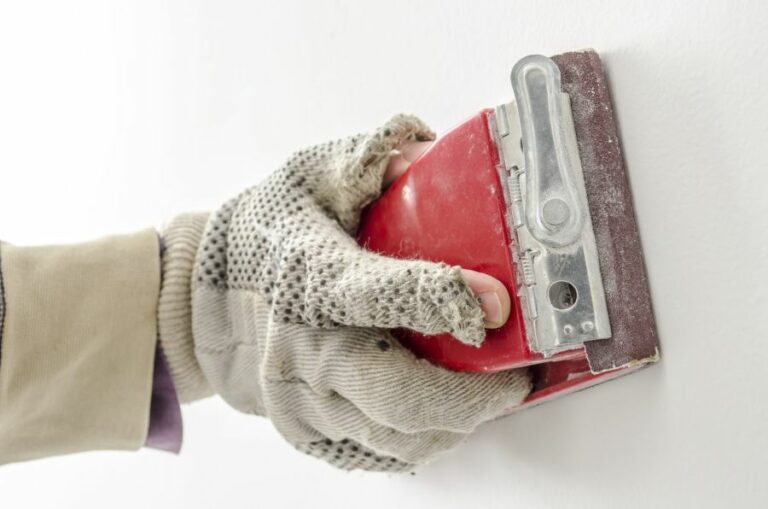
– Sanding and Smoothing
Sanding the surface ensures that it is smooth and creates a proper base for paint adhesion. Use appropriate sandpaper grit for the material being prepped and sand in the direction of the grain for wood surfaces. Vacuum or wipe the surface with a damp cloth to remove any sanding dust.
– Protecting Adjacent Surfaces
Before beginning the painting process, protect adjacent surfaces by masking them with painter’s tape and covering floors with drop cloths. This will help prevent paint from accidentally being applied to surfaces you do not want to be painted.
• Conclusion
Proper surface preparation is essential for achieving a high-quality, durable paint job. Always assess the surface condition, perform necessary repairs, clean the surface thoroughly, and conduct appropriate tests for cleanliness and adhesion. Ensuring that you follow these steps will help guarantee your paint job’s success and longevity.
Step | Description |
|---|---|
1 | Inspect the surface for any visible contaminants, such as dirt, grease, or oils. Clean the surface if needed. |
2 | Examine the surface for any loose or peeling paint. Scrape away any loose or peeling paint using a scraper or wire brush. |
3 | Look for any cracks, holes, or imperfections in the surface. Fill these with a suitable filler or caulking, then sand them smooth once dry. |
4 | Sand the entire surface to create a smooth, even texture. Use a fine-grit sandpaper for smooth surfaces, and a medium-grit sandpaper for rougher surfaces. |
5 | Wipe the surface clean with a damp cloth or sponge to remove any sanding dust or debris. |
6 | Apply a layer of primer to the surface, if needed, to provide a uniform base for the paint. Allow the primer to dry as per the manufacturer’s instructions. |
7 | Check the surface again for any imperfections. If necessary, apply a second coat of filler and re-sand any problem areas. |
8 | Perform a final inspection of the surface to ensure it is clean, smooth, and properly prepared for painting. |
Essential Steps in the Surface Preparation Process
Surface preparation is a crucial step in many industries, such as construction, painting, and manufacturing. Properly preparing surfaces can significantly enhance the quality, durability, and performance of materials and coatings.
• Importance of Surface Preparation
To achieve optimal results, it is essential to understand the importance of surface preparation. Proper surface preparation is the foundation for the success of any coating or treatment applied to a surface.
It can directly affect the performance and longevity of materials, as well as the final appearance of a finished product.
Surface preparation helps ensure proper adhesion of coatings, preventing premature failure or deterioration. It also removes surface contaminants, such as dust, grease, and corrosion, which can negatively affect the quality and performance of materials.
Additionally, proper surface preparation can promote a smooth and even finish, resulting in a professional and aesthetically pleasing final product.
• Inspection and Evaluation
The first stage of surface preparation is the inspection and evaluation of the surface. This step involves assessing the current condition of the material and determining the appropriate surface preparation methods required.
During the inspection, it is essential to identify any visible contaminants, such as dirt, oil, or rust, which may require removal prior to surface preparation.
Additionally, it is crucial to examine the surface for any damage or defects, such as cracks, scratches, or corrosion, as these issues may need to be addressed before surface preparation can begin.
• Cleaning and Degreasing
Once the surface has been thoroughly inspected and evaluated, cleaning and degreasing are typically the next steps in the surface preparation process.
This stage involves the use of various cleaning methods and materials to remove contaminants that can negatively impact the adhesion, performance, and appearance of coatings or treatments.
Cleaning methods can include pressure washing, steam cleaning, or the use of solvents and degreasers to break down and remove surface contaminants such as dirt, oil, and grease.
I recommend using cleaning products and methods specifically formulated for the type of surface and contaminant you are working with to ensure thorough and effective cleaning.
• Abrasive Blasting
Abrasive blasting, also known as sandblasting, is a common and highly effective method of surface preparation. This process involves using a high-pressure stream of abrasive material, such as sand, glass beads, or steel shot, to remove surface contaminants, roughen the surface, and create a uniform profile.
I recommend abrasive blasting for surfaces that require the removal of heavy rust, mill scale, or old paint. The process can also be used to etch certain materials, such as glass or metal, to improve adhesion for coatings or treatments.
The type of abrasive material and the pressure of the blasting will depend on the specific requirements of your project.
• Mechanical Surface Preparation
Mechanical surface preparation involves using tools and equipment to modify the surface texture and remove contaminants or defects. Common mechanical surface preparation techniques include grinding, sanding, and wire brushing.
Grinding is well-suited for addressing surface defects or removing thicker coatings, while sanding is often used for smoothing and leveling surfaces prior to the application of coatings. Wire brushing is a useful method for removing loose rust or paint from surfaces, particularly when working with metal.
It is essential to select the appropriate mechanical surface preparation method for your specific project requirements to achieve the best results.
• Chemical Surface Preparation
In some instances, chemical surface preparation may be necessary to treat a surface effectively. This process involves using chemical agents, such as acids or alkaline solutions, to remove contaminants, etch the surface, or modify the surface chemistry.
For example, acid etching is often used on concrete surfaces to create a porous profile, allowing for improved adhesion of coatings or treatments. Alkaline cleaning solutions can be used to remove oil, grease, and other contaminants from metal surfaces.
When selecting a chemical treatment, it is crucial to use a product specifically designed for your intended surface material and to follow all safety precautions and handling guidelines.
• Final Inspection and Verification
After completing the surface preparation process, a final inspection and verification are necessary to confirm the surface is adequately prepared for the intended application.
This step typically involves visually evaluating the surface for cleanliness, observing the surface profile, and performing any additional testing or measurements needed to assess the preparedness of the surface.
Following these stages of surface preparation will ensure optimal adhesion, performance, and longevity of materials and coatings applied to a surface. By understanding the importance of surface preparation and following expert recommendations, you can achieve professional-quality results for your projects.
Stage | Description |
|---|---|
Stage 1 | Assessing the surface (identifying defects, determining surface cleanliness, measuring the surface profile, and checking for soluble salts) |
Stage 2 | Surface cleaning (removing dirt, grease, oil, and other contaminants using solvents, detergents, or degreasers) |
Stage 3 | Roughening the surface (abrasive blasting, grinding, or sanding to create a surface profile to promote adhesion) |
Stage 4 | Repairing surface defects (filling cracks, holes, or other imperfections with suitable materials) |
Stage 5 | Surface conditioning (applying a primer or intermediate coat to maintain the prepared surface and enhance adhesion) |
Importance of Surface Preparation Prior to Coating
A successful coating application relies heavily on proper surface preparation. In fact, inadequate surface preparation is one of the leading causes of coating failures.
• The Role of Surface Preparation in Coating Performance
Surface preparation, as the name suggests, is the process of preparing the surface for coating. It includes cleaning, degreasing, and profiling the surface to provide a suitable substrate for the coating to adhere to. There are a few critical reasons why surface preparation is important before coating:
– Optimal Adhesion
To achieve a strong bond between the coating and substrate, the surface must be clean, free from contaminants, and have an adequate profile. Proper surface preparation will ensure the coating adheres well, leading to a durable and long-lasting finish.
– Enhanced Performance
With an adequately prepared surface, the coating can perform at its best, providing desired properties such as corrosion resistance, anti-fouling, insulation, or aesthetics. On the other hand, a poorly prepared surface may compromise the coating’s protective capabilities, leading to premature failure.
– Extended Service Life
A well-prepared surface and optimal coating adhesion together contribute to longer service life for the coated structure, reducing the need for frequent maintenance and repairs.
– Cost-Effectiveness
Although it may seem that thorough surface preparation is time-consuming and costly, doing it right the first time is more cost-effective in the long run. By ensuring the surface is prepared correctly, you are reducing the chances of coating failure and the need for costly repairs or recoating.
• Types of Surface Preparation
There are various techniques for surface preparation, ranging from simple cleaning to more advanced methods. Some common types include:
- Cleaning and degreasing
- Abrasive blasting
- Power tool cleaning
- Chemical treatments
Selecting the most suitable method depends on the substrate material, coating type, and performance requirements. It is crucial to follow the coating manufacturer’s recommendations and industry standards to ensure the best results.
• Recommendations for Effective Surface Preparation
Based on personal experiences and industry best practices, the following recommendations can help in achieving effective surface preparation before coating:
– Assess the Surface Condition
Before starting any surface preparation, assess the substrate for physical and chemical conditions to determine the best course of action. Identify the presence of rust, mill scale, previous coatings, or contaminants, such as oil and grease.
– Choose the Right Method
Select the appropriate surface preparation method based on the substrate material, coating type, and desired properties. Consult with the coating manufacturer or a specialist to ensure the best choice is made.
For example, abrasive blasting is often recommended for steel surfaces, while chemical treatments are more suitable for sensitive aluminum substrates.
– Follow Industry Standards and Guidelines
Ensure that the chosen surface preparation method is conducted according to industry standards and guidelines, which outline the requirements for achieving desired surface cleanliness and profile.
For example, a commonly referred to standard is the SSPC/NACE joint surface preparation standards for various methods.
– Validate Surface Readiness
Once the surface preparation process is complete, verify that the required cleanliness and profile have been achieved before applying the coating. This may involve visual inspection or more advanced techniques such as replica tape or surface profilometers.
– Maintain Cleanliness Before Coating
Avoid any contamination of the surface after surface preparation and before coating. Ensure that the surrounding environment is clean, and take necessary precautions, such as using coverings or controlling access to the area.
• In Conclusion
Proper surface preparation is critical for ensuring optimal coating adhesion, performance, and service life. By following the recommendations mentioned above, you can significantly improve the chances of a successful coating application and avoid the pitfalls of inadequate surface preparation.
Remember to always consult with specialists or coating manufacturers to get the best guidance for your specific situation. Don’t underestimate the importance of investing time and effort in proper surface preparation it will pay off in the long run by delivering a durable and reliable coated structure.
Final Stage in Surface Prep Before Coating Application
Surface preparation plays a critical role in determining the longevity and effectiveness of coating applications. Properly preparing the surfaces before the application of coatings ensures that the coating adheres well to the surface, minimizing the chances of premature failure.
• Importance of Thorough Surface Preparation
Surface preparation is not just about cleaning the surface and removing dirt or debris; it involves a complete analysis of the surface condition, removing existing coatings or contaminants, and ensuring that the surface has the right profile and roughness.
Inadequate surface preparation can lead to poor adhesion, blistering, peeling, or even complete failure of the coating system.
As industry professionals, we recommend that you never compromise on the quality of surface preparation, as it is the foundation on which a high-performance coating system is built.
A well-prepared surface will not only enhance the life of your coating but also ensure optimal performance and protection.
• Last Stage of Surface Preparation: Surface Profiling and Inspection
The last stage of surface preparation is crucial in ensuring that the surface is completely ready for coating application.
This stage involves surface profiling and an inspection to ensure that the surface meets the specific requirements for a successful coating. Let’s take a closer look at the various aspects of this stage.
– Surface Profiling: Achieving the Right Surface Roughness
Profiling the surface involves creating controlled surface roughness to enhance the adhesive properties of the coating. The required surface roughness depends upon the type of coating to be applied and the performance requirements of the coating system.
There are several methods to achieve the desired surface profile, such as abrasive blasting, grinding, etching, or mechanical methods like power tools or needle guns. It is essential to choose a suitable method depending on the project requirements and surface conditions.
– Inspection: Ensuring Compliance with Surface Preparation Standards
Once the surface has been profiled as per the requirements of the coating system, a detailed inspection must be carried out. This inspection ensures that the surface has been adequately prepared and is free from contaminants, thus preventing complications with the coating application.
Several industry standards govern surface preparation for coating applications, such as SSPC (Steel Structures Painting Council) and NACE (National Association of Corrosion Engineers).
It is necessary to follow these standards, as they ensure that the surface preparation process is done correctly and consistently.
– Verifying Surface Cleanliness, Surface Profile, and Ambient Conditions
During the inspection, several aspects of the surface preparation process must be verified, including surface cleanliness, surface profile, and ambient conditions.
- Surface Cleanliness: The surface should be thoroughly cleaned, removing any existing coatings, rust, oil, grease, or other contaminants that might affect the coating adhesion. This can be done using cleaning methods such as solvent cleaning, steam cleaning, or high-pressure water cleaning, followed by a visual inspection.
- Surface Profile: The surface profile should be measured using specific instruments such as a surface profile comparator or a replica tape test to ensure it meets the requirements of the coating system. These instruments can help in quantifying the amount of roughness created on the surface.
- Ambient Conditions: The ambient conditions, such as temperature, humidity, and air pressure, must be monitored closely during the surface preparation process. These conditions can have effects on the performance of the coating system. For example, applying a coating in high humidity conditions can lead to premature failure or poor adhesion.
• Final Thoughts
The last stage of surface preparation is crucial for achieving a durable and effective coating application.
By profiling the surface and performing a thorough inspection, you can ensure that the surface is free from contaminants and has the required roughness, which will significantly improve the adhesion and performance of the coating system.
As industry professionals, our recommendation is to invest time and effort into the surface preparation process, as it lays the foundation for a successful coating application.
By adhering to industry standards and best practices, you can ensure that your surface preparation is done correctly, leading to a long-lasting, high-performance coating system.