Expert Wire Brush Cleaning Methods
As someone with extensive experience in wire brush cleaning, I have perfected various techniques and methods to achieve outstanding results. Whether dealing with rusty tools or grime on your grill, having the right approach to wire brush cleaning can make all the difference.
Expert wire brush cleaning methods:
Expert wire brush cleaning methods involve selecting the appropriate brush type, properly preparing the work area, using suitable techniques for different surfaces, and adhering to safety precautions. Key factors include choosing stainless steel, brass, carbon steel, or nylon brushes, applying the right pressure, following the brushing pattern, and wearing protective gear.

Discover expert wire brush cleaning methods that will make your surfaces sparkle like new! From rust removal to paint stripping, our techniques will help you achieve the desired results. Read on for exclusive tips from professionals and elevate your wire brush cleaning game!
Contents
- 1 Top Techniques for Effective Wire Brush Cleaning
- 2 Tips for Thoroughly Cleaning Wire Brushes
- 3 Preparing Joints for Welding: Best Cleaning Practices
- 4 Wire Brush Maintenance: Keeping It in Top Condition
- 5 A Guide to Cleaning Metal Bristle Brushes
Top Techniques for Effective Wire Brush Cleaning
Wire brushes are essential tools in various industries and households for cleaning applications. They are highly effective in removing rust, paint, and other residues from different surfaces.
• Choose the Right Wire Brush
Before diving into the cleaning process, it is essential to select the most appropriate wire brush. Wire brushes come in various sizes, shapes, and bristle materials, with each type designed for specific applications. Some common types include:
– Stainless Steel Wire Brushes
Ideal for usage on stainless steel, aluminum, copper, bronze, and brass surfaces. Using a carbon steel brush on these surfaces can lead to contamination and corrosion.
– Brass Wire Brushes
These brushes are suitable for use on non-sparking or soft metals such as brass, bronze, and copper. Additionally, brass brushes are appropriate for non-ferrous metal cleaning.
– Carbon Steel Wire Brushes
They are suited for aggressive cleaning on surfaces like iron, steel, and other hard metals. Carbon steel brushes effectively remove rust, paint, and scale.
– Nylon Wire Brushes
Perfect for delicate surfaces that may be prone to scratches. They are ideal for plastics, fiberglass, or wood cleaning.
• Proper Preparation
Before starting the cleaning process, be sure to follow these steps:
- Wear proper protective gear: Safety goggles, gloves, and long-sleeved shirts are essential to protect yourself from potential injuries.
- Secure the part or surface to be cleaned: Fasten the object onto a workbench or clamp it securely in a vise.
- Inspect the brush for damage: Check the wire brush for any signs of wear or broken bristles before starting the cleaning.
• Cleaning Techniques for Different Surfaces
– Cleaning Metal Surfaces
- Use gloves: Always wear gloves when handling wire brushes to prevent accidental cuts or scratches.
- Start with a technique called ‘feathering’: Gently skim the brush over the surface before applying more force gradually. This approach prevents any unintentional damage to the object being cleaned.
- Apply appropriate pressure: Apply enough pressure to the brush to effectively remove debris without damaging the base material.
- Avoid excessive use of force: Overdoing the pressure could result in premature brush wear and possible damage to the surface.
- Follow the brushing pattern: For the best results, it is important to follow the brushing pattern of the wire bristles on the brush.
– Cleaning Wooden Surfaces
- Choose a brush with softer bristles: Opt for nylon wire brushes to avoid scratching or gouging the wood surface.
- Test on a small area: Before proceeding with the entire surface, test the brush on a small, less visible portion of the wooden surface. This would help ensure the brush does not damage the wood.
- Brush along the grain: When cleaning wood surfaces, always brush along the wood grain to avoid damaging or scratching the wooden surface.
- Clean corners and crevices: To clean tight spots, use smaller, more precise wire brushes or specialty brushes, such as end brushes or tube brushes.
– Cleaning Plastic Surfaces
- Select appropriate brush: Choose a nylon wire brush to clean plastic surfaces as they offer gentle cleaning that prevents damage.
- Test on an inconspicuous area: As with other surfaces, begin by testing the brush on a small, less visible portion of the surface to confirm that it will not damage the plastic.
- Brush gently: Gently brush the surface with low pressure to remove dirt, dust, and other residue.
- Avoid excessive pressure: Applying too much pressure could cause the plastic surface to melt or deform.
• Safety Precautions
While using wire brushes for cleaning, adhere to the following safety guidelines:
- Always wear personal protective equipment: Goggles, gloves, and long-sleeved shirts are essential in preventing injuries.
- Maintain a proper grip: Hold the brush firmly to prevent it from slipping and causing harm.
- Inspect the brush before use: Check for any signs of damage or foreign objects lodged in the bristles that could injure the user.
- Always follow the manufacturer’s guidelines: Ensure you follow the instructions provided by the brush manufacturer on the recommended use and safety precautions for the specific brush type.
• Conclusion
When done correctly, wire brush cleaning is an efficient and effective method to remove surface contaminants such as rust, paint, and debris.
Choosing the right brush for the surface is imperative, and proper techniques will ensure the desired results without damaging the material being cleaned. Following the advice shared in this article will assist you in achieving expert-level wire brush cleaning.
For further information on brush usage and maintenance, consult OSHA guidelines on wire brushes and power brush safety.
Tips for Thoroughly Cleaning Wire Brushes
Wire brushes are versatile and indispensable tools. They come in handy for various purposes, such as cleaning, smoothing surfaces, and removing paint and rust. However, like any other tools, wire brushes require proper maintenance to ensure optimal performance and longevity.
• Why Cleaning Wire Brushes is Essential
Cleaning wire brushes regularly is essential as it helps to:
- Maintain optimal performance
- Prevent rust and corrosion
- Extend the lifespan of the tools
- Improve safety during use
Ignoring the cleaning process may lead to premature wear and tear of the wire bristles, requiring frequent replacement and affecting the effectiveness of your projects.
• Necessary Tools and Materials
Before you start the cleaning process, gather the following materials:
- A container (large enough to accommodate your wire brush)
- Washing detergent or cleaning solvent
- Warm water
- A soft bristle brush or old toothbrush
- A wire brush comb (optional)
- Protective gloves
- Eye protection
- Clean rags or towels
- Lubricant or rust inhibitor (optional)
Always remember to wear protective gloves and eye protection while cleaning wire brushes to prevent accidents and injuries.
• Step-by-Step Cleaning Process
– Step 1: Fill the Container With Warm Water and Detergent
Fill the container with warm water, ensuring that it covers the wire brush entirely. Add a generous amount of detergent or cleaning solvent, then mix the solution to create a soapy mixture.
– Step 2: Soak the Wire Brush
Place the wire brush in the soapy water, making sure the bristles are submerged completely. For heavily soiled brushes, let them soak for about 15-20 minutes. Soaking softens accumulated dirt, debris, and paint, making it easier to clean the bristles.
If you’re working with a solvent-based solution, follow the manufacturer’s instructions regarding soaking time and safety precautions.
– Step 3: Scrub the Bristles
After soaking, use a soft bristle brush or an old toothbrush to scrub the bristles gently. Start from the base, moving towards the tips. This process dislodges dirt, debris, and paint particles, which might be stuck between the bristles.
Ensure you don’t apply excessive force, which may damage the bristles.
A wire brush comb can also be used to clean the bristles by running it through the wire brush. This approach is beneficial for removing larger debris and straightening bent wire bristles.
– Step 4: Rinse Thoroughly
After scrubbing the bristles, rinse the wire brush under a running tap to remove all soap and dislodged dirt. Ensure that no detergent or solvent remains on the brush, as this may cause rusting in the future.
– Step 5: Dry the Wire Brush
Shake off excess water from the wire brush and lay it on a clean rag or towel. Pat dry the bristles using another clean towel to remove as much moisture as possible.
For thorough drying, leave the wire brush in a well-ventilated area with bristles facing down to air dry. Avoid using heat sources as they may damage the bristles or the brush handle.
– Step 6: Apply Lubricant or Rust Inhibitor (Optional)
After drying your wire brush, you may choose to apply a thin layer of lubricant or rust inhibitor to the bristles to prevent rust and corrosion.
A silicone-based lubricant is recommended as it does not attract dirt, unlike oil-based products. Use a clean cloth to wipe away any excess lubricant or rust inhibitors.
Remark: This step is particularly useful for brushes that don’t see regular use or are stored in a humid environment.
• Tips to Keep Your Wire Brushes Clean
- Make it a habit to clean your wire brushes after every use to prevent debris build-up.
- Use a wire brush comb throughout your cleaning activities to remove large debris and maintain bristle alignment.
- Store your wire brushes in a dry and well-ventilated area, away from moisture, to prevent rust and corrosion.
- Periodically inspect the bristles for wear and tear, and replace the brushes if they’re no longer effective.
By following the above guidelines, you will prolong the life of your wire brushes and preserve their effectiveness. The result will be a better outcome for your projects and a safer work environment.
For expert advice on wire brushes and their maintenance, visit the Wire Reinforcement Institute website, an industry-leading organization dedicated to advancing the use of wire and wire products.
Step | Description |
|---|---|
1 | Remove loose debris by gently tapping the brush against a hard surface or using a soft brush to remove accumulated particles. |
2 | Soak the wire brush in a mild detergent solution and warm water to remove grease and grime. |
3 | Scrub the bristles with an old toothbrush to remove dirt trapped between the wires. |
4 | Rinse the brush thoroughly with clean water to remove any remaining soap residue. |
5 | Shake off any excess water and let the brush air dry completely before using or storing it. |
6 | Apply a light coat of oil or rust preventive spray to the metal bristles, if necessary, to prevent corrosion. |
Preparing Joints for Welding: Best Cleaning Practices
• Importance of Joint Cleaning and Preparation
Welding is a process that relies heavily on the quality of the joint and the materials being joined. Proper cleaning and preparation of the joint is critical to ensure a quality weld, which in turn affects the overall integrity and performance of the welded structure.
• The Most Common Method: Grinding
Among the numerous methods of joint preparation and cleaning, the most widely employed is the use of grinding tools. Grinding is a versatile and efficient method that can provide the required surface finish and cleanliness for a wide range of joint surfaces.
– Grinding Tools
Common grinding tools employed in joint preparation are:
- Angle grinders
- Die grinders
- Pneumatic grinders
- Hand files
The right choice of grinding tool depends on the joint’s configuration, the material being welded, and the level of precision required.
Angle grinders are versatile and can be used in numerous applications due to the availability of different attachments, such as grinding wheels, flap disks, or wire brushes. Die grinders are useful for reaching intricate sections of the joint, while hand files can be used for fine-tuning and finishing.
– Grinding Techniques
When grinding a joint, it is crucial to follow proper techniques to avoid introducing surface defects or damaging the base material. Some recommended practices include:
- Use a sharp and appropriate grinding tool for the specific application.
- Hold the grinding tool at the correct angle to achieve the required joint geometry.
- Apply consistent and gentle pressure without forcing the grinder onto the workpiece.
- Do not stay in one spot for too long, as this can overheat the base material and lead to weakening.
• Other Common Methods for Joint Cleaning and Preparation
While grinding is the most prevalent method for joint cleaning and preparation, other techniques can also be employed depending on the specific joint requirements and material properties.
– Chemical Cleaning
Chemical cleaning involves the use of solvents, acids, or alkalis to remove surface contaminants such as oil, grease, dirt, and oxides. It is useful in situations where mechanical methods may be too aggressive or may introduce contaminants.
Common chemical cleaning agents include acetone, isopropyl alcohol, and specialized cleaning solutions. The cleaned joint must be thoroughly rinsed and dried before welding to remove any residual cleaning agent.
The American Welding Society (AWS) provides additional guidance on appropriate cleaning agents for specific metals.
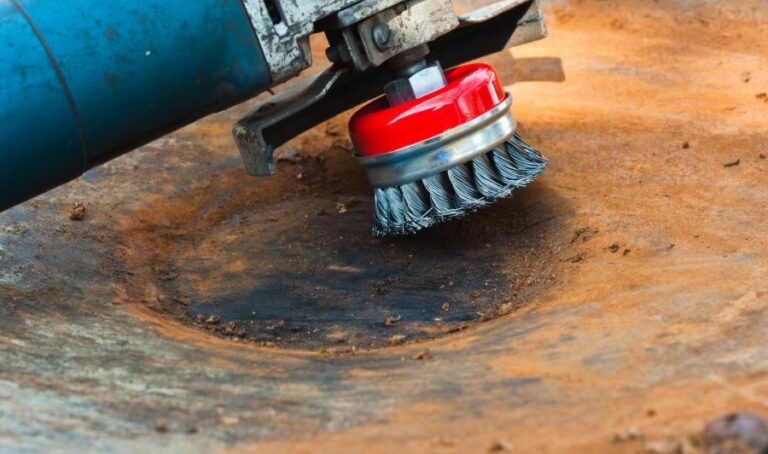
– Wire Brushing
Wire brushing is a simple and effective method for removing loose debris, rust, and scale from the joint surface. It is often used in conjunction with other cleaning methods.
Wire brushes come in various shapes and sizes, including handheld brushes and power tool attachments, depending on the application’s requirements.
– Abrasive Blasting
Abrasive blasting, such as sandblasting or shot blasting, uses compressed air to propel abrasive particles at the joint surface to remove rust, scale, and other contaminants.
It is vital to select an appropriate abrasive type and size for the specific material being welded to avoid introducing impurities into the joint.
Abrasive blasting is only suitable if the subsequent welding processes have a high tolerance for residual abrasive particles on the part.
• Recommendations for Effective Joint Cleaning and Preparation
From my experience in the welding industry, I recommend the following tips for effective joint cleaning and preparation:
- Always refer to the welding procedure’s cleaning requirements and specifications to select the right cleaning method and materials.
- Develop and maintain a clean work environment to minimize the risk of introducing contaminants into the weld joint.
- Inspect the joint after cleaning and before welding to ensure optimal joint cleanliness, removing any residual contaminants or debris.
- When using power tools for joint cleaning, ensure that the tool is in proper working condition and has a sharp and appropriate attachment for the specific application.
In conclusion, proper joint cleaning and preparation play a crucial role in the quality and integrity of the welded structure. Grinding is the most commonly used method, while other methods like chemical cleaning, wire brushing, and abrasive blasting also have their applications.
Regardless of the technique employed, adhering to recommended practices and paying close attention to cleanliness will significantly enhance the weld’s quality and the overall structure’s performance.
Wire Brush Maintenance: Keeping It in Top Condition
Wire brushes are versatile and practical tools commonly used for cleaning and removing paint, rust, and corrosion from various surfaces. However, to make sure your wire brush consistently delivers optimal performance, it is essential to maintain and take care of it properly.
• Choose the Right Wire Brush for the Task
Selecting the appropriate wire brush for your specific task is crucial for maintaining its lifespan and ensuring its efficient operation.
There are different types of wire brushes on the market, including brass wire brushes, stainless steel wire brushes, and carbon steel wire brushes. Each one has its advantages and its specific uses:
- Brass wire brushes are commonly used for cleaning non-ferrous metals or sensitive surfaces where steel wires may harm the material or scratch the surface.
- Stainless steel wire brushes are excellent for removing rust or corrosion from stainless steel surfaces without causing contamination.
- Carbon steel wire brushes are the most aggressive and are mainly used for removing heavy rust or paint but they may be too harsh for some delicate surfaces.
By selecting the proper type of wire brush for your task, you can help extend its lifespan and maintain its efficiency. You can read more about different types of wire brushes at this link from McMaster University.
• Clean the Wire Brush after Each Use
One of the most effective ways to maintain your wire brush’s performance and longevity is to clean it after each use. This will help prevent dirt, debris, or paint build-up that can cause damage to the bristles and reduce their effectiveness.
Here are some recommended steps to clean your wire brush after using it:
- Remove any loose debris from the bristles using your hands or a soft-bristled brush.
- In a bucket, mix a small quantity of mild detergent with warm water.
- Dip the wire brush into the soapy water, then use a soft-bristled brush to scrub off any stubborn debris or build-up on the bristles.
- Rinse the wire brush thoroughly with a water hose, ensuring the water flows through the bristles. This step will help remove soap residues or remaining contaminants from the brush.
- Shake off excess water from the brush and allow it to air-dry before storing it.
• Inspect the Wire Brush Regularly
Regular inspection of your wire brush is essential to identify any wear and tear or damage to the brush that may impact its performance. Look for the following signs during the inspection:
- Broken or bent wire bristles
- Excessive wear or thinning of the bristles
- Loose or damaged handle
If you notice any of these signs, it might be time to replace your wire brush. Continuing to use a damaged or worn brush may lead to poor results and can even be unsafe.
• Proper Storage of Your Wire Brush
Proper storage of your wire brush is another crucial aspect of maintaining its lifespan and efficiency. Follow these guidelines to store your wire brush correctly:
- Store the wire brush in a dry, cool area away from direct sunlight or moisture. Humidity or heat can cause rust or corrosion on the metal wire bristles.
- Hang the wire brush on a peg or hook, or store it in a designated toolbox or drawer. This practice will prevent the brush from being crushed or damaged by other items.
- Ensure the brush is clean and dry before putting it away, as this will prevent mold or mildew from forming in the bristles.
• Stay Safe While Using a Wire Brush
Safety is paramount when using a wire brush. Make sure to follow these safety tips to protect yourself and your wire brush:
- Always wear safety goggles or glasses to protect your eyes from flying debris.
- Use gloves to protect your hands from potential scratches or abrasions.
- Ensure the surface you are working on is stable and secure to avoid accidents.
- If you are using a power-driven wire brush or attachment, follow the manufacturer’s safety and operating guidelines for proper use.
By adhering to these safety measures, you can help preserve your wire brush and minimize the risk of injury.
• In Conclusion
Maintaining your wire brush is an essential aspect of using this versatile and practical tool.
By selecting the right wire brush for the task, cleaning it after each use, inspecting it regularly, storing it properly, and following safety precautions, you can ensure it remains effective and durable for years.
Step | Description |
|---|---|
1 | Inspect the wire brush regularly for damage or wear. |
2 | Remove any debris or buildup from the bristles by gently tapping the brush against a solid surface. |
3 | For heavily soiled brushes, soak the brush in a solution of warm water and mild detergent for a few minutes before gently agitating it to loosen debris. |
4 | Rinse the wire brush thoroughly with clean water to remove any detergent residue. |
5 | Dry the brush completely to prevent rusting, either by air drying or using a clean cloth to remove excess moisture. |
6 | For brushes prone to rusting, apply a light coating of oil or rust preventive spray to protect the metal surfaces. |
7 | Store the wire brush in a dry, well-ventilated area away from direct sunlight and extreme temperatures. |
8 | Replace the wire brush when the bristles are worn, damaged, or no longer effective in cleaning tasks. |
A Guide to Cleaning Metal Bristle Brushes
A metal bristle brush is a versatile and highly effective cleaning tool commonly used for various applications, such as removing rust, paint, or dirt from surfaces and maintaining barbecue grills.
Over time, the brush may accumulate debris and lose its effectiveness. To ensure optimal performance, it is essential to regularly clean the brush by following a proper cleaning and maintenance routine.
• Step-by-Step Process for Cleaning a Metal Bristle Brush
– Step 1: Prepare the Cleaning Solution
The first step is to prepare a cleaning solution that will help remove dirt and debris from the bristles. Mix warm water with a few drops of dishwashing liquid soap and stir well to create a soapy mixture.
This gentle cleaning solution will help break down grease and dirt without causing any damage to the bristles.
– Step 2: Cleaning the Metal Bristles
Submerge the metal bristle brush in the soapy water solution and gently agitate the brush back and forth. For stubborn dirt or debris, consider using an old toothbrush or another soft-bristle brush to scrub between the bristles.
Pro Tip: When cleaning the metal bristle brush, use a soft-bristle brush or cloth to avoid scratching or damaging the bristles.
– Step 3: Rinse the Brush
After cleaning the bristles, it’s time to rinse the brush under running water. Ensure that all the soapy water and loosened dirt are removed from the brush.
– Step 4: Disinfecting the Metal Bristle Brush
In some cases, you may want to disinfect your brush, especially when it has come into contact with bacteria-laden materials like raw meat, while cleaning a barbecue grill.
To disinfect the brush, mix a solution of one part bleach to 10 parts water in a container. Soak the bristles in the solution for a few minutes, then rinse thoroughly with clean water to remove any bleach residue.
Please note that the University of Georgia Extension recommends using this bleach-water solution for sanitizing food-contact surfaces.
– Step 5: Dry the Brush
After cleaning and disinfecting your metal bristle brush, gently shake off any excess water and pat it dry with a clean cloth or paper towel.
Recommendation: To prolong the life of your brush, it is essential to store it in a dry and well-ventilated area after cleaning to prevent rusting of the bristles.
• Regular Maintenance Tips for Metal Bristle Brushes
To maintain the effectiveness of your metal bristle brush and prolong its lifespan, consider following these simple maintenance tips.
1. Regular Cleaning
Regularly cleaning your metal bristle brush will help remove built-up dirt and debris. This process not only ensures optimal performance but also prolongs the life of the brush.
2. Proper Storage
To avoid rust and damage, always store your brush in a dry and well-ventilated area when not in use. Keeping your brush in a damp or confined space may lead to rusting of the metal bristles.
3. Promptly Address Rust
If you notice any rust on the bristles or handle of your metal brush, immediately take action to remove it. You can use a rust remover and follow the manufacturer’s instructions to eliminate rust and prevent it from spreading.
A properly maintained brush will have an extended lifespan and perform better during cleaning tasks.
• Conclusion
A clean and well-maintained metal bristle brush will ensure optimal performance during various applications. By following the steps mentioned above and paying attention to regular maintenance tips, you can extend the life of your brush and make it more effective in accomplishing tasks.
Remember, proper storage and prompt action against rust will also contribute significantly to the brush’s longevity and effectiveness.
Step | Description |
|---|---|
1 | Remove loose debris: Tap the brush gently against a hard surface to remove any loose dirt or particles. |
2 | Soak the brush: Fill a container with warm soapy water and soak the metal bristle brush for about 10 minutes. This will help loosen any remaining dirt and debris. |
3 | Scrub the brush: Using another brush or an old toothbrush, scrub the bristles of the metal brush to remove any remaining dirt and debris. |
4 | Rinse the brush: Thoroughly rinse the metal bristle brush under warm water to remove all soap and debris. |
5 | Dry the brush: Shake off excess water from the brush and place it bristle-side down on a clean towel to air dry. |