Assessing Surface Conditions For Prep Work. What Pros Say
When it comes to prep work on any surface, whether it’s for painting, flooring, or construction, understanding and assessing the conditions is absolutely crucial for a successful outcome. Fortunately, you’ve come to the right place for guidance on evaluating surface conditions and effectively navigating this critical stage of your project.
Assessing surface conditions for prep work:
Assessing surface conditions for preparation tasks involves evaluating the surface type, its current condition, ambient conditions, and age to make informed decisions about materials and methods. This crucial step helps identify potential problems, ensure suitable solutions, establish accurate project timelines and budgets, and achieve desired results with increased durability. Conducting thorough assessments and consulting professionals enhances project success and longevity.
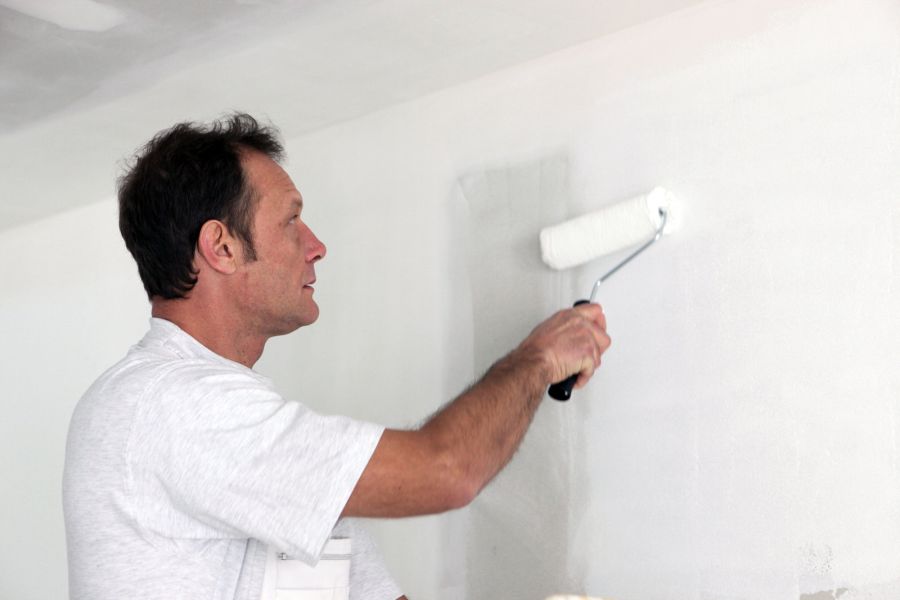
Curious about accurately assessing surface conditions for prep work? We’ve got you covered! In the following content, we’ll guide you through various techniques and tips to ensure maximum adhesion and longevity for your project. Keep reading for valuable insights on creating the perfect surface!
Contents
- 1 Evaluating Surface Conditions for Preparation Tasks
- 2 Methods for Inspecting Surface Readiness
- 3 Key Considerations in the Surface Preparation Process
- 4 Examining Surface Preparation Prior to Painting
- 5 SA 2.5 Surface Preparation: A Crucial Process for Protective Coating
- 6 Exploring Different Surface Preparation Approaches
- 7 Standards for Effective Surface Preparation
Evaluating Surface Conditions for Preparation Tasks
Proper assessment of surface conditions before initiating any prep work is essential. It not only influences the choice of methods and materials used in the project, but also affects the final outcome and durability of the end result.
• Importance of Surface Assessment
Evaluating surface conditions is a crucial step in projects such as painting, repairing, coating, or refinishing. It helps to:
- Identify potential problems or challenges
- Determine the suitability of different materials and processes
- Establish accurate timelines and budgets
- Achieve desired results and increase the lifespan of the project
• Factors to Consider
– Surface Type
The first factor in assessing surface conditions is determining the type of material being worked with, such as wood, metal, concrete or plaster. Each material has its own unique characteristics that will influence the choice of prep work to be done.
For example, some materials like wood might require sanding, filling of holes or knots, and the use of a primer. For other surfaces, like metal, it may involve cleaning, removing rust or corrosion, and applying a corrosion-resistant treatment.
– Surface Condition
The existing condition of the surface plays a significant role in deciding the appropriate prep work. Inspect the surface for:
- Dirt, dust, or mildew
- Chipping, peeling or flaking
- Cracks, holes or dents
- Warping, distortion, or unevenness
- Stains or discoloration
Take note of each issue and keep them in mind when planning the prep work.
– Ambient Conditions
The surrounding environment can have a significant impact on the success of your prep work. Factors such as temperature, humidity, and air quality should not be overlooked.
For instance, painting projects are best performed in temperatures ranging from 50F to 85F, with relative humidity between 40% and 70%.
– Age of Surface
Older surfaces may require more attention and effort during the assessment and preparation process. They can often be more susceptible to damage or have underlying issues that may not be visible at first glance.
This is why it’s crucial to take the age of the surface into consideration when planning your prep work, as it can impact the final result and durability.
• Expert Recommendations for Surface Assessment
– Documenting Current Conditions
Before initiating the prep work, take photographs or make notes on the current surface conditions. This documentation will serve as a valuable reference throughout the project to ensure that all issues have been addressed.
– Testing Methods
Conducting preliminary tests can help determine the right products and methods for your project. For example, test a small area with a specific cleaning solution, paint, or coating to gauge its effectiveness before applying it on the entire surface.
– Consult Professionals
If you are unsure about the best course of action, don’t hesitate to consult with professionals. Paint, coating, and refinishing experts can provide valuable insights into the proper assessment of surface conditions and suggest appropriate solutions based on their extensive experience.
• Conclusion
In conclusion, assessing surface conditions for prep work is a fundamental step that should not be taken lightly. It is necessary to understand the material type, existing condition, ambient conditions, and age of the surface to devise a comprehensive and effective plan.
By following expert recommendations and conducting thorough assessments, you can enhance your project’s success and ensure long-lasting results.
Methods for Inspecting Surface Readiness
Surface preparation is a crucial step in any coating or painting project, as it directly affects the quality, durability, and longevity of the applied materials.
• Selection of Surface Preparation Method
The first step to checking surface preparation is selecting the appropriate method based on the substrate type, existing surface conditions, and project specifications. The chosen method should effectively remove any contaminants, loose or poorly adhering materials and achieve the desired surface profile.
There are several surface preparation methods, including:
- Hand and power tool cleaning: Suitable for small-scale, mild surface contaminations like rust, mill scale, and old coatings.
- Abrasive blasting: Ideal for larger projects with more severe contaminations or when a more aggressive profile is required.
- Water jetting: A popular method for cleaning surfaces sensitive to mechanical damage or when a specific water-soluble contaminant needs to be removed.
- Chemical cleaning: Used on surfaces with stubborn chemicals or coatings that cannot be taken off using traditional methods.
• Evaluation of Surface Cleanliness
Once the surface has undergone the selected preparation method, it is essential to verify that it is free of contaminants and residues that could affect the coating’s performance.
Various standards, such as SSPC-SP (Steel Structures Painting Council Surface Preparation Specifications) and ISO 8501 (International Organization for Standardization), provide guidelines for evaluating cleanliness levels.
Visual inspection should be carried out to determine the presence of any visible contaminants or residues. For further information on cleanliness standards, refer to the SSPC website and ISO website.
Using a clean, white cloth or lint-free tissue, wipe the surface and check for any color transference or residue. If any contaminants remain, repeat the cleaning process or adjust the surface preparation method until a satisfactory level of cleanliness is achieved.
• Measurement of Surface Profile Depth
An adequately prepared surface should have an appropriate profile depth to promote coating adhesion. Different profile depths are required depending on the type of coating used and project specifications.
ASTM D4417 (Standard Test Methods for Field Measurement of Surface Profile of Blast-Cleaned Steel) and ISO 8503 (Surface Roughness Characteristics of Blast-Cleaned Steel Substrates) outline guidelines for assessing surface profile depth.
To measure the surface profile:
- Use a device such as a surface profile gauge, replica tape, or stylus instrument to take profile depth measurements.
- Take several readings (minimum of 10) at random locations on the prepared surface.
- Calculate the average of the readings to ensure compliance with project specifications.
If the average profile depth does not meet the required specifications, follow these recommendations:
- If the profile is too shallow, consider using a more aggressive preparation method.
- If the profile is too deep, perform additional surface preparation to reduce the profile depth, if permissible by the substrate.
• Verification of Proper Anchor Patterns
Anchor patterns are crucial for promoting coating adhesion, as they provide a mechanical interlocking between the applied material and substrate. A correctly prepared surface should have a uniform and consistent anchor pattern, with adequate profile depth and minimal profile spikes or high points.
To verify that the desired anchor pattern has been achieved:
- Visually inspect the prepared surface for any inconsistencies or irregularities.
- Check for the presence of profile spikes or high points, which can lead to poor coating adhesion or increased coating thickness.
- If needed, adjust the surface preparation method to remove any irregularities or high points and achieve a uniform anchor pattern.
• Conclusion
It is imperative to thoroughly inspect and evaluate the surface preparation of substrates before applying any coatings or materials.
By selecting the appropriate preparation method, verifying cleanliness, measuring profile depth, and ensuring consistency in anchor patterns, you can significantly increase the success and durability of your coating or painting project.
Remember always to consult industry standards and guidelines to ensure compliance with specific project requirements.
Method | Description |
|---|---|
Visual inspection | Visually examine the surface for cleanliness, roughness, and profile. |
Surface profile measurement | Use a replica tape or a surface profilometer to measure the surface profile. |
Soluble salt testing | Conduct tests such as the Bresle method or chloride ion test to check for soluble salts on the surface. |
Dust testing | Use a tape test or brush to check for excessive dust on the surface that may affect coating adhesion. |
Dew point and relative humidity measurement | Measure the dew point and relative humidity to ensure surface temperature is 3-5C above the dew point during surface preparation. |
Key Considerations in the Surface Preparation Process
Before painting any surface, proper preparation is crucial to achieve desired results.
• Surface Type
The first and most important factor to consider is the type of surface you are working with. Different materials require specific preparation techniques and products to ensure a long-lasting, quality finish.
– Wood
For wooden surfaces, you must thoroughly clean the surface and remove any loose or peeling paint, as well as sand the surface smooth. Once the surface is clean and smooth, you should apply a suitable primer to improve adhesion and increase durability.
– Concrete
Concrete surfaces require special attention. Be sure to remove any dirt, grease, or oil before applying paint. Epoxy or masonry primers are recommended to enhance the adhesion and longevity of the paint.
– Metal
For metal surfaces, it is crucial to remove any rust and apply a rust-inhibiting primer before painting. Additionally, using metal-specific paint can help provide additional durability.
• Surface Condition
Another vital factor to consider is the condition of the surface. Be sure to inspect the area for any damages, cracks, or irregularities that might need repair before commencing surface preparation.
– Cleanliness
Ensure that the surface is clean and free from dust, dirt, grease, or oil, which can interfere with the adhesion of paint or primer. You should use a proper cleaner or degreaser, followed by thorough rinsing and a sufficient drying period.
– Cracks and Holes
Any cracks or holes in the surface should be filled and repaired using suitable materials, such as wood filler for wooden surfaces or concrete patch for concrete surfaces. Afterward, sand the area smooth and feather the edges to ensure a seamless finish.
– Peeling Paint
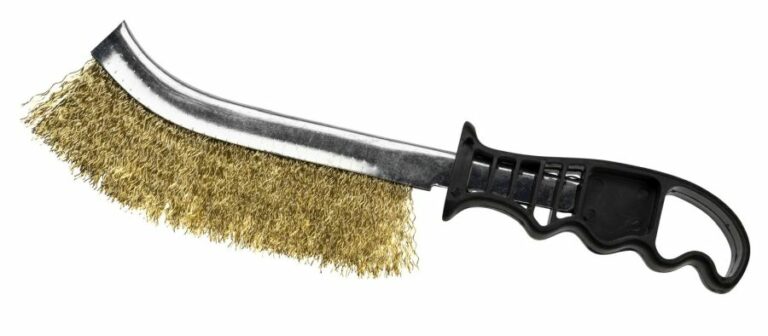
Remove any loose or peeling paint by scraping or using a wire brush. You may also need to sand the surface to ensure a smooth and even surface.
• Surface Preparation Techniques
Various techniques can be used to adequately prepare a surface for painting. Some of these methods include:
– Sanding
Sanding is essential for ensuring a smooth surface for better adhesion of paint. Use an appropriate grit sandpaper, depending on the surface and its condition. Coarser grits are ideal for rougher surfaces or removing old paint, while finer grits result in a smoother finish.
– Priming
Priming is crucial for improving the adhesion of paint to the surface, increasing durability, and providing a smoother finish. Choose a primer designed for the specific surface you are working on, and apply according to the manufacturer’s directions.
– Pressure Washing
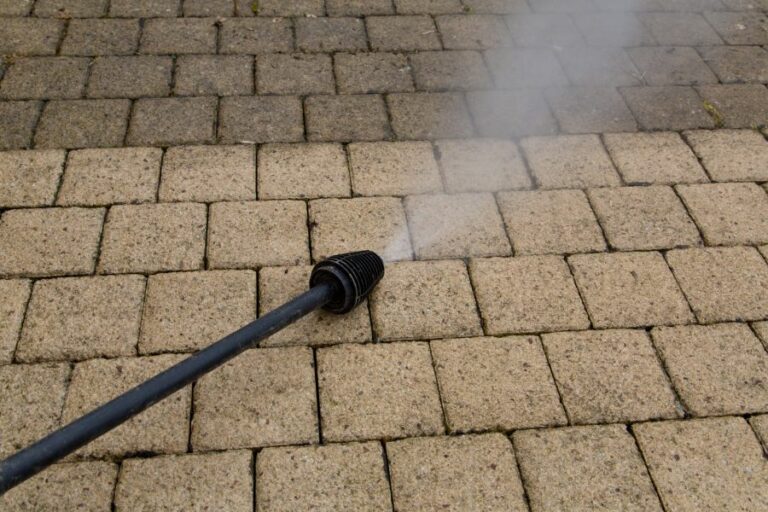
Pressure washing is an effective technique for removing dirt, dust, and loose paint from surfaces, particularly exterior ones. Ensure that the surface is thoroughly dry before applying paint or primer.
– Scraping
Scraping off loose or cracked paint using a scraper or wire brush helps create a smooth surface for better adhesion of the new paint.
• Moisture Considerations
Before applying paint or primer, ensure that the surface is completely dry. Moisture beneath the surface can cause paint to peel, blister, or fail prematurely. It is recommended to wait at least 24-48 hours after pressure washing or in humid conditions before painting.
• Environmental Factors
Lastly, consider the environment in which the painting will occur. Temperature and humidity can significantly affect paint application and drying times.
– Temperature
The ideal temperature for painting most surfaces is between 50-85F (10-29C). Painting in extreme temperatures can cause the paint to dry too quickly or too slowly, affecting the final result.
– Humidity
High humidity can prolong paint drying times, while low humidity can cause the paint to dry too quickly. The recommended humidity range for most paint applications is between 40-70%.
• Conclusion
In summary, successful surface preparation involves considering multiple factors, from surface type and condition to preparation techniques and environmental factors.
With proper attention to these elements, you can significantly improve the adhesion, durability, and overall appearance of your painting project.
Examining Surface Preparation Prior to Painting
Proper surface preparation is a crucial step in any painting project, as it ensures better adhesion, enhanced durability, and an overall improved paint job.
• Identifying Existing Surface Conditions
Before beginning any painting project, it is essential to familiarize yourself with the surface conditions in order to determine the necessary preparation steps. Common surface issues include:
– Dust and Dirt
A dusty or dirty surface will significantly hinder paint adhesion, so it is crucial to clean it thoroughly before painting. For more detailed information on proper dust and dirt removal techniques, click here.
– Efflorescence
Efflorescence appears as white, crystalline deposits on surfaces, typically caused by the migration of soluble salts to the surface.
To treat efflorescence, use a stiff brush to remove loose material, then clean the area thoroughly with a solution of water and trisodium phosphate (TSP). Rinse thoroughly and allow drying before painting.
– Flaking and Peeling
Loose, flaking, or peeling paint should be removed before commencing a new paint job. This can be achieved through methods such as scraping, sanding, or using a chemical paint remover. Be sure to smooth the edges of remaining paint to promote proper adhesion.
– Mold and Mildew
Ignoring the presence of mold and mildew on surfaces before painting can lead to recurring issues and possible paint failure. To effectively treat mold and mildew, clean the surface using a solution of water and household bleach, then rinse and allow drying before painting.
• Choosing the Right Method of Surface Preparation
After assessing the existing surface conditions, it is crucial to select the proper method of surface preparation to ensure optimal results. Some methods include:
– Sanding
Sanding is a common method for preparing surfaces before painting, as it smooths rough areas, promotes adhesion, and removes contaminants. Use a fine-grit sandpaper to avoid scratches, and be sure to remove all sanding dust before painting.
– Degreasing
Degreasing is critical for surfaces that are heavily contaminated with oil, grease, or other similar contaminants. A high-quality degreaser should be used and thoroughly rinsed after application to ensure proper paint adhesion.
– Pressure Washing
Pressure washing is an effective method for removing dirt, mold, and other surface contaminants from exterior surfaces. Be sure to use a pressure washer equipped with the appropriate nozzle, and avoid using excessive pressure that could damage the surface.
– Chemical Stripping
When dealing with stubborn coatings or multiple layers of paint, chemical strippers can be highly effective. Always follow the manufacturer’s instructions and take proper safety precautions during use.
– Abrasive Blasting
Abrasive blasting, such as sandblasting, can be an effective method for removing rust, scale, and old paint from various surfaces. However, it can also be damaging to certain substrates and should be approached with caution.
• Testing for Surface Readiness
Before applying paint, it is important to conduct several tests to ensure proper surface preparation.
– Adhesion Tape Test
This test evaluates paint adhesion by applying a strip of masking tape to the prepared surface and then peeling it off. If any paint comes off with the tape, the surface is not properly prepared and requires further attention.
– Moisture Content Test
Excess moisture in surfaces can cause paint to blister, peel, or fail. Use a moisture meter to test the substrate’s moisture content before painting, and ensure it meets the manufacturer’s recommendations.
– Surface Temperature Test
Painting on surfaces that are too hot or cold can result in paint failure. Use an infrared thermometer to test the surface temperature and ensure it falls within the optimal range specified by the paint manufacturer.
• Final Recommendations
Proper surface preparation can make or break a painting project. By following the steps outlined in this guide, you can ensure that your surfaces are adequately prepared and ready for a successful paint job.
Step | Description |
|---|---|
1 | Inspect the surface for dirt, dust, and debris. Clean the surface thoroughly if needed. |
2 | Check for any existing paint, rust, or other imperfections on the surface that may need to be removed or treated before painting. |
3 | Verify the moisture content of the surface is within acceptable limits. If possible, use a moisture meter to measure accurately. |
4 | Ensure the surface is smooth and even. Fill any cracks, holes, or divots with an appropriate filler material and sand the surface if necessary. |
5 | Apply a primer or sealer to the surface if required, according to the manufacturer’s recommendations and the specific surface being painted. |
6 | Check the ambient conditions, such as temperature and humidity, to ensure they are within the recommended range for your paint product. |
7 | Ensure all necessary personal protective equipment (PPE) and safety measures are in place before starting the painting process. |
SA 2.5 Surface Preparation: A Crucial Process for Protective Coating
• Importance of Surface Preparation in Protective Coating
Surface preparation plays a significant role in the durability and performance of protective coatings applied on various surfaces, such as steel structures, pipelines, and marine vessels.
Properly preparing the surface ensures that the coating adheres correctly, providing maximum protection against corrosion, wear, and environmental factors. Among the different surface preparation methods available, one well-established standard in the industry is the SA 2.5 surface preparation.
• What is SA 2.5 Surface Preparation?
SA 2.5 surface preparation, also known as “near-white metal blast cleaning,” is a crucial process in which a surface is thoroughly cleaned to remove all contaminants, including rust, mill scale, and previous layers of paint.
This procedure results in an almost pure white metal base, ensuring that the protective coating adheres effectively, providing a durable and long-lasting finish.
The SA 2.5 designation is part of the Swedish Standard SIS 05 59 00, which specifies the levels of surface cleanliness achieved through various abrasive blast cleaning methods. SA 2.5 represents a high level of cleanliness, making it a widely accepted and recognized standard in the protective coating industry.
• Abrasive Blast Cleaning Techniques in SA 2.5 Surface Preparation
In order to achieve the SA 2.5 cleanliness level, abrasive blast cleaning techniques are employed. These methods involve propelling abrasive particles onto the surface to remove contaminants and create a uniform surface profile.
The selection of abrasive materials and equipment used for blast cleaning can significantly impact the quality and efficiency of the surface preparation process. Some commonly used abrasive materials for SA 2.5 surface preparation include:
- Steel grit
- Steel shot
- Aluminum oxide
- Garnet
- Crushed glass
The choice of abrasive material depends on factors such as the required surface finish, the nature of the substrate, and project-specific requirements.
• Factors to Consider During SA 2.5 Surface Preparation
To ensure that the surface preparation process achieves the desired cleanliness level and results, several critical factors must be considered:
– Surface Profile
An essential aspect of the SA 2.5 surface preparation is creating a uniform surface profile, which contributes to the coating’s long-term performance. A consistent profile promotes better adhesion between the coating and the substrate and assists in accommodating various coating layers.
– Surface Cleanliness
Prior to blast cleaning, the surface must be free of contaminants such as grease, oil, or dirt that could interfere with achieving the SA 2.5 cleanliness level. A clean surface will enable the abrasive blast cleaning to be more effective and contribute to the overall longevity of the protective coating.
– Environmental Factors
It is crucial to consider environmental factors during the SA 2.5 surface preparation process. For instance, working in humid conditions can lead to flash rust forming on the prepared surface.
To prevent this, appropriate measures should be taken, including using proper equipment and selecting suitable abrasive materials.
– Inspection and Quality Control
The inspection and quality control processes form an integral part of the SA 2.5 surface preparation. After the surface has been prepared, a thorough inspection should be carried out to ensure that the desired cleanliness level has been achieved and the surface profile is consistent.
• Benefits of Proper SA 2.5 Surface Preparation
When executed correctly, SA 2.5 surface preparation provides several long-term benefits, including:
- Improved adhesion of protective coatings, reducing the likelihood of failure
- Enhanced corrosion resistance, extending the service life of structures and components
- Reduced maintenance costs and downtime associated with recoating activities
- Compliance with industry standards and best practices for coating application
In conclusion, SA 2.5 surface preparation is a crucial process in the protective coating industry, ensuring that surfaces are adequately prepared to receive a coating that provides ongoing protection against corrosion and environmental factors.
By adhering to best practices and considering the essential factors during surface preparation, project managers and coating professionals can significantly improve the longevity and performance of their coatings.
For more information on surface preparation standards, visit the SSPC (Society for Protective Coatings) website.
Exploring Different Surface Preparation Approaches
Surface preparation is a critical component in many industries, including construction, building maintenance, and manufacturing. Proper surface preparation can significantly impact the success, quality, and longevity of a project or product.
• Importance of Surface Preparation
Surface preparation is vital because it directly affects the adhesion, appearance, and performance of applied coatings or treatments. A well-prepared surface enables coatings to bond properly, preventing premature failure or breakdown.
It can also improve the aesthetics and extend the lifespan of materials, ultimately saving costs on maintenance and replacement.
Furthermore, by removing contaminants, surface preparation methods can minimize the risk of corrosion or other issues that may negatively impact the structural integrity of the material.
• Types of Surface Preparation Methods
There are numerous surface preparation methods available; each method varies according to factors such as material type, intended use, and environmental conditions. Some of the most common methods include the following.
– Cleaning and Degreasing
Cleaning and degreasing remove contaminants, including oil, grease, and dirt, from a surface, thus improving adhesion and reducing the risk of corrosion. Techniques such as hand wiping, solvent cleaning, and high-pressure water jetting are often employed.
In some cases, alkaline or acidic cleaners may be used to provide a deep clean, especially for metal surfaces.
Example: ASTM D4258, ASTM D4259, and ASTM D3276 are examples of industry-standard methods for cleaning surfaces. More information can be found on the ASTM International website.
– Abrasive Blasting
Abrasive blasting, also known as sandblasting, is a method that employs a high-pressure stream of abrasive material to clean or shape a surface. This process can effectively remove old coatings, rust, and mill scale, leaving a rough surface profile that allows for improved adhesion of new coatings.
There are several types of abrasive blasting, including dry or wet blasting, using various abrasives such as sand, glass beads, steel shot, or plastic media.
Example: The SSPC-SP 5/NACE No.1 standard details the requirements for a white metal blast cleaning, which is a thorough abrasive blast cleaning method.
– Grinding and Polishing
Grinding and polishing methods involve the use of machines or handheld tools fitted with abrasive discs or wheels to remove or smooth the surface layer.
These methods can be used to remove coatings, provide a specific surface profile, or improve the surface’s overall appearance. It includes techniques such as diamond grinding, shot blasting, and scarifying.
Example: Concrete grinding is often used as a surface preparation method prior to applying epoxy coatings or overlays. The International Concrete Repair Institute (ICRI) provides guidelines for proper evaluation and selection of concrete surface profiles.
– Chemical Methods
Various chemical methods can be employed for surface preparation. These methods include the use of acids, alkalis, or solvents to clean surfaces or remove contaminants or coatings.
An example of a chemical method used is acid etching, which creates a rough profile on a concrete surface, improving the adhesion of coatings or overlays.
Example: ASTM D4260 and ASTM D4262 are examples of industry-standard methods for acid etching concrete surfaces. More information can be found on the ASTM International website.
• Factors to Consider When Choosing a Surface Preparation Method
Selecting the appropriate surface preparation method will depend on several factors, including:
- The material being prepared (e.g., concrete, steel, wood, etc.)
- The desired end-use or performance requirements
- The type and severity of the contaminants or coatings being removed
- Environmental considerations, such as dust control or waste disposal
- Cost and time constraints
It is essential to carefully evaluate each factor and choose the most suitable method that will provide the best results for the specific project or application.
• Final Thoughts
In conclusion, surface preparation methods play a crucial role in ensuring the success and longevity of a project or product. By choosing the appropriate method and diligently applying it, you can significantly enhance the quality and durability of your work.
It’s essential to stay informed about industry standards and recommendations, as these can provide valuable guidance when deciding on the most effective and efficient surface preparation methods. Constantly updating your knowledge and technique arsenal is key to maintaining the highest quality in your work.
Standards for Effective Surface Preparation
Surface preparation is a crucial step in the process of coating, painting, or applying other protective coverings to an industrial or marine structure. It ensures proper adhesion of the coating, reduces the chance of premature failure, and improves the overall appearance of the final product.
• The Importance of Surface Prep Standards
Surface prep standards provide a basis for planning, conducting, and evaluating the results of surface preparation. They are essential in outlining the necessary steps to ensure a clean, dry, and contaminant-free surface before applying a coating. Adhering to well-defined standards minimizes the risk of premature failure and improves the performance of the coating.
– The Role of Regulatory Bodies
Various organizations and regulatory bodies have established internationally recognized surface preparation standards.
Among them are the International Organization for Standardization (ISO), the Society for Protective Coatings (SSPC), the National Association of Corrosion Engineers (NACE), and the American Society for Testing and Materials (ASTM).
These organizations help set industry standards and best practices for surface preparation, ensuring consistency and quality across different projects.
International Organization for Standardization (ISO)
The ISO is an independent, non-governmental organization that develops standards to achieve international consistency and promote global trade.
It provides several standards related to surface preparation, such as ISO 8501 (preparation grades for various substrates) and ISO 12944 (corrosion protection of steel structures by protective paint systems).
Society for Protective Coatings (SSPC)
The SSPC is a professional association focused on the protection and preservation of industrial and marine structures.
They provide a set of widely recognized surface preparation standards, such as SSPC-SP1 (Solvent Cleaning), SSPC-SP2 (Hand Tool Cleaning), and SSPC-SP5 (White Metal Blast Cleaning). These standards detail the various methods and levels of cleanliness required for different applications.
National Association of Corrosion Engineers (NACE)
NACE is a global organization dedicated to protecting assets from the effects of corrosion. In collaboration with the SSPC, NACE provides standards for surface preparation and paint application.
American Society for Testing and Materials (ASTM)
The ASTM is an international organization that develops technical standards for various industries. They offer standards for surface preparation, such as ASTM D4258 (cleaning concrete surfaces before applying the coating) and ASTM D4417 (measuring the profile of abrasive-blasted surfaces).
• Preparing Surfaces for Coating
Surface preparation typically involves cleaning, profiling, and inspecting the substrate. The objective is to create an ideal surface for the coating to adhere to, ensuring long-lasting protection and performance.
– Cleaning
Surfaces should be free of contaminants such as dirt, oil, grease, and rust before applying the coating. Methods for cleaning include solvent cleaning, hand tool cleaning, power tool cleaning, and abrasive blast cleaning, each of which follows a specific standard (e.g., SSPC-SP1 for solvent cleaning).
– Profiling
Profiling involves creating an appropriate surface roughness to ensure the proper adhesion of the coating. Various methods include abrasive blasting, mechanical methods, and chemical processes.
Experts measure the surface profile using instruments adhering to standards like ASTM D4417 (for abrasive-blasted surfaces).
– Inspection
Inspecting a surface before and after surface preparation ensures that the substrate is clean and ready for coating. Inspection involves evaluating the cleanliness and surface profile against specific standards.
For example, rust and other contaminants can be visually assessed using guides like SSPC-VIS 1 (Joint Surface Preparation Standards).
• Recommendations for Effective Surface Preparation
Based on years of experience and knowledge in surface preparation, it is important to adhere to the following recommendations:
- Always follow the appropriate surface prep standard for your specific application. This helps ensure proper adhesion and performance of the coating.
- Invest in quality training for your workforce, ensuring they are familiar with surface preparation techniques and industry standards. Properly trained personnel can identify and adhere to the appropriate methods and achieve the required cleanliness and profile.
- Regularly inspect surfaces, both before and after preparation, to ensure compliance with the respective standards and maintain quality control.
- Continuously update your knowledge of surface preparation standards and best practices, staying informed on advancements in techniques and equipment to improve efficiency and performance.
In conclusion, surface preparation standards are an essential component of the coating process, promoting consistency and ensuring long-lasting protection. Adhering to these standards improves the performance and longevity of the protective coatings.
By understanding the role of regulatory bodies, the various methods of surface cleaning and profiling, and implementing industry best practices, one can achieve a successful surface preparation process.

