Best Surface Prep Techniques For Painting. What Pros Say
When it comes to achieving a flawless paint job, the key lies in proper surface preparation. We understand that this crucial step can often be confusing and time-consuming, but don’t worry – we are here to help. Our expertise in the best surface prep techniques for painting will ensure that your paint adheres perfectly and the final result is nothing short of professional.
Best surface prep techniques for painting:
The best surface preparation techniques for painting include cleaning and degreasing surfaces using soap and water or degreasing solutions, sanding and scuffing for proper paint adhesion, repairing the damage with fillers and patching materials, and priming to create a uniform base for paint. Following these steps will lead to a successful and long-lasting paint job.

Unlock the secrets to a flawless paint job! Discover the best surface preparation techniques that will ensure a long-lasting, professional finish on your painting projects. Keep reading to master the art of perfect painting!
Contents
- 1 Top Surface Preparation Methods for Paint Projects
- 2 Optimal Painting Preparation Strategies Explained
- 3 Popular Techniques for Effective Surface Preparation
- 4 Essential Steps for Prepping Surfaces to Paint
- 5 An Overview of Surface Preparation Approaches
Top Surface Preparation Methods for Paint Projects
A well-prepared surface is crucial for a successful paint job. Proper surface preparation ensures that the paint adheres correctly, which leads to a long-lasting and high-quality finish.
• Cleaning and Degreasing
Before starting any surface preparation, it’s essential to clean the surface thoroughly. Dirt, grease, and oil can all prevent paint adhesion, leading to peeling and an uneven finish.
– Soap and Water
Simple soap and water can be adequate for many surfaces. Use a sponge or cloth to scrub away dirt and grime, then rinse thoroughly with clean water. Allow the surface to dry completely before proceeding with any additional preparation.
– Degreasing Solutions
For surfaces with grease or oil, you may need a degreasing solution. There are many commercial degreasers available, but a simple mixture of trisodium phosphate (TSP) and water can be effective.
Use a cloth or sponge to apply the solution, then rinse with clean water and allow the surface to dry. Always follow the manufacturer’s instructions for the specific degreaser you select.
• Sanding and Scuffing
Sanding and scuffing the surface are essential steps in ensuring proper paint adhesion. These techniques create a rough surface for the paint to grip onto and promote a long-lasting finish.
– Manual Sanding
For small surfaces, manual sanding with sandpaper is sufficient. Start with a coarse grit (around 80-100), then progress to a medium grit (150-180) and finish with a fine grit (220-240).
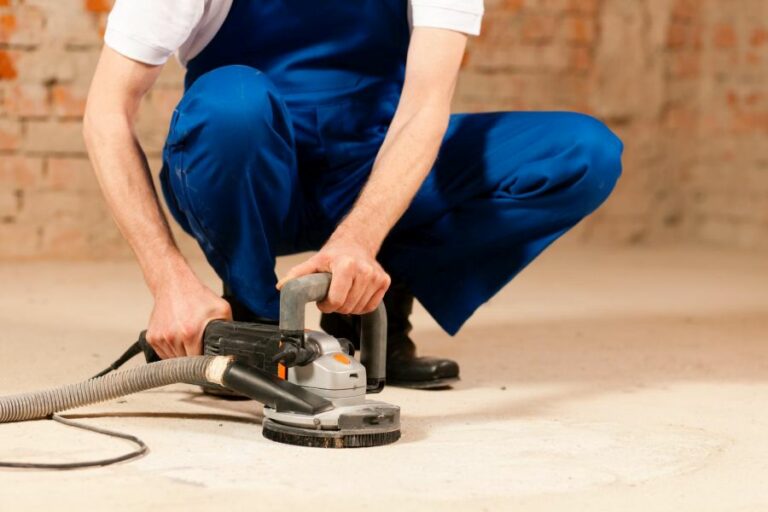
– Power Tools
For larger surfaces or those with layered or uneven paint, power tools such as orbital sanders may be helpful. These tools can significantly speed up the sanding process, providing a consistent and even finish.
Always wear appropriate safety gear, such as goggles and a dust mask, when using power tools for sanding.
– Scuffing Painted Surfaces
For painted surfaces, scuffing with a Scotch-Brite pad or sanding sponge can provide adequate surface texture for the new paint to adhere to. This technique removes any gloss and creates a rough surface for the new paint to grip onto.
• Repairing Damage
Cracks, holes, and other damage can impact the final appearance of a paint job. Taking the time to repair these imperfections is essential for a professional-looking result.
– Filling Holes and Cracks
For small holes and cracks, use a pre-mixed spackling compound or wood filler. Apply the product with a putty knife, then smooth the surface until it’s flush with the surrounding area. Allow the filler to dry thoroughly before proceeding with any additional sanding.
– Patching Larger Damage
For larger holes or damaged sections, you may need to use a more robust patching material, such as a two-part epoxy filler. These products typically dry harder and are more resistant to shrinking, making them ideal for larger repairs.
Again, follow the manufacturer’s instructions for the specific product you select.
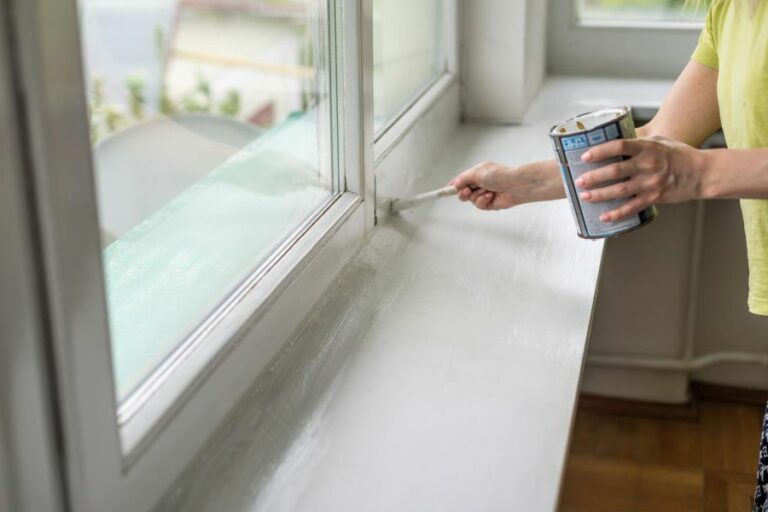
• Priming
Priming is an essential step in the surface preparation process, as it helps to create a uniform base for the paint to adhere to. Primer also helps to seal porous surfaces and block stains from bleeding through the new paint.
– Choosing the Right Primer
Select a primer based on the surface you are painting and the type of paint you plan to use. There are many different types of primers available, including oil-based, latex, and shellac-based options. Consult the manufacturer’s recommendations for the best primer for your specific project.
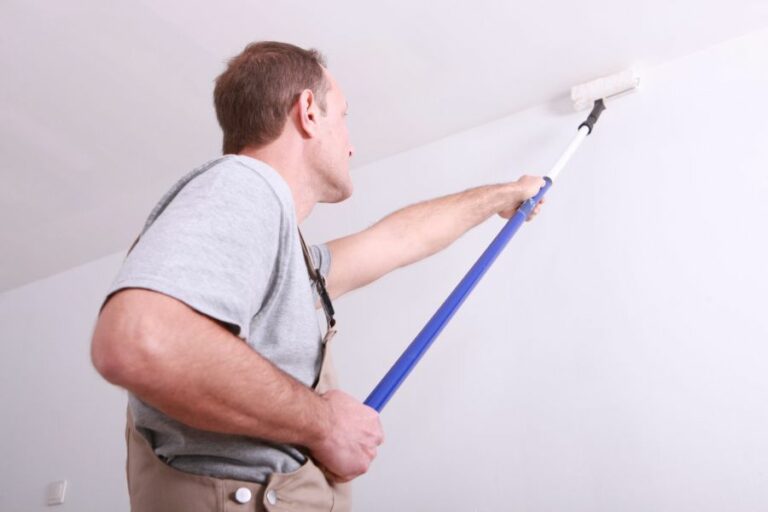
– Application Techniques
Apply the primer using a brush, roller, or spray application method, depending on the surface area and your personal preference. Use smooth, even strokes to create a consistent finish, and allow the primer to dry according to the manufacturer’s directions.
• Final Tips
Remember to:
- Allow surfaces to dry completely between each step, providing adequate drying time.
- Always wear appropriate safety gear, such as gloves, goggles, and a dust mask.
- Use proper ventilation when working with chemicals, primers, and paints.
By following these surface prep techniques, you’ll be well on your way to a successful and long-lasting paint job. For additional resources, consult the Paint Quality Institute for expert advice and best practices.
Technique | Description |
|---|---|
Cleaning | Remove dust, dirt, and debris from the surface using a soft cloth or brush. Wipe down with a damp cloth to remove any remaining residue. |
Sanding | Smooth out rough or uneven surfaces using a fine-grit sandpaper. Always sand in the direction of the grain for wood surfaces. |
Degreasing | Remove oil, grease, or other contaminants from the surface with a degreaser or mild detergent solution. Rinse with clean water and let dry. |
Priming | Apply a high-quality primer to the surface to enhance paint adhesion and durability and to provide a uniform base for the topcoat. |
Repairing | Fill any holes, cracks, or dents with an appropriate filler or patching compound, sand smooth, and prime before painting. |
Taping | Use painter’s tape to mask off any areas that should not be painted, such as trim, molding, or hardware. |
Optimal Painting Preparation Strategies Explained
There’s a popular saying in the painting industry that goes, “Preparation is 80 percent of the job.” And it’s true. Properly preparing a surface for painting can make all the difference in the final outcome of your project.
• Surface Cleaning: The First Step in Prepping for Painting
Before you can even begin to think about applying primer or paint, it’s crucial to have a clean surface to work on. Surface impurities such as dirt, dust, grease, and old paint residues can not only interfere with paint adhesion but also affect the final appearance of your paint job.
To ensure a professional-looking result, follow these steps:
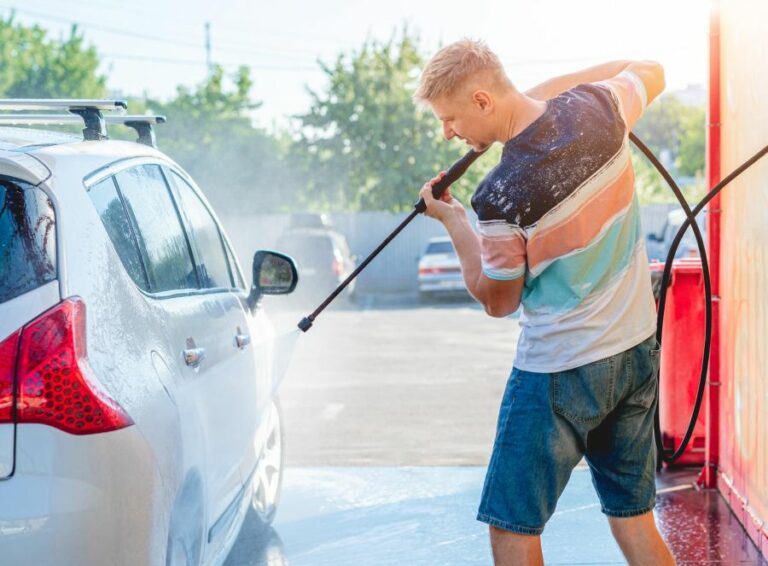
- Remove dust and dirt: Use a vacuum, damp cloth, or soft-bristled brush to remove any loose debris from the surface. If you’re dealing with a large or particularly dirty surface, you can also use a pressure washer to get the job done more quickly.
- Clean the surface: For stubborn dirt or grease, mix a solution of warm water and mild detergent (dish soap or laundry detergent works well) and scrub the surface using a sponge or soft-bristle brush. Rinse thoroughly with clean water and allow the surface to dry completely.
- Remove mildew: If your painted surface has mildew on it, use a solution of one part bleach to three parts water to kill the mildew before painting. Apply the solution using a sponge or brush and let it sit for 15 minutes before rinsing it with water. Be sure to wear necessary protective gear, such as gloves and goggles, when handling bleach.
You can learn more about surface cleaning from experts like the Painting Contractors Association or by visiting their website.
• Surface Preparation: Repairing Damages and Imperfections
Once your surface is clean, it’s time to address any damages or imperfections that might be present to achieve a smooth and even paint finish. The specific steps involved in this stage will vary depending on the type and condition of your surface.
Here are some common repairs that you might need to make:
– For Drywall and Plaster
- Repair holes and cracks: Use a joint compound or pre-mixed patching material to fill any holes, dents, or cracks in the surface. Follow the manufacturer’s instructions on the package and use a putty knife or trowel to achieve a smooth finish.
- Sand the surface: Once the repairs are dry, use fine-grit sandpaper (120- or 150-grit) to smooth out the patched areas and create a seamless, uniform surface. Be sure to remove any sanding dust with a vacuum or damp cloth before proceeding to the next step.
– For Wood Surfaces
- Fill gaps and holes: For small imperfections, use a wood filler or putty, while larger gaps or holes can be filled with an epoxy-based filler. Following the manufacturer’s instructions is essential, as different fillers may have different drying times and sanding requirements.
- Sand the surface: Once dried, sand the entire surface using progressively finer grits of sandpaper (going from 80- to 150-grit). This will help remove any rough spots and create a smooth surface for painting. Remember always to remove sanding dust after each round of sanding.
– For Previously Painted Surfaces
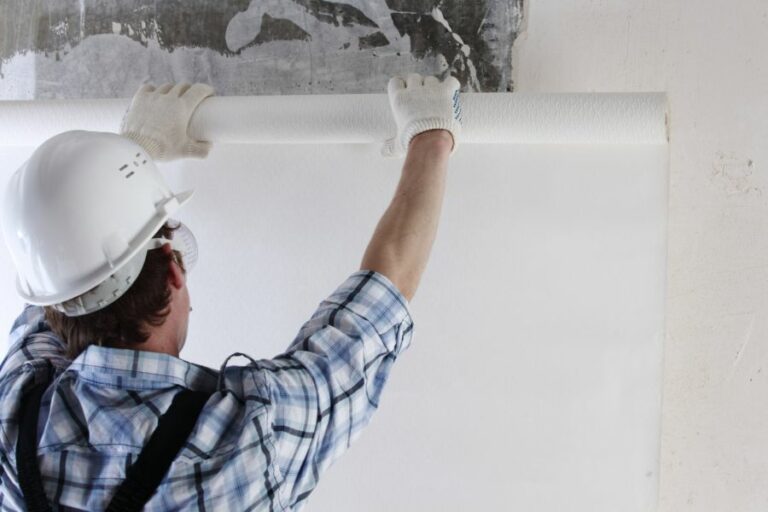
- Scrape and remove loose paint: If your surface has any peeling or flaking paint, use a paint scraper or stiff-bristle brush to remove loose paint. If necessary, use a heat gun or chemical paint stripper to assist in removing more stubborn paint layers.
- Sand the surface: Lightly sand the entire surface, using fine-grit sandpaper (150- or 220-grit) to ensure the new paint adheres evenly to the existing paint. Remove all sanding dust using a vacuum or damp cloth.
• Priming Your Surface: The Key to Proper Paint Adhesion
Priming is an essential step in preparing your surface for painting, as it provides a uniform base for the paint to adhere to and helps prevent problems such as peeling or uneven color. Invest in a high-quality primer, and you will see the difference it makes in the final outcome of your paint job.
Choose a primer based on your surface type (e.g., latex primer for drywall or oil-based primer for wood), and apply 1-2 coats following the manufacturer’s instructions. You may need to tint the primer to a similar color as your topcoat, especially for darker or more vibrant paint colors.
• Masking and Protecting Your Workspace
Before diving into the actual painting process, take the time to mask off areas you want to avoid painting, such as windows, doors, and trim. Use painter’s tape and plastic sheeting or drop cloths to protect surfaces from accidental splatters, drips, or spills.
Proper masking not only saves you time but also ensures a clean and professional final result.
After following these steps scrupulously, you’re now set for a successful painting project that will yield beautiful results. Remember, the key to a flawless paint job lies in diligent surface prep and using high-quality materials. Happy painting!
Step | Description |
|---|---|
1. Clean the surface | Remove dirt, grease, and other contaminants for better paint adhesion. |
2. Scrape off old paint | Remove loose or peeling paint with a scraper or wire brush. |
3. Sand the surface | Sand the surface to create a smooth, even base for the new paint. |
4. Fill any holes and cracks | Use spackle or wood filler to fill any holes, dents, or cracks for a flawless finish. |
5. Apply primer | Apply a primer to enhance paint adhesion and coverage and ensure a uniform finish. |
6. Mask and protect surrounding areas | Use painter’s tape and drop cloths to protect surfaces and fixtures from paint splatters. |
Popular Techniques for Effective Surface Preparation
Surface preparation is a crucial step in many industries, including construction, automotive, and manufacturing, ensuring that a surface is clean, free of contaminants, and ready for further treatment or coating.
One of the most common techniques used for surface preparation is abrasive blasting, also known as sandblasting or grit blasting.
• Overview of Abrasive Blasting
Abrasive blasting is a process where abrasive particles, such as sand, steel shot, or glass beads, are propelled at high velocity onto a surface. This process removes unwanted contaminants, roughens or smoothens the surface, and prepares it for a subsequent coating or treatment.
Abrasive blasting is highly effective for removing rust, paint, scale, and other debris from various surfaces, such as steel, concrete, and wood.
– Types of Abrasive Blasting
There are several types of abrasive blasting techniques, each with its own set of advantages and applications. Some of the most common are:
- Dry Abrasive Blasting: Utilizes compressed air to propel abrasive particles onto a surface. This type is most commonly used for general surface preparation tasks.
- Wet Abrasive Blasting: This involves mixing water with the abrasive particles, creating a slurry that is then propelled onto the surface. This technique reduces dust emissions, making it more environmentally friendly and suited for sensitive applications.
- Wheel Blasting: Employs a high-speed wheel to launch abrasive particles at the surface. This method is often used for pre-treatment of metallic surfaces in the manufacturing industry.
- Vacuum Blasting: Combines abrasive blasting with a vacuum system, which collects both the debris and spent abrasive particles. This technique minimizes dust emissions and is suitable for indoor applications or confined spaces.
– Choosing the Right Abrasive Material
The effectiveness of abrasive blasting largely depends on the selection of the most suitable abrasive material for a specific application. Some of the most common abrasive materials include:
- Silica Sand: Also known as quartz sand, this is a low-cost and highly available abrasive. However, it is important to note that silica sand poses significant health risks when inhaled, making it a less popular choice in recent times.
- Steel Grit and Steel Shot: These abrasives are highly effective in cleaning, deburring, and roughening metallic surfaces. Steel grit is angular in shape, while steel shot is round, resulting in different surface finishes.
- Glass Beads: These abrasives produce a smooth, bright finish and are commonly used for peening, deburring, and cleaning softer metals, like aluminum and brass.
- Aluminum Oxide: This abrasive material is highly durable and versatile, making it suitable for a wide range of applications, such as cleaning, etching, and coating removal.
- Garnet: Garnet is a natural, environmentally friendly abrasive that offers excellent cutting and cleaning capabilities, making it suitable for various surface preparation tasks.
– Safety Considerations
Abrasive blasting can pose potential hazards, such as high noise levels, dust emissions, and risk of injury from flying particles. To ensure safe operation, protective equipment, like goggles, gloves, ear protection, and respiratory equipment, should be worn.
Moreover, proper training, maintenance, and inspection of blasting equipment are essential to minimize the risks associated with the process.
• Factors Affecting the Quality of Abrasive Blasting
Several factors can influence the effectiveness and efficiency of abrasive blasting, such as:
– Air Pressure
Higher air pressure increases the velocity of the abrasive particles and reduces blasting time. However, too high of pressure can damage the surface, especially when working with softer materials.
– Nozzle Size
Choosing the right nozzle size is essential for optimal abrasive impact and coverage of the surface. A larger nozzle will result in a broader coverage but at the expense of reduced abrasive impact, while a smaller nozzle will have the opposite effect.
– Abrasive Size and Shape
The size and shape of the abrasive particles will determine the surface finish and the speed of the process. Larger particles will clean and strip surfaces quicker but may leave a rougher finish.
Smaller particles, on the other hand, will produce a finer finish but may take longer to remove contaminants.
– Distance and Angle of Nozzle
The distance and angle at which the nozzle is held relative to the surface can significantly affect the quality and speed of the process.
A close and perpendicular nozzle position to the surface will result in a more aggressive blasting action while increasing the distance and angling the nozzle will produce a gentler abrasive effect.
• Conclusion
Abrasive blasting is a versatile and effective surface preparation technique used in a wide array of industries. By choosing the right abrasive material, equipment, and operating parameters, abrasive blasting can provide a clean and well-prepared surface for a variety of applications.
For further information on abrasive blasting and its various applications, visit the National Association of Corrosion Engineers (NACE) website, a reputable organization dedicated to corrosion prevention and surface protection.
Surface Preparation Techniques | Commonality |
|---|---|
Cleaning | Common |
Abrasive Blasting | Most Common |
Grinding | Common |
Chemical Treatment | Less Common |
Heat Treatment | Less Common |
Essential Steps for Prepping Surfaces to Paint
Painting a surface might seem like an easy task, but the outcome of the project largely depends on how well you prepare the surface before applying paint.
• Assessing the Surface Condition
Before you start the preparation process, it’s essential to assess the condition of the surface. Check for any damages, such as cracks, holes, and peeling paint.
Damages and imperfections will need to be fixed prior to painting to ensure a smooth and seamless finish. Also, make sure the surface is clean, dry, and structurally sound.
• Cleaning the Surface
A clean surface is crucial for proper paint adhesion. Dust, dirt, grease, and other contaminants can affect the paint’s ability to adhere to the surface and may cause problems like peeling, bubbling, or uneven color. Here are some recommended cleaning methods for different surfaces:
– Wood Surfaces
- Remove dust and dirt with a soft-bristle brush or a vacuum cleaner with a soft brush attachment.
- If the wood is greasy or stained, use a wood cleaner or a mild detergent mixed with warm water and a sponge or a soft cloth to clean the surface. To avoid damaging the wood, do not use abrasive cleaners or stiff brushes.
- Rinse the surface with clean water and let it dry completely before moving on to the next step.
– Metal Surfaces
- Remove loose rust or paint with a wire brush or sandpaper.
- Clean the surface with mineral spirits or a mild detergent mixed with warm water and a sponge or a soft cloth. Ensure you remove all traces of grease and oil, as these can lead to paint adhesion problems.
- Rinse thoroughly with clean water and dry the surface with a clean cloth or towel.
– Concrete and Masonry Surfaces
- Remove dust, dirt, and loose particles with a stiff-bristle brush and a vacuum cleaner.
- Clean the surface with a mild detergent or a concrete cleaner mixed with warm water and a stiff-bristle brush. Make sure to remove all stains and mold, as these can affect paint adhesion and may bleed through the new paint.
- Rinse the surface thoroughly with clean water and let it dry completely before moving on to the next step.
• Repairing Damages and Imperfections
Fixing damages and filling imperfections will ensure a smooth and even paint application. Follow these steps for repairing various surface types:
– Repairing Wood Surfaces
- Fill small cracks, nail holes, and other imperfections with a wood filler or putty. Apply the filler with a putty knife and smooth it out.
- Once the filler is dry, sand the surface with fine-grit sandpaper (150 to 220 grit) to ensure a smooth finish. Remove sanding dust with a tack cloth or a vacuum cleaner.
– Repairing Metal Surfaces
- Fill small dents and holes with an auto body filler or a two-part epoxy filler, following the manufacturer’s instructions. Smooth the filler with a putty knife.
- After the filler has dried, sand the surface with fine-grit sandpaper (150 to 220 grit). Remove sanding dust with a tack cloth or a vacuum cleaner.
– Repairing Concrete and Masonry Surfaces
- Fill cracks and holes with a concrete patch or masonry repair product. Follow the manufacturer’s instructions for proper application and drying times.
- After the patch has dried, smooth the surface with a trowel or a mortar jointer. For larger repairs, you may need to use a sander or grinder with a masonry wheel.
• Sanding the Surface
Sanding the surface helps to remove any remaining imperfections and creates a rough texture for better paint adhesion. Use fine-grit sandpaper (150 to 220 grit) for most surfaces, and remove sanding dust with a tack cloth or a vacuum cleaner.
• Applying Primer
Priming the surface ensures better paint adhesion, uniform color, and increased durability. Choose the right primer for your surface type and paint, and follow these steps:
- Stir the primer thoroughly with a paint stick.
- Use a brush or roller to apply the primer on the surface. Use long, even strokes, and work from top to bottom.
- Allow the primer to dry for the recommended time (usually 1 to 2 hours) before moving on to the paint application.
• Final Thoughts
Proper surface preparation is the key to a successful painting project. By following the steps outlined in this guide, you can ensure a smooth, even finish that will last for years to come.
Remember, the time and effort put into preparing the surface for painting will pay off in the long run and significantly improve the final result.
Step | Description |
|---|---|
1. Clean the surface. | Remove dust, dirt, grease, and any other contaminants from the surface using a damp cloth, sponge, or brush. Allow the surface to dry completely. |
2. Sand the surface. | Lightly sand the surface with medium-grit sandpaper to remove any existing paint or rough spots. This will help the new paint adhere better. |
3. Repair any damage. | Fill in any holes, cracks, or dents with filler or spackle. Once the filler has dried, sand it smooth. |
4. Remove any residue. | Wipe down the surface with a tack cloth or damp cloth to remove any sanding dust or residue before applying the primer. |
5. Apply primer. | If the surface is porous, stained, or to be painted with a lighter color, apply a coat of primer to seal the surface and provide better paint adhesion. |
6. Allow primer to dry. | Allow the primer to dry according to the manufacturer’s instructions, typically 1-2 hours, before applying paint. |
An Overview of Surface Preparation Approaches
Surface preparation is a crucial step in the process of painting, coating, bonding, or any other application that involves adhering materials to a surface. It ensures the durability and longevity of the applied material by removing contaminants and providing a suitable surface profile for proper adhesion.
• Cleaning Techniques
– Solvent Cleaning
Solvent cleaning is a common method for removing grease, oil, and other contaminants from a surface. The process involves applying a solvent, such as alcohol or acetone, on the surface and wiping it off using a clean cloth or paper towel.
It’s important to choose a solvent compatible with the surface material and the future coating to avoid any adverse reactions.
Solvents can vary in their effectiveness and safety, so it’s recommended to use a solvent with low toxicity and high flash point. Additionally, it’s crucial to follow safety guidelines and wear appropriate personal protective equipment (PPE) when handling solvents.
– Detergent Cleaning
Detergent cleaning is another effective method for removing contaminants from surfaces. This technique involves the use of water-based detergents, which can be applied using brushes, sponges, or pressure washers.
After cleaning, the surface must be thoroughly rinsed with water to remove any residue left behind by the detergent.
When selecting a detergent, ensure it is compatible with the surface substrate and future coating. Additionally, consider using biodegradable detergents to minimize environmental impact. It is important to follow the manufacturer’s instructions for proper mixing ratios and application methods.
• Mechanical Surface Preparation Techniques
– Abrasive Blasting
Abrasive blasting is a versatile and efficient method for surface profiling and cleaning. The process involves propelling a stream of abrasive media particles at high velocity against the surface, resulting in contaminant removal and uniform surface profile creation.
Some common types of abrasive blasting include sandblasting, shot blasting, and bead blasting.
Selecting the appropriate abrasive media is vital in achieving desired outcomes. Factors to consider when choosing an abrasive media include hardness, shape, size, and recyclability.
For example, steel shot is recommended when preparing a steel surface for coating to achieve a smooth surface profile due to its rounded shape and strength.
– Grinding
Grinding is a mechanical surface preparation technique that uses abrasive tools such as grinding wheels or discs to remove surface contaminants and create a suitable profile.
Grinding can be performed using angle grinders, bench grinders, or specialized grinding machines, depending on the size and complexity of the surface to be prepared.
When selecting grinding wheels or discs, consider factors such as the abrasive material, grain size, and bonding type. The choice of abrasive should be compatible with the surface material, while the grain size determines the surface finish produced.
A proper match between the grinding tool and surface material will ensure optimal results and prevent damage to the grinding equipment or the surface itself.
– Scabbling and Scaling
Scabbling and scaling are techniques used to remove old, damaged or deteriorated coatings and surface materials. Scabbling utilizes pneumatic or hydraulic tools with impact or rotary action, such as needle guns or scarifiers, to chip away at the surface.
Scaling, on the other hand, employs tools like scrapers, chisels, or wire brushes to manually remove surface materials.
Both methods are effective for preparing surfaces, but they can create a rough profile and are most suited for removing thick or tough layers of material.
It’s essential to use the appropriate tool and technique, applying adequate pressure and handling to avoid damaging the underlying substrate.
• Chemical Surface Preparation Techniques
– Acid Etching
Acid etching is a chemical surface preparation technique that involves applying a diluted acid solution to the surface. This creates a chemical reaction that removes contaminants and impurities from the surface while providing a suitable profile for adhesion.
Commonly used acids for this process include hydrochloric, phosphoric, and sulfuric acids. Ensure to follow safety guidelines when handling acids, as they can be hazardous.
It’s also vital to neutralize and rinse the surface thoroughly with water after etching to prevent any further chemical reactions that could harm the applied coatings.
– Chemical Stripping
Chemical stripping is a technique for removing existing coatings or paints from a surface. This method involves applying chemical strippers, which can be in the form of liquids, gels, or pastes, on the surface.
These chemicals break the bond between the surface substrate and the coating, allowing it to be removed. When selecting a chemical stripper, consider its effectiveness, environmental impact, and compatibility with the substrate.
Follow the manufacturer’s instructions for proper application and removal, and ensure the surface is rinsed and neutralized adequately after stripping. Always wear appropriate PPE when handling chemicals.
• In conclusion
Utilizing effective surface preparation techniques is critical in ensuring successful coatings, bonding or adhesion applications.
Understanding the advantages and limitations of each method and selecting the most suitable one based on surface material and desired outcome can lead to an increase in the durability and longevity of the applied materials.
Proper safety practices, environmental considerations, and equipment maintenance should be prioritized during surface preparation processes, yielding a professional result suitable for the project’s demands.
Technique | Description |
|---|---|
Cleaning | Removing dirt, grease, oils, and other contaminants from the surface. |
Scrubbing/Washing | Using a brush or sponge with water, soap, or detergent to clean the surface. |
Degreasing | Using a chemical solution to remove grease and oils from the surface. |
Sanding | Using abrasive materials, such as sandpaper or steel wool, to smooth and even out the surface. |
Abrasive Blasting | Using a high-pressure stream of abrasive particles, such as sand or glass beads, to remove rust, paint, or other coatings from the surface. |
Chemical Stripping | Applying a chemical solution to dissolve and remove coatings, such as paint or varnish, from the surface. |
Etching | Applying a chemical solution to alter the surface texture or pattern for improved adhesion of coatings or other treatments. |
Phosphating | Applying a chemical solution to form a layer of metal phosphate on the surface, which can improve corrosion resistance and adhesion of coatings. |