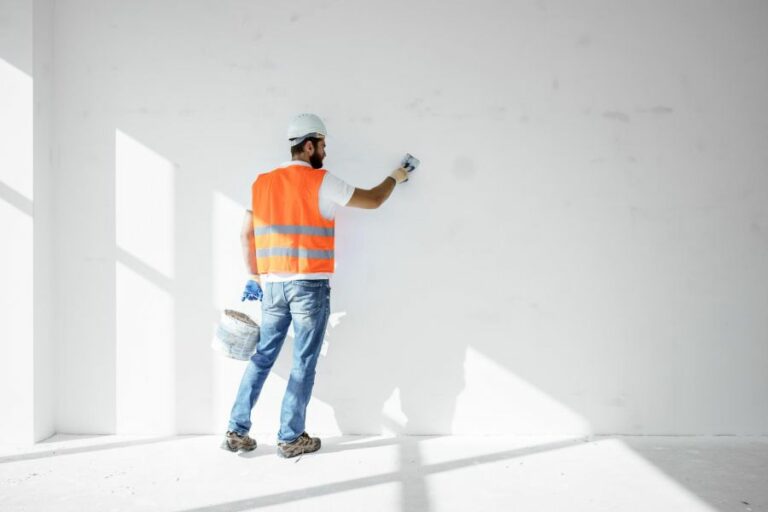
Clearing Wall Surfaces Prior To Repainting. What Pros Say
You’re ready to give your home a fresh new look with a coat of paint, but hold on! Before diving into the repainting process, a crucial step that is often overlooked is clearing the wall surfaces. Fear not, for we have the perfect guide that will ensure your walls are prepped and primed for a flawless and long-lasting paint job.
Clearing wall surfaces prior to repainting:
Proper wall surface preparation before repainting is crucial for achieving excellent results. It involves removing dirt, grease, and peeling paint, repairing damages and imperfections, sanding the surface, and applying a primer. This ensures a smooth, long-lasting finish and prevents paint issues such as peeling, bubbling, or uneven color distribution.
Want to give your walls a fresh look but not sure how to prepare the surfaces for a smooth, flawless finish? We have all the tips and tricks you need for clearing and prepping wall surfaces for repainting. Read on to learn how to achieve professional results and transform your space.
Contents
- 1 Preparing Wall Surfaces for Repainting: A Guide
- 2 Steps to Clean Walls Effectively Before Repainting
- 2.1 • Introduction
- 2.2 • Why Clean Walls Before Painting?
- 2.3 • Essential Tools and Supplies for Cleaning Walls
- 2.4 • Step 1: Protect Furniture and Floors
- 2.5 • Step 2: Prepare Your Cleaning Solution
- 2.6 • Step 3: Wash the Walls Systematically
- 2.7 • Step 4: Dry the Walls
- 2.8 • Step 5: Evaluate and Repeat if Necessary
- 2.9 • Step 6: Allow Walls to Dry Completely
- 2.10 • Final Thoughts
- 3 Recommended Cleaning Solutions for Painted Surfaces Pre-Repainting
- 4 Professional Painters’ Techniques for Cleaning Walls Prior to Painting
- 5 Best Methods for Cleaning Walls Post-Sanding and Pre-Painting
Preparing Wall Surfaces for Repainting: A Guide
• Why Is Proper Surface Preparation Important?
Preparing the wall surface before repainting is crucial to achieve excellent results. A clean and smooth surface allows the paint to adhere properly, preventing problems such as peeling, bubbling, and uneven color distribution.
Moreover, freshly painted walls with well-prepared surfaces last longer and require less maintenance.
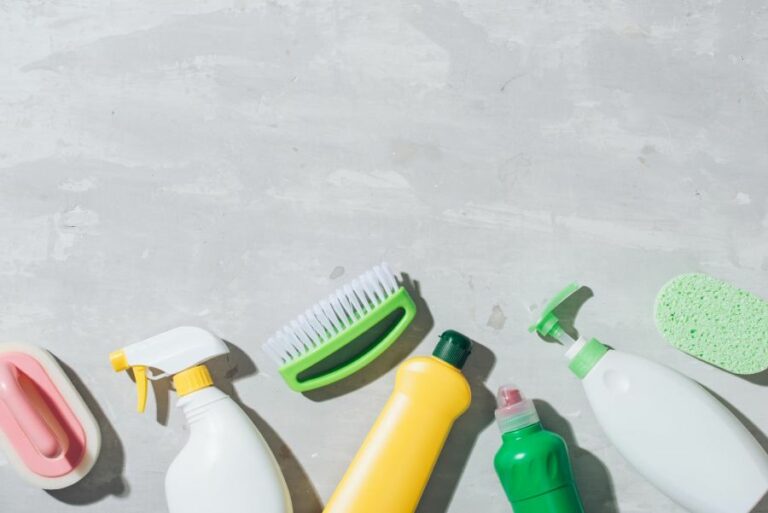
• Gathering the Necessary Tools and Materials
Before starting the cleaning process, gather all the necessary tools and materials. Some essential items include:
- Cleaning solution (such as trisodium phosphate or a milder alternative)
- Bucket and water
- Sponge or cloth
- Protective gear (gloves, goggles, and mask)
- Paint scraper
- Sandpaper or sanding block
- Drywall compound
- Putty knife
- Primer
- Paintbrushes and rollers
• Steps to Clear Wall Surfaces
1. Remove Dirt and Grease
Begin by removing any dirt, grease, or grime on the wall surface. This can be done using a sponge or cloth dipped in a cleaning solution. Trisodium phosphate (TSP) is a popular choice, known for its effectiveness in removing stubborn stains and grease.
However, TSP may not be suitable for all surfaces and may have environmental concerns. In such cases, consider using a milder, eco-friendly alternative.
Pay special attention to areas near light switches and kitchen walls, which tend to accumulate more grease and grime. Rinse the wall thoroughly with clean water and allow it to dry completely before moving on to the next step.
2. Scrape Off Peeling Paint
Old, peeling paint must be removed to ensure a smooth finish when repainting. Using a paint scraper, gently scrape away any loose or peeling paint. Be careful not to damage the wall surface while scraping, as it can lead to unsightly marks and more extensive repairs.
3. Repair Damages and Imperfections
Inspect the wall for any cracks, holes, or dents that need repair. These imperfections can affect the final appearance of the paint job, so it’s crucial to address them beforehand.
Small repairs can be done using a premixed drywall compound. Apply the compound using a putty knife, smoothing it over the damaged area. Allow it to dry and sand it down to create an even surface.
For more severe damages, such as large holes and deep cracks, you may need professional help to ensure a proper repair job.
4. Sand the Wall Surface
Sanding the wall surface is essential for creating a smooth, even base for the paint to adhere to. Use sandpaper or a sanding block with fine grit (around 120 to 150) to smooth out any rough spots or remaining imperfections.
It’s also a good idea to sand the entire wall lightly to improve the adhesion of the new paint. After sanding, be sure to remove any dust by wiping the wall with a damp cloth or using a vacuum cleaner with a brush attachment.
5. Apply Primer
Primer plays a significant role in achieving an even and long-lasting paint job. It improves paint adhesion, seals porous surfaces, and provides a smooth, uniform base for the topcoat.
Using a paintbrush or roller, apply the primer evenly over the entire wall, ensuring there are no visible gaps or streaks.
Allow the primer to dry completely before moving on to the painting stage. The drying time may vary depending on the product, so follow the manufacturer’s instructions carefully.
• Additional Tips for a Successful Repaint Job
- Don’t rush the drying process: Allowing ample time for the wall to dry after cleaning, repairs, and applying primer are crucial for a successful paint job. Rushing this process can result in paint not adhering correctly and lead to problems in the future.
- Choose high-quality paint: Investing in high-quality paint can make a big difference in the final appearance and durability of the paint job. A premium paint product will provide better coverage, easier application, and longer-lasting results.
- Test the paint color: Before committing to paint color, apply a small sample of it on the wall and observe how it looks under different lighting conditions. This way, you can ensure that you are satisfied with your choice before painting the entire wall.
- Use the correct painting technique: When it comes to painting, using the proper technique can greatly improve the final outcome. For instance, using the “W” technique when applying paint with a roller ensures even coverage and helps prevent visible roller marks.
In conclusion, taking the time to properly prepare the wall surface before repainting is crucial to achieving the best results. Following the steps outlined in this article, you can ensure a smooth, even, and long-lasting paint job.
Steps to Clean Walls Effectively Before Repainting
• Introduction
A fresh coat of paint can transform a room and give it a fabulous update. However, before you can grab your paintbrush and start painting, it’s crucial to prep your walls to ensure the best outcome. A critical part of this preparation is cleaning.
• Why Clean Walls Before Painting?
Cleaning walls before painting is an often overlooked but crucial step in the repainting process. Here are the three key reasons why:
- Better paint adhesion: Clean walls provide a more suitable surface for the paint to adhere to, resulting in a smoother and longer-lasting finish.
- Improved paint coverage: Dirt, grime, and grease can cause uneven paint coverage and make it difficult for the paint to cover the wall evenly.
- Reduced chance of paint failure: Proper cleaning will remove contaminants that may cause paint to peel, crack, or blister over time.
Now that we understand why it’s essential to clean walls before repainting, let’s dive into the process.
• Essential Tools and Supplies for Cleaning Walls
Before we begin, gather the following tools and supplies to make the cleaning process more efficient:
- Mild dish soap or cleaning solution (e.g., TSP, Trisodium Phosphate)
- Warm water
- 2 large buckets
- Sponge or soft cloth
- Soft-bristled brush
- Lint-free rags or towels
- Rubber gloves
- Drop cloths or plastic sheeting
- Masking tape
• Step 1: Protect Furniture and Floors
Before you start cleaning the walls, prepare the room by removing or covering furniture and placing drop cloths or plastic sheeting on the floors to protect them from any water or cleaning solution. Use masking tape to secure the edges of the drop cloths or sheeting to the floor.
• Step 2: Prepare Your Cleaning Solution
Use a mild dish soap or a specially-formulated cleaning solution like Trisodium Phosphate (TSP) mixed with warm water.
If you are using TSP, follow the manufacturer’s instructions for the appropriate dilution ratio. Fill one of your buckets with the cleaning solution and the other with plain water for rinsing.
Tip: While TSP is an effective cleaner, it can be harsh on the environment and may not be suitable for all surfaces. In such cases, consider using a TSP substitute or a mild dish soap diluted in warm water.
• Step 3: Wash the Walls Systematically
Starting at the top of the wall and working your way down, use a sponge or soft cloth dampened in the cleaning solution to gently scrub the surface. Use circular motions and avoid saturating the wall, as excessive moisture can damage the drywall.
For stubborn stains or areas of heavy grime, use a soft-bristled brush to gently scrub the area without applying too much pressure to avoid damaging the wall.
After washing a section of the wall, use a clean sponge or cloth dampened with plain water to rinse the area. This will help remove the residual cleaning solution and dirt.
Tip: I recommend washing walls at least two or three feet in width at a time. This will allow you to rinse the wall before the cleaning solution dries, preventing streaks and residue.
• Step 4: Dry the Walls
After cleaning and rinsing the walls, it’s essential to dry them thoroughly to prevent moisture-related damage. Use lint-free rags or towels to gently pat the wall dry, starting from the top and working your way down.
Tip: If you have access to high-quality window squeegees, you can use one to remove the excess water from the walls before patting them dry.
• Step 5: Evaluate and Repeat if Necessary
Once the walls are dry, inspect them for any remaining dirt, grime, or stains. If necessary, repeat the cleaning process for specific areas or the entire wall until you achieve a clean and uniform surface.
• Step 6: Allow Walls to Dry Completely
It’s crucial to let the walls dry completely for at least 24 hours before applying primer or paint. This will minimize the risk of moisture-related paint issues, such as blistering or peeling.
• Final Thoughts
Cleaning walls before repainting is a critical step in achieving a professional and long-lasting paint job. By diligently following the steps and tips outlined in this article, you’ll be well on your way to transforming your space with a fresh, clean coat of paint.
Step | Description |
|---|---|
1. Prepare the Area | Remove all furniture, cover the floors with drop cloths, and mask any fixtures or baseboards that you want to protect. |
2. Dust the Walls | Use a vacuum cleaner with a brush attachment, a broom, or a duster to remove any dust and cobwebs from the walls. |
3. Mix a Cleaning Solution | Prepare a mild cleaning solution with water and gentle dish soap, or use a commercial wall cleaner. You can also use a solution of water and white vinegar for stubborn stains. |
4. Wash the Walls | Using a sponge or soft cloth, work from the top to the bottom of the wall, applying the cleaner in circular motions. Make sure to wring out the sponge or cloth frequently to avoid excessive dripping. |
5. Rinse the Walls | Use a clean sponge or cloth and fresh water to rinse the walls, removing any soap residue. |
6. Dry the Walls | Use a clean, dry towel or microfiber cloth to gently pat the walls dry, ensuring all excess moisture is removed. |
7. Address Any Remaining Stains | For stubborn stains, use a solution of water and white vinegar or a commercial stain remover, and gently scrub the area with a soft brush or cloth. |
8. Allow the Walls to Fully Dry | Wait for the walls to air dry completely before proceeding with painting, typically about 24 hours. |
Recommended Cleaning Solutions for Painted Surfaces Pre-Repainting
• The Importance of Surface Preparation
Preparing a painted surface before repainting is a crucial step in the painting process. Proper cleaning ensures better adhesion of the new paint, improves the finish quality, and extends the lifespan of the paint job.
• Assessing Your Painted Surface
Before determining the best cleaning method, you should assess the condition of the painted surface. Look for signs of peeling, chipping, or flaking paint and any mold, mildew, or dirt accumulation.
– Chipped, Peeling, or Flaking Paint
If the old paint is noticeably chipping, peeling, or flaking away, it needs to be removed before repainting. You can use a paint scraper, wire brush, or an electric or pneumatic paint removal tool to remove the loose paint.
If the paint is lead-based, you must follow proper lead paint removal procedures, such as using a HEPA vacuum and wearing protective gear.
– Mold and Mildew
If your painted surface has mold and mildew, these contaminants must be removed before repainting. Use a solution of one part household bleach to three parts water and a soft-bristled brush to clean the affected area.
After cleaning, rinse the entire surface thoroughly with clean water to remove any residual bleach.
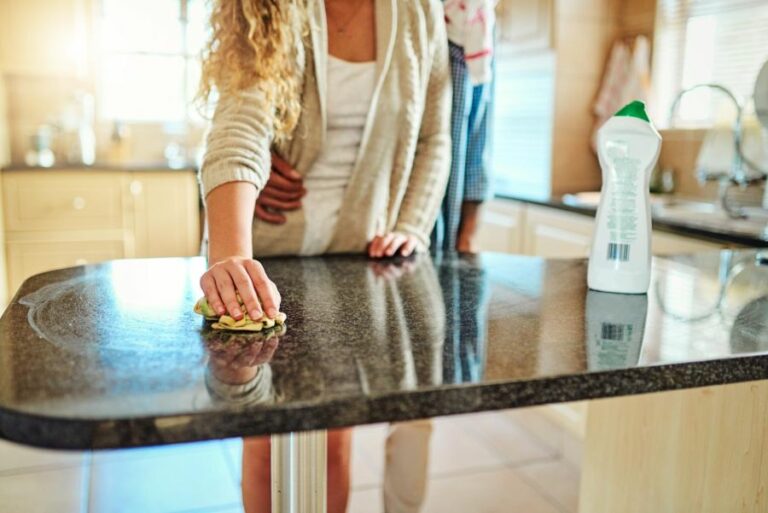
– Dirt and Grime
If your painted surface has accumulated dirt and grime, you can use a sponge or cloth and a mixture of warm water, and a mild detergent like dish soap to clean the surface. Be careful not to scrub too hard, as this can damage the existing paint.
• Cleaning Methods
– Manual Cleaning
When tackling a small area or focusing on specific spots, manual cleaning methods work best. Use a sponge, cloth, or soft-bristled brush and a gentle cleaning solution to remove dirt and grime.
Be careful not to oversaturate the surface or scrub too hard, as this may damage the paint. Always rinse the surface with clean water after using a cleaning solution to prevent residue buildup.
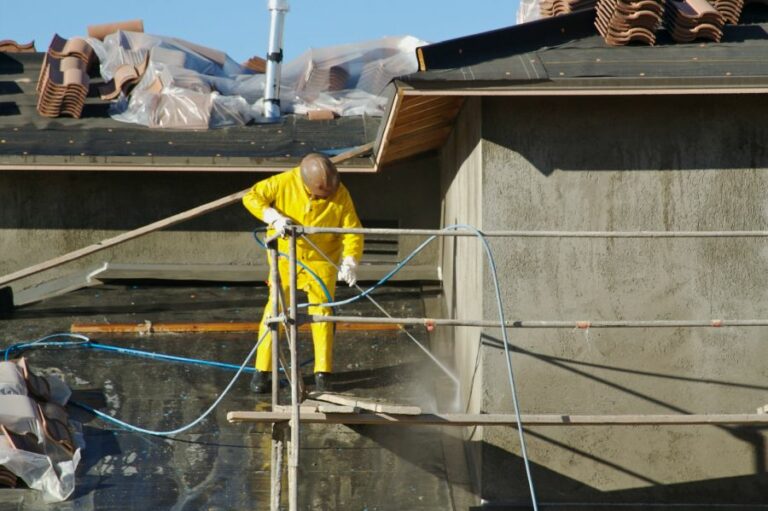
– Pressure Washing
For larger surfaces or exterior paint jobs, pressure washing is an efficient and effective cleaning method. Pressure washing can remove dirt, grime, and mildew that may have accumulated on the surface over time.
Start at low pressure and gradually increase as needed, being careful not to damage the paint or the surface underneath. Always keep the pressure washer nozzle at least 12 inches away from the surface to avoid damage.
• Drying and Further Preparation
After cleaning, allow the painted surface to dry thoroughly. Drying times may vary depending on the surface, the cleaning method used, and the weather conditions. Generally, it takes about 24 hours for a surface to dry completely after cleaning.
Once the surface is dry, you may need to do additional preparations, such as patching cracks, holes, or dents using a suitable filler material like spackling paste or wood filler. Sand the filled areas smooth and wipe away any dust or debris with a tack cloth.
• Primer Application
In some cases, especially when changing paint colors, applying a primer before repainting is recommended. Primers help improve paint adhesion and provide a uniform surface for the new paint, ensuring a longer-lasting and high-quality finish.
• Final Thoughts
Proper surface preparation is crucial for achieving professional and long-lasting painting results. By thoroughly cleaning your painted surface, you set the stage for a successful repainting project.
By following the recommendations and methods outlined in this article, you can ensure that your repainted surface will look fresh and last for years to come.
Step | Description |
|---|---|
1 | Dust the surface using a soft brush or cloth to remove any loose dirt and debris. |
2 | Prepare a cleaning solution by mixing a few drops of mild dish soap in a bucket of warm water. |
3 | Dampen a sponge or cloth in soapy water and gently scrub the painted surface. |
4 | Rinse the surface thoroughly with clean water to remove any soap residue and allow it to dry completely. |
5 | For stubborn stains or grease, use a commercial cleaner specifically designed for painted surfaces. |
6 | If the surface has mold or mildew, use a mixture of water and bleach (1 part bleach to 3 parts water) and let it sit for a few minutes before scrubbing and rinsing. |
7 | If necessary, use a deglosser to remove any gloss from the old paint before repainting. |
Professional Painters’ Techniques for Cleaning Walls Prior to Painting
As a professional painter with years of experience, I can confidently state that cleaning walls before painting is an essential step in the painting process. There are various reasons why it is important, and I will explain this in the following sections.
Additionally, I will be providing recommendations on how to clean the walls effectively.
• Importance of Cleaning Walls Before Painting
– Improved Adhesion
One of the main reasons for cleaning walls before painting is to ensure the paint adheres to the surface well. Dust, dirt, and grease can accumulate on the wall over time, interfering with the paint’s adhesion.
A clean surface provides a strong foundation for the paint, making the finish more durable and long-lasting.
– Enhanced Appearance
Cleaning walls before painting can help ensure a smooth, even finish. Uneven surfaces and debris can lead to an unsatisfactory and unprofessional final result. A clean surface allows for a better finish and makes it easier to spot imperfections that require additional attention or touch-ups.
– Reduced Painting Errors
Having a clean surface helps in identifying any wall defects like cracks, holes, and dents that may need fixing before painting. Addressing these imperfections before applying paint will save time and effort in the long run, as it reduces the chances of needing to revise your work after applying the first coat.
• Tips for Cleaning Walls Before Painting
– Removing Dust and Dirt
Before starting any painting project, it is essential to remove dust and dirt from the walls. One effective method is using a microfiber cloth or a vacuum cleaner with a soft brush attachment to clean the wall gently. Move the cloth or brush in a top-to-bottom motion, ensuring you cover the entire surface.
– Tackling Grease Stains
Grease stains may be stubborn, requiring a more specialized approach. I recommend using a mild dishwashing liquid mixed with warm water to create a cleaning solution.
Apply the solution to the grease stains using a sponge, then gently scrub until the stain is removed. Be sure to rinse the sponge frequently during the process.
– Cleaning Mold and Mildew
Mold and mildew can be a common issue in damp areas, such as bathrooms or basements. To address mold and mildew, create a solution of one-part bleach to three parts water and apply it to the affected areas using a sponge.
Allow the solution to sit for a few minutes before rinsing with clean water. If mold or mildew is a recurring problem, you may need to consult a professional for further investigation and remediation.
– Drying the Walls
After cleaning, it is crucial to allow the walls to dry completely before proceeding with painting. Open the windows and doors, and use fans or dehumidifiers to facilitate quicker drying times.
• Final Preparation
Once the walls have been thoroughly cleaned and dried, inspect the surface for any remaining imperfections or damage. Address these issues by filling cracks, holes, or dents with a suitable filler, and sand them smooth once dry.
After addressing any imperfections, it is important to remove any remaining dust using a clean, damp cloth or a tack cloth, ensuring the surface is entirely smooth and dust-free.
• In Conclusion
Cleaning walls before painting is an essential part of the process, contributing to enhanced paint adhesion, a better finish, and reduced painting errors.
Professional painters understand the importance of this step and always ensure walls are cleaned and prepped for the best possible results. Implementing the tips and techniques shared here will ensure a successful, professional-quality painting project.
Best Methods for Cleaning Walls Post-Sanding and Pre-Painting
Properly cleaning walls after sanding is a crucial step in the painting process. It ensures that the paint adheres properly, and it helps create a smooth and consistent finish.
• Materials and Tools for Cleaning Walls
Before you begin cleaning your walls, gather the necessary materials and tools to make the job more efficient.
- Vacuum Cleaner with Brush Attachment: A vacuum cleaner with a brush attachment is great for removing dust and debris from the walls. The brush helps to loosen any stubborn particles that may be clinging to the surface.
- Tack Cloth: A tack cloth is a special type of cloth that is treated with a sticky substance. This helps it to pick up and trap dust and other particles, making it an excellent tool for cleaning walls.
- Damp Cloth or Sponge: A damp cloth or sponge is useful for wiping down the walls after using a tack cloth. This helps to remove any remaining dust or residue.
- Mild Dish Soap or Wall Cleaner: A mild cleaner, such as dish soap or a wall cleaner, is effective in removing any stubborn stains or dirt that may be on the walls. Avoid using harsh chemicals or abrasive cleaners, as they can damage the surface.
- Bucket of Warm Water: Warm water helps to dissolve and remove dirt and grime more easily than cold water.
- Ladder or Step Stool: Depending on the height of your walls, a ladder or step stool may be needed to safely reach all areas.
• Step by Step Guide to Cleaning Walls After Sanding
Here are the steps to follow when cleaning your walls after sanding:
1. Vacuum the Walls
Start by vacuuming the walls using the brush attachment. Work from the top of the wall down to the baseboards, moving in a horizontal motion. This helps to remove the majority of the dust and debris from the surface. Be sure to vacuum any corners, edges, or trim on the walls as well.
2. Use a Tack Cloth
Following the vacuuming, use a tack cloth to pick up any remaining dust and particles. Gently wipe the walls with the tack cloth, working from the top to the bottom.
Be thorough in your cleaning, as any dust left behind can lead to an uneven paint job. If the tack cloth becomes too dirty, fold it over to reveal a clean section or replace it with a new one.
3. Wipe with a Damp Cloth or Sponge
After using the tack cloth, take a damp cloth or sponge and gently wipe down the walls. This helps to remove any residual dust or dirt that may still be present. Be sure to wring out the cloth or sponge frequently to avoid spreading the dirt.
4. Clean with Mild Dish Soap or Wall Cleaner
If there are any stains or stubborn dirt on the walls, use a mixture of mild dish soap or wall cleaner with warm water in a bucket.
Dampen a cloth or sponge in the solution and gently scrub the affected areas. Be sure to rinse the cloth or sponge frequently to prevent spreading the dirt.
5. Rinse and Dry
After cleaning with soap or a cleaner, use a clean, damp cloth or sponge to rinse the walls. Make sure to remove any soap residue. Finally, use a dry microfiber cloth or clean towel to thoroughly dry the walls. This helps prevent moisture from causing any issues with the paint application.
• Expert Tips for Cleaning Walls After Sanding
Here are some valuable tips to remember when cleaning your walls after sanding:
- Always wait until the wall has completely dried before starting the painting process.
- Wear safety glasses and a dust mask during the sanding and cleaning process to protect your eyes and lungs from dust particles.
- Check if the walls need additional cleaning after the first round of vacuuming and using a tack cloth. They may require another pass to ensure a dust-free surface.
- Change the vacuum cleaner bag or empty the dust container before starting to ensure it’s working at maximum efficiency.
• Conclusion
Cleaning your walls after sanding is an essential step in achieving a professional-looking paint job. Following the steps and tips provided in this article will ensure a clean and dust-free surface, ready for painting.
Method | Description |
|---|---|
Damp Cloth | Wipe down the walls using a damp cloth to remove dust and debris from sanding. |
Tack Cloth | Use a tack cloth to pick up any remaining dust particles on the wall after using a damp cloth. |
Vacuum Cleaner | Use a vacuum cleaner with a brush attachment to remove dust from the walls and the surrounding area. |
Dry Brush | Use a dry brush to sweep away any loose dust particles from the wall before wiping it down with a damp cloth. |