Preparing Surfaces For Repainting: Step-By-Step Guide
Are you planning to give your space a fresh new look with a repaint? Look no further! We have the perfect step-by-step guide to help you prepare your surfaces for a flawless repainting job. Our expert recommendations will ensure a smooth and professional-looking result, whether you’re a seasoned DIYer or a first-time painter.
Preparing surfaces for repainting: a step-by-step guide:
To prepare surfaces for repainting, follow these steps: 1) Assess the surface, addressing any imperfections. 2) Clean the surface with a mild detergent. 3) Remove old paint or wallpaper. 4) Repair surface imperfections using appropriate filler. 5) Sand and smooth the surface. 6) Apply primer evenly. 7) Perform a final surface inspection before painting. Proper preparation ensures a lasting, visually appealing paint job.

Continue reading as we delve further into this comprehensive step-by-step guide on preparing surfaces for repainting. Discover essential tips and learn the importance of proper surface preparation to ensure a smooth, long-lasting, and professional paint job. You won’t want to miss these expert insights!
Contents
- 1 Step-by-Step Guide to Surface Preparation for Repainting
- 2 9 Essential Steps for Proper Surface Preparation
- 2.1 • Step 1: Assess the Surface Condition
- 2.2 • Step 2: Remove Loose Material
- 2.3 • Step 3: Clean the Surface
- 2.4 • Step 4: Remove Old Paint
- 2.5 • Step 5: Repair Damages
- 2.6 • Step 6: Sand and Smooth
- 2.7 • Step 7: Decontaminate the Surface
- 2.8 • Step 8: Final Cleaning and Drying
- 2.9 • Step 9: Surface Profiling
- 3 Steps to Prepare an Aged Surface for a Fresh Paint Job
- 3.1 • Importance of Surface Preparation
- 3.2 • Step 1: Inspect and Assess the Surface
- 3.3 • Step 2: Clean the Surface
- 3.4 • Step 3: Remove Old Paint and Loose Debris
- 3.5 • Step 4: Repair Surface Damages
- 3.6 • Step 5: Sand the Surface
- 3.7 • Step 6: Prime the Surface
- 3.8 • Step 7: Caulking and Sealing
- 3.9 • Conclusion
- 4 Preparatory Tasks for Repainting an Old Painted Surface
Step-by-Step Guide to Surface Preparation for Repainting
A well-prepared surface not only ensures longevity and adhesion of the new paint but also enhances the overall appearance of the repainted area. This comprehensive guide details the essential steps involved in preparing various surfaces for repainting.
• Step 1: Assess the Surface
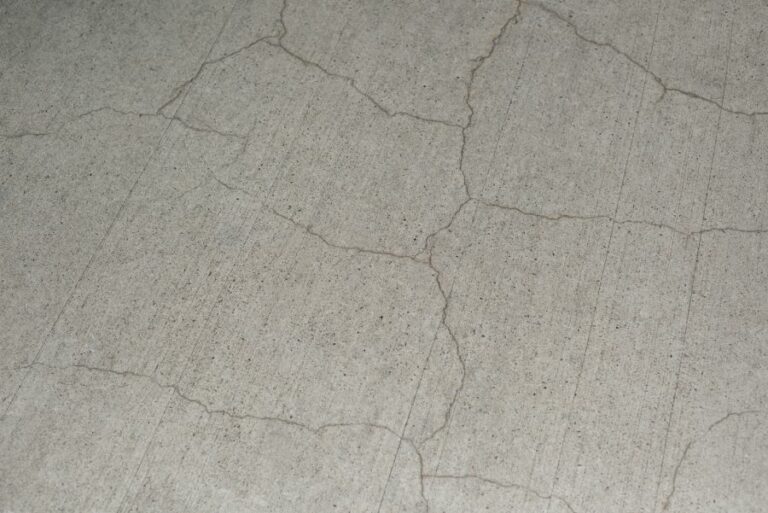
Different surfaces require distinct preparation techniques. Before starting, inspect the surface carefully, noting any cracks, holes, or uneven areas. Make sure to address these imperfections during the preparation stage to achieve the best results.
Some common surfaces and their unique considerations:
- Wood: Check for signs of rot and replace or repair any damaged areas.
- Drywall: Fill in dents, holes, or cracks with joint compound before sanding and priming.
- Masonry: Remove any loose or damaged areas and repair them with an appropriate filler.
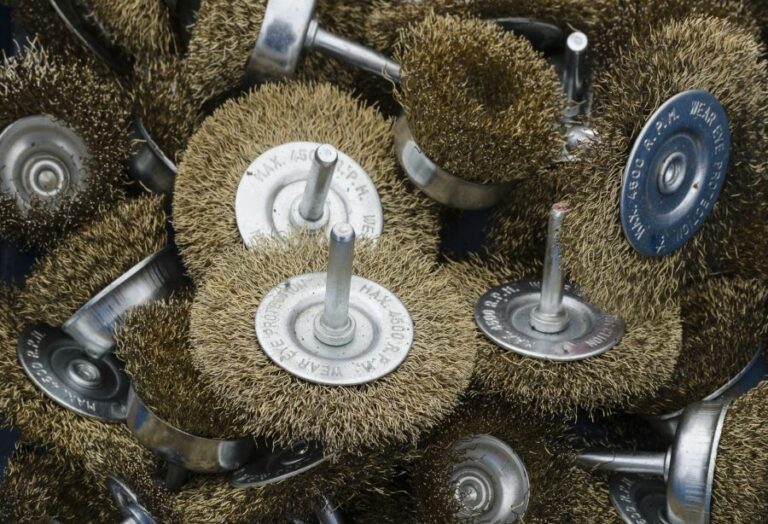
- Metal: Remove any rust or corrosion with a wire brush before sanding and priming.
• Step 2: Clean the Surface
A clean surface is essential for proper paint adhesion. Start by dusting off or vacuuming the surface to remove loose dirt and particles.
Next, use a mild detergent mixed with warm water to clean the surface thoroughly. For heavily soiled areas, consider using specialized cleaning agents, such as TSP (trisodium phosphate), to ensure it is free of grime, grease, and oil.
After cleaning, let the surface dry completely before proceeding.
• Step 3: Remove Old Paint and Wallpaper
Loose or peeling paint can disrupt the final finish and reduce the durability of the new paint. Use a paint scraper, putty knife, or wire brush to remove any old paint or wallpaper gently.
Take care not to damage the underlying surface in the process. For larger projects, consider using a paint-removing solution or a heat gun to expedite the task.
• Step 4: Repair Surface Imperfections
To achieve a smooth, professional finish, it is important to address any surface imperfections before repainting.
Depending on the surface and type of defect, use an appropriate filler, such as wood filler, joint compound, or masonry mortar, to fill in the gaps and cracks. Follow the manufacturer’s instructions for the best results.
For any nail or screw holes, first, remove any protruding hardware. Fill the holes with filler and use a putty knife to smooth it out, leveling it with the surrounding surface.
Allow the filler to dry as per the recommended time before proceeding.
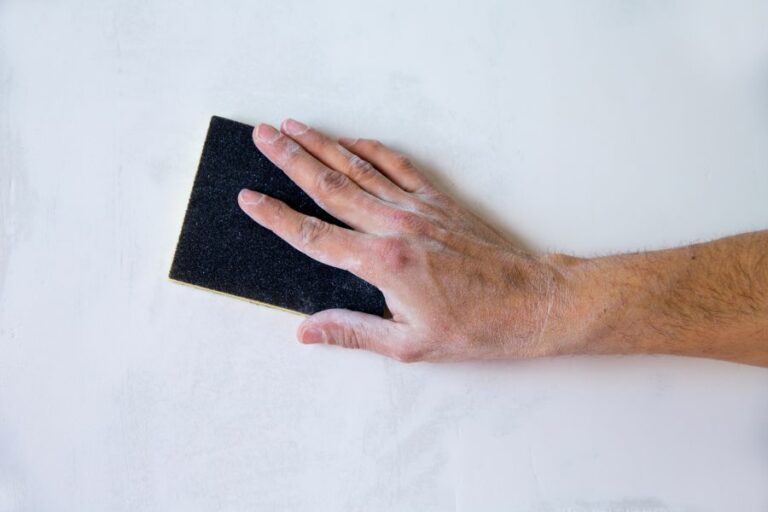
• Step 5: Sanding and Smoothing the Surface
Sanding creates a smooth, even surface that enhances paint adhesion. Use sandpaper or a sanding block with the appropriate grit (typically ranging from 120 to 220), depending on the condition and type of surface.
For larger surfaces or difficult-to-reach areas, consider using a power sander or sanding attachment for your drill.
Sand in circular motions, applying even pressure across the surface. Pay particular attention to any patched or filled areas, ensuring they blend seamlessly with the rest of the surface.
After sanding, remove any dust or debris with a vacuum, followed by wiping the surface down with a tack cloth or a damp cloth.
• Step 6: Apply Primer
Primer is critical for achieving an even, durable paint finish. Consult with your local paint supplier to select the appropriate primer for your surface.
Using a brush, roller, or airless paint sprayer, apply the primer evenly across the surface. Allow the primer to dry completely, according to the manufacturer’s instructions. In most cases, one coat of primer is sufficient.
However, for porous surfaces or drastic color changes, a second coat of primer may be necessary.
• Step 7: Final Surface Inspection
Before starting the painting process, perform a final inspection of the prepared surface. Look for any uneven areas, remaining dust or debris, or spots where the primer may have been applied too thinly. Address these issues as needed to ensure a smooth, professional finish.
Following this guide and devoting time to surface preparation will help achieve a long-lasting, visually appealing paint job. With the proper preparation, the final results will be well worth the effort.
9 Essential Steps for Proper Surface Preparation
• Step 1: Assess the Surface Condition
The initial step in surface preparation is to thoroughly assess the condition of the surface. This includes inspecting for loose material, contaminants, and damages that might interfere with the success of the upcoming work.
• Step 2: Remove Loose Material
Once the surface has been evaluated, any loose material such as old paint, rust, or scale should be removed. This can be done using hand tools like scrapers and wire brushes or power-tools like sanders and grinders.
For best results, use the appropriate tools and techniques that suit the specific material you’re working with.
• Step 3: Clean the Surface
Cleaning the surface is crucial for ensuring proper surface preparation. Any dust, dirt, grime, or grease should be thoroughly removed from the surface using water, detergent, or solvents as required.
• Step 4: Remove Old Paint
If the surface has old paint that needs to be removed, consider using paint removers, scrapers, or power tools to effectively eliminate the paint. Keep in mind that certain paints may contain harmful chemicals, and proper safety precautions and waste disposal methods should be followed.
• Step 5: Repair Damages
Surface damages such as cracks, holes, or dents should be repaired before proceeding with any further surface preparation. This might involve filling the cracks with a suitable filler or leveling the surface if required.
Remember to follow the manufacturer’s instructions on using the respective filler or leveling compound for the best results.
• Step 6: Sand and Smooth
To ensure a smooth and well-prepared surface, sanding is often necessary. Sanding can remove minor surface defects and improve the surface profile, which is vital for paint adhesion. Different grits of sandpaper or sanding tools can be utilized depending on the surface material and requirements.
• Step 7: Decontaminate the Surface
After sanding, it’s essential to decontaminate the surface to clear away any traces of oil, grease, or other contaminants that may have accumulated during the earlier steps.
Decontamination can be achieved using water, solvents, or specialized detergents, depending on the specific contaminants present on the surface.
• Step 8: Final Cleaning and Drying
Once decontamination is complete, a final cleaning should be conducted. This involves wiping the surface with a tack cloth or lint-free cloth to eliminate any remaining dust, dirt, or debris.
Following cleaning, allow the surface to dry completely, as any remaining moisture could hinder adhesion or lead to other issues during the application of coatings.
• Step 9: Surface Profiling
The final step in surface preparation involves profiling, which is the process of creating an optimal surface texture to promote adhesion between the coating and the substrate.
Surface profiling can be achieved using various techniques such as abrasive blasting, mechanical scarifying, or acid etching, depending on the surface material and desired outcome.
In conclusion, proper surface preparation is essential for achieving success in any coating or finishing job. By following these nine steps, you can ensure that the surface is optimally prepared for the application of coating materials and be confident in the longevity of the final result.
Steps to Prepare an Aged Surface for a Fresh Paint Job
A professional, clean, and polished paint job can work wonders in revamping the overall look of older surfaces. However, to achieve the desired results, it is crucial to prepare the surface meticulously before painting.
• Importance of Surface Preparation
Proper surface preparation is crucial for the following reasons:
- It ensures proper paint adhesion.
- It prevents premature paint failure.
- It helps identify any damage that needs repair before painting.
• Step 1: Inspect and Assess the Surface
The initial step involves a thorough inspection of the older surface. Closely examine the surface to detect any visible signs of damage, such as peeling paint, cracks, mold, or mildew.
If you discover any structural damages, consult a professional contractor to resolve the underlying issues before proceeding further.
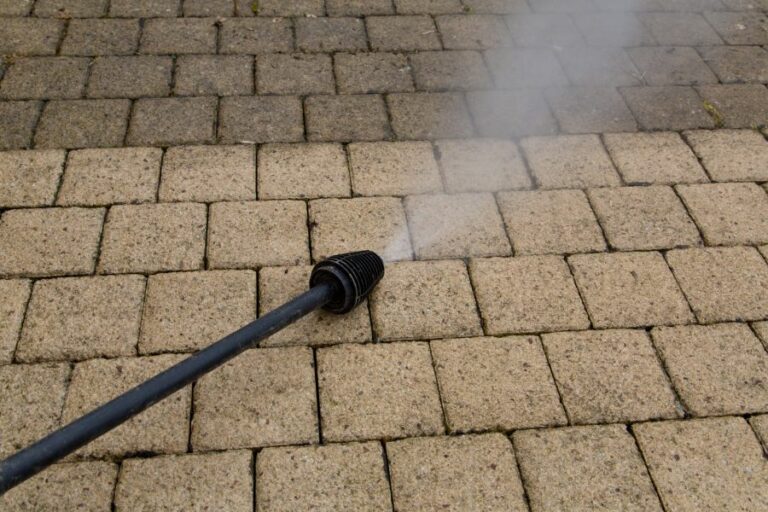
• Step 2: Clean the Surface
A clean surface is critical in achieving a flawless paint job. Remove any dirt, dust, grease, or grime present on the surface by using detergent and water. For outdoor surfaces, a pressure washer can greatly speed up this process.
• Step 3: Remove Old Paint and Loose Debris
Old, peeling paint should be scraped off the surface carefully using a paint scraper or a wire brush. For stubborn paint, using a heat gun or chemical paint remover can be more effective.
Ensure that you wear appropriate protective gear, such as goggles, gloves, and a face mask, while removing paint.
• Step 4: Repair Surface Damages
Minor damages and imperfections on the surface should be repaired before painting. Some common repairing tasks include:
- For cracked or damaged wood, use wood filler or putty to fill the gaps.
- Small holes or cracks in the drywall can be filled using a pre-mixed joint compound.
- When dealing with damaged stucco surfaces, apply a cement-based stucco patch.
After repairing the surface, let the filler material dry completely according to the manufacturer’s instructions before moving on to the next step.
• Step 5: Sand the Surface
Sanding the surface is necessary to achieve a smooth and even canvas for painting. Use the appropriate sandpaper grit for your specific surface type.
For rough surfaces, start with coarse sandpaper (60-80 grit) and gradually move to finer sandpaper (120-150 grit) until the surface feels smooth to the touch. Always sand in the direction of the surface grain for optimal results.
• Step 6: Prime the Surface
Once the surface is sanded and dust-free, apply a primer to seal any porous areas and provide better paint adhesion. Based on the surface type and condition, choose a primer that is specifically formulated for your needs.
For surfaces with stains, opt for a stain-blocking primer. Similarly, for surfaces with potential moisture or mildew problems, use a mold-resistant primer.
• Step 7: Caulking and Sealing
For the final touch, apply a paintable acrylic-latex caulk to any gaps or seams around windows, doors, and trim. Caulking prevents moisture from seeping in and provides a finished, professional look.
Wait for the caulk to cure completely as per the manufacturer’s guidelines before proceeding to apply the paint.
• Conclusion
Thorough surface preparation is vital in achieving a long-lasting and professional paint job on older surfaces. By following the steps outlined above, you can effectively prepare any older surface for a fresh coat of paint that revitalizes and enhances its appearance.
Investing time and effort in surface preparation is crucial, as it directly impacts the final paint job’s durability and finish.
Step | Description |
|---|---|
1 | Inspect the surface for any damage, cracks, or peeling paint. |
2 | Repair any damaged areas, cracks, or holes with appropriate filler material. |
3 | Remove any peeling or loose paint using a scraper, wire brush, or paint remover. |
4 | Sand the surface to smooth out any rough or uneven areas and to create a better surface for paint adhesion. |
5 | Clean the surface thoroughly, removing any dust, dirt, grease, or other contaminants. |
6 | Apply a suitable primer or undercoat to the surface, allowing it to dry according to the manufacturer’s instructions. |
7 | Apply the desired paint, following the manufacturer’s instructions for application methods and a number of coats. |
8 | Allow the paint to dry completely before using or touching the painted surface. |
Preparatory Tasks for Repainting an Old Painted Surface
A successful repainting job on an old painted surface requires proper planning, preparation, and execution.
• Assess the Surface Condition
Before you start your repainting project, it’s crucial to evaluate the condition of the existing paintwork. Look for signs of paint failure, such as peeling, flaking, blistering, or chalking. Pay special attention to areas that are frequently exposed to water or sunlight, as these may require additional prep work.
• Clean the Surface Thoroughly
Removing dirt, dust, and grime from the surface is an integral part of the preparation process. Start by washing the surface with a mild detergent and water using a soft brush or sponge. Scrub gently to avoid damaging the existing paintwork.
For stubborn stains or mildew, you may need to use a specialized cleaner or a solution of water and bleach. (Remember to protect your skin and eyes when using bleach.) Rinse the surface thoroughly with clean water and allow it to dry completely.
• Remove Loose, Peeling, and Flaking Paint
Use a scraper, putty knife, or wire brush to remove loose, peeling, and flaking paint from the surface. Be careful not to gouge or damage the substrate during this process. To create a smoother surface and improve adhesion, you may need to sand down any rough or uneven areas.
Use a medium-grit sandpaper (80-100 grit) for best results. For any remaining glossy spots, you can use a finer grit sandpaper (180-220 grit) to scuff the surface slightly. Remember to clean up the dust created by sanding before moving on to the next step.
• Repair Surface Imperfections
Now that the surface is prepped and cleaned, it’s time to repair any cracks, holes, or other imperfections on the substrate. To do this, use a filler material such as wood filler, caulk, or spackle, depending on the type and severity of the imperfection.
Follow the manufacturer’s instructions for the specific product you’re using. Once the filler material has dried, lightly sand the area to ensure a smooth finish.
• Prime the Surface
Priming the surface is a critical step in ensuring proper paint adhesion and durability. Apply the primer according to the manufacturer’s directions using a brush, roller, or sprayer.
Allow the primer to dry for the specified time before moving on to the repainting step.
• Protect Adjacent Surfaces
After priming the surface, it’s essential to protect any adjacent areas you don’t want to get paint on. Use painter’s tape to mask off trim, windows, doors, and any other nearby surfaces.
You may also want to cover the floor, furniture, or any landscaping with drop cloths or plastic sheeting to minimize the risk of paint splatters.
• Choose the Right Paint
Selecting the right paint for your repainting project is crucial for a professional finish. Consult a paint professional or reputable source to determine the appropriate paint type, finish, and color for your surface. Buy paint from a reputable manufacturer to ensure quality and longevity.
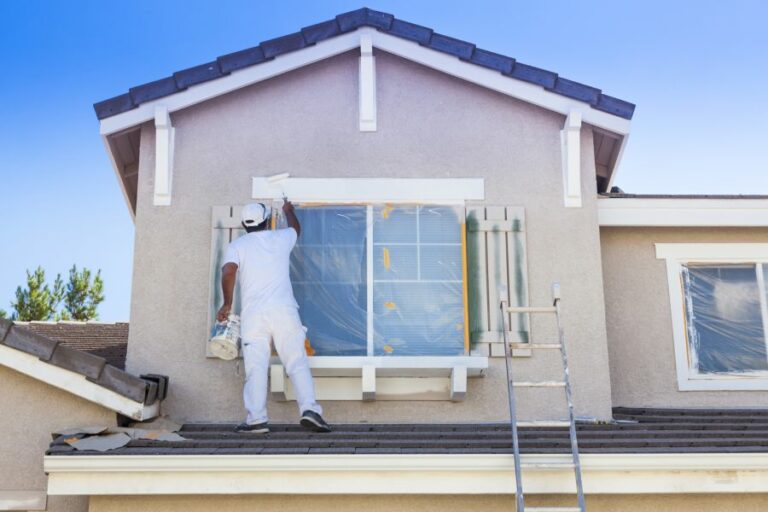
• Apply the Paint
With the surface prepped and protected, it’s time to apply the paint. Start by stirring the paint thoroughly to ensure a consistent finish. Using a brush, roller, or sprayer, apply the paint in thin, even coats.
Be sure to maintain a “wet edge” when painting, which means that each new stroke should overlap the previous stroke slightly to avoid visible lines. Apply additional coats as needed, always allowing each coat to dry thoroughly before applying the next one.
• Clean Up and Dispose
Once you’ve finished repainting (and the paint has had ample time to dry), carefully remove any painter’s tape or protective coverings. Clean and store your tools and equipment, and safely dispose of any leftover paint and other materials according to your local waste management regulations.
• In Conclusion
The key to a successful repainting project lies in thorough and meticulous preparation. By following the steps outlined in this article, you can ensure a professional and long-lasting finish for your old painted surface.
Step | Description |
|---|---|
1 | Inspect the surface for any damages such as cracks, peeling paint, or holes. |
2 | Remove any loose or peeling paint using a scraper, putty knife, or wire brush. |
3 | Repair any cracks, holes, or dents with a suitable patching compound or filler (e.g., spackling, wood filler). |
4 | Sand the surface to create a smooth and even finish. This may require using coarse-grit sandpaper for rough areas and fine-grit sandpaper for lighter work. |
5 | Wipe the surface clean using a damp cloth or sponge to remove dust and debris. Allow the surface to dry completely before proceeding. |
6 | Apply a primer or sealer to the surface, particularly if there are stains or discoloration. This will help ensure even coverage and adhesion of the new paint. |
7 | Mask off any areas that should not be painted using painter’s tape, such as trim, fixtures, or outlets. |
8 | Ensure proper ventilation and protection before beginning the painting process. This includes wearing safety equipment such as masks, goggles, and gloves. |