Preparing Surfaces For Painting: Cleaning Guide
Are you looking to repaint your home or office and want that perfect, professional finish? Preparing surfaces correctly is crucial for achieving a clean and smooth paint job. This guide’ll discuss the essential steps in cleaning and preparing surfaces for painting, ensuring a stress-free and successful painting experience. We’ve covered you, from tools and materials to techniques and safety measures.
Preparing surfaces for painting: cleaning guide:
To prepare surfaces for painting, clean them thoroughly to remove dust, dirt, and grease. Use a vacuum or duster, mild detergent, and degreaser or TSP solution for walls. Use a soft brush, mild detergent, and degreaser or TSP solution with wood surfaces. Clean metal surfaces by removing dust, using mild detergent, and removing rust. Lastly, clean concrete surfaces by sweeping, using a mild detergent or concrete cleaner and a degreaser or TSP solution.

Ready to get the best results from your painting project? Discover expert tips on properly preparing surfaces for a flawless finish. Read on to learn the essential cleaning guide that will elevate your painting skills to a professional level!
Contents
- 1 Guide to Cleaning Surfaces Before Painting
- 2 Best Practices for Cleaning Surfaces Prior to Paint
- 3 Necessary Surface Preparation for Painting Success
- 4 Wall Cleaning Procedures by Professional Painters
- 5 Dusting Techniques for Surfaces Before Paint Application
Guide to Cleaning Surfaces Before Painting
Painting a surface is an excellent way of breathing fresh life into a room or refurbishing a piece of furniture. However, for the perfect finish, it is crucial to prepare the surface correctly.
• The Importance of Cleaning Surfaces
Preparing the surface for painting involves removing dust, dirt, and grease, as well as ensuring the area is smooth and free of debris. Proper cleaning allows the paint to adhere better, resulting in a smooth, durable finish.
Additionally, a clean surface helps to prevent peeling, chipping, and other paint-related issues in the future.
• General Surface Cleaning Tips
Before diving into specific surface types, here are some general cleaning recommendations:
- Always wear gloves and protective gear when cleaning surfaces, especially when using chemicals.
- Ensure the area is well-ventilated when using chemical cleaners.
- Read and follow the instructions on any cleaning products carefully.
- Dispose of any waste materials, such as rags and chemicals, responsibly.
• How to Clean Different Surface Types
1. Cleaning Walls
Walls can accumulate dirt, dust, and stains over time, affecting paint adhesion. Follow these steps to clean your walls:
- Removing Dust: Use a vacuum cleaner with a brush attachment or a duster to remove any cobwebs or dust particles from the wall.
- Cleaning Stains: Mix a small amount of mild detergent with warm water. Using a sponge or cloth, gently clean any visible stains on the wall. Allow the wall to dry completely before painting.
- Dealing with Grease and Oil: For stubborn grease and oil stains, apply a degreaser or trisodium phosphate (TSP) solution to the wall. Be sure to rinse the wall thoroughly afterward and allow it to dry completely.
2. Cleaning Wood Surfaces
Wood surfaces, such as furniture or cabinets, can require extra care due to their porous nature. Follow these steps to clean your wood surfaces:
- Dusting: Remove dust particles using a soft brush or cloth in the direction of the wood grain.
- Cleaning Stains and Debris: For light stains or debris, use a damp cloth and mild detergent to gently clean the surface. For tougher stains, use a commercial wood cleaner following the product’s guidelines.
- Removing Grease: Apply a degreaser or TSP solution to remove any grease or oil from the surface. Rinse thoroughly and allow the wood to dry completely.
3. Cleaning Metal Surfaces
Properly cleaning metal surfaces can help prevent corrosion and ensure proper paint adhesion. Follow these steps to clean your metal surfaces:
- Dusting: Remove dust and loose particles using a soft brush or cloth.
- Cleaning Stains: Use a mild detergent and warm water to clean any stains or dirt from the surface. Rinse thoroughly and allow the metal to dry.
- Removing Rust: For rusty surfaces, use a rust remover or wire brush to remove any visible rust. Seal the surface with a rust-inhibiting primer before painting.
4. Cleaning Concrete Surfaces
Concrete surfaces, such as floors and walls, can be porous and prone to debris. Follow these steps to clean your concrete surfaces:
- Sweeping: Sweep the surface thoroughly to remove any loose dirt, dust, or debris.
- Cleaning Stains: Use a mild detergent or concrete cleaner with warm water to clean any visible stains or residue.
- Removing Grease and Oil: For stubborn grease and oil stains, apply a degreaser or TSP solution to the surface. Scrub the area thoroughly and rinse with clean water. Allow the concrete to dry completely before painting.
• Final Surface Preparation Tips
After the surface is cleaned, consider the following steps for optimal painting results:
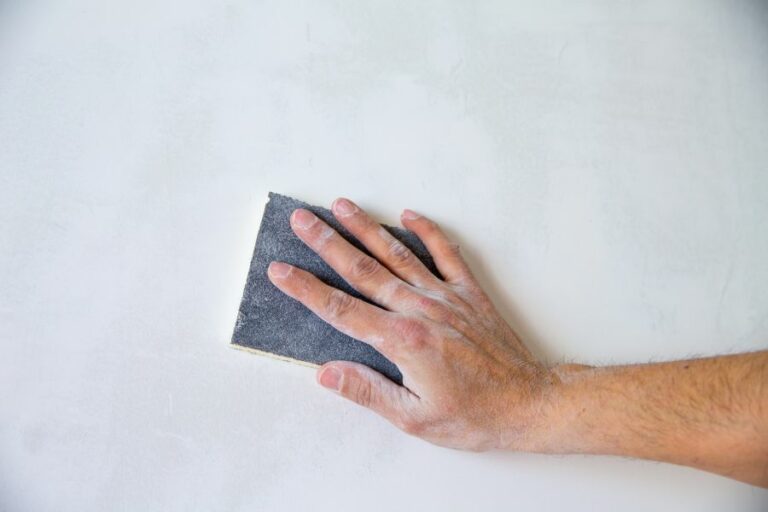
- Sanding: Lightly sand the surface to remove any imperfections and ensure a smooth finish. This step is especially important for wood surfaces. Be sure to wipe away any sanding dust with a damp cloth afterward.
- Priming: Apply a primer to the surface to improve paint adhesion and provide a uniform base for your paint color. Different surface types may require specific primers, so consult your paint store for recommendations.
- Taping: Apply painter’s tape to edges, trim, and other areas you do not wish to paint to ensure clean lines and protect surfaces from accidental paint spills.
Following this comprehensive cleaning guide will ensure your surfaces are well-prepared for painting, resulting in a beautiful, professional, and long-lasting finish.
Best Practices for Cleaning Surfaces Prior to Paint
Proper surface preparation is crucial for achieving a high-quality, durable paint job. One of the essential steps in this process is cleaning the surface to ensure it is free from dirt, dust, grease, and other contaminants that can negatively impact paint adhesion and overall finish quality.
• Types of Surfaces and Their Cleaning Requirements
– Wood Surfaces
Wooden surfaces need to be adequately cleaned before painting to ensure the paint adheres to the surface properly. Some of the critical cleaning steps for wooden surfaces include:
- Removing dirt and dust: Sweep or vacuum the surface to remove any loose dirt, dust, or debris.
- Cleaning the surface: Mix warm water and mild detergent to create a cleaning solution. Use a sponge or cloth to wipe the surface, making sure to avoid over-wetting the wood. Rinse with clean water and let it dry thoroughly.
- Sanding the surface: Sanding is essential to remove any old paint, varnish, or rough spots. Start with a coarse grit sandpaper (60-80 grit) and work your way to a finer grit (120-180 grit) for a smooth finish.
– Metal Surfaces
Cleaning metal surfaces before painting is vital to ensure proper paint adhesion and prevent corrosion. Some considerations when cleaning metal surfaces include:
- Removing rust, paint, and scale: Use a wire brush, sandpaper, or abrasive wheel to remove any loose rust, paint or scale from the surface. For larger areas, a power sander might be a practical option.
- Cleaning the surface: Degrease the surface using a specialized metal cleaner or a mixture of warm water and mild detergent. Ensure to remove all grease, oil, and dirt residues. Rinse thoroughly and let it dry.
- Additional treatment: For long-lasting protection against rust, consider applying a rust converter or rust-inhibiting primer before painting.
– Concrete and Masonry Surfaces
Concrete and masonry surfaces need thorough cleaning to ensure the paint bonds well and lasts longer. Some steps to consider when cleaning concrete and masonry surfaces are:
- Removing dirt and debris: Sweep or vacuum the surface to remove any loose dirt, dust, or debris.
- Surface repair: Examine the surface for cracks, holes, or other damages and repair as necessary using appropriate patching compounds. Let the repairs cure thoroughly according to the manufacturer’s recommendations.
- Cleaning the surface: Use a masonry cleaner or a mixture of water and trisodium phosphate (TSP) to clean the surface. For stubborn stains, consider using a pressure washer. Always follow the manufacturer’s instructions and safety precautions.
• Recommended Cleaning Products and Tools
While various cleaning products and tools are available, choosing the appropriate one depends on the surface type and the specific cleaning requirements. Some widely used options include:
– Cleaning Solutions
- Mild detergent: A solution of warm water and mild detergent, such as dish soap, is suitable for gentle cleaning of various surfaces like wood, metal, and plastic.
- Trisodium phosphate (TSP): TSP is an all-purpose cleaning agent, particularly effective on stubborn stains and heavy deposits on concrete and masonry surfaces. Check local regulations regarding TSP usage, and make sure to follow safety precautions and proper dilution ratios.
- Specialized cleaners: Surface-specific cleaners, such as metal degreasers or masonry cleaners, may offer more targeted cleaning results. Always follow the manufacturer’s guidelines for usage and safety.
– Cleaning Tools
- Brushes: A stiff-bristle brush, either manual or a drill attachment, is useful for removing dirt, rust, paint, or scale from various surfaces.
- Sponges and cloths: Use a sponge or microfiber cloth for gentle cleaning tasks such as applying a mild detergent solution to wood or metal surfaces.
- Sandpaper and abrasive wheels: Abrasive materials are helpful in removing rust, paint, and smoothing wooden surfaces through sanding. Choose the appropriate grit based on the surface and the necessary level of abrasion.
- Pressure washer: A pressure washer can be an effective cleaning tool for large or heavily stained exterior surfaces such as concrete, brick, or siding. Always follow safety guidelines and use the appropriate pressure settings for the surface being cleaned.
• Tips for Effective Surface Cleaning Before Painting
- Allow sufficient drying time: After cleaning the surface, ensure it is completely dry before applying primer or paint. Insufficient drying might cause paint adhesion problems or unsightly watermarks.
- Test the cleaning solution: Before using any cleaning solution on the entire surface, test a small, inconspicuous area to ensure it does not damage or discolor the material.
- Protect surrounding areas: Use drop cloths, masking tape, or plastic sheeting to protect surrounding areas from cleaning solutions and potential water or pressure washer damage.
- Follow safety precautions: Always wear appropriate safety gear, such as goggles and gloves, when using cleaning solutions and tools. Read and follow the manufacturer’s instructions and safety recommendations.
In conclusion, proper surface cleaning before painting is crucial to achieving a high-quality, long-lasting paint job.
By understanding the specific cleaning requirements for various surfaces and choosing the appropriate products and methods, you can optimize the preparation process and ensure a successful painting project.
Necessary Surface Preparation for Painting Success
A common question among homeowners and DIY enthusiasts is whether it’s necessary to clean surfaces before applying paint. The short answer is yes. Thorough surface preparation is critical for achieving professional-looking results and ensuring the paint’s longevity.
• Importance of Cleaning Surfaces Before Painting
There are several reasons why cleaning the surface before painting is crucial:
– Adhesion
Paint adheres better to a clean surface, ensuring a smoother finish and reducing the likelihood of peeling and blistering. Dirt, dust, grease, and other contaminants can interfere with the paint’s ability to bond to the surface, resulting in an uneven appearance and poor durability.
– Aesthetics
By removing dirt and stains from the surface, you create a more uniform base for the paint. This contributes to a better-looking final result that is more pleasing to the eye.
– Longevity
Properly preparing the surface can prolong the life of the paint, potentially saving you time and money in the long run. A well-prepared surface allows for a stronger bond between the paint and the surface, resulting in a longer-lasting, more durable finish.
• Steps to Clean the Surface Before Painting
1. Remove Loose Debris
Start by removing any loose debris, such as dust or cobwebs, from the surface. You can use a broom, vacuum, or a duster to accomplish this. This step helps ensure that loose particles do not become trapped under the paint.
2. Clean with Detergent
Next, clean the surface with a mild detergent solution to remove dirt, grease, and other contaminants. You can mix a small amount of dish soap with water or purchase a cleaning solution designed specifically for pre-paint cleaning.
Apply the solution to the surface using a sponge or cloth and then rinse thoroughly with water. Allow the surface to dry completely before moving on to the next step.
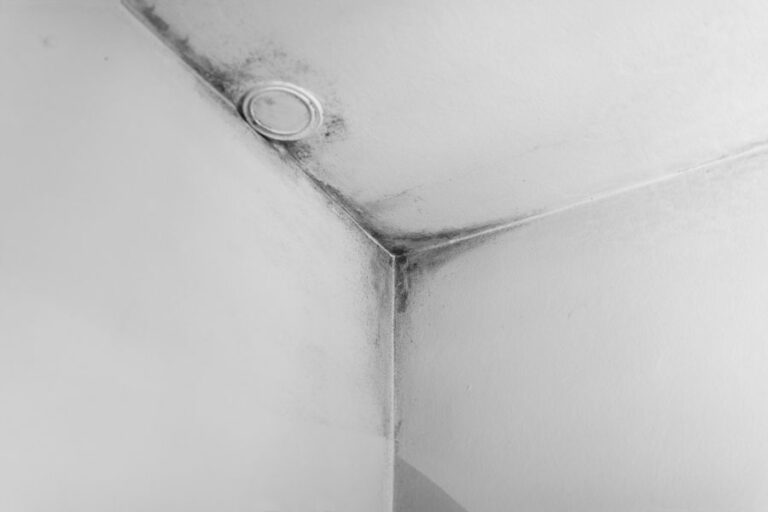
3. Remove Mold or Mildew
If your surface has mold or mildew, it’s essential to treat the problem before painting. Otherwise, the growth can continue underneath the paint, compromising its integrity and potentially causing health issues. To remove mold or mildew, use a mixture of one part bleach and three parts water.
Apply the solution to the affected area, let it sit for a few minutes, and then scrub the surface with a brush. Be sure to wear gloves and protective eyewear while handling bleach. Rinse the surface with water and allow it to dry thoroughly.
4. Address Stains
For surfaces with tough stains or residues, such as nicotine or adhesive remnants, use a stain-blocking primer before applying paint. This will effectively seal the stain, preventing it from bleeding through the paint.
• Consequences of Skipping Surface Cleaning
If you opt to forego cleaning the surface before painting, you risk several negative outcomes:
- Poor paint adhesion, leading to peeling, blistering, or flaking.
- A less attractive finished result, as dirt and stains may be visible under the paint.
- Reduced longevity of the paint job, potentially requiring more frequent repainting.
• Additional Tips for Surface Preparation
- For particularly rough or uneven surfaces, consider sanding or using a paint scraper to achieve a smoother base before applying paint.
- Always allow surfaces to dry completely after cleaning to avoid trapping moisture under the paint.
- Follow the paint manufacturer’s instructions for surface preparation and application to achieve the best results.
• Conclusion
In summary, cleaning the surface before painting is a crucial step that can significantly impact the final appearance, durability, and longevity of your paint job. By taking the time to thoroughly clean and prepare the surface, you can greatly improve the quality and professional look of your project.
Wall Cleaning Procedures by Professional Painters
As an experienced painter, I can attest to the vital importance of cleaning walls before applying paint, time and again in my career.
• The Importance of Cleaning Walls Before Painting
Cleaning walls before painting is not merely a recommended step. It’s essential. Successful paint adhesion relies heavily on the wall’s cleanliness, ensuring that the paint bonds securely to the surface. Dirty walls can lead to paint rejection, uneven textures, and an overall disappointing finish.
Moreover, different contaminants on the surface, such as mold or mildew, can compromise the paint’s durability and cause health concerns for the occupants in the long term. Dedicate some time to prepare the wall properly, as it will dramatically improve the overall result and longevity of your project.
– Improved Paint Adhesion, Texture, and Durability
A spotless wall equates to a perfect canvas for your paint application. The paint adheres better to clean surfaces, preventing unwanted peeling or uneven textures later on. Furthermore, a clean surface permits the fresh coat of paint to dry uniformly, resulting in a top-quality finish.
By contrast, a dirty, unprepared wall can lead to paint splotches, peeling or flaking, and an unwanted texture, which can mandate expensive corrective action. In short, investing time in cleaning your walls will save you money and effort in the long run.
– Health and Safety Considerations
Mold or mildew growth on walls is not only unsightly but also poses health risks for the occupants of the building. Cleaning the walls appropriately helps prevent these growths from returning under the fresh layer of paint, which would otherwise exacerbate the problem.
This invaluable step ensures a clean, healthy environment for those who use the space.
• Efficient Techniques for Cleaning Walls Before Painting
Several techniques and tools can facilitate wall cleaning before painting.
– Vacuuming or Dusting
Start by removing visible dust, cobwebs, and dirt from the wall surface with a vacuum cleaner, preferably one with a brush attachment or a simple duster. Covering both the wall and baseboards effectively removes any loose debris, preventing it from becoming trapped under the fresh coat of paint.
– Washing the Walls
Irremovable stains or dirt call for a more thorough cleaning process: washing. Using a mild detergent (a simple mixture of water and dish soap works well), gently scrub the walls with a soft sponge or cloth. Take care to avoid aggressive scrubbing that could damage the wall’s surface.
For walls with wallpaper or a fragile texture, use a non-abrasive cloth dampened with water without detergent. Carefully test a small area beforehand to ensure the surface will not be damaged.
– Tackling Mold or Mildew
If mold or mildew is present, ensure proper removal before painting. A common solution for mild cases involves a mixture of water and bleach applied with a cloth or sponge. A multitude of commercial mold and mildew removers are also available.
Keep in mind that severe cases may mandate professional assessment and remediation before proceeding with painting.
– Let the Walls Dry
An often overlooked yet essential step is allowing the walls sufficient time to dry after cleaning. Not only does this prevent trapped moisture under the paint, but it also ensures that the surface is prepared for securing paint. Furthermore, any moist spots can compromise the final finish and the paint’s durability.
• In conclusion
As a seasoned painter, I firmly assert the immense significance of cleaning walls before painting. By performing a thorough cleaning to remove dirt, stains, mold, or mildew, you will witness improved paint adhesion and an unparalleled finish.
This practice also promotes a safer and healthier environment for the building’s occupants.
Remember to use the appropriate cleaning techniques and materials for your specific wall type and condition, and always allow enough time for the wall to dry before painting. Your investment in proper preparation will pay off in the form of a professional, lasting paint job.
Dusting Techniques for Surfaces Before Paint Application
Painting can be a rewarding and cost-effective way to spruce up your living space. However, for a professional-looking result, it’s essential to properly prepare the surfaces beforehand. One crucial step in surface preparation is dusting the surface to ensure a clean, smooth paint job.
• Why Dusting Surfaces Is Essential for Painting
Dusting the surfaces to be painted is crucial in achieving a smooth, even, and long-lasting paint job. Dust and other particles that accumulate on surfaces can lead to poor paint adhesion, an uneven appearance, and a less durable paint job.
Moreover, proper dusting can help you detect any irregularities or damage that might need additional prep work before painting.
• Choosing the Right Tools for Dusting Surfaces
Having the right tools is essential when dusting surfaces for painting. Some commonly recommended tools include:
– Microfiber Cloths
These soft, durable cloths are excellent at attracting and trapping dust particles. They can be found in the cleaning aisle of most stores and can be reused after washing.
– Tack Cloths
Tack cloths are sticky, lint-free cloths that pick up dust and debris easily. They are especially popular in woodworking and can be purchased at any hardware or paint store.
– Vacuum Cleaner with a Soft Brush Attachment
A vacuum cleaner with a soft brush attachment can remove dust and debris from surfaces without causing scratches or damaging the surface.
– Duster with an Extendable Handle
A duster with an extendable handle can help you reach hard-to-clean areas, such as ceilings and high walls. Opt for a duster with soft, densely-packed fibers to capture dust effectively.
• Proper Methods for Dusting Surfaces
Now that you have the right tools, it’s essential to follow the correct dusting methods. Here are some recommendations:
1. Start by Removing Large Debris
Before dusting, remove any large debris, such as spiderwebs or peeling paint, using a soft-bristle brush or a scraper. Be gentle to avoid damaging the surface.
2. Vacuum the Surface
Using a vacuum cleaner with a soft brush attachment, gently vacuum the surface using smooth, overlapping strokes. Begin at the top of the surface and work your way down to ensure dust doesn’t fall onto already cleaned areas.
3. Wipe the Surface with a Microfiber Cloth
Fold the microfiber cloth into quarters so you have multiple clean sides to use. Gently wipe the surface using an “S” motion, working from the top down. Re-fold the cloth to expose a clean side as it becomes dirty.
4. Use a Tack Cloth for Maximum Dust Removal
If you’re working with a particularly dusty surface or want to ensure maximum dust removal, gently wipe the surface with a tack cloth after using the microfiber cloth. Avoid applying too much pressure, as this could transfer the tacky substance to the surface.
5. Allow the Surface to Dry if You Used a Damp Cloth
If you’ve used a dampened microfiber cloth to remove stubborn dust, it’s important to allow the surface to dry completely before proceeding with painting. Failure to do so could lead to moisture being trapped under the paint.
• Expert Tips for Dusting Surfaces Before Painting
Here are some valuable tips to make the dusting process more effective and efficient:
- Proper lighting: Ensure you have adequate lighting when dusting surfaces. Good lighting can help you spot dust, dirt, and imperfections more easily.
- Work systematically: Working systematically can help you avoid the need to re-clean areas. Start at the top of the room and work your way down, then work your way around the room in a consistent order.
- Use the right tool for the job: While all the tools mentioned earlier can help you eliminate dust, choose the one that best suits your particular surface and situation. For example, use a vacuum with a brush attachment for textured surfaces and a microfiber cloth for smooth surfaces.
- Environmental Considerations: Keep in mind environmental factors, such as humidity and pollen levels, which might affect the dust levels on your surfaces. Check local air quality forecasts to plan your dusting and painting on days with lower levels of pollutants.
By following these guidelines, you can properly dust your surfaces before painting, ensuring a beautiful, smooth, and durable paint job. Remember, investing time in surface preparation pays off in the long run and can make all the difference in the final result. Happy painting!
Step | Description |
|---|---|
1 | Gather necessary materials: a soft bristle brush, dusting cloth or tack cloth, and a vacuum if necessary. |
2 | Remove any loose debris from the surface by gently brushing it with a soft bristle brush. |
3 | If necessary, use the vacuum with a brush attachment to suck up any stubborn dust and debris. |
4 | Gently wipe the entire surface down with a dusting cloth or tack cloth to remove any remaining dust. |
5 | Inspect the surface to ensure all dust has been removed and the surface is ready for painting. |

