Essential Surface Prep Tools & Equipment. What Pros Say
Proper surface preparation can make all the difference when it comes to achieving a flawless finish on your painting or refinishing project. Choosing the right tools and equipment might seem overwhelming, but don’t worry; our expertise in this field can help guide you.
Essential surface prep tools & equipment:
Essential surface prep tools and equipment include personal protective equipment (PPE) like safety goggles, respirator masks, gloves, and ear protection. Other crucial tools are wire brushes, scrapers, pressure washers, sanding tools, dust collection equipment, acid etching or concrete surface profiling, surface grinders, scarifiers, and surface primers or sealers. These tools ensure efficient, effective, and safe surface preparation for construction or renovation projects.

Ready to achieve flawless results in your painting or refinishing project? Discover the must-have surface prep tools & equipment that will make all the difference! Read on to learn about the secret behind professional finishes and how you can get them too.
Contents
- 1 Crucial Tools & Equipment for Surface Preparation
- 2 Surface Preparation: Key Equipment Utilized
- 3 A 9-Step Guide to the Surface Preparation Process
- 4 Comparing SSPC SP11 and SP15: Key Differences
- 5 Most Widely Used Method in Surface Preparation Techniques
Crucial Tools & Equipment for Surface Preparation
Proper surface preparation is a crucial step in achieving quality results when working on construction or renovation projects.
• Safety First: Personal Protective Equipment (PPE)
Before diving into the tools and equipment, it’s essential to prioritize safety. Proper personal protective equipment (PPE) is necessary when working with various surfaces and materials. Examples of PPE include:
- Safety goggles or glasses
- Respirator masks
- Gloves
- Ear protection
For more information on selecting the right PPE, visit the OSHA website.
• Surface Cleaning and Removal Tools
Before applying any coatings or treatments to a surface, thorough cleaning and removal of any loose material or residues are necessary. Some essential cleaning and removal equipment includes:
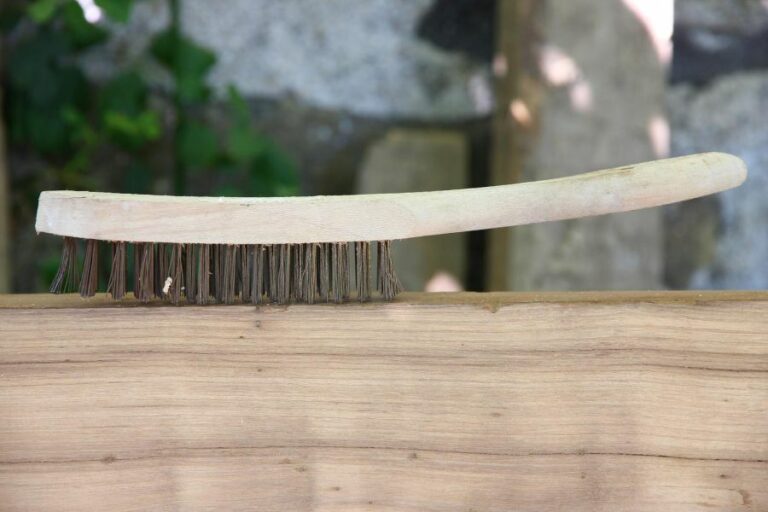
– Wire Brushes
Wire brushes are ideal for removing rust, paint, and other substances from surfaces. They come in various sizes and shapes and can be attached to drills or angle grinders for improved efficiency.
– Scrapers
Scrapers are essential for removing old paint, wallpaper, and other materials from walls and ceilings. Various types of scrapers exist, from simple hand-held tools to heavy-duty, long-handled versions with replaceable blades.
– Pressure Washer
A pressure washer is an invaluable tool for cleaning and preparing surfaces, such as concrete or brick. By adjusting the water pressure, it can remove dirt, grime, and other contaminants from surfaces quickly and efficiently.
– Sanding Tools and Equipment
Sanding is essential for smoothing surfaces and ensuring proper adhesion of paints and other coatings. A variety of sanding tools is available for different tasks, including:
Orbital Sanders
Orbital sanders provide a smooth, even finish and are ideal for less-experienced users. They work well for surfaces such as wood, drywall, and metal.
Belt Sanders
Belt sanders are best suited for removing heavy layers of paint or other materials. They’re efficient but can leave marks on the surface, so they should be followed with an orbital or hand sander for a smooth finish.
Hand Sanding Blocks
Hand sanding blocks are simple and inexpensive tools for small-scale sanding tasks. They’re available in various shapes and sizes to fit specific areas, such as corners or rounded surfaces.
– Dust Collection Equipment
Keeping the work area clean and protected from dust is essential for proper surface preparation. Some dust collection equipment options include:
- Vacuum dust collection systems for power tools
- Portable dust collectors
- Shop vacuums
• Surface Conditioning Tools and Equipment
Proper surface conditioning is necessary for ensuring the adhesion and durability of coatings such as paint, epoxy, or varnish. Some essential equipment for surface conditioning includes:
– Acid Etching or Concrete Surface Profiling
Acid etching or concrete surface profiling is commonly used to prepare concrete surfaces for coatings. Solutions such as muriatic acid create a rough texture to ensure strong adhesion. Always use caution when working with acid and follow manufacturer directions.
– Surface Grinders and Scarifiers
Surface grinders and scarifiers are essential for large-scale surface preparation. These powerful machines can remove paint, epoxy, and other coatings from concrete and other surfaces.
– Surface Primers and Sealers
Applying an appropriate primer or sealer before applying a coating can improve adhesion, durability, and appearance. Be sure to research and choose the right product for your specific surface type and project needs.
• Final Thoughts
Investing in the right surface prep tools and equipment will streamline the process and ensure a high-quality, long-lasting result. Proper surface preparation sets the groundwork for any successful construction or renovation project, so it’s essential not to overlook this critical step.
By selecting the appropriate tools and methods for your specific project, you will maximize your chances of success and ultimately improve the appearance and longevity of your surfaces.
Surface Preparation: Key Equipment Utilized
Surface preparation is a crucial step in various industries, including construction, manufacturing, automotive, and shipbuilding. The right equipment can make a significant difference in the quality and efficiency of the job.
• Abrasive Blasting Equipment
Abrasive blasting (sometimes referred to as sandblasting) is a popular method for surface preparation. This technique involves propelling abrasive material at high velocity onto the surface to remove contaminants and coatings or create a specific surface profile.
The primary abrasive blasting equipment includes:
– Blast Pots
Blast pots are the heart of any abrasive blasting system. They store and mix the abrasive media with compressed air before it is released through the blast nozzle. Various blast pot sizes and capacities are available, depending on the scale and requirements of the project.
– Blast Nozzles
The blast nozzle is a critical component that directs and accelerates the abrasive material onto the surface. Nozzles are available in a range of materials, such as boron carbide, tungsten carbide, and ceramic, which withstand the abrasive’s velocity.
The size and shape of the nozzle also impact the blasting pattern, coverage, and force.
– Blast Hoses
Blast hoses deliver the abrasive media and compressed air from the blast pot to the nozzle. These hoses must be durable and resistant to abrasion to maintain their integrity over time. Typically, they consist of a rugged outer layer and a reinforced wear-resistant inner lining.
• Mechanical Surface Preparation Equipment
Mechanical methods of surface preparation include grinding, milling, and scarifying. These techniques remove coatings and contaminants and roughen or smooth the surface using rotating or reciprocating mechanical devices. The equipment used for mechanical surface preparation includes:
– Grinders
Grinders are handheld or walk-behind machines that use abrasive discs or grinding wheels to remove coatings, adhesives, and other materials from the surface. They can also smooth uneven surfaces and create specific surface profiles.
There are various types of grinders available, including angle grinders, concrete floor grinders, and planetary grinders.
– Scarifiers
Scarifiers are powerful machines that use rotating drums with cutting teeth or flails to remove coatings, high spots, and other surface imperfections. They can produce a rough, grooved surface suitable for the adhesion of new coatings or overlays.
Scarifiers are commonly used on concrete, asphalt, and steel surfaces.
– Shot Blasters
Shot blasting is a surface preparation method that uses centrifugal force to propel the abrasive material, typically steel shot, at the surface. This process removes contaminants, and coatings, and roughens or smooths the surface.
Shot blasters are self-contained machines that collect and recycle the used abrasive material, making them more environmentally friendly and cost-effective than some other techniques.
• Hand Tools and Accessories
In addition to the larger surface preparation equipment, various hand tools and accessories play a vital role in the surface preparation process. These may include:
– Scrapers and Brushes
Scrapers and brushes are essential for removing loose debris, rust, and flaking paint from surfaces before using more aggressive surface preparation methods. Both manual and powered scrapers and brushes are available, depending on the size and difficulty of the job.
– Needle Scalers
Needle scalers are pneumatic or electric tools equipped with a cluster of thin, chisel-like needles that impact the surface, removing rust, scaling, and other contaminants. These devices can access tight spaces and corners where other tools may not be suitable.
– Hand Sanders
Hand sanders (manual or power-operated) are used to smooth or roughen small surface areas. They typically utilize abrasive paper or mesh and are available in various shapes and sizes, depending on the application and surface contours.
• Surface Preparation Equipment Safety and Maintenance
Proper safety procedures and equipment maintenance are essential aspects of surface preparation jobs. Workers should be appropriately trained and wear personal protective equipment such as safety glasses, gloves, hearing protection, and respiratory protection.
Regular inspections and maintenance of the equipment can help prevent failures and minimize downtime.
In conclusion, selecting the right surface preparation equipment and using it correctly is essential for achieving optimal results. By understanding the various options available and their applications, you can make informed decisions on the most suitable equipment for your projects.
A 9-Step Guide to the Surface Preparation Process
Surface preparation is a critical step in any painting, coating, or adhesive application process. It ensures that the surface is clean, smooth, and ready to receive the applied material.
• Step 1: Inspection and Assessment
The first step in surface preparation is to thoroughly inspect and assess the condition of the surface. Look for cracks, pits, or other defects that could affect the final result. By identifying these issues beforehand, you can address them properly and avoid wasting time and resources later on.
Recommendation: Make a checklist of potential issues to look for during the inspection. This could include rust, peeling paint, dirt, grease, and contaminants.
• Step 2: Cleaning
After the inspection, it’s essential to clean the surface thoroughly. This step ensures that dirt, grease, oils, and other contaminants are removed, allowing for better adhesion of the applied material. There are various cleaning methods available, such as solvent cleaning, water jetting, and degreasing.
Recommendation: Always follow the manufacturer’s recommendations for cleaning agents and methods, as using the wrong approach could damage the surface or leave residue behind.
• Step 3: Material Removal
Next, remove any old, loose, or damaged material from the surface. This may include peeling paint, rust, or old adhesives. Material removal methods include scraping, wire brushing, sanding, and abrasive blasting.
Recommendation: Choose a material removal method that is environmentally friendly and cost-effective for your project. Always follow safety guidelines to avoid injury from flying debris or hazardous materials.
• Step 4: Surface Profiling
Surface profiling creates an ideal texture for the new material to bond with. This process involves roughening the surface to provide a better grip on the applied material. Common methods include sanding or grinding, acid etching, and abrasion.
Recommendation: Research the ideal surface profile for your specific application and ensure that the surface profiling method you choose will achieve that profile.
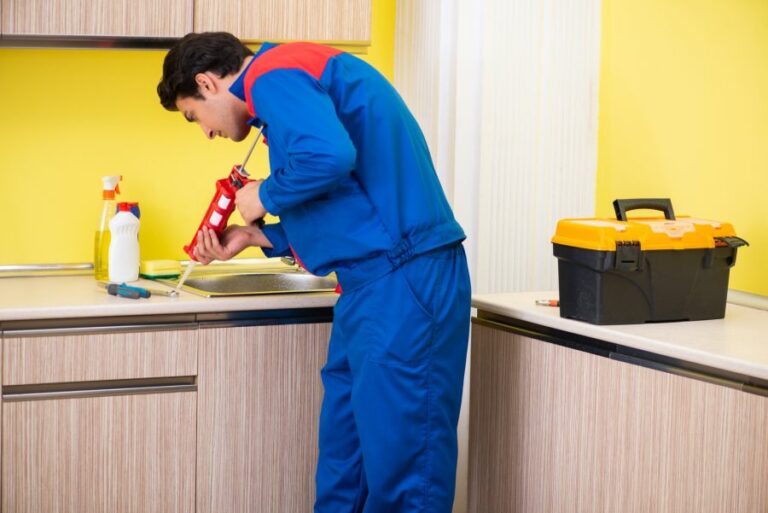
• Step 5: Repairing Defects
Once the surface has been cleaned and roughened, repair any defects that were identified during the inspection. These may include cracks, dents, and holes. Use appropriate repair materials such as fillers, putties, or sealants to address these issues.
Recommendation: It’s crucial to follow the manufacturer’s directions for mixing, applying, and curing the repair material to ensure a strong and durable repair.
• Step 6: Priming
Priming ensures excellent adhesion for the new material and prevents any remaining contaminants from causing problems. Apply a suitable primer, pre-treatment, or sealer to the surface, following the manufacturer’s instructions for proper application and drying times.
Recommendation: It’s essential to use the correct primer for the material being applied, as using the wrong product could result in poor adhesion or even damage to the surface.
• Step 7: Surface Drying
Before applying any new material, it’s crucial to let the surface dry completely. Moisture trapped beneath the applied material could cause adhesion problems or lead to other issues such as mold or corrosion.
Recommendation: Depending on the project, consider using a moisture meter to ensure that the surface is suitably dry before applying the new material.
• Step 8: Masking and Protecting Adjacent Surfaces
Before applying any paint or coating, protect adjacent surfaces that should not come into contact with the new material. Use masking tape, plastic sheeting, or drop cloths to cover and shield these areas.
Recommendation: Pay attention to detail when masking areas to avoid any overspray or mistakes that could damage the overall finish of the project.
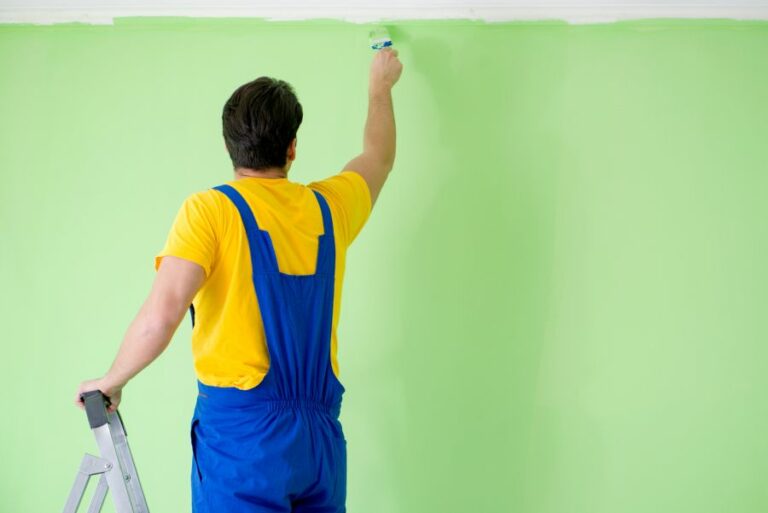
• Step 9: Application of New Material
After completing all the previous steps, the surface is now prepared for the application of the new material. Follow the manufacturer’s instructions for proper mixing, application, and drying times to ensure a successful project.
Recommendation: Take your time when applying the new material, and follow all safety guidelines, as rushing or cutting corners could result in a subpar finish or potential hazards.
In conclusion, following these nine vital steps for surface preparation will help ensure the success of your painting, coating, or adhesive application project. Adhering to each of these steps diligently will result in a high-quality and durable finish that will stand the test of time.
Comparing SSPC SP11 and SP15: Key Differences
The Society for Protective Coatings (SSPC) provides industry guidelines for selecting surface preparation methods, known as Surface Preparation (SP) Standards. These are essential for proper surface preparation to achieve the desired performance of coating systems.
• SSPC SP11 Standard: Power Tool Cleaning to Bare Metal
When preparing a surface for a coating system, the SSPC SP11 Standard is often utilized. Like other surface preparation standards, the purpose of SP11 is to provide concise requirements for cleaning and preparing a metallic surface using power tools.
The primary goal of SP11 is to remove all the existing coatings, rust, and mill scale from the surface being prepared.
– Benefits of Using SSPC SP11
The significant advantages of utilizing SSPC SP11 include the following:
- Achieving a Clean, Bare Metal Surface: This is crucial for ensuring proper bonding between the substrate and the subsequent coating system, which will ultimately prolong the service life of the coating.
- Versatility: Since power tools are often used in the surface preparation process, the SSPC SP11 Standard can be applied to areas with complex geometries, edges, and other irregular surfaces.
- Lower Costs: Compared to abrasive blasting methods, power tool cleaning typically costs less in terms of equipment and materials.
- Reduced Environmental Impact: Power tool cleaning produces significantly less airborne dust and contaminants than abrasive blasting methods.
– Key Requirement of SSPC SP11
The SSPC SP11 Standard outlines specific criteria that must be met during the surface preparation process:
- All visible rust, mill scale, coatings, and foreign matter must be removed, leaving only the bare metal surface. At least 95% of each square inch of the prepared surface must be free of all visible residues.
- The remaining 5% of each square inch may contain staining, provided that the surface is free from any loose matter.
• SSPC SP15 Standard: Commercial Grade Power Tool Cleaning
In situations where a less stringent surface preparation is sufficient, the SSPC SP15 Standard becomes applicable. SP15 focuses on providing requirements for commercial-grade power tool cleaning.
– Benefits of Using SSPC SP15
The primary advantages of utilizing SSPC SP15 are:
- Time-Savings: As commercial-grade power tool cleaning removes contaminants without necessarily exposing the bare metal substrate, the overall preparation time can be reduced.
- Lower Costs: Similar to SP11, power tool cleaning using SP15 standards does not require expensive equipment, and the costs related to labor and materials are generally lower.
- Less Waste Generation: As SP15 requires the removal of only loose coatings, rust, and mill scale, rather than complete substrate exposure, less material is removed, reducing waste generation.
– Key Requirement of SSPC SP15
The SSPC SP15 Standard specifies the following criteria that must be achieved during surface preparation:
- All visible oil, grease, dirt, loose mill scale, loose rust, and loose coatings must be removed.
- The stains or shadows of rust, coatings, and mill scale may remain, provided that they are tightly adherent.
• Recommendations for Choosing Between SSPC SP11 and SP15
The selection of the appropriate surface preparation standard depends on multiple factors, including:
- The required coating system’s durability and performance.
- The environment in which the surface will be exposed.
- The service life expected from the coating system.
- Project-specific requirements and budget constraints.
In general, if the project demands a highly durable and long-lasting coating system, SSPC SP11 would be the recommended standard to achieve a proper bond with the substrate.
However, for less critical applications where commercial-grade surface preparation is acceptable, the SSPC SP15 standard can be considered for reduced time, cost, and waste generation.
• Conclusion
Understanding the differences between SSPC SP11 and SP15 standards is essential in the coatings industry, as it directly impacts the durability and performance of the applied coating system.
By knowing when to apply each standard and the benefits that each method provides, professionals in the industry can make informed decisions, ensuring the success and longevity of their projects.
Criteria | SSPC SP11 | SSPC SP15 |
|---|---|---|
Name | Power Tool Cleaning to Bare Metal | Commercial Grade Power Tool Cleaning |
Objective | To remove all visible rust, mill scale, paint, and other contaminants, leaving only clean bare metal. | To remove loose contaminants without necessarily removing all tightly adhering mill scale, rust, and paint. |
Finish | Bare metal surface with a minimum 1 mil surface profile. | Uniform appearance, with some mill scale, rust, or paint possibly remaining if it is tightly adhering. |
Application | Ideal for surfaces that require a high level of cleanliness and surface profile for high-performance coatings. | Suitable for surfaces that will receive coatings or linings where a high-quality clean surface is not critical. |
Most Widely Used Method in Surface Preparation Techniques
Surface preparation is a crucial step in many industries, including manufacturing, construction, and maintenance. Among various surface preparation techniques, abrasive blasting is the most common method used in multiple applications due to its efficiency and versatility.
• An Overview of Abrasive Blasting
Abrasive blasting, sometimes known as sandblasting, is a surface preparation technique that uses a high-pressure stream of abrasive particles to clean, profile, or modify the surface of a material.
The process removes contaminants, rust, paint, and other substances, creating a clean and smooth surface for further treatments like painting or bonding.
The principle of abrasive blasting is simple, as it involves projecting abrasive particles onto the surface at high speed, utilizing either compressed air, water, or a centrifugal force. The abrasive particles then strike the surface, effectively removing contaminants and creating a specific surface profile.
– Types of Abrasive Blasting
There are several types of abrasive blasting methods, each with its benefits and applications. These include:
- Dry Abrasive Blasting: Utilizes compressed air as a medium to propel abrasive particles onto the surface. It’s widely used in construction and maintenance projects, as it’s capable of removing thick layers of contaminants in a short time.
- Wet Abrasive Blasting: Uses water along with abrasive particles, providing a dust-free and gentler surface treatment. The water helps to minimize dust emissions and reduces the risk of heat distortion on the surface.
- Centrifugal Abrasive Blasting: Projects abrasive particles onto the surface using a rotating wheel, solving the issue of compressed air consumption and offering high production efficiency.
- Vacuum Abrasive Blasting: Employs suction to remove contaminants and abrasive particles from the surface while simultaneously recycling the abrasive. It is often used in sensitive environments where dust emission control is crucial.
– Advantages of Abrasive Blasting
The popularity of abrasive blasting as a surface preparation method can be attributed to its numerous advantages:
- Efficiency: Abrasive blasting can quickly remove thick layers of contaminants, rust, and paint, enabling faster project completion.
- Versatility: The method is suitable for a wide range of materials, such as metal, concrete, and wood, and can be adapted by selecting appropriate abrasive media and equipment for each specific application.
- Surface profiling: Abrasive blasting not only cleans the surface but also creates a specific surface texture, improving the adhesion of paint, coatings, or bonding materials.
- Environmentally friendly: Wet abrasive blasting and vacuum abrasive blasting techniques are designed to minimize dust emissions, reducing the environmental impact of surface preparation.
– Precautions while Performing Abrasive Blasting
As with any industrial process, taking necessary precautions is essential to ensure safety and achieve desired results. Below are some recommendations:
- Proper personal protective equipment (PPE): Abrasive blasting can be hazardous, especially when working with silica-based abrasives. Employees should wear appropriate PPE, such as respiratory protection and protective clothing, to minimize health risks.
- Regular equipment maintenance: Inspect and maintain abrasive blasting equipment regularly, checking hoses, nozzles, and other components for wear and tear. Replace damaged parts promptly to avoid accidents and ensure efficient performance.
- Appropriate abrasive media selection: Different materials and applications require specific abrasive media types. Selecting the right media will maximize the efficiency of the process and reduce the likelihood of damage to the surface.
- Training: Ensure that employees receive proper training in abrasive blasting techniques, safety procedures, and equipment usage, minimizing the risk of accidents and improving productivity.
• Conclusion
Abrasive blasting is the most common surface preparation technique due to its efficiency, versatility, and ability to create a specific surface profile.
By understanding the types of abrasive blasting methods, their advantages, and necessary precautions, industries can optimize the surface preparation process, ensuring a clean and smooth surface for the successful application of coatings or other treatments.