Interior Wall Makeover Strip Before Painting, What Pros Say
Are you tired of staring at those dull and lifeless walls in your home? Craving a fresh new look to bring life to your interiors? Worry no more! We’re here to help you transform your space with a fantastic interior wall makeover strip before painting.
Interior wall makeover strip before painting:
Stripping interior walls before painting is crucial for a professional and long-lasting paint job as it removes dirt, grime, and old paint and reveals hidden damage. Preparing a clean, smooth surface ensures better paint adhesion, reduces peeling, and helps in addressing underlying issues such as cracks, mold, or dampness.

Looking to give your interior walls a fresh makeover? Strip away the old before applying that beautiful new coat of paint. Discover expert tips and tricks to ensure a flawless finish while saving time and effort. Stay with us; we have so much more to share!
Contents
- 1 Revamp Interior Walls: Stripping Prior to Painting
- 2 Is Stripping Wall Paint Necessary Before Repainting?
- 3 Eliminating Wall Flaws Before Applying Paint: How-To
- 4 Top Wall Preparation Techniques for a Flawless Paint Job
- 5 Pre-Painting Checklist for Impeccable Interior Walls
- 5.1 • Assess the Walls and Choose the Right Paint
- 5.2 • Remove Furniture and Protect the Floor
- 5.3 • Clean the Walls
- 5.4 • Repair Damage and Fill Holes
- 5.5 • Remove Loose Paint and Sand
- 5.6 • Mask and Protect Surfaces
- 5.7 • Apply Primer
- 5.8 • Tint the Primer (Optional)
- 5.9 • Ready Your Paint and Tools
- 5.10 • Cut In and Paint
- 5.11 • Clean Up and Remove Tape
- 5.12 • Reinstall Hardware and Arrange Furniture
Revamp Interior Walls: Stripping Prior to Painting
• The Importance of Stripping Walls
Preparing your walls to be painted is an essential step that should not be ignored. Stripping your walls can make all the difference between a seamless and professional-looking paint job and one where imperfections are visible.
• Why Strip Interior Walls?
Every wall has a history, and over time, it accumulates dirt, grime, and layers of old paint. When you decide to renew the look of your walls, stripping them back to their original surface can provide a clean and smooth canvas for your new paint job.
This will ensure better adhesion of the paint and reduce the risk of peeling or flaking over time. Stripping your walls can also reveal any hidden damage or issues that need to be addressed before applying a new coat of paint, such as cracks, mold, or dampness.
• Necessary Tools and Supplies
Before starting the stripping process, gather the necessary tools and supplies to make your job easier. These may include:
- Protective gear: Safety goggles, gloves, and a dust mask
- Drop cloths or plastic sheets: To protect your floors and furniture from debris
- Wallpaper scorer or utility knife: To help remove old wallpaper or scored paint
- Wallpaper steamer or paint stripper: To assist in removing stubborn layers of old paint or wallpaper
- Scraper or putty knife: To remove softened paint or wallpaper
- Sandpaper or sanding block: To smooth rough areas after stripping
- Bucket of warm soapy water and sponge: To clean the walls before painting
- Primer: To prepare the walls for a new coat of paint
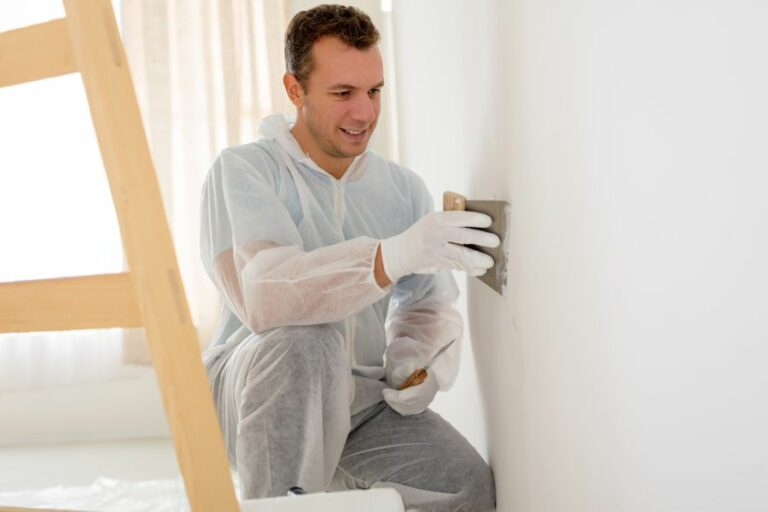
• Step-by-Step Guide to Stripping Walls Before Painting
– Step 1: Clear and Protect the Room
Move your furniture away from the walls to the center of the room and cover it with drop cloths or plastic sheets.
If possible, remove any light fixtures, electrical outlets, and switch plates from the walls. Also, cover your floors with drop cloths or plastic sheets to protect them from debris during the stripping process.
– Step 2: Remove Any Wallpaper or Loose Paint
If your walls are covered with wallpaper or have old, flaking paint, it’s essential to remove these materials before applying a new coat of paint.
Use a wallpaper scorer or utility knife to gently score the surface, allowing steam or paint stripper to penetrate more effectively. Then, use a wallpaper steamer or paint stripper per the manufacturer’s instructions to loosen the adhesive or old paint.
Expert Tip: For guidance on using a wallpaper steamer or paint stripper, refer to this guide from This Old House.
– Step 3: Scrape the Walls
Once the wallpaper or paint is softened, use a scraper or putty knife to remove it from the walls. Be gentle, as scraping too forcefully can damage the underlying surface.
Scrape in the direction of the natural grain (horizontal or vertical) to help prevent dents, and work in small sections for better control.
– Step 4: Smooth the Walls
After all the old paint or wallpaper is removed, sand the walls to smooth out any rough or uneven areas. Use a medium-grit sandpaper or sanding block, and apply light pressure to avoid damaging the walls.
– Step 5: Clean the Walls
Before painting, clean the walls with a sponge dipped in warm soapy water to remove any dirt, grime, or dust left from the stripping process. Allow the walls to dry completely so the new paint has a clean surface to adhere to.
– Step 6: Prime the Walls
Before applying your new paint, it’s crucial to apply a coat of primer to the walls. This will help to create an even and consistent surface for the new paint while also ensuring better adhesion and longer-lasting results.
Follow the manufacturer’s instructions on the primer, and be sure to let it dry completely before painting.
• Final Thoughts
Stripping your walls before painting may seem like an extra step, but it’s well worth it to achieve professional, long-lasting results.
Taking the time to create a clean, smooth surface will not only make your fresh paint look its best but also ensure that it stands up to daily wear and tear.
Always remember to work carefully and follow proper safety precautions to protect yourself and your home throughout the process. Happy painting!
Is Stripping Wall Paint Necessary Before Repainting?
Whether to strip existing wall paint before repainting a room or surface is a common dilemma faced by homeowners, DIY enthusiasts, and professional painters.
• Factors to Consider Before Stripping Paint
There are several factors that should be taken into consideration when deciding if paint should be stripped before repainting. These include:
1. Condition of the Existing Paint
If the existing paint is in relatively good condition, with no major chips, cracks, peeling, or flaking, then it is generally safe and advisable to paint over it without stripping.
However, if the old paint is exhibiting signs of wear and tear or damage, it may be best to strip it before applying a fresh coat of paint.
This will ensure that the new paint adheres properly to the surface and that any issues with the old paint do not compromise the quality and longevity of the new paint job.
2. Type of Paint
Some types of paint may be incompatible with one another, which could lead to adhesion issues or other problems with the final result.
For example, painting over oil-based paint with latex-based paint can be problematic, as the two types of paint do not bond well together.
In such cases, stripping the old paint before applying a new coat may be necessary to ensure a successful paint job. To know the type of paint, try the denatured alcohol test.
3. Layers of Paint
If the paint on the wall has been layered over multiple times, it may be more difficult for the new paint to adhere properly to the surface. In such cases, stripping paint can help to provide a cleaner and more uniform surface for the new paint to adhere to, resulting in a more long-lasting and professional-looking finish.
4. Intended Finish
If a specific texture or finish is desired for the new paint job, it may be necessary to strip the existing paint first. This is because the old paint may interfere with the application of the desired texture, making it difficult to achieve a consistent and uniform finish.
• Pros and Cons of Stripping Paint
– Pros:
- Better Adhesion for New Paint: Stripping paint provides a cleaner, more even surface, allowing the new paint to adhere better to the wall or surface.
- Improved Aesthetics: A fresh start with a stripped surface can lead to a more professional and long-lasting finish, where imperfections from the previous paint layers are removed.
- Detection of Hidden Issues: Stripping paint can reveal issues with the wall or surface that were hidden beneath the layers, such as cracks, moisture problems or damage.
- Compatibility: Removing old paint can help to ensure that the new paint job is compatible with the surface and thereby prevent potential adhesion issues.
– Cons:
- Extra Time and Effort: Stripping paint can be time-consuming and labor-intensive, especially if the area to be painted is large or the surface is intricately detailed.
- Risk of Damage: Do not risk damage to the underlying surface when removing paint; for example, by using a caustic paint remover, getting careful attention must be taken, especially with older plaster walls or delicate surfaces.
- Higher Cost: Stripping paint can be more costly than simply repainting over the existing paint, due to the additional materials and labor involved.
• Preparing Walls for Painting
Whether or not paint is being stripped, proper preparation is essential for a successful paint job. Here are some tips to prepare walls for painting:
- Remove any furniture and cover the floor with a drop cloth or plastic sheeting to protect it from paint splatters.
- Clean the walls and surfaces to remove any dust, dirt, grease, and other contaminants that could interfere with paint adhesion.
- Repair any damage, such as cracks or holes, with a filling compound and sand the area smoothly.
- If the old paint is in good condition, lightly sand the surface to create a slightly rough texture that will help the new paint adhere to it.
- Apply a coat of primer to the walls, particularly if the existing paint color is dark or bold or if painting with a lighter shade than the existing paint. Primer can also help to seal the surface, ensuring better adhesion of the new paint.
- Mask off any areas that should not be painted, such as baseboards, trim, and light switches.
• Conclusion
Ultimately, whether or not to strip paint before repainting depends on various factors, including the condition of the existing paint, the type of paint being used, the number of layers on the surface, and the desired finish.
Stripping paint can offer several benefits, such as improved adhesion and a better-looking result, but it can also be time-consuming, labor-intensive, and costly.
Properly assessing the situation and preparing the walls for painting will help to ensure a successful and long-lasting paint job.
Eliminating Wall Flaws Before Applying Paint: How-To
A smooth, perfectly painted wall starts with a flawless surface. Any imperfection can spoil the appearance of a finished paint job. To achieve the best results, follow this guide on how to thoroughly remove wall imperfections before painting.
• Assessing the Wall’s Current Condition
Before starting your wall preparation, determine the extent of the imperfections. This step helps you choose the appropriate method for repairing any damage or blemishes. Some common imperfections include:
- Small holes from nails or screws
- Dents and indentations
- Cracks and seam separations
- Uneven surfaces and joint compound residue
- Wallpaper adhesive residue
- Peeling paint
Recommendation: Examine the entire wall carefully before beginning, and note all defects.
• Repairing Holes and Dents
- Fill small holes and dents with a premixed patching compound. Using a putty knife, apply a thin layer of the compound to the damaged area, then scrape it smooth. For deeper holes or dents, apply multiple layers of filler, allowing each layer to dry before applying the next.
- Repair larger holes with a patch kit. Available at most hardware stores, these kits typically include a piece of adhesive-backed fiberglass mesh and a patching compound. Apply the mesh over the hole, then cover it with the compound, feathering the edges for a smooth finish.
- Allow the repair patches to dry thoroughly. This step usually takes 24 hours, but drying times may vary depending on temperature and humidity.
Recommendation: Use a high-quality patching compound for better adhesion and smoother results.
• Addressing Cracks and Seam Separations
- Use a utility knife to remove loose or peeling paint along the crack. This step creates a clean edge and exposes any underlying damage for easy repair.
- Apply a flexible acrylic caulk to hairline cracks. Use a caulk gun to apply a thin bead of caulk along the length of the crack, then smooth it out with a damp sponge or your finger. Use a paintable caulk to ensure proper adhesion of the new paint layer.
- Repair larger cracks and seam separations with joint compound and fiberglass mesh tape. Apply a layer of joint compound to the damaged area, embedding the mesh tape in the wet material. Allow the compound to dry before adding another layer, feathering the edges for a smooth finish.
Recommendation: Check for any hidden structural problems or moisture issues, as this can cause recurring cracks.
• Creating a Smooth and Level Surface
- Sand the entire wall with fine-grit sandpaper. Use a sanding pole or a hand sander with 120-grit sandpaper to smooth any rough spots, remove burrs or leftover compounds, and eliminate surface imperfections. Sand in a circular motion to avoid creating visible sanding marks.
- Wipe the wall with a damp sponge or cloth to remove sanding dust. This step ensures the paint adheres properly and prevents any remaining dust from causing a rough or uneven finish.
- Apply a high-quality primer to the wall. Priming is essential for sealing repairs, providing a uniform surface, and improving paint adhesion.
Recommendation: Always sand and prime before painting to achieve a professional-quality result.
• Removing Wallpaper Adhesive and Peeling Paint
- Peel away any remaining wallpaper or loose paint. Use a scraper, putty knife, or wallpaper steamer to remove stubborn adhesive and flaking paint.
- Wash the wall with a solution of warm water and mild detergent. This step helps remove any residual adhesive or oils that may interfere with paint adhesion. Rinse the wall with clean water and allow it to dry thoroughly.
- For persistent adhesive or thick layers of old paint, consider using a chemical paint remover or stripper. Follow the manufacturer’s instructions closely and ensure proper ventilation when working with hazardous materials.
Recommendation: Test removal methods in an inconspicuous area first to avoid damaging the wall and surrounding surfaces.
• Final Thoughts
By taking the time to properly address wall imperfections and following these guidelines, you will achieve a professional-quality paint job that will last for years.
Your beautifully painted walls will be a testament to your attention to detail and the care you put into the preparation process.
Step | Description |
|---|---|
1 | Inspect the wall for any imperfections such as cracks, holes or protruding nails. |
2 | Remove any loose paint, wallpaper, or debris from the wall surface using a scraper. |
3 | Fix small cracks and holes using a putty knife and pre-mixed joint compound. Apply the compound and let it dry according to the manufacturer’s instructions. |
4 | For larger cracks and holes, use a mesh repair patch before applying the joint compound. |
5 | Sand the repaired areas smooth using fine-grit sandpaper. Be sure to wear a dust mask and goggles for protection. |
6 | Clean the wall with a damp sponge or cloth to remove any dust and debris. Allow the wall to dry completely. |
7 | Apply a coat of primer to the wall to ensure proper adhesion of the paint and to hide any repaired areas. Allow the primer to dry according to the manufacturer’s instructions. |
8 | The wall is now ready for painting. |
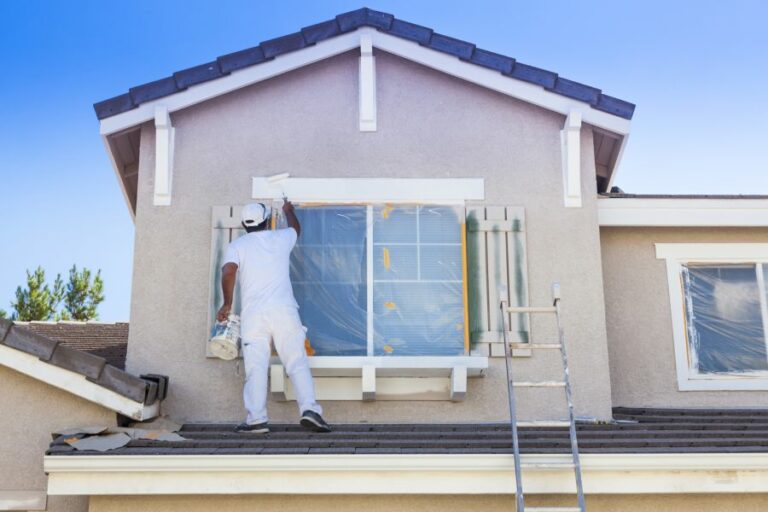
Top Wall Preparation Techniques for a Flawless Paint Job
A well-prepared wall is crucial for achieving professional-looking painting results. Preparing your walls correctly is as essential as selecting the right paint and tools for the job.
• Cleaning the Walls
1. Remove dust and cobwebs: Before starting any wall preparation, it’s essential to clean the surfaces by removing any dust or cobwebs. Use a vacuum cleaner with a soft brush attachment or a microfiber cloth to get rid of any loose dirt or debris.
2. Wash the walls: Next, wash the walls with a sponge and a mild detergent solution. Make sure to wring out the sponge to avoid soaking the wall, which could cause damage.
For stubborn stains or greasy spots, you can use a degreasing agent or a solution of trisodium phosphate (TSP) and water. Ensure proper ventilation when using TSP or similar products, and follow the instructions specified by the manufacturer.
Rinse the walls with clean water and let them dry thoroughly before moving on to the next steps.
• Repairing Surface Damages
3. Examine the walls for damages: After the walls are clean and dry, inspect them for any damages such as cracks, holes, or peeling paint. These issues need to be fixed before painting to achieve a smooth and even finish.
4. Fix cracks and holes: For small cracks and holes, use a putty knife to apply pre-mixed joint compound or spackling paste. Press the filler firmly into the crack or hole and smooth the surface with the knife. Allow the filler to dry completely, as directed by the manufacturer.
For larger holes, you might need to use a wall repair patch kit, which usually includes a mesh or adhesive patch and joint compound. Follow the kit’s instructions for best results.
5. Scrape off peeling or loose paint: Use a paint scraper or a putty knife to remove any loose or peeling paint from the wall. Be careful not to damage the wall surface when scraping.
6. Sand the walls: After the filler has dried, sand the repaired areas to smooth out any imperfections. Use fine-grit sandpaper (120 to 150 grit) for this task.
Sand in a circular motion and avoid pressing too hard, as it can create grooves in the wall. Also, sand the entire wall lightly to create a uniform surface, which will help the fresh paint adhere better.
Remember to wear appropriate safety gear, such as a dust mask and eye protection, when sanding.
• Priming the Walls
7. Choose the right primer: Selecting the proper primer is crucial for ensuring a long-lasting and professional paint job.
Primers seal the wall surface, providing a smooth base for the paint. Depending on the wall’s conditions and the type of paint you’ll be using, you might need a specific primer, such as stain-blocking or bonding primer.
Consult with a paint specialist or refer to the paint manufacturer’s recommendations to choose the appropriate product.
8. Apply the primer: Before applying the primer, protect the floors with drop cloths, and cover any doorways or windows with painter’s tape. Use a paintbrush to cut in around the edges of the room and a paint roller to apply the primer to the rest of the walls.
Allow the primer to dry for the recommended time before starting the painting process.
• Final Tips and Recommendations
In my experience, taking the time to clean, repair, and prime the walls before painting significantly improves the final result. Not only will it create a smooth, even base for the paint, but it will also extend the life of your paint job.
Remember, the best wall prep before painting is a combination of thorough cleaning, repairing any damages, and applying the appropriate primer. Taking these steps will help you achieve a professional-looking paint job that will last for years to come.
Step | Description |
|---|---|
1. Clean the walls | Remove dirt, dust, and grease by washing the walls with a mild detergent solution. Allow the walls to dry completely. |
2. Repair damages | Fill any holes, cracks, or dents with a patching compound. Allow the compound to dry and then sand the surface smooth. |
3. Sand the surface | Lightly sand the entire wall surface with fine-grit sandpaper to ensure proper adhesion of the paint and a smooth finish. |
4. Remove sanding dust | Wipe down the walls with a damp cloth or sponge to remove any sanding dust. Allow the walls to dry completely. |
5. Apply primer | Apply a coat of primer to create an even base for the paint and to improve adhesion. Allow the primer to dry according to the manufacturer’s instructions. |
6. Tape off areas | Use painter’s tape to protect trim, baseboards, and other areas that should not be painted. Make sure the edges are sealed tightly to prevent paint from seeping underneath the tape. |
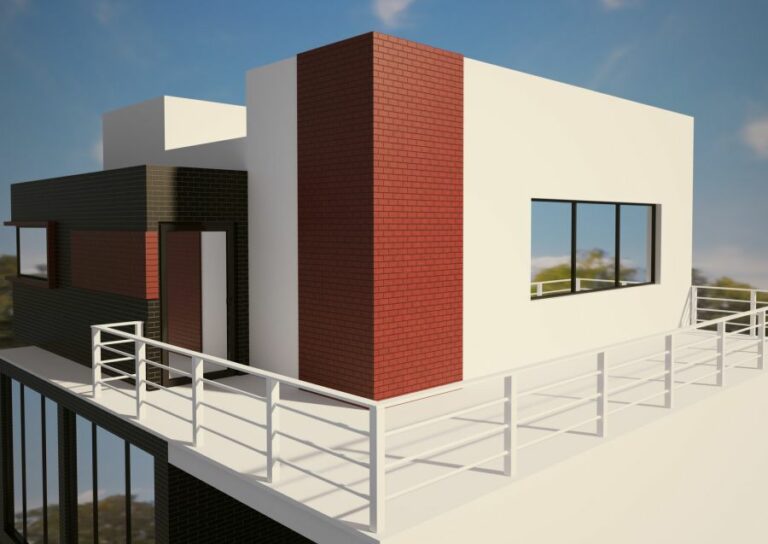
Pre-Painting Checklist for Impeccable Interior Walls
Painting the interior walls of your home can be a great way to freshen up the space and give it a new look. Before you start, it’s crucial to properly prepare the walls to ensure a smooth, durable finish. Here’s a step-by-step guide on what to do before painting interior walls.
• Assess the Walls and Choose the Right Paint
Before you start, inspect your walls for any damage, such as cracks, holes, or peeling paint. You’ll need to address these issues before moving on to the next steps.
It’s also crucial to choose the right paint for your walls; use latex paint for drywall and oil-based paint for wood surfaces. Consider the finish (matte, satin, semi-gloss, or high-gloss) based on the room’s function and the desired look.
• Remove Furniture and Protect the Floor
Clear the room of furniture or move it to the center and cover it with drop cloths. Protect your floors with plastic sheeting or canvas drop cloths to catch any paint drips and spills. Tape the edges of the drop cloth to the floor for added security.
• Clean the Walls
Before painting, it’s crucial to clean the walls to remove any dirt, dust, or grease that could affect paint adhesion. Use a sponge or cloth with a mixture of water and a mild detergent like TSP to clean the walls, then rinse with clean water and let them dry completely.
• Repair Damage and Fill Holes
Repair any cracks or holes in the walls with a patching compound or putty to create a smooth surface. Sand the repaired areas with medium-grit sandpaper, then use a damp cloth to remove any dust.
• Remove Loose Paint and Sand
Peeling or flaking paint should be removed before applying a new coat. Use a putty knife or paint scraper to carefully remove the loose paint, taking care not to damage the wall surface. For glossy or semi-gloss surfaces, lightly sand the walls with fine-grit sandpaper to ensure better paint adhesion.
• Mask and Protect Surfaces
Use painter’s tape to mask off trim, baseboards, and any other surfaces you don’t want to paint. Remove any electrical outlet and switch covers, and tape over the openings to protect them from paint splatters.
• Apply Primer
Priming the walls is an essential step before painting, as it helps create a uniform surface and ensures better paint adhesion.
Choose a primer that corresponds with your chosen paint type (latex or oil-based) and apply it evenly using a brush or roller. Allow the primer to dry completely according to the manufacturer’s instructions.
• Tint the Primer (Optional)
For a more vibrant and uniform color, consider tinting the primer by adding a small amount of your chosen paint color. This step can help minimize the number of paint coats needed to achieve the desired result.
• Ready Your Paint and Tools
Once the walls are completely dry and prepped, it’s time to get your paint and tools ready. Pour your paint into a paint tray, and gather a good-quality paintbrush for cutting in and a paint roller for the larger areas.
Having an extension pole for your roller can help you reach high areas without a ladder.
• Cut In and Paint
Begin by cutting in the edges of the walls using a brush, carefully creating a border about 2-3 inches wide. Take your time and maintain a steady hand to ensure crisp, straight edges.
Once the edges are completed, use a roller to apply the paint in a “W” or “M” pattern, working in sections and maintaining a wet edge to avoid any visible roller marks.
Apply additional coats as needed, allowing the paint to dry between coats according to the manufacturer’s instructions.
• Clean Up and Remove Tape
After the final coat is completely dry, carefully remove the painter’s tape from the trim and baseboards. Clean your brushes, rollers, and any other tools with the appropriate solvent or water, following the manufacturer’s cleaning guidelines.
• Reinstall Hardware and Arrange Furniture
Once the paint is dry and your tools are cleaned, it’s time to reinstall any electrical outlet and switch covers, put back any removed hardware, and arrange the room’s furniture.
By following these steps to properly prepare and paint your interior walls, you’ll achieve a beautiful, long-lasting finish that transforms your space. Happy painting!
Step | Description |
|---|---|
1 | Remove furniture, wall fixtures, and outlet covers |
2 | Clean the walls with a sponge or cloth, removing dust and dirt |
3 | Repair any cracks, holes, or other damage with a filler or patching compound |
4 | Sand and smooth the wall surface to ensure an even finish |
5 | Apply painter’s tape to protect baseboards, trim, and any areas not being painted |
6 | Prime the walls, if necessary, to create the best base for the paint |