Prep Work Making Surfaces Paint-Friendly, What Pros Say
Preparing a surface for painting might seem like a daunting task, but fear not – we’re here to help make it smooth and straightforward. A well-prepped surface is the key to achieving professional, long-lasting results. We’ve got you covered with tips and techniques to make your surfaces paint-friendly.
Prep work: making surfaces paint-friendly:
Proper surface preparation is crucial for achieving a smooth, long-lasting paint finish. This involves assessing the surface’s condition, cleaning, repairing damage, and priming. Different materials, such as wood, metal, and drywall, require specific preparation techniques. Using appropriate tools, materials, and safety precautions will ensure an effective, paint-friendly surface.

Discover the secrets to achieving flawless painted surfaces. Our comprehensive guide unveils expert tips and techniques for surface preparation, ensuring exceptional painting results every time. Don’t miss out on the essential prep work advice – read on!
Contents
- 1 Prepping Surfaces: Creating a Paint-Friendly Canvas
- 2 Cleaning and Prepping Tips for a Flawless Paint Job
- 3 Expert Painters’ Secrets to Perfectly Prepped Walls
- 4 Nautical Surface Prep: How to Ready Ship Surfaces for Painting
Prepping Surfaces: Creating a Paint-Friendly Canvas
• Importance of Surface Preparation
In any painting project, proper surface preparation is key to achieving a smooth and long-lasting finish.
Skipping this critical step may lead to paint peeling, chipping, or an uneven finish that won’t last long. In my experience, investing time and effort in preparing surfaces can significantly improve the final results and prevent future issues.
• Assessing the Surface
The first step in making a surface paint friendly is to assess its current condition. Check for any dirt, debris, or grease that may affect the adhesion of the paint.
Also, look for any existing peeling, cracks, or damage that may need repair before painting. Keep in mind that different surface materials may require different preparation techniques.
– Wood Surfaces
Wood is a common material for both interior and exterior surfaces. To prepare wood for painting, follow these steps:
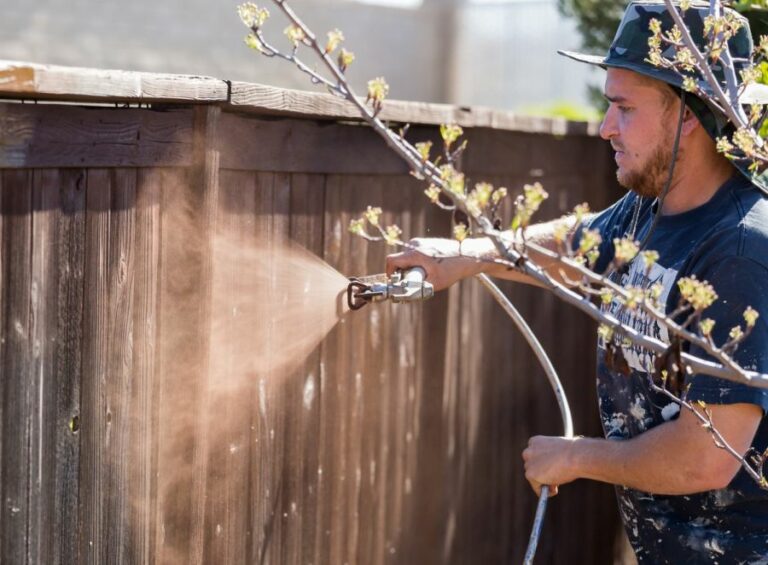
- Cleaning: Remove any dirt or debris using a brush or vacuum. If the surface is greasy or stained, use a wood cleaner or diluted detergent solution and rinse thoroughly. Allow the wood to dry completely.
- Sanding: Sand the surface to remove any rough spots, existing paint, or varnish. I recommend using medium-grit sandpaper (e.g., 80-120 grit) and sanding in the direction of the wood grain. Wipe away any remaining dust.
- Repairing: Fill any holes or cracks with wood filler, following the manufacturer’s instructions. After the filler has dried, sand the area smooth and wipe away any dust.
- Priming: Apply a wood primer to seal the surface and improve paint adhesion. This step is particularly important for untreated wood or surfaces with stains or knots. Be sure to follow the primer manufacturer’s instructions, including drying times.
– Metal Surfaces
Metal surfaces, such as railings, doors, and furniture, require special attention to prevent rust and ensure a strong paint bond. Here’s how to prepare metal surfaces for painting:
- Cleaning: Wipe away any dirt, grease, or grime with a clean cloth and mild detergent solution. Rinse the surface with clean water and allow it to dry completely.
- Removing Rust: If rust is present, use a wire brush, sandpaper, or rust-removing solution to remove it. Thoroughly clean the surface afterward.
- Sanding: Lightly sand the surface with fine-grit sandpaper to promote paint adhesion.
- Priming: Apply a metal primer to the surface, following the manufacturer’s instructions. This step is crucial to prevent rust and ensure long-lasting results.
– Drywall and Plaster Surfaces
Preparation of drywall and plaster surfaces largely involves repairing any damage and ensuring a smooth, clean surface. To do this, follow these steps:
- Cleaning: Wipe away any dust or debris with a dry cloth.
- Repairing: Patch any holes or cracks with joint compound or plaster, following the product’s instructions. Sand the repaired area smooth and remove any dust.
- Priming: For new or untreated drywall, apply a drywall primer to seal the surface and improve paint adhesion. This is essential for a uniform finish.
• Choosing the Right Tools and Materials
Using the appropriate tools and materials can make your surface preparation more efficient and effective. Some essential items to have on hand include:
- Sandpaper (various grits)
- Wood filler
- Joint compound or plaster
- Cleaning supplies (brushes, vacuum, detergent, etc.)
- Primer (wood, metal, or drywall)
- Paintbrushes, rollers, or sprayers (as needed for primer application)
It’s also helpful to protect surrounding areas from dust and debris with drop cloths, masking tape, and plastic sheeting. Taking these precautions can save you time and effort during cleanup.
• Safety Considerations
Surface preparation may involve working with chemicals, dust, and debris, so it’s essential to prioritize your safety.
Wear appropriate personal protective equipment, such as gloves, goggles, and dust masks. If you’re working with solvents or chemicals, ensure adequate ventilation and follow the manufacturer’s safety guidelines.
Lastly, be cautious when using tools such as sanders or scrapers, as improper use could cause injury or damage to the surface.
• In Summary
Taking the time to properly prepare surfaces for painting can greatly improve the appearance and longevity of your finished project.
By following the recommendations outlined above, you’ll be well on your way to creating a paint-friendly surface and achieving professional-quality results.
For further guidance on surface preparation techniques, consult resources such as the Painting and Decorating Contractors of America (PDCA) Painting Standards or your local paint supplier.
• Surface Preparation: A Crucial Step for a Perfect Paint Job
Surface preparation is an essential step before painting any surface. Properly prepping the surface ensures that the paint adheres correctly and lasts longer.
– Cleaning the Surface
The first step to preparing a surface is to clean it thoroughly. Dust, dirt, grease, and oil can all prevent paint from adhering and cause it to peel or chip away later. Here are some cleaning methods depending on the surface:
- Washing: Use a sponge or cloth along with mild dishwashing detergent and water to clean the surface. Rinse with water and let it dry completely. Avoid using harsh chemicals that can damage the surface or leave a residue.
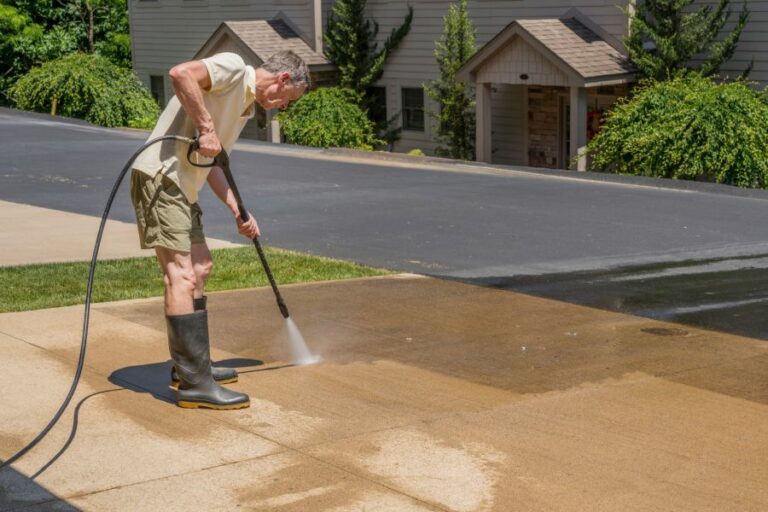
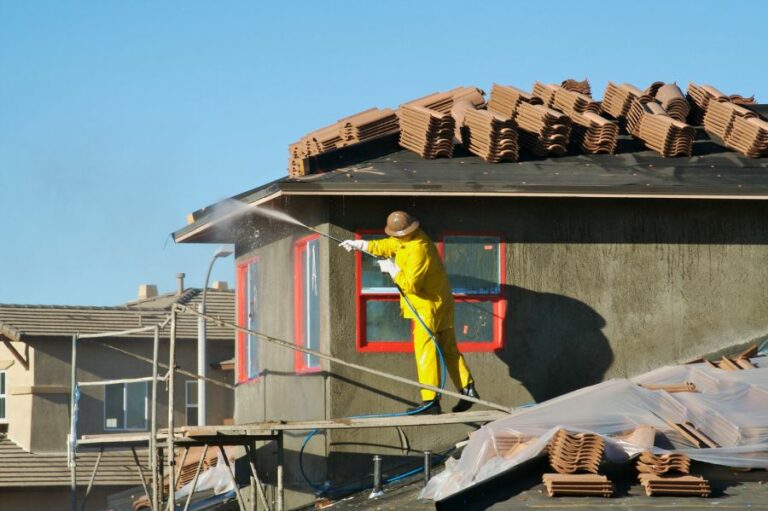
- Pressure Washing: For exteriors, pressure washing can quickly remove dirt, mildew, and chalking paint. Make sure to follow the manufacturer’s instructions and safety precautions.
– Sanding the Surface
Sanding is required to even out rough surfaces, remove old paint or stains, and provide a “tooth” for the new paint to adhere properly. There are various tools and sandpaper grits available, depending on the surface and desired finish:
- Manual Sanding: For smaller projects or intricate details, sandpaper or a sanding sponge works well. Start with coarse grit (60-80) and progress to finer grits (100-150) to achieve a smooth surface.
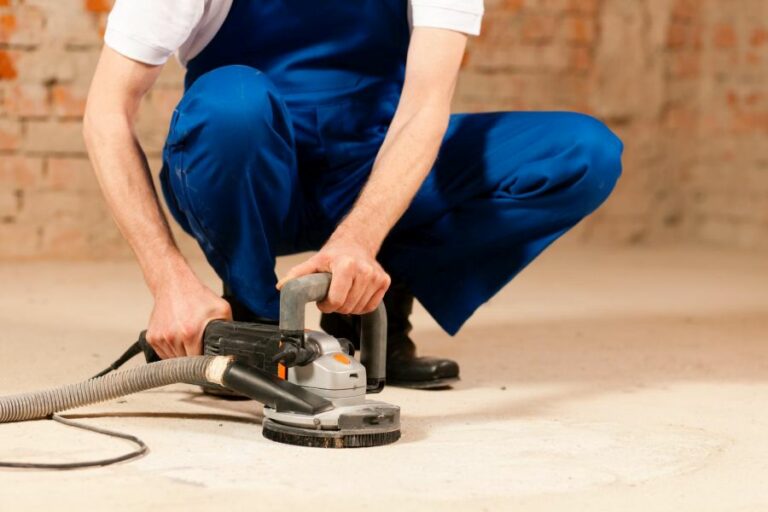
- Power Sanders: For larger projects or flat surfaces, power sanders such as orbital or belt sanders save time and effort. Use caution to avoid damaging the surface, and always wear eye and respiratory protection.
- Chemical Removers: For stubborn or peeling paint, consider using a chemical paint remover. Follow the instructions carefully to avoid damaging the surface or harming yourself.
Remember to remove any sanding dust or debris with a clean, damp cloth or vacuum with a brush attachment.
– Repairing Damaged Surfaces
Cracks, holes, dents, or other damages must be addressed before painting to ensure a smooth, long-lasting finish. Here are some common repair techniques:
- Wood: Fill small holes, dents, or scratches with wood filler, sanding it smooth once it dries. For larger repairs, replace the damaged section or seek professional help.
- Drywall: Small dents, cracks, or nail holes can be filled using joint compound or spackle; while more significant damages may require patches or replacement.
- Metal: Clean the surface with a wire brush and use a rust converter on any rusted areas. For dents, use an appropriate filler and sand it smooth after it dries.
- Masonry: Fill cracks or holes with the appropriate mortar, caulk, or patching compound. Allow the repair to cure fully before painting.
– Priming the Surface
Priming is essential for promoting proper paint adhesion, sealing porous surfaces, and providing a uniform base for the topcoat. Here are some key factors to consider when choosing a primer:
- Compatibility: Use a primer compatible with the surface and topcoat material (water-based or oil-based). Consult the manufacturer’s guidelines for the best results.
- Tint: For darker paint colors, consider tinting the primer to a similar shade. This helps reduce the number of topcoat layers required for full coverage.
- Stain-blocking: For surfaces with stains or strong color variations, choose a stain-blocking primer to prevent bleed-through.
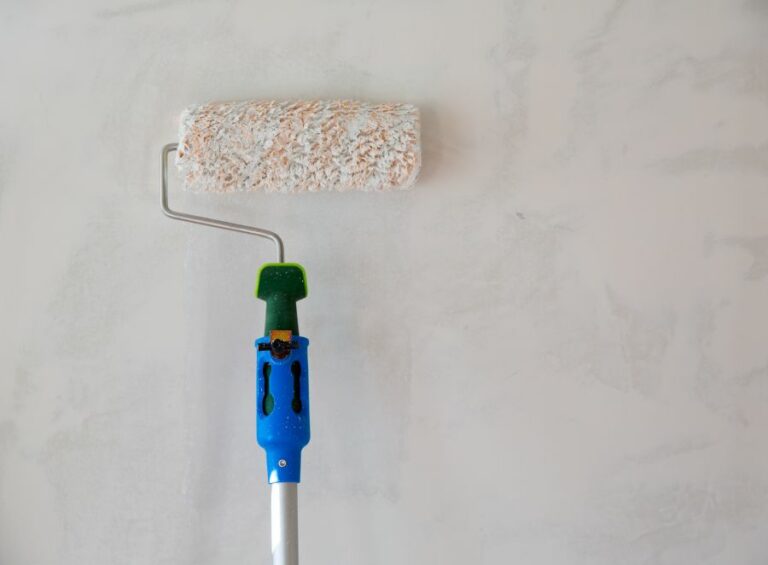
Apply the primer using a roller, brush, or sprayer, ensuring an even and thin coat. Allow it to dry completely before applying the topcoat.
– Masking and Protecting Adjacent Surfaces
Before painting, cover adjacent surfaces, furnishings, or flooring to protect them from paint splatters or accidental drips. Use painter’s tape, drop cloths, or plastic sheeting to prevent damage.
To summarize, proper surface preparation is crucial to achieving a professional, long-lasting paint job. By following the steps of cleaning, sanding, repairing, priming, and protecting, you can ensure that your painting project looks great and lasts for many years to come.
Remember to always follow safety guidelines and manufacturer instructions for the best results. Happy painting!
Cleaning and Prepping Tips for a Flawless Paint Job
A successful and long-lasting paint job requires proper surface preparation. Regardless of the type of surface you are planning to paint, cleaning and prepping are critical steps to achieve professional-looking results.
• Remove Dirt and Dust
Before you begin any paint job, it is crucial to remove all dust, dirt, and grime from the surface. Accumulated dirt can lead to uneven paint application and contribute to poor adhesion.
- Use a clean cloth or a mild detergent to clean the surface.
- Rinse the surface with water to remove any detergent residue.
- Allow the surface to dry completely before proceeding.
For larger surfaces or outdoor projects, consider using a pressure washer to clean the surface more effectively. The U.S. Department of Energy provides helpful tips on cleaning and maintaining exterior surfaces using a pressure washer.
• Remove Loose or Peeling Paint
The paint does not adhere well to surfaces with loose or peeling paint. Begin by inspecting the surface for any loose or peeling paint, and follow these steps to remove it:
- Use a paint scraper or a wire brush to scrape away any loose or peeling paint.
- Sand the edges of the remaining paint to create a smooth transition between the old and new paint layers.
- Wipe away any dust or debris with a clean cloth.
• Repair Damaged Surfaces
Damaged surfaces, such as cracks, holes, and dents, should be repaired prior to painting to ensure a uniform and professional-looking finish. Here are some tips on how to address common surface imperfections:
– Repair Cracks and Holes in Drywall
- Apply a joint compound to any cracks or holes using a putty knife.
- Smooth the compound so it is flush with the surrounding surface.
- Allow the compound to dry according to the manufacturer’s instructions.
- Lightly sand the patched area to ensure a smooth surface.
– Fill Dents in Metal Surfaces
- Use an auto body filler to fill any dents, following the manufacturer’s instructions.
- Allow the filler to dry before sanding it smooth.
- Wipe away any dust or residue with a clean cloth.
– Repair Damaged Wood Surfaces
- Fill any holes, gouges, or imperfections with a wood filler, following the manufacturer’s instructions.
- Allow the filler to dry before sanding it smooth.
- Wipe away any dust or residue with a clean cloth.
• Sand Rough or Glossy Surfaces
Paint adheres best to surfaces with a slight “tooth” or roughness. If you are working with a glossy or rough surface, follow these steps to promote better paint adhesion:
- Sand the surface using fine-grit sandpaper (approximately 120 to 150 grit).
- Remove any dust or debris with a clean cloth or a tack cloth.
- If necessary, repeat the sanding process with finer-grit sandpaper to achieve the desired smoothness.
• Address Stains and Mildew
Stains and mildew can bleed through the new paint and create unsightly blemishes. To tackle these issues, follow these steps:
- Clean any stains or mildew with a bleach solution (1 part bleach to 3 parts water).
- Rinse the surface with water and let it dry completely.
- Apply a stain-blocking primer to prevent the stains or mildew from bleeding through the new paint layer.
• Prime the Surface
Priming is an essential step in preparing a surface for paint, as it promotes better adhesion and creates a uniform base for the paint to adhere.
- Choose a primer appropriate for the surface you are painting (e.g., wood, metal, or drywall).
- Apply the primer according to the manufacturer’s instructions using a brush or roller.
- Allow the primer to dry completely before applying the paint.
By following these recommendations and taking the time to properly clean and prep your surface before painting, you can ensure a professional and long-lasting paint job that you will be proud of.
Step | Description |
|---|---|
1 | Inspect and repair any damaged areas on the surface to be painted. |
2 | Remove any dirt, dust, and debris from the surface using a broom, vacuum, or air blower. |
3 | Wash the surface using a mixture of mild detergent and water. A pressure washer can be used for large surfaces, while a sponge or cloth can be used for smaller areas. Make sure to rinse thoroughly to remove any soap residue. |
4 | Remove any loose or peeling paint with a paint scraper or wire brush, and sand the area smooth. |
5 | Remove any mold or mildew with a solution of bleach and water, and rinse thoroughly. |
6 | Fill any holes or cracks with the appropriate filler or caulk, and sand smooth once dry. |
7 | Tape off any areas not to be painted, such as trim, windows, and door frames, using painter’s tape. |
8 | Apply a coat of primer to ensure proper paint adhesion and coverage. |
Expert Painters’ Secrets to Perfectly Prepped Walls
The process of prepping walls for painting is an essential step before the actual painting begins. It ensures a smooth surface and a long-lasting finish. Professional painters know that if the preparation work isn’t done correctly, the final result will show it.
• Cleaning the Walls
The first and foremost step in prepping a wall for painting is to clean the surface. Remove any dirt, dust, grime, or grease from the walls using a soft sponge or cloth and a mild detergent solution. It is crucial to remove any contaminants, as they can affect paint adherence and the overall finish of the paint job.
If mold or mildew is present on the walls, a specialized cleaning solution may be necessary. You can find mold and mildew removers in most hardware stores, or you can create your own solution using a mixture of water and bleach.
Be sure to clean the walls thoroughly, scrubbing gently to avoid damaging the surface. After cleaning, allow the walls to dry completely for at least 24 hours.
• Inspecting the Walls for Damage
Before painting, it is essential to inspect the walls for any damage, such as cracks, holes, dents, or flaking paint. These issues should be addressed before starting the painting process, as uneven surfaces will cause the paint to appear patchy and unprofessional.
If you must remove wallpaper before painting, make sure to do so with care. Use a steamer or a wallpaper-removal solution to soften the adhesive, then gently scrape away the paper. Take your time to avoid damaging the underlying surface.
• Repairing Wall Imperfections
After inspecting the walls, repair any damage using the appropriate materials and techniques. For instance:
– Filling Cracks and Holes
To repair small cracks or holes, apply a pre-mixed patching compound using a putty knife. Press the compound firmly into the crack or hole, ensuring the area is entirely filled.
Feather the edges of the compound so that it blends seamlessly with the surrounding wall texture. Allow the compound to dry according to the manufacturer’s instructions, then sand the area smoothly using fine-grit sandpaper.
– Repairing Dents
For larger dents or holes, use a two-step process that involves applying a patch made of fiberglass mesh or rigid patch material, followed by a joint compound. Cut the patch to fit over the damaged area and adhere it per the manufacturer’s instructions.
Apply a layer of joint compound, then embed the patch and add more compound to fully cover and blend the repair. Allow the compound to dry, then sand until smooth.
– Addressing Flaking Paint
If the wall has flaking or peeling paint, gently scrape away the loose material using a paint scraper or a wire brush. Sand the affected area to create a smooth transition between the exposed surface and the surrounding paint.
It’s essential to address flaking paint to ensure that the new paint adheres correctly and creates a flawless finish.
• Priming the Walls
After repairing any damage and cleaning the walls, the final preparation step is to apply a primer. Primer serves several purposes, including providing a uniform base and sealing any porous areas or repair materials for even paint absorption.
Choose a high-quality primer that is compatible with the paint you plan to use (make sure to use a latex-based primer with latex paint). Apply the primer evenly with a brush, roller, or sprayer, and allow it to dry according to the manufacturer’s instructions.
If the walls are heavily stained or if a drastic color change is planned, consider using a stain-blocking primer to prevent the old color or stains from bleeding through the new paint.
Priming is especially crucial for surfaces that are porous or have repairs made using a joint compound, as paint tends to be absorbed unevenly in those areas. Priming ensures a consistent finish and can also help save on paint costs by reducing the need for multiple coats.
• Conclusion
Preparing walls for painting is an essential step that should not be overlooked. Professional painters understand the importance of proper cleaning, inspection, repair, and priming in achieving a flawless and long-lasting paint job.
By following these steps, you can ensure that your walls are prepped correctly and will result in an impressive final outcome. Remember, a little extra time spent on preparation will save time and effort in the long run and guarantee a professional-looking paint job.
Nautical Surface Prep: How to Ready Ship Surfaces for Painting
Painting a ship is essential for its maintenance, protection against corrosion, aesthetic appearance, and adherence to industry standards. Preparing the surface for painting is a crucial step in this process.
• Assessing the Surface Condition
Before starting the surface preparation, it is essential to assess the overall condition of the surface. This includes identifying the type and extent of corrosion, paint failure, and any damage or irregularities.
The International Maritime Organization (IMO) provides guidelines for surface inspection in the MSC.1/Circ.1519 document.
• Surface Cleaning and Degreasing
Before any paint is applied, the ship’s surface must be thoroughly cleaned and degreased. This will remove any contaminants, such as dirt, grease, and oil, which can negatively impact paint adhesion and performance.
– High-Pressure Water Washing
High-pressure water washing is an effective method of surface cleaning. A pressure washer is used to spray water onto the surface at high pressure, dislodging dirt, dust, and other contaminants. It is crucial to use a pressure washer with sufficient power, usually above 3,000 psi, to achieve the best results.
– Solvent Degreasing
Using a degreasing solvent is essential for removing oils and grease from the surface. A cloth or sponge soaked in the solvent should be used to wipe down the surface, ensuring that all areas are covered.
• Removing Old Paint and Rust
Once the surface is clean and free of contaminants, the next step is to remove any loose paint and rust, as well as any residues that may affect the paint’s adhesion.
– Hand Tools
For small areas and touch-ups, hand tools such as wire brushes, scrapers, and sanding blocks can be used to remove the old paint and rust. Be sure to follow safety procedures and wear the appropriate personal protective equipment (PPE) while using hand tools.
– Power Tools
For larger areas, power tools like grinders, sanders, and needle guns can make quick work of removing paint and rust. Always follow the manufacturer’s guidelines and safety precautions when using these tools.
– Abrasive Blasting
Abrasive blasting, also known as sandblasting, is an aggressive method of surface preparation. It involves the use of compressed air to propel abrasive media onto the surface, removing paint, rust, and other materials.
There are different types of abrasive media available, such as sand, steel shots, and copper slag. Choosing the appropriate abrasive for your specific job will depend on factors such as the type of coating being removed and the desired surface profile.
Ensure that appropriate PPE and safety measures are in place, and consider environmental regulations when using abrasive blasting methods.
• Surface Profile
It is important to have the correct surface profile before painting to ensure proper paint adhesion. Different paint types and specifications require different surface profiles, so it is essential to consult the paint manufacturer’s guidelines.
– Hand and Power Tools
Tools such as grinders and sanders can be used to create the desired surface profile. Be sure to choose the correct type of abrasive disc or attachment for the specific paint requirements.
– Abrasive Blasting
If abrasive blasting is used for surface preparation, selecting the proper abrasive type and size is critical for achieving the desired surface profile.
• Applying the Paint
Once the ship’s surface is clean, free of contaminants, and has the correct surface profile, you are ready to apply the paint. It is crucial to follow the paint manufacturer’s guidelines for mixing, application and recommended environmental conditions.
By following the steps outlined above, you will have appropriately prepared your ship’s surface for painting, ensuring the longevity and effectiveness of the paint in protecting your vessel.
In conclusion, proper surface preparation is vital for the success and longevity of a ship’s paint job. Following the guidelines discussed in this article will ensure that your ship’s surface is ready for painting, ultimately contributing to the vessel’s appearance, performance, and maintenance.
Step | Description |
|---|---|
1. Inspection | Inspect the surface for any defects, rust, or damage. Identify areas that require repairs or additional surface preparation. |
2. Cleaning | Clean the surface with freshwater, soap, or degreasers to remove dirt, grease, and other contaminants. Rinse thoroughly and allow to dry. |
3. Repairing | Repair any damaged areas, such as patching holes or welding seams. Ensure repairs are properly treated to prevent rust and deterioration. |
4. Removing rust and old paint | Remove rust, old paint, and other surface imperfections using scraping, sanding, or abrasive blasting methods. Ensure the surface is smooth and clean. |
5. Priming | Apply a coat of primer to the surface to provide a base for the new paint and to protect the surface from corrosion. |
6. Sanding | Sand the primed surface lightly to create a smooth and uniform surface, free of any defects or imperfections. |
7. Cleaning again | Clean the surface again to remove any dust or debris created during the sanding process. Allow the surface to dry before proceeding to paint. |
8. Painting | Apply the first coat of paint, following the manufacturer’s recommendations for application technique and drying times. Apply additional coats as necessary, allowing each coat to dry before applying the next. |
9. Inspecting and Touch-ups | Inspect the finished paint job for any defects or areas that require touch-ups. Make any necessary corrections to ensure a high-quality and long-lasting paint finish. |