Scraping Techniques For Smoother Paint. What Pros Say
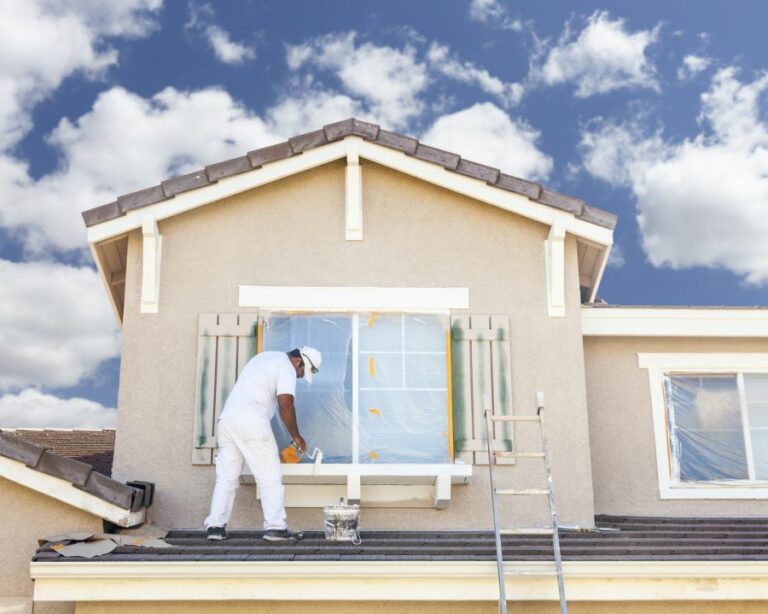
Are you tired of dealing with uneven, patchy paint on your walls? We’ve got you covered. In this discussion, we’ll explore various scraping techniques that leave your painted surfaces looking smooth and professional. With our tried and tested methods, you’ll be able to tackle those stubborn paint issues in no time.
Scraping techniques for smoother paint:
Scraping is an essential technique for achieving a smooth paint finish. Common paint scrapers include putty knives, triangular scrapers, and carbide scrapers. To scrape effectively, apply consistent pressure, hold the scraper at a 30-45 degree angle, and maintain a sharp blade. Sanding, priming, and using high-quality paint further ensure a flawless finish.

Are you tired of uneven paint jobs and unsightly streaks? Discover the secrets to a flawlessly smooth finish in our comprehensive guide on scraping techniques for smoother paint. Dive in to elevate your DIY skills and give your walls the makeover they deserve! Keep reading to unlock the magic.
Contents
- 1 Smoothing Paint: Effective Scraping Methods
- 2 Simplifying Paint Removal: Techniques to Scrape Effortlessly
- 3 Mastering Silky-Smooth Paint Strokes
- 4 Exploring the Art of Scraping Paint Techniques
- 5 Achieving a Seamless, Polished Painting Appearance
Smoothing Paint: Effective Scraping Methods
Having a smooth, flawless paint finish is the ultimate goal for painting projects. In order to achieve this, surface preparation is crucial, and removing any old paint or rough patches is an essential part of this process. One of the most effective ways to do this is through scraping.
• Understanding Paint Scrapers
Paint scrapers come in a variety of shapes and sizes, each designed for specific tasks. When selecting a scraper for your project, make sure to choose one that suits the requirements of the task at hand. Here are some common types of paint scrapers:
– Putty Knife
A putty knife is a versatile tool that can be used for removing paint, applying filler, and scraping surfaces. Its flexible blade allows you to apply consistent pressure across the surface, making it ideal for flaking or chipping paint.
– Triangular Scraper
A triangular scraper is designed for reaching corners and tight spaces. Its pointed edges can easily scrape paint from small, hard-to-reach areas, making it a handy tool for detailed projects.
– Carbide Scraper
A carbide scraper, as the name suggests, comes with a blade made from carbide steel. This sturdy blade can easily remove several layers of paint at once, making it suitable for large-scale projects or surfaces with thick, stubborn paint.
• Using Scrapers Effectively
When using a paint scraper, it is important to understand some basic techniques to achieve the best results. Here are some tips to keep in mind:
– Applying the Correct Pressure
Apply consistent pressure on the scraper for even removal of paint. Too much pressure may cause gouging, while too little will be ineffective. Finding the right balance will result in a well-prepared surface for painting.
– Choosing the Right Angle
Hold the scraper at an angle that allows the blade to work efficiently without damaging the underlying surface. Generally, a 30- to 45-degree angle is recommended.
– Keeping the Blade Sharp
A sharp blade is essential for clean and effective scraping. Ensure to maintain the sharpness of the blade, sharpening or replacing it as needed. A dull blade can lead to uneven scraping and may even cause damage to the surface.
• Chemical Stripping vs. Scraping
In some cases, chemical stripping agents can be used to remove old paint instead of scraping. These products work by softening the paint, making it easier to scrape or wipe away. While chemical stripping may seem like an easier option, it does have its downsides:
- Some chemical strippers can be harmful to the user or the environment.
- The process can be time-consuming, as you have to wait for the paint to soften.
- It may not be effective on all types of paint, especially older paints or those with multiple layers.
As such, scraping remains a more reliable and precise method for removing old paint and preparing surfaces for a smooth paint finish.
• Additional Techniques for Achieving a Smooth Paint
While scraping is a crucial part of surface preparation, other techniques should be considered to ensure the best possible paint finish.
– Sanding
After scraping, sand the surface to further smooth out any imperfections or residue left behind. Sanding helps to create a consistent, even surface that is ideal for paint adhesion.
– Priming
Applying a quality primer will provide a solid base for the paint to adhere to. Priming ensures better paint coverage, color consistency, and durability.
– Using High-Quality Paint
Investing in high-quality paint will go a long way in achieving a smooth, flawless finish. Better quality paints have better pigments and binders, ensuring a more even application and longer-lasting results.
• Conclusion
Scraping is a critical part of obtaining a smooth paint finish for any project. By following the techniques and tips discussed in this article, you will be better equipped to remove old paint and create a surface that is well-prepared for a new layer of paint.
Don’t forget about the importance of proper sanding, priming, and selecting the right paint to ensure the highest quality finish.
Simplifying Paint Removal: Techniques to Scrape Effortlessly
Paint removal can be a tedious and time-consuming task, particularly when dealing with stubborn, thick layers of paint on various surfaces. I you’re looking for ways to make the paint easier to scrape, there are several techniques and tools that can significantly speed up and simplify the process.
• Understand the Type of Paint You’re Dealing With
Before diving into specific techniques, it’s essential to understand the type of paint you’re about to remove. This will help you choose the most effective method and product to make the paint easier to scrape. The two main types of paint are:
- Water-based (latex): Water-based paints are more environmentally friendly and generally easier to remove compared to oil-based paints. They are more sensitive to heat, which makes them more suitable for heat-assisted scraping techniques.
- Oil-based: Oil-based paints, on the other hand, are more resistant to water and heat. They require stronger, more specialized products to dissolve their bonds and make them easier to scrape off.
• Using a Paint Softener: Expert Recommendation
One of the most effective ways to make paint easier to scrape is by using a paint softener or paint stripper. These products are specially designed to break down the chemical bonds in paints, making them easier to remove.
There are various paint softeners available in the market, including solvent-based, caustic-based, and bio-based products.
As an expert, I recommend using bio-based paint softeners. These products do not contain harmful chemicals, and they have a lower environmental impact compared to other softening products.
Most bio-based paint removers are suitable for both water-based and oil-based paints, making them a versatile option for various paint-scraping projects.
When using a paint softener, make sure to follow the manufacturer’s instructions to achieve the best results. Some useful products include Soy Gel and Citristrip.
• Proper Tools for Effective Paint Scraping
Having the right tools can significantly impact the effectiveness and ease of paint scraping. Here’s a list of essential tools to make paint removal a breeze:
1. Safety Equipment
Before starting any paint-scraping project, make sure to wear proper safety equipment, including gloves, goggles, and a face mask or respirator. These will protect you from any harmful chemicals or debris during the process.
2. Scraper or Putty Knife
A good quality scraper or putty knife is essential for effective paint removal. Choose a scraper with a sharp, wide blade to remove larger chunks of paint more efficiently. For smaller, hard-to-reach areas, a narrower putty knife is the best tool for the job.
3. Heat Gun or Paint Removal Tool
Using a heat gun or a specialized paint removal tool can be beneficial, particularly for water-based paints. Applying heat to the paint loosens its bonds with the surface, making it easier to scrape off. Be careful not to overheat the paint, as it can produce fumes or damage the underlying surface.
4. Wire Brush
A wire brush is a helpful tool to use after scraping to remove residual paint and debris, ensuring a clean surface for repainting or refinishing.
5. Sandpaper
After removing the majority of the paint, using fine-grit sandpaper can help smooth and prepare the surface for new paint or finish.
• Essential Techniques for Effective Paint Scrape
In addition to using the appropriate products and tools, following these expert tips and techniques can help make paint scraping more manageable and efficient:
- Start with the edges: When using a paint softener, start by applying it around the edges of the painted area. This allows the product to seep underneath the paint, making it more effective.
- Use the right pressure: Applying too much pressure while scraping can damage the underlying surface. Use just enough pressure to remove the paint effectively without causing damage.
- Scrape in the same direction: To minimize surface damage, scrape in the same direction as the wood grain or underlying material.
- Clean the tools regularly: Make sure to clean your scraper or putty knife regularly to remove accumulated paint and ensure optimal performance.
- Don’t rush: Patience is key when removing paint. Allow enough time for the paint softener to work, and be gentle with scraping to avoid damaging the underlying surface.
In conclusion, a proper understanding of the type of paint, choosing the appropriate paint softener, using specialized tools, and following expert tips and techniques can significantly make the paint easier to scrape.
Adopting these strategies in your next paint removal project will ensure efficient and effective paint removal while minimizing the risk of damage to the underlying surface.
Mastering Silky-Smooth Paint Strokes
Painting can be a rewarding and therapeutic hobby, but getting smooth paint strokes can be a challenge for both beginners and experienced artists.
• Understanding Your Paints and Brushes
Before diving into techniques for smoother paint strokes, it’s important to understand the basic components and tools you use. Two principal factors affect the smoothness of your paint strokes: your choice of paint and brushes.
– Selecting the Right Paint
There are various types of paints available, including acrylics, oils, and watercolors. Each paint type has its own unique characteristics and properties that affect the smoothness of your paint strokes.
- Acrylics: Acrylic paints are versatile and easy to work with but can dry quickly. Their fast-drying nature may make it difficult to maintain smooth brush strokes, especially for beginners. To achieve smoother paint strokes with acrylics, consider using retarders, which slow down the drying process. (Golden Paints Retarders)
- Oils: Oil paints are known for their rich colors and smoothness, making them a popular choice among artists seeking smoother paint strokes. However, they require more skill and experience to work with, as well as a longer drying time.
- Watercolors: These paints are favored for their transparency and delicate touch, but achieving smooth strokes can be challenging due to their fluid consistency.
– Choosing the Right Brushes
Your choice of brush plays a crucial role in achieving smooth paint strokes. Ensure that your brushes have high-quality bristles that taper at the ends, allowing for even paint application.
- Synthetic brushes: These brushes can be a good option for smooth paint strokes, as they tend to maintain their shape and stiffness better over time.
- Natural hair brushes: While these brushes often hold more paint and tend to create smoother strokes, they can also be more expensive and degrade over time.
• Techniques for Smoother Paint Strokes
With your tools in hand, it’s time to explore techniques that can help you achieve those coveted smooth paint strokes.
– Proper Brush Loading
One common reason for uneven paint strokes is improper brush loading, where insufficient paint is applied to the brush. To resolve this issue, ensure that you:
- Dip your brush gently into the paint, covering the bristles evenly but not to the extent of overloading.
- Press the brush firmly against your palette, allowing the paint to evenly coat the bristles.
- Maintain a consistent shape of the brush, avoiding splayed or uneven bristles, which can lead to uneven paint strokes.
– Mastering Brush Pressure
Applying the correct pressure on your brush is essential for achieving smooth paint strokes. Too much pressure will leave heavy lines, while too little can lead to streaky, uneven brush strokes. To master brush pressure:
- Practice using a light touch, gradually increasing pressure to understand your brush’s capabilities.
- When painting, gradually build up layers for smoother transitions between colors and brush strokes.
- Experiment with different-sized brushes for various pressure effects.
– Maintaining Brush Direction
For sleeker brush strokes, maintaining a consistent brush direction is crucial. By following a specific direction, and being mindful of how you hold your brush, you can eliminate wobbly or jagged lines. Try these tips for maintaining brush direction:
- Hold your brush at a slight angle to the canvas, ensuring that the bristles are parallel to the canvas and your direction of the painting.
- Glide your brush across the surface evenly, maintaining consistent pressure and direction of movement.
- When changing brush direction, gently lift the brush from the surface to prevent smudging or overlapping lines.
– Blending Techniques
Blending your paint is another essential aspect of achieving smooth paint strokes. Experiment with the following blending techniques:
- Wet-on-wet: This technique involves applying wet paint onto an already wet surface, allowing the colors to mix naturally for smoother transitions.
- Gradual layering: By gradually layering thin layers of paint, you can achieve a smoother and more delicate blending effect.
- Dry brushing: This method involves brushing paint onto a dry surface with minimal moisture, allowing the particles to scatter and create a smoother effect.
By understanding your paints and brushes and practicing techniques such as proper brush loading, mastering brush pressure, maintaining brush direction, and blending, you can unlock the secrets to achieving smoother paint strokes in your artwork.
Remember, practice makes perfect, and experimenting with different tools and techniques will ultimately lead to improvement in both the smoothness and overall quality of your paintings.
Steps | Description |
|---|---|
1. Use a high-quality brush | Invest in a good-quality brush with soft bristles which will help in achieving smoother paint strokes. |
2. Dilute your paint | Thin your paint with water (for acrylics) or solvent (for oils) to help it flow more smoothly and reduce visible brush strokes. |
3. Apply even pressure | Apply consistent pressure when using the brush, ensuring that the brush moves smoothly across the canvas without being pressed down too hard or lifted up too much. |
4. Paint in one direction | Try to paint in a single direction, as switching directions can cause the brush strokes to become more visible. |
5. Use a softening brush | After applying your paint, use a clean and dry softening brush to gently blend the paint and smooth out any visible brush strokes. |
6. Sand the surface (optional) | If you’re working on a surface other than canvas, you can try lightly sanding the surface between layers of paint to help reduce the appearance of brush strokes. |
7. Practice your technique | Improving your painting technique through practice will help you to naturally create smoother paint strokes over time. |
Exploring the Art of Scraping Paint Techniques
• Understanding the Scraping Painting Technique
The scraping painting technique, also known as “sgraffito,” is a creative and versatile method that allows artists to create captivating textures, patterns, and depth in their artwork.
By removing layers of paint or other material with tools such as palette knives, scrapers, or even credit cards, artists can reveal underlying colors, build up intriguing textures, and create stunning visual effects.
Scraping can be used in various ways: removing paint layers while they’re still wet to expose an entirely different color below, scraping back dried paint layers to reveal the texture, or even utilizing the raised textures created by the thicker paint application.
This technique invites artists to explore and experiment with their work, offering endless possibilities for unique and engaging art.
• Materials Needed for Scraping Technique
– Paint
Acrylic and oil paints are the most commonly used mediums for the scraping painting technique, as both can be applied in a range of thicknesses and have longer drying times. Watercolor or gouache can also be used, but keep in mind that these mediums dry quickly, and the scraping effect may be less dramatic.
– Tools for Scraping
A wide variety of tools can be used to scrape paint during the creative process:
- Palette Knives: Artists often use palette knives, which are thin, flat, and flexible, to apply, mix, or remove paint from a surface.
- Scrapers: These tools, such as commercial paint scrapers, can work well for larger areas and create straight lines.
- Household Items: Credit cards, plastic spoons, or toothpicks can be used to create unique effects and textures.
Both size and shape of the scraping tool will significantly impact the final result, so be prepared to experiment with different tools to find the perfect match for your artistic vision.
– Work Surface
Canvas, wood panels, or heavyweight paper are suitable surfaces for this technique. Ensure that your chosen surface can withstand the pressure of scraping without tearing, bending, or warping.
• Tips and Techniques for Successful Scraping
1. Experiment with Paint Thickness
The thickness of the paint applied will determine the scraping effect’s visibility and intensity. Applying paint in thin layers will create a subtler effect while using thick layers of paint will provide more dramatic, textured results. Experiment and find what works best for your desired style.
2. Working with Wet or Dry Paint
Scraping can be done on wet or dry paint, giving you the flexibility to choose the desired outcome:
- Wet Paint: Scraping wet paint creates smooth, flowing lines and allows for easier blending of colors.
- Dry Paint: Scraping dry paint results in a more dramatic effect, often revealing the texture and color of the underlying layers.
When working with wet paint, be mindful that the paint may still be wet underneath, even if the surface appears dry. This can create unexpected results when scraping, but it can also add an element of surprise and experimentation to your art.
3. Importance of a Clean Tool
Regularly clean your scraping tool to achieve a defined line or design. If the tool becomes saturated with paint, the scraped areas will become less distinct and appear smudged or muddy.
4. Direction and Pressure
When scraping, the direction and pressure applied to your tool can drastically change the outcome. Experiment with different angles, speeds, and pressures to reveal new patterns and endless possibilities.
• Final Thoughts
The scraping painting technique offers a unique opportunity to explore endless possibilities of texture, pattern, and depth in artwork. By experimenting with different tools, paint thicknesses, and approaches, artists can create stunning visual effects, pushing the boundaries of their artistic expression.
Achieving a Seamless, Polished Painting Appearance
Achieving a smooth finish in a painting is a sought-after skill for many artists. Whether you’re working with oils, acrylics, or watercolors, a smooth finish not only enhances the visual appeal of the artwork but it also exudes professionalism and expertise.
• Paint Consistency: The Key to Smoothness
One of the primary factors for a smooth finish is the paint’s consistency. Thick and pasty paint may leave unwanted textures on your canvas or paper. To avoid this, you’ll need to manage the viscosity of your paint.
– Thinning Your Paint
For oil paints, use linseed oil or specialized oil painting mediums in minimal amounts to achieve the desired consistency. Adding too much solvent can compromise the structure of the paint and cause it to run or drip.
With acrylics, use water or acrylic mediums to thin the paint. Remember that higher water content can make the paint less adhesive, so use it sparingly.
Watercolors are naturally thin, but if you need to lighten a color, add more water to the mix. Practice blending and controlling your water-to-paint ratio on a separate sheet before applying it to your project.
– Paint Quality & Pigment Size
High-quality paints have finely ground pigments and a smooth consistency that translates well onto the canvas. Investing in quality materials will significantly help achieve a smooth finish. Select paints that are labeled as “fine” or “artist quality” to ensure the pigments’ fineness.
• Brush Selection & Handling for Smooth Painting
The type of brush you use and how you handle it can greatly impact the smoothness of your painting.
– Choose the Right Brush
Soft-bristled brushes, such as those made from synthetic fibers or natural sable, are ideal for achieving a smooth finish. Round or filbert brushes are recommended for both detailing and broad strokes.
– Maintain Proper Technique
Proper brush handling is crucial to a smooth painting. Hold your brush near the end of the handle for a more relaxed grip and greater control. When applying paint, use gentle, gliding strokes rather than firm, scrubbing motions.
Adjust the pressure you apply depending on the thickness of the paint; lighter pressure for thinner paint and slightly more pressure for thicker paint.
• Utilizing Layering Techniques
Building your painting up in layers can help you achieve a smooth finish.
– Start with a Toned Ground
A toned ground is an initial base layer in a solid color or simple gradient that creates a smooth foundation for subsequent layers. This technique helps balance the overall composition and minimizes the appearance of brushstrokes.
– Build up Thin Layers
Instead of trying to achieve a solid color with a single heavy application, use multiple thin layers of paint. Allow each layer to dry fully before adding the next one. This method not only adds depth to your painting but also helps maintain a smooth surface.
– Glazing
Glazing is a technique used by artists to achieve a smooth blend of colors. In this technique, a thin, transparent layer of paint is applied over a dry layer, altering the color and creating a smooth transition. For oils, use a medium like linseed oil to create transparent glazes.
For acrylics or watercolors, simply thin the paint with water.
• Refining Your Art: Finishing Touches for Smooth Paintings
– Abate Visible Brushstrokes
You may notice visible brushstrokes or sharp transitions between colors even after layering and glazing. To smooth these spots, use a dry, soft blending brush to gently blur the lines or dab with a sponge to soften the transition.
– Varnishing Your Painting
Once the painting is complete and fully dry, apply a thin layer of varnish using a soft brush. This will not only protect your painting but also give it a uniformly smooth finish. Choose a matte or gloss varnish, depending on your desired finish.
In conclusion, achieving a smooth painting is based on the proper use of materials, brush handling, layering techniques, and finishing touches. By following the tips above, you can enhance your paintings and improve your overall skillset, resulting in polished and professional artwork.
Keep practicing and experimenting to find the techniques that work best for you and your style.
Steps | Description |
|---|---|
1. Prepare the painting surface | Ensure the surface is clean, smooth, and primed for painting. Sandpaper can be used to remove any texture or bumps. |
2. Use the right materials | Choose a paint that naturally dries smoothly, such as acrylic or oil paint. Use high-quality brushes that do not shed bristles. |
3. Start with thin layers of paint | Apply a thin layer of paint initially, allowing it to dry before adding more layers. Thin layers help to achieve a smoother appearance. |
4. Master brush technique | Use long, even brush strokes and maintain a steady hand to avoid visible brush marks. Avoid overlapping strokes where possible. |
5. Blend colors carefully | For a smoother appearance in areas where colors meet, use a clean, damp brush to blend the paint gently. |
6. Use a glazing technique | Apply a layer of transparent glaze to the painting, which can help create depth and smoothness. |
7. Sand between layers (optional) | For an ultra-smooth finish, lightly sand between dry layers of paint, being careful not to remove too much. Wipe clean with a damp cloth before applying the next layer. |
8. Varnish the finished painting (optional) | Apply a thin layer of varnish to the completed painting to protect it and give uniform appearance. |