How To Prep Surfaces For Unique Effects
Are you looking to add unique effects to your living or working space? Look no further, as we’re here to guide you through the process of prepping surfaces to achieve those eye-catching finishes. With our expert tips and techniques, you’ll feel confident and ready to create a masterpiece in no time.
How to prep surfaces for unique effects:
To prepare surfaces for unique effects, first assess the material (wood, metal, concrete, or drywall), and consult manufacturer guidelines. Clean and repair the surface, then prime it. For wood, sand in the direction of the grain. For metal, remove rust and use a corrosion-resistant primer. For concrete, etch the surface. For drywall, repair damages and use a drywall primer. Experiment with techniques like sponging, ragging, or specialty paint finishes.

Ready to transform your space with unique effects but unsure how to start? Our guide on prepping surfaces will help you achieve stunning results! Read on for expert tips and tricks that will ensure your surface is primed for eye-catching finishes. Don’t settle for ordinary make your project truly spectacular.
Contents
- 1 Preparing Surfaces for Distinctive Effects: A Guide
- 2 Techniques for Ready Various Surfaces for Paint Application
- 3 Exploring Diverse Surface Preparation Methods
- 4 Ensuring Surface Suitability: A Preparation Guide
- 5 Preparing Surfaces for Effective Adhesive Bonding
Preparing Surfaces for Distinctive Effects: A Guide
• Introduction
Prepping surfaces for unique effects is essential in ensuring professional-quality results with your design that stands out. Whether it’s for painting, plastering, or adding special finishes, proper surface preparation will guarantee a long-lasting and impressive outcome.
• Assessing the Surface
Before you begin prepping the surface, it’s essential to understand the type of material you are working with and its specific requirements. Identify whether the surface is wood, metal, concrete, or drywall, as each has unique preparation techniques.
If possible, consult the manufacturer’s guidelines on surface preparation. Additionally, consider the specific finish you’re targeting and the potential challenges that may arise during the process.
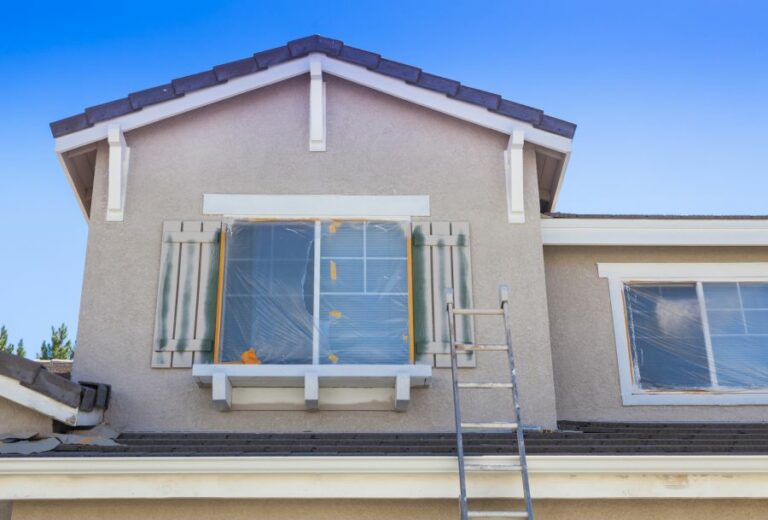
• Prepping Wood Surfaces
– Cleaning
Begin by cleaning the wood surface using a soft bristle brush or a vacuum with a brush attachment to eliminate dust and dirt. If your wooden surface was previously painted or stained, gently remove any peeling or flaking paint using a paint scraper or sandpaper.
– Sanding
Sanding is crucial in achieving a smooth finish on wood surfaces. Start with a coarse sandpaper, gradually moving to a finer grit until the desired smoothness is achieved. Ensure you sand in the direction of the grain to prevent scratches and achieve a uniform texture.
– Applying Primer
The final step in prepping a wood surface is applying a high-quality primer that has excellent bonding properties and can be easily tinted to match the chosen color. The primer will provide a stable base for your unique effects and ensure a durable finish.
• Prepping Metal Surfaces
– Removing Rust and Old Paint
For metal surfaces, start by removing any rust or old paint using a wire brush, paint scraper, or sandpaper. For larger surfaces, consider using a sandblasting machine or chemical-based rust removers to expedite the process.
– Cleaning
Clean metal surfaces using a solution of warm water and mild detergent, ensuring any residue is rinsed off with clean water. Allow the surface to dry thoroughly before moving on to the next step.
– Priming
Applying a corrosion-resistant primer is essential in protecting the metal surface and providing an even base for your unique effects. Choose a primer specifically designed for metals and follow the manufacturer’s guidelines for application and drying times.
• Prepping Concrete Surfaces
– Repairing Cracks and Holes
Concrete surfaces require repairs before prepping for unique effects. Use a concrete patching compound to fill any cracks or holes, making sure to smooth the compound and allow it to dry completely.
– Cleaning
Pressure washing is an effective method for cleaning concrete surfaces, as it removes dirt, debris, and mildew. Alternatively, scrub the surface using warm water mixed with a mild detergent, followed by a thorough rinse with clean water.
– Etching
Etching the concrete surface will provide a better bonding surface for your unique effects. Use a concrete etching solution, following the manufacturer’s directions for application and rinsing.
• Prepping Drywall Surfaces
– Repairing Damages
Inspect the drywall for any damages, such as holes or dents, and repair them using a joint compound. Apply the compound to the damaged area using a taping knife and allow it to dry before sanding it down to achieve a smooth surface.
– Cleaning
Remove any dust or debris from the surface using a vacuum or a soft brush. You may want to remove any oil residues with a solution of water and trisodium phosphate (TSP), available at most hardware stores.
– Priming
Using a drywall primer will provide a consistent base for your unique effects and minimize the possibility of the paint soaking into the drywall. Apply the primer following the manufacturer’s instructions, allowing it to dry before applying any special effects or finishes.
• Adding Unique Effects
Now that your surface is adequately prepped, you can experiment with various techniques to achieve unique effects. Some popular options include sponging, ragging, color washing, or using specialty paint finishes.
Remember to test your chosen technique on a small, inconspicuous area before applying to the entire surface. This will allow you to perfect your technique and ensure the desired result.
• Conclusion
Proper surface preparation is the key to achieving unique effects and a high-quality, long-lasting finish. By following the recommended steps outlined in this article, you can ensure your surfaces are well-prepped for your desired outcome.
For additional resources and advice, consider visiting the Paint Quality Institute for expert tips on surface preparation and techniques.
Now, go forth and create those outstanding finishes you’ve always wanted, and don’t forget to share your results with others who might find inspiration in your work!
Surface | Preparation | Tips |
|---|---|---|
Wood | Sand smoothly, clean, and apply a primer or sealant. | Choose high-quality sealants to prevent yellowing over time. Avoid creating grooves during sanding. |
Metal | Remove dust, dirt, and rust. Use a metal-specific primer. | For outdoor metal surfaces, use a rust-inhibiting primer to prolong the life of the paint. |
Glass | Clean the glass using a gentle cleaner to remove fingerprints and dirt. | Use specialized glass paint or add a glass painting medium to acrylic paint for better adhesion. |
Canvas | Apply gesso to prime the canvas, making it more receptive to paint. | Add multiple layers of gesso to achieve a smoother, more professional finish. |
Plaster | Allow the plaster to dry completely before painting. Seal with an appropriate primer or paint directly on the surface. | Sealing the surface can help prevent the plaster from absorbing the paint too quickly. |
Fabric | Pre-wash and dry fabric to remove dirt and sizing. Iron any wrinkles. | Use fabric paints or add a textile medium to acrylic paints for better flexibility and washability. |
Techniques for Ready Various Surfaces for Paint Application
Painting any surface requires careful preparation to ensure a smooth, long-lasting, and professional finish.
• Preparing Walls for Painting
– Repairing Drywall
Before painting walls, inspect them for damages such as holes, cracks, and dents. Fill small holes with a pre-mixed spackling compound, and allow it to dry before sanding the area smoothly using fine-grit sandpaper.
For larger damages, you may need to apply a drywall patch or joint compound. Remember to feather out the edges, creating a smooth transition to the surrounding wall. Check Family Handyman for more detailed repair instructions.
– Cleaning Walls
Remove dust, cobwebs, and dirt with a vacuum cleaner or a soft brush. For greasy or dirty walls, mix a solution of mild detergent and warm water and gently wipe the surface with a sponge. Rinse with clean water and allow the wall to dry completely before painting.
– Sanding and Priming
Sanding walls ensures a smooth and even painting surface. First, apply a high-quality primer to the cleaned and repaired wall. Primer creates a uniform surface for the paint to adhere to and prevents the original color of the wall from bleeding through.
After the primer dries, lightly sand the wall with fine-grit sandpaper to remove any remaining imperfections and ensure a smooth finish.
• Preparing Wood Surfaces for Painting
– Cleaning and Sanding
First, clean the wood surface with a solution of mild detergent and warm water to remove dirt, grease, and other debris.
Let the surface dry completely before sanding. Sand the wood evenly in the direction of the grain using medium-grit sandpaper, progressing to fine-grit sandpaper until the wood is smooth to the touch.
– Priming
After sanding, apply a wood primer to seal the surface and promote paint adhesion. Choose the primer according to the type of paint you will use.
A water-based primer is suitable for latex paint, while an oil-based primer is best for oil-based paint. Allow the primer to dry according to the manufacturer’s instructions.
• Preparing Metal Surfaces for Painting
– Removing Rust and Flaking Paint
To prepare metal surfaces, first remove any rust using a wire brush or fine-grit sandpaper and clean the metal with a cloth to eliminate loose debris. For flaking or peeling paint, use a paint scraper or a wire brush to remove as much of the old paint as possible.
– Cleaning and Degreasing
Clean the metal surface with a solution of mild detergent and warm water, rinsing thoroughly to remove all residue. For heavily greased or oily surfaces, you may need to use a specific metal degreaser.
– Priming and Sanding
Once the metal is clean and dry, apply a rust-inhibiting primer to prevent future corrosion. After the primer has dried, lightly sand the surface with a fine-grit sandpaper to create a smooth surface for the paint to adhere to.
• Preparing Plastic Surfaces for Painting
– Cleaning
First, clean the plastic surface using a solution of mild detergent and warm water to remove dirt, oil, and other contaminants. Let the surface dry thoroughly before proceeding.
– Sanding and Priming
Even though sanding is not always necessary on plastic surfaces, it can help increase paint adhesion. Lightly sand the surface with fine-grit sandpaper, then wipe away any dust.
Apply a primer specifically designed for plastic, ensuring complete coverage of the surface. Allow the primer to dry according to the manufacturer’s instructions.
• Addressing Challenging Surfaces
For surfaces that are traditionally difficult to paint, such as glossy or laminate surfaces, the key is to create a roughened texture for better paint adherence. This can be achieved by lightly sanding the surface with fine-grit sandpaper and applying a high-adhesion primer before painting.
In conclusion, the key to a successful paint job is proper surface preparation. By following the guidelines provided in this article for each type of surface, you can ensure a smooth, professional, and long-lasting finish for your painting project.
Exploring Diverse Surface Preparation Methods
Surface preparation is a vital step in many construction and maintenance processes, influencing the performance, appearance, and durability of materials. Proper surface preparation is vital for the success of coatings, adhesives, and other applications.
• Why Surface Preparation Matters
Getting the surface correctly prepped ensures that finishes, coatings, or adhesives have a strong, long-lasting bond. Inadequate preparation can result in premature failure, leading to costly repairs or replacements.
Therefore, understanding and selecting the best-suited method for a specific project is essential.
• Abrasive Blasting
Abrasive blasting is a method that involves forcefully projecting a high-pressure stream of abrasive media at a surface. This technique effectively removes contaminants, such as rust, grime, and previously applied coatings. There are various types of abrasive blasting, including:
– Sandblasting
In sandblasting, sand particles are propelled at a swift pace to clean or etch surfaces. This method is versatile and efficient, but it may produce an excessive amount of dust. Ensure proper protective equipment and dust control measures are in place when using this technique.
– Shot Blasting
Shot blasting uses small steel balls, or “shots,” to remove surface contaminants. This method is suitable for cleaning and preparing large areas, like concrete floors or steel beams, but it may not be suitable for intricate or delicate surfaces.
– Soda Blasting
Soda blasting uses sodium bicarbonate (baking soda) as an abrasive medium, making it an eco-friendly option for gentle yet efficient cleaning. It is ideal for removing paint, grease, and other contaminants from various surfaces without causing structural damage.
• Chemical Cleaning
Chemical cleaning methods involve using solvents or cleaning agents to remove surface contaminants. The choice of cleaner should depend on the type, severity, and location of the contaminants. Some common chemical cleaning methods include:
– Acid Etching
Acid etching uses a mild acid solution to remove contaminants and roughen the surface, improving adhesion. This method is popular for preparing concrete surfaces for coatings, but it requires careful handling and disposal of the acid.
– Alkaline Cleaning
Alkaline cleaning uses a high-pH solution to dissolve and remove greases, oils, and other organic contaminants. Alkaline cleaning is suitable for metal and steel surfaces, but it requires neutralization after cleaning to avoid corrosion.
– Solvent Cleaning
Solvent cleaning uses organic solvents to dissolve and remove contaminants such as grease, oil, and old paint. This method works best in small areas or with intricate surfaces. However, solvents can pose health, safety, and environmental risks, so proper handling and disposal are crucial.
• Mechanical Cleaning
Mechanical cleaning involves the use of machines and tools to physically remove contaminants and roughen surfaces. These methods can be fast, efficient, and effective for specific applications. Some commonly used mechanical cleaning methods include:
– Grinding
Grinding employs abrasive wheels or discs to remove surface imperfections and level the surface. This method is excellent for smoothing welds, removing paint, and preparing concrete surfaces for coatings or overlays.
– Scabbling
Scabbling uses specialized equipment with pneumatic or hydraulic hammers to remove the top layer of a surface. This method is effective for removing old paint, coatings, or weak concrete layers, and preparing surfaces for new materials.
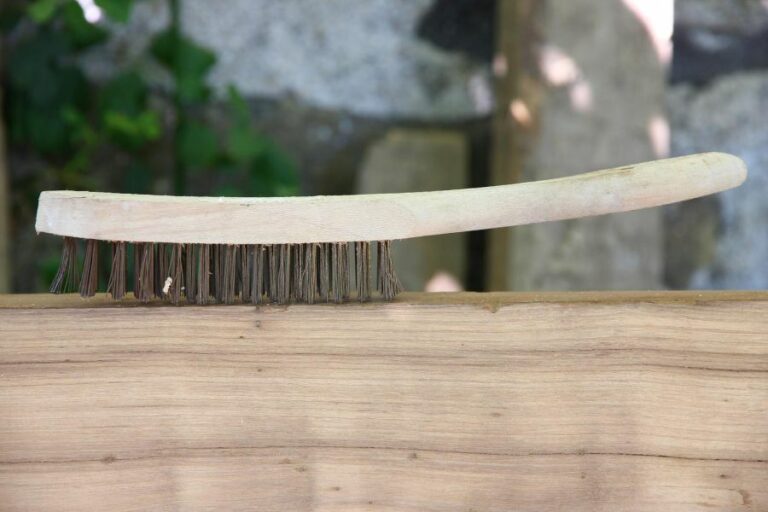
– Power Tool Cleaning
Power tool cleaning uses devices such as wire brushes, sanders, and scrapers to remove contaminants and roughen surfaces. This method is ideal for smaller or intricate areas, and it can be tailored to match the specific application.
• Final Thoughts
Each surface preparation method has its advantages, limitations, and requirements. It is vital to understand the properties of the surface materials, the desired outcome, safety regulations, and project limitations before selecting a specific method.
By investing time in proper surface preparation, you help ensure the longevity, performance, and durability of applied materials, thus maximizing the overall success of your project.
Ensuring Surface Suitability: A Preparation Guide
A well-prepared surface is essential for achieving the desired outcome in painting, construction, or any other application. Whether you are working with wood, metal, or concrete, taking the necessary steps to make sure the surface is suitable will ensure a longer-lasting and more professional result.
• Assessing the Surface Condition
Before you can begin the preparation process, it is crucial to evaluate the surface condition. Look for any damage or defects, such as cracks, dents, holes, or rust. This assessment will help determine which repairs are necessary and inform the subsequent preparation steps.
• Wood Surface Preparation
When working with wood, the main goals are to ensure the surface is clean, smooth, and free from defects.
– Cleaning the Wood
A clean surface is vital for the proper adherence of paint or other finishes. Start by removing any dirt, grease, or residue from the surface.
- Use a soft brush or cloth to remove dust and loose dirt.
- For stubborn stains or grease, use a mild detergent solution and a scrub brush.
- Rinse the surface with clean water and allow it to dry completely.
– Sanding the Surface
To achieve a smooth finish, sanding is necessary to remove any imperfections, such as rough spots, splinters, or raised grain.
- Begin with a coarse-grit sandpaper (e.g., 80-100 grit) and work your way up to a finer grit (e.g., 220 grit).
- Sand the surface in the direction of the wood grain to minimize scratches.
- Remove sanding dust with a brush, tack cloth, or by wiping down the surface with a damp cloth.
I recommend using a sanding block or an orbital sander for larger surfaces to maintain consistent pressure and even sanding.
– Repairing Defects
Fill any cracks, dents, or holes in the wood using a wood filler or putty.
- Choose a filler that matches the color of the wood or can be stained.
- Apply the filler using a putty knife and smooth it out to be flush with the surface.
- Once the filler is dry, sand the area to remove any excess and blend it with the surrounding surface.
• Metal Surface Preparation
Working with metal surfaces requires focused attention to remove rust, corrosion, and old paint to ensure a durable and long-lasting finish.
– Cleaning the Metal
Remove dirt, oil, and grease from the surface before proceeding with further preparation steps.
- Wipe down the surface with a cloth dampened in a degreasing solution or rubbing alcohol.
- Thoroughly clean any nooks or crannies using a wire brush.
- Rinse the surface with clean water and allow it to dry completely.
– Removing Rust and Old Paint
- Use a wire brush, sandpaper, or abrasive pad to remove rust and old paint from the surface.
- For larger areas or severe corrosion, using a grinder or chemical rust remover may be necessary.
- Make sure to wear appropriate safety gear, such as gloves and eye protection, during this process.
– Priming the Surface
After cleaning and removing rust, a primer is essential for protecting the metal from further corrosion and ensuring proper paint adhesion.
- Choose a primer specifically designed for metal surfaces, such as rust-inhibiting or self-etching primers.
- Apply the primer according to the manufacturer’s instructions and allow it to dry completely.
• Concrete Surface Preparation
Preparing a concrete surface is crucial for achieving a strong bond between the concrete and any coatings or treatments applied.
– Cleaning the Concrete
- Remove any dirt, oil, or grease by scrubbing the surface with a stiff brush and a detergent solution.
- Rinse thoroughly with clean water and allow the concrete to dry.
- For stubborn stains, consider using a pressure washer or a commercial concrete cleaner.
– Repairing Cracks and Holes
- Use a concrete repair compound, epoxy, or mortar mix to fill cracks, holes, or other defects in the surface.
- Follow the manufacturer’s instructions for proper mixing and application.
- Allow the repair material to cure according to the recommended time before proceeding with further surface preparation.
– Etching the Surface
Etching is necessary for creating a rough profile that promotes better adhesion of paints, sealers, or other coatings.
- Apply a concrete etching solution according to the manufacturer’s instructions.
- Scrub the surface with a stiff brush to ensure even coverage and remove any loose material.
- Rinse away the etching solution and loose debris with clean water.
- Allow the surface to dry completely before applying any coatings.
In conclusion, properly preparing a surface is critical to obtaining a professional and long-lasting result. Taking the time to assess the surface, clean it, and make any necessary repairs will ensure a successful outcome, regardless of the material being worked with.
Preparing Surfaces for Effective Adhesive Bonding
Adhesive bonding is a widely-used technique in various industries, from automotive and aerospace to construction and electronics. Proper surface preparation is crucial for achieving strong, long-lasting bonds.
• Importance of Surface Preparation
Surface preparation is the first and most critical step in adhesive bonding. Achieving a clean, contaminant-free surface is essential for strong adhesion.
Contaminants such as oils, dirt, and moisture can significantly reduce bond strength and cause premature bond failure, leading to costly repairs or replacements.
• Steps to Prepare Surfaces for Adhesive Bonding
– 1. Select the Appropriate Adhesive
Different materials and applications may require specific adhesives to ensure optimal bond performance. Consider factors such as material compatibility, bond strength, temperature resistance, and chemical exposure when selecting an adhesive.
Consult adhesive manufacturers or reference material compatibility charts to ensure the suitable adhesive is chosen for your application.
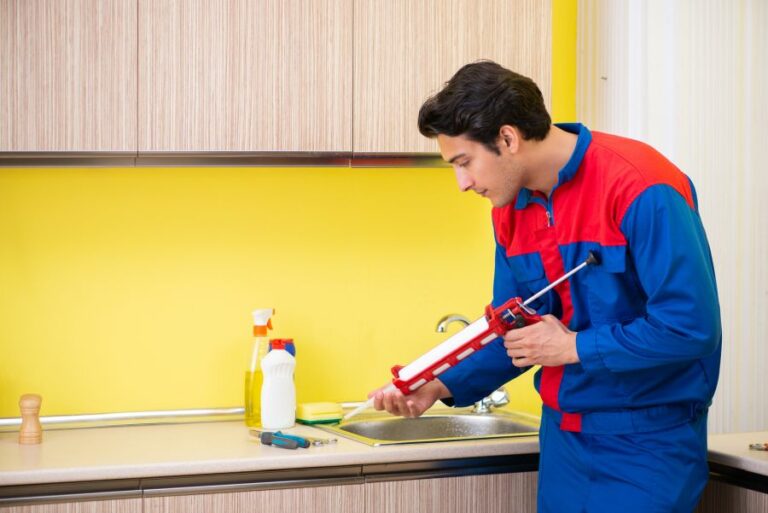
– 2. Clean the Surface
Thorough surface cleaning is essential to remove contaminants that can affect bond strength. Common cleaning methods include:
- Solvent wiping: Using a clean cloth and an appropriate solvent, such as isopropyl alcohol or acetone, to remove oils, greases, and other contaminants.
- Ultrasonic cleaning: Placing the parts into a solution, which is agitated using ultrasonic waves, to break down contaminants and remove them from the surface.
- Vapor degreasing: Exposing the parts to vaporized solvent, which dissolves and removes contaminants upon condensation on the surface.
- Aqueous cleaning: Utilizing soap and water solutions, along with agitation or pressure, to remove dirt, grease, and other contaminants.
It is essential to use the necessary personal protective equipment (PPE) and follow proper safety protocols when handling chemicals and solvents.
– 3. Dry the Surface
After cleaning, it is crucial to dry the surface thoroughly to eliminate any remaining moisture. Common drying methods include:
- Air-drying: Allowing the solvent or cleaning solution to evaporate from the surface. Utilize clean, dry, and contaminant-free compressed air to accelerate the process, if needed.
- Oven drying: Placing the parts in a drying oven to evaporate any residual moisture.
– 4. Surface Roughening or Activation
Some bonding applications may benefit from increased surface roughness or chemical activation of the surface to promote adhesion. Common methods for surface roughening or activation include:
- Mechanical abrasion: Using sandpaper, abrasive pads, or wire brushes to create micro-scratches on the surface, increasing surface area for the adhesive to bond.
- Blasting: Exposing the surface to a high-pressure stream of abrasive media, such as sand, glass beads, or aluminum oxide, to create a rough surface texture.
- Etching: Applying a chemical solution, such as an acid or alkaline solution, to dissolve a thin layer of the surface material and create a micro-roughness that enhances adhesive bonding.
- Plasma or corona treatment: Exposing the surface to a high-energy plasma or corona discharge to create a chemically-active surface, improving adhesion.
Always follow appropriate safety guidelines and PPE requirements when using these methods.
– 5. Priming (if applicable)
Some adhesive systems may require the application of a primer to enhance bond performance. Ensure the primer is specifically designed for the selected adhesive and substrate materials. Follow the manufacturer’s recommendations for primer application, drying or curing times, and proper storage.
• Final Thoughts on Surface Preparation
Proper surface preparation is essential for achieving a successful adhesive bond.
By selecting the appropriate adhesive, cleaning and drying the surface, and applying the necessary surface roughening or activation methods, engineers and technicians can create strong, durable, and long-lasting bonds in various applications.
Remember that each application is unique, and results may vary depending on the materials, adhesive, and environmental conditions involved.
When in doubt, consult the adhesive manufacturer or experts in the adhesive bonding field, and always follow the recommended guidelines and safety protocols to ensure the best bonding outcome.
How do you prepare surfaces for adhesive bonding?
Step | Description |
|---|---|
1. Cleaning | Remove all dirt, grease, oil, and contaminants from the surface using solvents, detergents, or other cleaning methods. |
2. Degreasing | Use a suitable degreaser to remove any remaining traces of oil, grease, or other contaminants that can interfere with the adhesive bond. |
3. Drying | Ensure the surface is thoroughly dry before applying the adhesive, as moisture can negatively affect the bonding process. |
4. Sanding or Abrading | Increase the surface roughness and surface area by sanding, abrading, or roughening the surface to promote better adhesion. |
5. Chemical Treatment | Apply chemical treatments, such as primers or adhesion promoters, to improve the bonding strength and durability. |
6. Application of Adhesive | Apply the adhesive evenly to the prepared surface, following the manufacturer’s instructions for the specific product being used. |
7. Assembly and Curing | Join the two surfaces together and maintain pressure while the adhesive cures, ensuring a secure bond. |