Smooth Surface Prep For Textured Painting. What Pros Say
Are you looking to enhance your space with textured painting but unsure how to achieve the perfect canvas for it? Well, let me assure you that you’ve come to the right place. With our guidance, you’ll be able to prepare a smooth surface that’s perfect for textured painting, and you’ll be well on your way to a stunning result.
Smooth surface prep for textured painting:>
Smooth surface preparation for textured painting involves selecting proper sandpaper and sanders, using suitable patching compounds, applying a quality primer, and following a series of steps, including cleaning, sanding, patching, caulking, and priming. Proper surface preparation ensures paint adherence and a flawless finish for a professional result.

Are you planning to dive into textured painting but unsure about achieving a smooth surface as the perfect canvas? Read on as we share expert tips and techniques to help you master the art of surface preparation, ensuring a flawless finish for your beautiful textured masterpieces!
Contents
- 1 Smooth Surface Preparation for Textured Painting
- 2 Techniques for Smoothing Canvas Prior to Painting
- 3 Preparing a Smooth Canvas for Rock Art: Artist’s Process
- 4 Best Paste Options for Creating Textured Artwork
- 5 Achieving a Smooth Canvas: Does Gesso Make a Difference?
Smooth Surface Preparation for Textured Painting
• Importance of Surface Preparation
The key to achieving a professional-looking texture on a painted surface is proper surface preparation. A well-prepared surface ensures that the paint adheres correctly and creates a long-lasting, flawless finish.
• Choosing the Right Materials for Surface Preparation
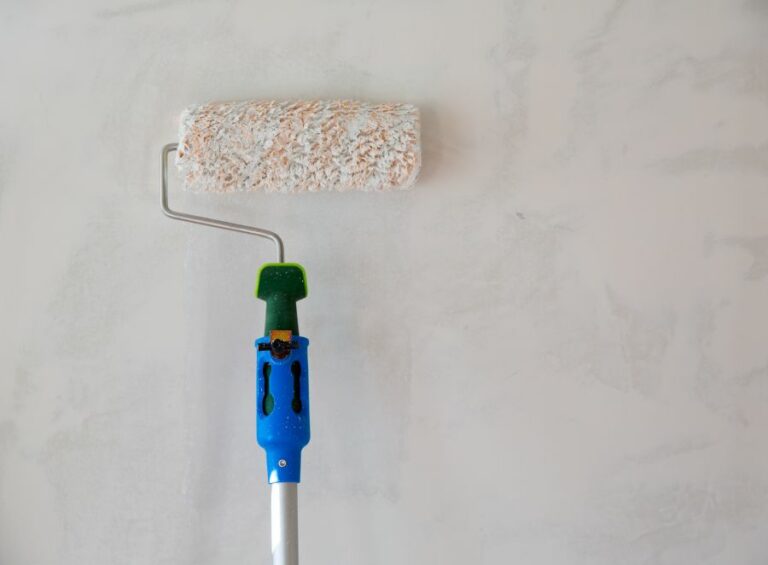
– Sandpaper and Sanders
Selecting the proper sandpaper is essential for creating a smooth surface. Use coarse sandpaper (80-100 grit) to remove heavy textures and imperfections. Gradually transition to finer sandpaper (150-220 grit) for smoothing and finishing the surface.
For large areas or uneven surfaces, consider using a power sander. Handheld sanders offer a better grip and more control, while pole sanders allow you to reach high or hard-to-reach areas.
– Patching Compounds
Choose a suitable patching compound for filling dents, cracks, or holes in the surface. Premixed compounds are easy to use but may take longer to dry, while powder compounds can be adjusted for desired consistency and may dry more quickly.
Be sure to follow the manufacturer’s instructions for mixing and use.
– Primer
Use a quality primer to seal and protect the surface, ensuring proper paint adhesion. Choose a primer that matches your paint type (water-based or oil-based) and, if required, tint it to match the paint color.
• Steps for Preparing a Smooth Surface
– Cleaning and Dust Removal
Before beginning any surface preparation, clean the surface thoroughly. Remove dust, dirt, and grime using a mild detergent solution and a sponge or cloth. Rinse with clean water and allow the surface to dry completely.
Alternatively, you can use a vacuum cleaner to remove dust, but ensure the vacuum has a soft brush attachment to avoid damaging the surface. After cleaning, inspect the surface for any remaining dirt, grime, or loose paint that may interfere with the texture.
– Sanding
Sanding removes imperfections, rough spots, and old paint, creating a smooth, uniform surface. Use coarse sandpaper to remove heavy textures and major imperfections, then gradually transition to finer sandpaper for a smooth finish.
When sanding, be sure to apply even pressure and move in circular motions, avoiding creating deep scratches or grooves. If using a power sander, follow the manufacturer’s instructions for proper use and safety.
– Patching and Repair
Fill any cracks, dents, or holes in the surface with the appropriate patching compound. Applying the compound in thin layers using a putty knife or a flexible scraper, smoothing it out as much as possible.
Allow the compound to dry according to the manufacturer’s recommendations, then sand it to blend seamlessly with the surrounding surface.
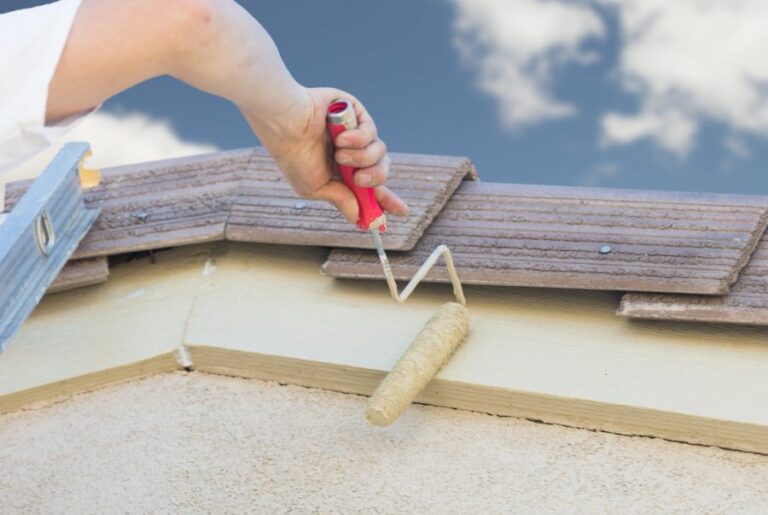
– Caulking
Seal any gaps or joints between the surface and adjacent materials using a paintable caulk. Apply a thin, continuous bead of caulk along the gap, then smooth it with a damp finger or a caulking tool. Allow the caulk to dry before proceeding to the next step.
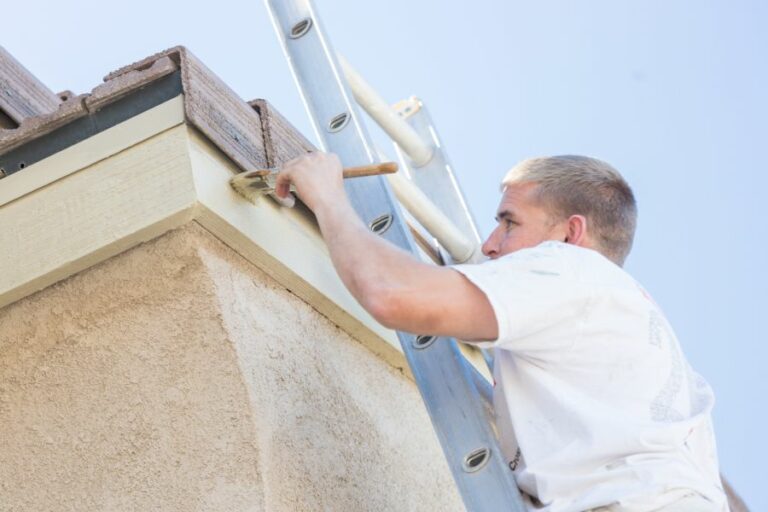
– Priming
Before applying paint, prime the surface to seal and protect it. Use a quality primer that is compatible with your chosen paint, and if required, tint it to match the paint color.
Apply primer with a brush, roller, or sprayer, ensuring even coverage and a smooth surface. Let the primer dry according to the manufacturer’s recommendations, then lightly sand any rough spots with a fine-grit sandpaper.
• Final Tips and Recommendations
- Always wear appropriate safety gear (gloves, goggles, dust masks) when working with sandpaper, patching compounds, and primers.
- Proper ventilation is crucial when working with paints, primers, and solvents. Open doors and windows to ensure good airflow, and if using toxic materials, consider wearing a respirator.
- When selecting your materials and tools, read the product labels and manufacturer’s instructions carefully to ensure proper use and safety.
By following these guidelines for smooth surface prep for textured painting, you will be well on your way to achieving a professional finish that lasts. Remember, proper surface preparation is essential for the success of any painting project. Good luck and happy painting!
Techniques for Smoothing Canvas Prior to Painting
Smooth canvas is essential for achieving a high-quality and professional-looking painting. In fact, many artists believe that the quality of their artwork is directly proportional to the smoothness of the canvas.
This is because an even surface allows for better paint control, smoother brush strokes, and a more precise final outcome.
• Picking the Perfect Canvas: Material and Texture
Begin by selecting the most appropriate canvas material and texture for your project. Some artists prefer a fine, smooth surface, whereas others enjoy the natural grain and texture provided by a more coarse weave.
- Cotton Canvas: Most commonly used, affordable, and easily found in art supply stores. It features a more textured surface.
- Linen Canvas: A higher quality alternative due to its tighter and smoother weave. It is also more expensive as compared to cotton.
Tip: For a smoother surface, consider choosing a canvas with a fine or medium grain. Finer grains are more suited for detailed work, while coarser grains add texture to the painting.
• Acquiring a Smooth Surface: Canvas Stretching and Priming
– Stretching the Canvas
Creating a smooth and taut surface is essential. Start by properly stretching the canvas on a wooden frame. Here’s a step-by-step guide to help you achieve a perfectly stretched canvas:
- Measure and cut the canvas to the desired size, allowing extra material to wrap around the frame.
- Place the frame on top of the canvas and align it. Fold one side of the canvas over the frame and secure it with a staple in the center.
- Move to the opposite side, ensuring the canvas is taut, and secure it with a staple in the center.
- Repeat these steps for the remaining two sides.
- Gradually work your way out from the center staples, alternating sides, while keeping the canvas taut during the process.
- Fold the corners neatly and secure them with staples.
Tip: For additional tightening, consider applying a warm, damp cloth to the backside of stretched canvas and letting it air dry. The water will cause the canvas fibers to shrink, resulting in a tighter and smoother surface.
– Priming the Canvas
To smoothen the canvas further and create a more uniform surface, it is important to prime the canvas with a gesso layer. Gesso is a white, paint-like substance that prepares the canvas by sealing the fibers, providing a surface with the right absorbency for paint.
- Apply a thin, even layer of gesso to the canvas using a wide, flat brush or a paint roller. Ensure the gesso covers the entire surface.
- Allow the gesso to dry completely (usually between 30 minutes to an hour).
- Lightly sand the dried gesso layer with fine-grit sandpaper (220 grit or higher) in a circular motion to remove any rough patches or bumps.
- Repeat the process of applying gesso and sanding for a total of 2-3 layers, resulting in a smoother canvas.
Tip: For a more detailed guide on priming your canvas, visit this resource from the Artists Network.
• Smoothing the Canvas: Alternative Methods
If priming and stretching the canvas you bought isn’t enough, there are other strategies to achieve a smoother surface.
– Using a Canvas Pad
A canvas pad is a book containing multiple sheets of primed, ready-to-use canvas paper. If you’re after a smoother surface, choose a fine-grain canvas pad. These pads come conveniently pre-smoothened and can be easily stored or transported.
– Purchasing Pre-Stretched and Pre-Primed Canvas
Many art supply stores offer pre-stretched and pre-primed canvases that come in a variety of sizes and textures. This shortcut skips the stretching and priming process, saving time and effort. Choose a fine-grain option for a smoother surface.
• Final Thoughts
To create a professional-looking painting, it is imperative that you start by priming on a smooth canvas. This guide provides detailed step-by-step instructions on how to stretch and prime the canvas properly, ensuring an even and taut surface.
Exploring alternative methods, such as using a fine-grain canvas pad or purchasing pre-stretched and pre-primed canvases, can also help achieve a smooth canvas for painting.
Investing the time and effort in preparing the canvas correctly is essential for the quality and longevity of your artwork, making your creations more vibrant and visually appealing.
Step | Description |
|---|---|
1 | Inspect the canvas for any imperfections, such as dents or wrinkles. |
2 | Stretch the canvas onto a suitable frame, making sure it is tightly secured and wrinkle-free. |
3 | Apply a layer of gesso to the canvas using a wide brush or painting knife. Ensure the gesso is spread evenly and smoothly over the entire surface. |
4 | Allow the gesso to dry completely. This may take several hours or even overnight. |
5 | Sand the dried gesso with fine-grit sandpaper, ensuring the surface is smooth and even. Be gentle to avoid damaging the canvas fibers. |
6 | Wipe away any dust or debris using a soft, dry cloth or brush. |
7 | Apply additional layers of gesso as needed, repeating the sanding process in between layers. This will help to achieve maximum smoothness. |
8 | Once satisfied with the smoothness of the canvas, proceed with your painting project. |
Preparing a Smooth Canvas for Rock Art: Artist’s Process
Creating art on unconventional surfaces, such as rocks, can be a fun and exciting challenge for artists. Yet, it also requires certain techniques and preparations to achieve a smooth canvas.
• Step 1: Choosing the Right Rock
To ensure a successful project, it is crucial to select a rock with the appropriate characteristics. Ideally, the rock should:
- Be relatively flat and smooth, making it easier for artists to create an even, uniform canvas
- Have minimal cracks or fissures, as these can interfere with the paint application
- Be able to withstand the elements, if the artwork is intended for an outdoor display
It is worth mentioning that some rocks may not be suitable for painting due to their porous nature or dust content. In such cases, sealing the rock may be necessary to create a uniform, non-porous surface.
• Step 2: Cleaning the Rock
Before beginning the artistic process, it is essential to clean the rock thoroughly. This step will remove any dirt, debris, or loose particles that may otherwise interfere with the paint or other art materials. Following the steps below will result in a clean, prepared surface:
- Rinse the rock with water to remove any loose dirt or debris.
- Using mild soap and a soft brush, gently scrub the surface of the rock, paying attention to any grooves or crevices.
- Rinse the rock again to remove any soap residue.
- Allow the rock to dry completely before moving on to the next steps.
• Step 3: Sanding the Rock Surface
Sanding the rock is a crucial step in creating a smooth canvas. This process will help to even out any uneven surfaces and remove any remaining imperfections. Here are the steps to effectively sand a rock:
- Begin by using coarse-grit sandpaper (e.g., 60-80 grit) to remove prominent imperfections. Apply even pressure while sanding, and be careful not to create grooves or divots in the rock.
- Move on to a medium-grit sandpaper (e.g., 100-150 grit) to smooth out the surface further.
- Finally, use fine-grit sandpaper (e.g., 220-400 grit) for a final smoothing pass. This step will ensure a polished, even surface for painting.
- Wipe away any dust or debris with a damp cloth, and allow the rock to dry completely.
• Step 4: Applying Primer or Gesso
To create a uniform base for the paint or other art materials, artists should apply a coat of primer or gesso to the rock’s surface. This step will both enhance the vibrancy of the colors and ensure proper adhesion of the paint to the rock. To apply primer or gesso, follow these steps:
- Choose a high-quality primer or gesso specifically formulated for non-traditional surfaces.
- Using a flat brush or foam applicator, apply a thin, even layer to the rock, being careful to avoid any brush marks or streaks.
- Allow the primer or gesso to dry completely, according to the manufacturer’s instructions.
- If necessary, lightly sand the primed surface with fine-grit sandpaper (e.g., 400-600 grit) to ensure a perfectly smooth finish.
• Step 5: Begin Creating Art
Now that the rock surface is clean, sanded, and primed, it is ready for the artist’s chosen medium. Whether using acrylics, oils, or other materials, be sure to follow the appropriate techniques and procedures for the chosen medium to ensure a successful outcome.
I recommend testing the chosen mediums on a small, unobtrusive area of the rock to ensure compatibility and the desired effect before beginning the entire piece.
• Conclusion
Creating a smooth canvas on rocks may require a bit of patience and effort, but the results can be incredibly rewarding. By following the steps outlined above, artists can prepare a rock surface that will showcase their creativity and skill, resulting in a unique and eye-catching work of art.
Best Paste Options for Creating Textured Artwork
Textured art is a versatile art form that adds depth and dimension to a piece. The key to achieving that perfect textured look lies in the materials you use. Central to those materials is the paste.
• Acrylic Paste: The Most Versatile Option
One of the most popular and versatile types of paste for textured art is acrylic paste. This medium is suitable for both beginners and experienced artists due to its ease of use. The acrylic paste acts as a thickening agent that adds volume to your paint without affecting its color.
– Pros
- Versatile: can be used on different surfaces such as canvas, wood, and paper
- Water-resistant when dry
- Dries quickly
- Can be mixed with other acrylic mediums
- Easy to manipulate with various tools and techniques
– Cons
- Not suited for very thin layers or small details
I recommend Golden’s Light Molding Paste for those who are looking for a highly versatile paste that offers excellent results in various textures.
• Modeling Paste: For Heavily Textured Art
Modeling paste, also known as sculpting paste, is a thick and stiff medium preferred by artists who seek to create heavily textured artwork. Due to its consistency, it can be easily applied with a palette knife or other tools.
– Pros
- Creates a strong and durable texture
- In most cases, it can be sanded or carved after drying
- Can be used on various surfaces, such as canvas, wood, and paper
- Can be tinted with acrylic paint or other coloring agents
– Cons
- Dries relatively slowly in comparison to other pastes
- Artists need to work quickly as it can become unworkable if left for too long
For artists who are looking for a paste capable of building heavy textures, I recommend Liquitex’s Modeling Paste.
• Gesso Paste: An Excellent Base for Textured Paintings
Gesso paste, traditionally a mixture of plaster and animal glue, is not only used to prime surfaces but also to create textures. Today, there are various types of gesso available, from traditional to acrylic-based options.
– Pros
- Serves as a base layer and primer for your painting
- Can be applied in multiple layers to achieve various textures
- Available in clear, white, and black options.
- Can be mixed with acrylic mediums, sand, or other materials to modify texture
- Can be tinted with acrylic paint or other coloring agents
– Cons
- Requires longer drying times between layers
- Can crack if applied too thickly
For a Gesso paste that is easy to work with and provides an excellent base, I recommend Winsor & Newton’s Professional Acrylic Gesso.
• Gel Mediums: Flexible and Durable Textures
Gel Mediums are a popular choice among artists looking for flexible and durable textures in their work. These versatile pastes can be used to create a range of textures, from smooth to coarse.
– Pros
- Available in various viscosities and sheerness to create diverse textures
- Flexible and crack-resistant
- Can be used to create glazes, extend paint, or adhere collage materials
- Can be mixed with acrylic paint, pigment powders, or other mediums
– Cons
- May take longer to dry when applied in thick layers
- Less suitable for sculptural or carving techniques
For an all-around reliable gel medium that offers textured art enthusiasts countless possibilities, I recommend Golden’s Regular Gel Medium.
• Mixing Your Own Textured Paste: A DIY Approach
If you’re feeling experimental or cost-conscious, consider making your own textured paste. Several recipes involve mixing items such as cornstarch, white glue, and water. This approach allows you the freedom to adjust the consistency and texture to your liking.
In conclusion, choosing the perfect paste for your textured art depends on factors such as the desired effect, flexibility, durability, and drying time. Explore various options, experiment, and, most importantly, have fun creating your textured masterpieces.
Achieving a Smooth Canvas: Does Gesso Make a Difference?
Gesso is a crucial element in the world of painting. It serves as a primer, preparing canvases and other surfaces for the application of paint. One of the common questions artists have about gesso is whether it can create a smooth canvas or not.
• The Role of Gesso in Canvas Preparation
Gesso is a mixture of white paint, a binder (such as acrylic medium, rabbit skin glue, or PVA), and calcium carbonate. The primary function of gesso is to provide a barrier between the paint and the raw canvas material.
This barrier prevents the absorption of oil and water from the paint, which can lead to canvas degradation over time.
Another important function of gesso is to provide a uniform surface texture for the paint to adhere to. The application of gesso can significantly improve the canvass surface, transforming its rough texture into a more even and smooth surface.
A smoother canvas surface allows the paint to glide on more easily, providing a better painting experience and a visually appealing result for the artist.
– Choosing the Right Gesso for Smooth Canvas
There are different types of gesso available in the market: acrylic gesso, oil-based gesso, and traditional gesso. Each type has its benefits, and choosing the right one depends on the artist’s preference and the type of paint they will be using.
Acrylic gesso is the most popular and widely used type of gesso. It is water-based, fast-drying, and compatible with both acrylic and oil paints. Acrylic gesso generally provides a good balance between smoothness and tooth, making it a suitable choice for most artists seeking a smooth canvas.
Oil-based gesso, on the other hand, is specifically designed for oil painting. It has a more slippery surface than acrylic gesso, which may not be suitable for all artists. Lastly, traditional gesso is made from a mixture of rabbit skin glue and calcium carbonate.
This type of gesso provides a very smooth surface but is less commonly used due to its labor-intensive application process and potential issues related to cracking and yellowing over time.
• Techniques for Creating a Smooth Canvas with Gesso
Achieving a smooth canvas using gesso requires proper preparation, application, and patience. The following techniques can help you achieve a smooth canvas with gesso:
1. Cleaning and Stretching the Canvas
Before applying gesso, ensure the canvas is clean and well-stretched. Remove any dust or dirt that may be on the canvas, as this could create an uneven surface for the gesso to adhere to. Stretch the canvas properly to eliminate any wrinkles that could interfere with the smooth application of the gesso.
2. Diluting the Gesso
Diluting the gesso with a small amount of water helps create a smoother surface. This technique is particularly useful for acrylic gesso, which can be quite thick straight out of the container.
Add water sparingly, as adding too much could result in a runny gesso that will not provide sufficient coverage on the canvas.
3. Applying Gesso in Multiple Thin Layers
Achieving a smooth canvas with gesso typically requires multiple thin layers. Apply the gesso using a large, flat brush in long, even strokes, working in one direction for each layer. Allow each layer to dry thoroughly before applying the next one.
This can take anywhere from 30 minutes to an hour, depending on the type of gesso and ambient conditions.
– 4. Sanding Between Gesso Layers
One of the key techniques for creating a smooth canvas with gesso is sanding between layers. Once each layer of gesso is completely dry, lightly sand the surface with fine-grit sandpaper (220 or finer) before applying the next layer.
Sanding smoothens the texture by knocking down any brush strokes or high spots in the gesso, leading to a much smoother finish. Be sure to clean the surface with a dry cloth or tack cloth to remove any dust generated during sanding.
5. Repeating the Process until Desired Smoothness is Achieved
The number of gesso layers and sanding cycles necessary to achieve the desired smoothness depends on the artist’s preference and desired final texture. It is not uncommon to apply 3 to 5 layers of gesso before reaching the ideal canvas smoothness.
Remember to be patient and allow each layer to dry thoroughly before moving on to the next step.
• Final Thoughts
Gesso plays a vital role in preparing a canvas for painting, and its application can indeed result in a smooth canvas surface.
Selecting the right gesso type, properly preparing the canvas, and applying multiple thin layers while sanding between each one help achieve the desired smooth canvas surface. With practice and patience, artists can create a consistently smooth canvas that greatly enhances their painting experience.