Evaluating Surfaces For Ideal Preparation. What Pros Say
When it comes to achieving optimal results in various applications, the significance of preparing surfaces effectively cannot be overstated. From painting to adhesion and even showcasing a material’s true potential, proper surface preparation is key to success. With our extensive knowledge and experience in this field, you can confidently rely on us to guide you through the process of evaluating surfaces for ideal preparation.
Evaluating surfaces for ideal preparation:>
Evaluating surfaces for ideal preparation involves assessing cleanliness, surface profile, material compatibility, and surface defects. Appropriate cleaning techniques, ASTM D4417 profile measurements, compatibility tests, and defect inspection should be employed to ensure optimal performance and durability of coatings, adhesives, or other surface treatments.

Discover the secrets behind choosing the best surfaces for various preparation tasks! Our detailed analysis delves into the pros and cons of various materials and techniques, ensuring optimal results in every application. Read on to elevate your skills and master the art of surface preparation!
Contents
- 1 Assessing Surfaces for Optimal Preparation
- 2 Methods for Determining Surface Preparation
- 3 Key Factors in Surface Preparation Considerations
- 4 Evaluating the Quality of Surface Finishes
- 5 Top Technique for Preparing Surfaces Effectively
Assessing Surfaces for Optimal Preparation
• Importance of Surface Evaluation
Proper surface evaluation is crucial for ensuring optimal performance and longevity of coatings, adhesives, and other surface treatments. It’s essential to determine whether a surface is adequately prepared and suitable for its intended application.
• Key Factors in Surface Evaluation
– Surface Cleanliness
Before applying any coating or adhesive, it is critical to ensure that the surface is free from contaminants. Contaminants such as dust, dirt, grease, and oils can negatively impact the performance of coatings and adhesives by:
- Reducing adhesion between the coating or adhesive and the surface
- Creating imperfections in the finished product
- Promoting premature failure of the applied material
To achieve optimal cleanliness, we recommend using industry-standard cleaning techniques like solvent wiping or power washing. NACE has established widely-accepted cleanliness standards that serve as excellent benchmarks to follow.
– Surface Profile
The surface profile refers to the surface’s texture and roughness, highly significant factors in determining how well a coating or adhesive will bond to the surface.
Generally, a rougher surface will provide better adhesion, as it increases the surface area and offers a more mechanical “grip” for the coating or adhesive. However, excessively rough surfaces can lead to uneven application, resulting in poor performance.
Surface profiles can be measured using ASTM D4417, which includes three methods: visual comparison, depth micrometers, and replica tape. Comparing your surface measurements to these standards ensures that your preparation is appropriate for your intended application.
– Material Compatibility
It’s crucial to confirm that the coating or adhesive is chemically compatible with the surface material. Incompatible materials can lead to various issues, including:
- Weakening or damaging the surface material
- Reducing adhesion
- Producing unwanted chemical reactions
Always consult the manufacturer’s technical documentation and ensure that your chosen coating or adhesive is suitable for your surface material. If in doubt, consider performing a small-scale compatibility test before proceeding with a full-scale application.
– Surface Defects
Once the surface has been cleaned and its profile is within acceptable limits, it’s vital to inspect the surface for any defects. Defects like scratches, dents, or cracks can significantly reduce the performance and long-term durability of the applied material.
Depending on the severity of the defects, they may need to be repaired before proceeding. Common repair methods include:
- Filling and smoothing with a compatible material
- Welding to close cracks or gaps
• Surface Evaluation Techniques
– Visual Inspection
A thorough visual inspection is a crucial first step in evaluating surface preparedness. Through the use of lighting and magnification, as appropriate, you can quickly identify contaminants, surface defects, and cleanliness issues.
– Surface Profile Measurement
As mentioned earlier, it’s crucial to measure the surface profile using one of the ASTM D4417 methods. These techniques will help you to determine the suitability of the surface for your intended application.
– Material Compatibility Testing
When evaluating a surface, you may need to perform material compatibility tests. These tests will help you determine whether the chosen coating or adhesive will correctly bond to the surface without causing any adverse reactions.
There are several methods available for conducting compatibility tests, including:
- Cross-cut adhesion test
- Pull-off adhesion tests
- Exposure testing
Select the appropriate method based on your project’s specific requirements.
• Final Thoughts
Evaluating surfaces for ideal preparation involves a thorough understanding of important factors, including cleanliness, surface profile, material compatibility, and surface defects.
It’s crucial to know about these factors and use appropriate methods to ensure that your surface is properly prepared, ensuring optimal performance and durability of the applied material.
By following the guidelines and recommended methods discussed in this article, you can be confident that your surface will be well-prepared for outstanding results.
Methods for Determining Surface Preparation
Surface preparation is an essential step in many industrial processes, as it helps to ensure the proper adhesion, performance, and appearance of coatings, adhesives, and paints.
• Surface Profile Measurement
Surface profile refers to the roughness of a surface, which can be crucial for the adhesion and performance of coatings and other materials.
A suitable level of roughness allows for proper mechanical interlocking between the coating and the substrate. There are several methods available for assessing surface profiles.
– Testex Press-O-Film Replica Tape
Testex Press-O-Film Replica Tape is an industry-standard tool that allows for quick and accurate surface profile measurement through a simple two-step process. First, the replica tape is pressed onto the prepared surface using a spring-loaded micrometer.
By removing the tape and measuring its thickness, you can obtain an accurate reading of the surface profile. This method covers a wide range of surface profiles, is easy to perform, and does not require extensive training.
– Surface Profile Gauge
A surface profile gauge, also known as a stylus profilometer, is a digital instrument that uses a stylus to measure surface roughness.
As the stylus traverses along the prepared surface, it records the variations in height, which are then converted into a numerical value on the device’s display. This allows for a more in-depth analysis of the surface profile and can output results in various parameters, such as Ra or Rz.
When utilizing a surface profile gauge, make sure to follow the manufacturer’s instructions and perform multiple measurements at different locations on the surface to obtain a representative sample.
• Surface Cleanliness Assessment
Assessing the cleanliness of a prepared surface is another critical factor. Residues like oils, grease, and salts can lead to premature coating failure and reduced performance.
– Water Break Test
The water break test is a straightforward method of evaluating surface cleanliness. By applying water to the surface, you can observe how it behaves. If the water spreads evenly across the surface, forming a continuous film, it indicates that the surface is free from contaminants.
However, if the water breaks into separate droplets or does not evenly wet the surface, there may be residual contaminants present.
– Bresle Patch Test
The Bresle Patch test is a more quantitative method of assessing surface cleanliness, specifically in measuring the presence of salts.
A Bresle Patch is a self-adhesive plastic patch with a specialized, soluble membrane. You can learn more about this test method from the ISO 8502-6 standard.
To perform this test, adhere the Bresle Patch to the prepared surface, inject a known volume of deionized water into the patch with a syringe, and then extract the water after a specified period of time.
By analyzing the extracted water for any dissolved salts, you can determine the level of surface contamination.
• Visual Inspection
Visual inspection is often the most straightforward and cost-effective method of evaluating surface preparation.
By observing the prepared surface for any defects, such as excessive roughness, scratches, or materials that could cause coating adhesion issues, you can quickly identify areas that may require additional attention.
Utilizing specialized lighting, like a high-intensity LED light with adjustable angles, can aid in visual inspection. This allows for better detection of surface imperfections and residue.
• Conclusion
Effectively measuring surface preparation is crucial for the success and performance of coatings and adhesives.
By employing the methods discussed above, like Testex Press-O-Film Replica Tape, surface profile gauges, water break tests, and Bresle Patch tests, you can ensure that your substrates are optimally prepared for their intended applications.
Moreover, visual inspection remains an essential and reliable method of surface preparation evaluation.
Method | Description |
|---|---|
Visual Inspection | Examining the surface visually to assess the cleanliness and roughness, often using comparison charts for reference. |
Surface Profile Measurement | Using instruments like a surface profile gauge, replica tape, or stylus profiler to quantitatively measure the surface roughness. |
Surface Contamination Test | Performing tests to determine the presence of contaminants like oil, grease, and salts on the surface. |
Adhesion Test | Applying and removing a test patch of the coating to check the adhesion strength between the coating and the prepared surface. |
Wet Film Thickness Measurement | Measuring the thickness of a coating immediately after application using a wet film comb or gauge. |
Dry Film Thickness Measurement | Measuring the thickness of the cured coating using a magnetic or ultrasonic dry film thickness gauge. |
Key Factors in Surface Preparation Considerations
Preparing a surface for any kind of painting or coating job is crucial to its overall success and longevity. Regardless of the type of surface (e.g., walls, floors, metallic structures), failure to properly prepare it can lead to premature failures of the applied material.
• Assessing the Surface Condition
One of the first things that you need to do is to assess the surface’s current condition. You should identify any defects or irregularities on the surface that may require repair or treatment before any coating can be applied. Some common surface issues include:
- Cracks
- Potholes
- Rust or corrosion
- Surface contaminants such as grease, dirt, or old paint
It is important to address these surface issues first to ensure proper adherence and performance of the applied material.
• Cleaning the Surface
Cleaning the surface is a vital step to ensure it is free from any contaminants that may compromise the adhesion, performance, and durability of the applied material.
Contaminants such as dirt, dust, grease, or oil should be removed before performing any other step in the surface preparation process. Common cleaning methods include:
- Washing with soap and water
- Pressure washing
- Steam cleaning
- Using solvent-based cleaners
For more guidance on cleaning surfaces, refer to the Environmental Protection Agency’s website.
• Selecting the Right Method of Surface Preparation
Once you have cleaned the surface, choosing the right method of surface preparation is crucial. This decision is often influenced by the type and extent of the existing coating or film, as well as the desired performance level of the new coating or material.
Common methods of surface preparation include:
– Abrasive Blasting
Abrasive blasting is a process where abrasive particles are propelled at high velocity onto the surface to remove rust, old paint, mill scale, or other contaminants. It can be performed using different types of abrasive particles such as sand, steel shot, or crushed mineral grit.
– Hand and Power Tools
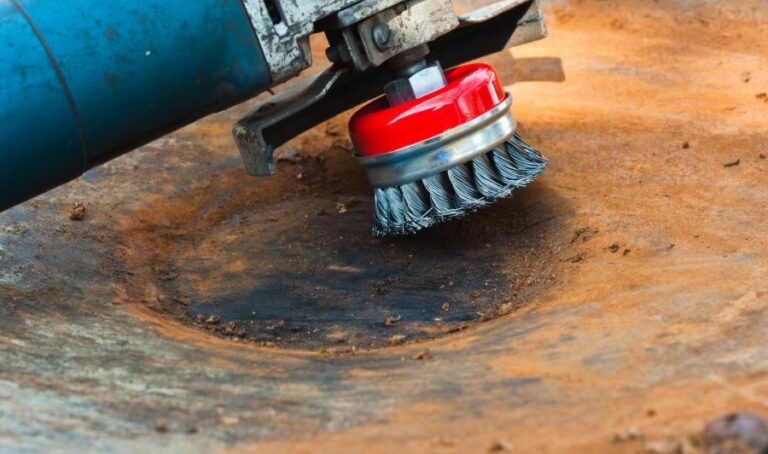
Hand and power tools can be used for superficial cleaning and surface preparation tasks, such as removing loose rust, old paint, or dirt. Tools such as wire brushes, sandpaper, and scrapers are commonly used for these purposes.
– Chemical Stripping
In cases where mechanical methods may not be suitable or feasible, chemical stripping can be employed to remove existing coatings. Chemical strippers soften or dissolve the old coatings, allowing them to be easily removed.
– Etching and Acidizing
Primarily used on concrete surfaces, etching uses chemicals to create a roughened profile on the surface that promotes the adhesion of the applied material. Acidizing, on the other hand, is often applied to metallic surfaces to remove surface rust or mill scale and provide a clean, active surface.
• Choosing the Appropriate Coating
After adequately preparing the surface, choosing the appropriate coating material is essential. Factors such as the nature of the substrate, environmental conditions, and the desired performance level of the coating should be considered. Some common coating types include:
- Paints
- Epoxies
- Polyurethane
- Powder coatings
Consult with a coating manufacturer to determine the most suitable option for your specific application.
• Preparing the Surface
Preparing the surface is often a multi-step process that involves cleaning, repairing, and treating the surface. Some steps that you may need to take include:
- Filling cracks, holes, or other defects on the surface
- Sanding or grinding to achieve the desired surface profile
- Priming the surface for enhanced adhesion and durability
• Verifying Surface Readiness
Before applying the chosen coating, it is essential to verify that the surface is ready. Some checks you may need to perform include the following:
- Ensuring all surface defects have been addressed
- Ensuring the surface is clean and free of contaminants
- Confirming the desired surface profile has been achieved
- Ensuring that the surface is dry and free of moisture
In conclusion, surface preparation is a critical aspect of any coating or painting project. Taking the time to carefully and thoroughly prepare the surface will greatly improve the performance and durability of the applied material.
Remember to assess, clean, choose the right preparation method, and verify the surface’s readiness before applying the coating to achieve the best possible result.
Evaluating the Quality of Surface Finishes
Surface finish, also known as surface texture or surface topography, is a vital factor in determining the performance and aesthetics of a manufactured part.
• A Brief Overview of the Surface Finish
Surface finish refers to the microscopic deviations in the texture of a part’s surface. These irregularities can be caused by manufacturing processes, such as machining, casting, forging, and additive manufacturing. Understanding and controlling surface finish is essential to:
- Minimize wear and friction
- Improve the performance of bearings and seals
- Reduce corrosion and material buildup
- Enhance the appearance and tactile feel
- Ensure proper fit and function between mating parts
• Key Parameters for Surface Finish Evaluation
To assess surface finish, we must understand the essential parameters commonly used in the industry. These parameters help us quantify surface characteristics, and they can be divided into three main groups: amplitude, spacing, and hybrid parameters.
– Amplitude Parameters
Amplitude parameters are used to evaluate surface roughness, which is the most critical aspect of surface finish. Some common amplitude parameters include:
- Ra (Arithmetic Average Roughness): The average of the absolute values of the profile height deviations from the mean line over the evaluation length.
- Rq (Root Mean Square Roughness): The square root of the average of the squared profile height deviations from the mean line over the evaluation length.
- Rz (Maximum Height of the Profile): The vertical distance between the highest peak and the deepest valley within the evaluation length.
- Rt (Total Height of the Profile): The vertical distance between the highest peak and the lowest valley within the overall measurement length.
– Spacing Parameters
Spacing parameters are used to assess the peak and valley distribution across the profile. Some common spacing parameters include:
- Sm (Mean Spacing of Profile Irregularities): The average distance between consecutive irregularities along the profile.
- S (Maximum Spacing of Profile Irregularities): The maximum distance between consecutive irregularities along the profile.
– Hybrid Parameters
Hybrid parameters combine both amplitude and spacing characteristics, providing a more comprehensive evaluation of surface texture. Some common hybrid parameters include:
- Rk (Core Roughness Depth): The depth of the surface roughness profile, excluding the highest peaks and deepest valleys.
- Rpk (Reduced Peak Height): The average height of the profile peaks above the core roughness.
- Rvk (Reduced Valley Depth): The average depth of the valleys below the core roughness.
• Surface Finish Measurement Techniques
There are several methods to measure surface finish, each with its advantages and limitations. Some of the most widely used techniques include:
– Contact Profilometry
Contact profilometers, also known as stylus profilometers or surface roughness testers, use a diamond stylus to trace the surface profile.
The stylus is mounted on a mechanical arm, and as it moves along the surface, the vertical displacement of the stylus is recorded, generating a detailed profile of the surface topography.
Key benefits of contact profilometry include high resolution, repeatability, and the ability to generate quantitative surface metrics. However, this method may not be suitable for very delicate, soft, or adhesive materials, as the stylus may damage the surface or be obstructed by the material.
– Optical Profilometry
Optical profilometers are non-contact instruments that use optical techniques, such as white light interferometry or confocal microscopy, to generate a three-dimensional image of the surface. This approach is ideal for delicate or soft materials that may be damaged by a contact stylus.
Optical profilometry offers high resolution and non-destructive characterization but may be less suitable for certain surface geometries, such as steep slopes or deep valleys, where light collection can be challenging.
– Atomic Force Microscopy (AFM)
AFM is a high-resolution scanning probe technique that measures surface topography at the nanoscale. AFM uses a sharp probe to scan across the surface, generating a precise three-dimensional profile.
While AFM offers exceptional resolution and accuracy, it has a limited scanning area and may be less practical for the evaluation of larger parts.
• Expert Recommendations for Surface Finish Evaluation
- Select the appropriate measurement technique based on the material properties, surface geometry, and required resolution.
- Use multiple surface finish parameters, such as amplitude, spacing, and hybrid parameters, to gain a comprehensive understanding of the surface characteristics.
- Consider the influence of the manufacturing process on surface finish and adjust your evaluation technique accordingly.
- Keep in mind that if measurements are close to the specification limits or if the surface finish varies significantly along the part, it may be necessary to specify a tighter tolerance or further optimize the manufacturing process.
- Refer to industry standards, such as ASME B46.1 or ISO 4287, for guidance on parameter selection, surface finish specification, and measurement techniques.
From an experienced professional’s perspective, proper evaluation and control of surface finish play a crucial role in ensuring part performance, longevity, and overall quality.
Method | Description |
|---|---|
Visual inspection | Examine the surface with the naked eye or use a magnifying tool to identify irregularities, roughness, or defects. |
Surface roughness testers | Use instruments, such as profilometers or interferometers, to measure the surface’s roughness or waviness by tracing a stylus over the surface or using light patterns and reflections. |
Surface comparison charts | Compare the surface finish with a set of standard charts or samples that display various levels of roughness or textures to determine the closest match. |
Microscopic examination | Use a microscope to analyze the surface finish at high magnification, revealing details about the material’s topography and identifying defects or irregularities. |
Non-contact optical techniques | Employ optical systems, such as confocal microscopes or laser scanners, to measure the surface finish without touching it, reducing the risk of damage or contamination. |
Top Technique for Preparing Surfaces Effectively
Surface preparation plays a crucial role in the durability, effectiveness, and overall success of a coating system. The main objective is to provide a clean, smooth, and contaminants-free surface that allows better adhesion of coatings.
Among various techniques available for surface preparation, abrasive blasting is the most popular and commonly used method.
• Abrasive Blasting: An Overview
Abrasive blasting, also known as sandblasting, is the process of forcefully propelling a stream of abrasive material against a surface under high pressure to remove contaminants, rust, paint, or to create a smooth and uniform surface profile.
Abrasive blasting ensures excellent adhesion of coatings and helps in increasing the overall service life of the substrate.
The American Society of Civil Engineers defines abrasive blasting as a process that employs compressed air to force a mixture of air and abrasive through a nozzle at high velocity against the surface to be cleaned or finished.
This technique depends on the type of abrasive material, equipment, nozzle used, and surface condition.
• Types of Abrasive Blasting
There are several types of abrasive blasting, including:
1. Dry Abrasive Blasting
Dry abrasive blasting uses high-pressure air to propel abrasive particles against the surface. The most common type of dry blasting is sandblasting, which employs sand as the abrasive material.
Other materials, such as steel grit, glass beads, or coal slag, can be used, depending on the required surface profile.
2. Wet Abrasive Blasting
Wet abrasive blasting involves mixing water with abrasive materials before propelling them onto the surface. This method reduces dust and provides a cleaner working environment. Moreover, it helps in controlling the surface profile, as the water cushions the impact of the abrasive particles.
3. Vacuum or Dustless Blasting
Vacuum blasting, also called dustless blasting, is a type of wet abrasive blasting that uses a vacuum system to retrieve the spent abrasive, water, and contaminants from the surface. This method minimizes waste, making it an environmentally friendly choice.
• Advantages of Abrasive Blasting
Some of the benefits of using abrasive blasting for surface preparation include:
- Effectiveness: Abrasive blasting ensures the thorough removal of contaminants, rust, and existing coatings, creating an ideal surface condition for the application of new coating systems.
- Efficiency: This technique provides quick and efficient results, considerably reducing the preparation time compared to manual methods such as hand tool cleaning or wire brushing.
- Versatility: Abrasive blasting can be used on various surfaces, including steel, concrete, wood, and even delicate materials like glass, using different types of abrasive materials.
- Improved Adhesion: The surface profile created by abrasive blasting increases the contact area between the coating and the substrate, resulting in a stronger bond and improving the durability of the coating system.
• Safety Precautions for Abrasive Blasting
Abrasive blasting has potential hazards, and appropriate safety measures must be taken to ensure the well-being of the workers. Some of the safety recommendations include:
- Personal Protective Equipment (PPE): Workers should wear appropriate PPE, such as goggles, face shields, gloves, earplugs, dust masks, and safety shoes during the blasting process.
- Proper Ventilation: Adequate ventilation is essential for removing airborne dust and ensuring a safe work environment, especially during dry abrasive blasting.
- Dust Suppression: Wet or vacuum abrasive blasting methods should be preferred over dry blasting when possible to minimize dust generation.
- Proper Training: Workers should undergo proper training in the safe operation and maintenance of the blasting equipment, as well as in recognizing potential hazards associated with the process.
• Conclusion
In summary, abrasive blasting, in its various forms, is the most common technique for surface preparation due to its efficiency, versatility, and effectiveness in creating an ideal surface for the application of coatings.
By following safety precautions and ensuring the appropriate selection of equipment and abrasive materials, this method can lead to successful results in a variety of applications.


