Paint-Ready Surface Prepping Guide, What Pros Say
Are you looking to give your walls a fresh, new look but feeling unsure about the first steps to take? Worry no more. Our comprehensive and easy-to-follow ‘Paint Ready Surface Prepping Guide’ is here to help you with everything you need to know. With years of experience under our belt, we can confidently say our guide will leave you feeling more than prepared to tackle your next painting project.
Paint-ready surface prepping guide:
A paint-ready surface prepping guide involves assessing the surface for issues, repairing cracks/holes, removing peeling/flaking paint, treating mold/mildew/water damage, smoothing uneven texture, cleaning, sanding, priming the surface, and taping off areas. Proper preparation ensures a professional, long-lasting finish for your paint job.

Delve into our comprehensive guide on paint-ready surface preparation! We’ve got your project covered, from cleaning tips to the right sanding techniques. Transform your space with a flawless finish by mastering these crucial steps. Keep reading and unlock the secrets to perfect paint application!
Contents
- 1 Guide to Preparing Surfaces for Painting
- 2 Tools and Techniques for Surface Preparation
- 3 Surface Preparation: A 9-Step Process Explained
- 3.1 • Step 1: Evaluate the Surface
- 3.2 • Step 2: Choose the Right Method
- 3.3 • Step 3: Remove Loose Material
- 3.4 • Step 4: Address Visible Defects
- 3.5 • Step 5: Abrasive Blasting or Power Tool Cleaning
- 3.6 • Step 6: Waterjetting
- 3.7 • Step 7: Chemical Cleaning
- 3.8 • Step 8: Surface Drying
- 3.9 • Step 9: Surface Profiling
- 4 Top Methods for Pre-Painting Surface Preparation
Guide to Preparing Surfaces for Painting
A well-prepared surface is the key to achieving professional-looking results when painting. We will explore the steps and techniques necessary to achieve a paint-ready surface.
• Assessing Your Surface
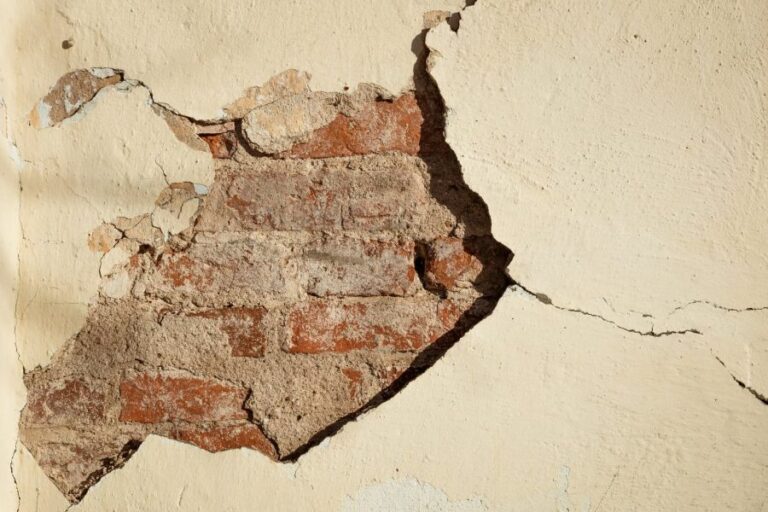
Before starting, it is important to assess the condition of the surface to determine if there are any issues that may affect the final outcome. Some common problems include:
- Cracks or holes in the surface
- Peeling or flaking paint
- Mold, mildew, or water damage
- Uneven texture
Addressing these issues properly will ensure a smoother, longer-lasting finish.
– Repairing Cracks and Holes
Fill any cracks or holes with a suitable filler, such as joint compound or putty. Sand the filled areas smoothly once the filler is dry.
– Removing Peeling or Flaking Paint
Scrape away any loose paint using a paint scraper or putty knife. Once the loose paint is removed, sand the area to smooth out any remaining edges.
– Treating Mold, Mildew, or Water Damage
Mold and mildew should be treated with a mold and mildew remover, and the surface should be allowed to dry thoroughly. If water damage is present, address the source of the moisture and repair any damaged areas before proceeding with surface preparation.
– Smoothing Uneven Texture
If your surface has an uneven texture, such as a stippled or knockdown finish, sand the area to achieve a smoother finish. Be sure to wear appropriate safety gear, including a dust mask, to protect yourself from dust particles.
• Cleaning the Surface
Once any necessary repairs are made, clean the surface to remove dirt, dust, and grease. A clean surface will allow for better paint adhesion and a more even finish.
- Dust: Use a microfiber cloth, brush, or vacuum cleaner with a brush attachment to remove dust from the surface.
- Wash: Use a mild detergent and warm water to clean the surface. For stubborn stains, use a sponge or cloth to scrub gently. Avoid soaking the surface, as excessive moisture can cause damage to some materials.
- Rinse: Wipe the surface with a clean, damp cloth to remove any soap residue. Allow the surface to dry completely before moving on to the next step.
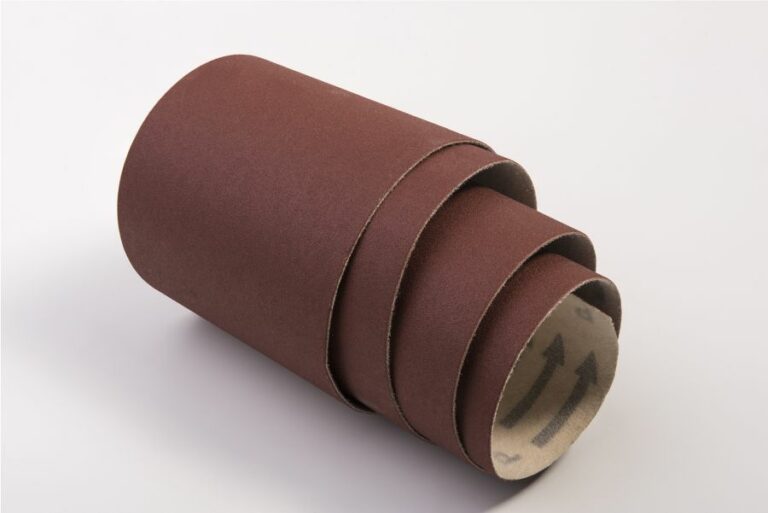
• Sanding the Surface
Sanding promotes paint adhesion and smooths out any remaining imperfections. Follow these steps for a properly sanded surface:
- Choose the Right Grit: Determine the appropriate grit sandpaper for your surface based on the current finish and desired finish. Consult this guide from Family Handyman for guidance on selecting the right sandpaper.
- Sand Evenly: Using a sanding block or orbital sander, sand the surface in a consistent, even manner. Be sure to sand in the direction of the grain for wood surfaces to avoid scratching.
- Clean Up: Remove any dust generated from sanding with a vacuum or tack cloth.
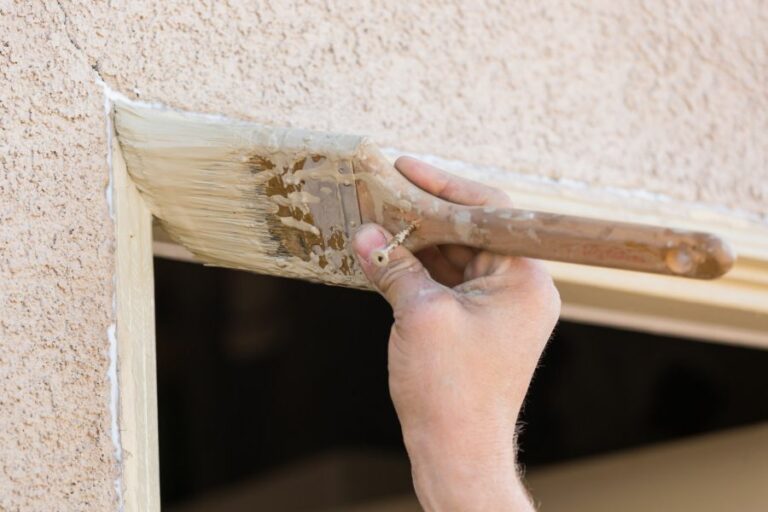
• Priming the Surface
A quality primer seals the surface, improves paint adhesion, and provides a uniform base for the paint to adhere. Follow these steps to apply primer:
- Select the Appropriate Primer: Choose a primer that is compatible with your surface material and the type of paint you will be using. Some surfaces may require a specific primer, such as stain-blocking or mold-resistant primers.
- Apply the Primer: Using a brush, roller, or sprayer, apply the primer to the surface in a thin, even coat. Be sure to cover the entire surface, paying attention to any edges or corners.
- Dry Time: Allow the primer to dry according to the manufacturer’s instructions. Some primers may require light sanding after drying for optimal adhesion.
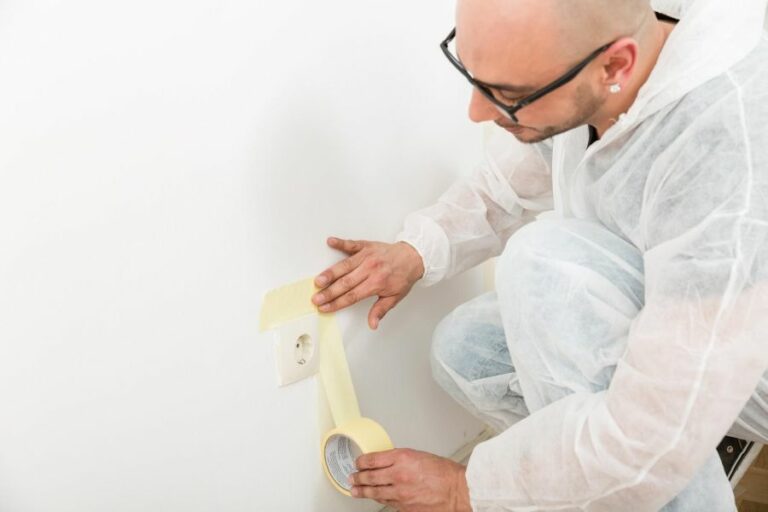
• Taping Off Areas
If certain areas do not need to be painted, such as window trim or baseboards, use painter’s tape to protect those surfaces. Press the tape firmly against the surface to prevent paint from seeping underneath.
• Final Thoughts
With careful attention to surface preparation, your paint job will have a professional, long-lasting finish. By following this paint-ready surface prepping guide, you can achieve a smooth, uniform base for your paint project, whether you are a do-it-yourself home painter or a professional contractor.
Tools and Techniques for Surface Preparation
Properly preparing a surface before applying a fresh coat of paint can make all the difference in the end result. This step-by-step guide will walk you through the essential steps of surface preparation and share some expert recommendations for getting the job done right.
• Assess the Surface Condition
Before you start prepping the surface, it’s important to assess its current condition. This will help you determine which steps are necessary for proper surface preparation. If you’re working on a wall with peeling or chipped paint, you’ll need to remove the loose paint and sand the surface.
If you’re painting a glossy surface, you’ll need to degloss it first. For walls with stains, applying a stain-blocking primer is essential.
– Repair Damages
When dealing with surfaces that have cracks, holes, or other damage, repairing them is a critical step in ensuring a smooth, professional-looking paint job. Small cracks and holes can be easily filled with spackling paste or a suitable filler, while larger damage may require patching.
Allow the filler to dry, then sand the area with fine-grit sandpaper until it’s smooth and flush with the surrounding surface. Wipe away any dust with a clean, damp cloth.
– Clean the Surface
A clean surface is essential for proper paint adhesion. Use a mild detergent and warm water to wash surfaces thoroughly, removing dirt, grease, mildew, and other contaminants.
Be sure to rinse the surface well, as soap residue can interfere with paint adhesion. Allow the surface to dry completely before moving on to the next step.
If you’re painting a surface exposed to mold and mildew, it’s important to address this issue correctly to prevent future problems. This may involve using a mold-killing solution or consulting with a professional for proper removal and treatment.
– Remove Loose or Peeling Paint
Scraping off loose or peeling paint is crucial for a successful paint job. Use a paint scraper or putty knife to carefully remove any loose, flaking, or chipped paint. A wire brush can also be helpful for removing stubborn areas of paint.
For larger areas or multiple layers of paint, using a heat gun or chemical paint stripper may be more efficient. Be sure to follow the manufacturer’s instructions and safety recommendations when using these tools.
– Sand the Surface
Sanding helps to create a smooth surface that promotes better paint adhesion. Use fine-grit sandpaper (typically between 120 and 220 grit) to lightly sand the entire surface, paying particular attention to rough or uneven areas. Sanding also helps to remove any remaining loose paint.
For larger surfaces or heavy sanding jobs, consider using a power sander with fine-grit sandpaper or sanding pads. Always wear safety goggles and a dust mask when sanding to protect yourself from dust and debris.
– Degloss Glossy Surfaces
If you’re painting over a glossy surface, it’s important to degloss it first. This step is necessary to ensure proper paint adhesion, as glossy surfaces can often repel fresh paint.
There are several options for deglossing a surface, including liquid deglossers, sanding, or using a primer specifically designed for use on glossy surfaces. Follow the manufacturer’s instructions for the chosen method to ensure proper surface preparation.
– Apply a Primer
In many cases, applying a primer is an essential part of preparing a surface for painting. Primers are especially important when:
- Painting over a dark color with a lighter one
- Painting bare wood, drywall, or metal surfaces
- Covering stains, mold, or mildew
- Painting over a glossy surface
Choose a primer that best suits the material and application, and follow the manufacturer’s instructions for proper use. Allow the primer to dry completely before applying the paint.
• Final Thoughts
Proper surface preparation is crucial for achieving a high-quality, professional-looking paint job.
By assessing the surface, repairing damages, cleaning, removing loose paint, sanding, deglossing, and applying a primer, you’ll set yourself up for success and ensure that your paint job lasts for years to come.
Tools | Description |
|---|---|
Sandpaper | Used to smooth out any rough surfaces or remove old paint. |
Wire brush | Helps remove rust and loose paint from metal surfaces. |
Putty knife | Used to scrape off old paint or apply filler to any holes or cracks in the surface. |
Painter’s tape | Protects adjoining surfaces and creates clean lines when painting. |
Cleaning solution | Removes dirt, grease, and other contaminants from the surface before painting. |
Drop cloths | Protects floors and furniture from paint splatters while working. |
Surface Preparation: A 9-Step Process Explained
Surface preparation is essential for any painting or coating task. It ensures that the final result is durable, long-lasting, and visually appealing. This comprehensive guide will provide you with the nine essential steps for proper surface preparation.
• Step 1: Evaluate the Surface
Before starting any surface preparation work, it’s essential to evaluate the current condition of the surface. Check for any damages, rust, dirt, or other contaminants that may affect the paint or coating application.
You can consult resources from professional organizations, such as the SSPC (Society for Protective Coatings) or NACE International (National Association of Corrosion Engineers), for guidance on evaluating surfaces.
• Step 2: Choose the Right Method
There are various surface preparation methods available, ranging from manual cleaning to sophisticated and powerful techniques. The choice depends on factors such as the surface condition, the type of coating to be applied, and the desired result. Some common surface preparation methods include:
- Hand and power tool cleaning
- Abrasive blasting (e.g., sandblasting or grit blasting)
- Waterjetting
- Chemical cleaning
• Step 3: Remove Loose Material
Before any treatment, remove loose materials from the surface. This may include dirt, dust, grease, and old paint or coatings. It’s essential to clear these contaminants, as they can impact the adhesion of new paint or coatings, leading to premature failure.
• Step 4: Address Visible Defects
After removing loose material, address any visible defects on the surface. Common surface defects include cracks, corrosion-related damage, and efflorescence (crystalline deposits).
Repairing these defects is crucial to ensure a smooth, even finish and optimize the performance of the paint or coating.
• Step 5: Abrasive Blasting or Power Tool Cleaning
For surfaces that require more thorough cleaning or removal of old paint or coatings, abrasive blasting or power tool cleaning may be necessary. These methods provide in-depth surface preparation by removing surface contaminants, providing a clean surface for the new coating to adhere to.
Abrasive blasting uses pressurized air and abrasive media to remove rust, mill scale, and old coatings effectively. On the other hand, power tool cleaning involves the use of tools like wire brushes, sanders, grinders, and needle guns for surface preparation.
Note: Ensure that proper safety measures are in place when using abrasive blasting or power tool cleaning.
• Step 6: Waterjetting
In some cases, water jetting may be required for surface preparation. Water jetting is a technique that uses high-pressure water to clean and remove contaminants from the surface.
It’s an environmentally friendly method that is suitable for removing soluble salts, dirt, and other foreign materials.
• Step 7: Chemical Cleaning
Chemical cleaning is another surface preparation method wherein a chemical solution is used to remove stubborn contaminants like rust, grease, and old paint. Choosing the appropriate chemical cleaning agent for your specific surface is essential to prevent damage and ensure optimal paint adhesion.
• Step 8: Surface Drying
After completing the surface cleaning and treatment process, it’s essential to ensure that the surface is dry before applying any coating. Moisture can hinder the adhesion of paint, leading to poor performance or premature failure.
This is particularly important when using water jetting or chemical cleaning, as these methods involve the use of water or solvents that may leave the surface damp.
• Step 9: Surface Profiling
The final step in surface preparation is to create a suitable profile for the new paint or coating. A proper surface profile ensures that the new coating adheres effectively and that the desired aesthetic finish is achieved. Some common surface profiling techniques include:
- Light sanding for smooth surfaces
- Grinding for rough surfaces
- Applying a filler to repair defects
- Brush blasting to create a roughened surface
In conclusion, proper surface preparation is crucial to the success of any painting or coating project. By carefully following the nine steps mentioned above, you can achieve a durable, long-lasting, and visually appealing result.
Remember that each situation and surface may require different methods, and don’t hesitate to consult with knowledgeable professionals for an optimal outcome.
Step | Description |
|---|---|
1 | Remove all loose materials and contaminants (dust, dirt, grease, etc.) from the surface. |
2 | Use a scraper to remove any old paint, adhesive, or other materials adhering to the surface. |
3 | Sand the surface with sandpaper or an abrasive pad to create a smooth and even surface. |
4 | Remove dust and debris from the surface using a vacuum or a soft brush. |
5 | Create a clean, dry, and grease-free surface by wiping it with a clean, damp cloth or sponge and allowing it to dry completely. |
6 | Prime the surface with a suitable primer, if necessary, to ensure proper paint or coating adhesion. |
7 | Repair any defects, cracks, or holes in the surface with filler, and sand them smooth once they are dry. |
8 | Apply masking tape or painter’s tape to any areas that need protection from paint or other coatings, such as trim, outlet covers, or fixtures. |
9 | Check the surface one last time for cleanliness and smoothness before applying paint or other coatings. |
Top Methods for Pre-Painting Surface Preparation
As an experienced painter, I understand the importance of proper preparation before starting any painting project. It is crucial to ensure a smooth, long-lasting finish that you can be proud of.
• Assess the Surface
Before you start any prep work, it’s important to assess the surfaces that will be painted. Check for cracks, holes, or peeling paint, and identify any repairs needed.
– Repair Damages
For cracks or holes, patch the damage with a suitable filler. I recommend using a lightweight, pre-mixed spackling compound for small repairs and a setting-type compound for larger ones.
Once the filler has dried, sand it down for a smooth finish. Be sure to apply a primer over the repaired area before painting.
– Remove Old, Peeling Paint
If you are dealing with peeling paint, it is important to remove it before applying a new coat. Use a scraper or wire brush to carefully remove the loose paint. If the peeling is extensive, consider investing in a paint remover, which can save you time and effort.
• Clean the Surface
A clean surface is crucial for paint adhesion. Dirt, dust, and mildew can interfere with the paint’s ability to bond, resulting in a finish that may peel or chip prematurely.
– Dusting and Vacuuming
Begin by simply dusting or vacuuming the surfaces using a brush or vacuum cleaner attachment. This will remove loose dust and debris, making the subsequent cleaning more effective.
– Washing Walls
Use a mild detergent and water to wash the walls, as this will help remove grease, dirt, and grime. A sponge or cloth works well for this task; just be sure to wring it out properly to avoid overly saturating the walls. Allow the surfaces to dry completely before moving on to the next step.
– Tackling Mildew
If you notice mildew on your surfaces, it is important to address it before painting. Mix a solution of one part bleach to three parts water, and use a sponge or cloth to gently scrub the affected areas. Rinse with clean water and allow the area to dry before proceeding.
• Sanding Surfaces
Sanding is an essential step in the prep process, as it promotes better paint adhesion and ensures a smoother finish. Use a sanding block or electric sander with fine-grit sandpaper, and gently scuff the surfaces to ensure the paint has a good surface to grip onto.
– Priming Bare and Repaired Surfaces
Priming is necessary for any bare or repaired surfaces, as it helps to create a solid, even base for the paint to adhere to. A high-quality primer also helps to seal the surface, preventing any imperfections from bleeding through the paint.
– Protecting Windows, Doors, and Trim
Mask off any areas that you do not want to be painted, including windows, doors, and trim, using painter’s tape. This will save you time in the long run and ensure a clean, professional appearance.
• Choose the Right Paint
Selecting the appropriate paint is key to achieving the best results. I recommend using high-quality, 100% acrylic latex paint, as it provides excellent adhesion, coverage, and durability.
– Selecting the Right Sheen
Another essential consideration is the paint’s sheen. Generally, higher-sheen paints are more durable and easier to clean, making them ideal for high-traffic areas (such as kitchens and bathrooms).
Lower sheen paints, on the other hand, are great for hiding surface imperfections and providing a more subtle finish.
– Sample the Paint
Before committing to a paint color, I suggest purchasing a small sample and testing it out on a discrete section of your wall. This will help to ensure the color is well-suited to your space and its lighting conditions.
• Final Thoughts
Proper surface preparation is crucial for a successful painting project. By following these guidelines and using the right tools, you can ensure a professional result that will last for years to come. Most importantly, take your time, stay patient, and enjoy the satisfaction of a job well done.
Step | Description |
|---|---|
1. Gather materials | Assemble all necessary supplies, such as paint, brushes, rollers, trays, drop cloths, masking tape, ladder, and filler. |
2. Clear and cover the area | Remove or cover furniture, carpets, and fixtures to protect them from paint splatter and dust. Lay down drop cloths to catch any spills. |
3. Clean the surface | Wash walls and surfaces to remove dust, dirt, and grease that could prevent paint from adhering well. |
4. Repair damages | Fill holes, cracks, and gaps with appropriate filler to create a smooth surface for painting. |
5. Sand and prime | After the filler has dried, sand the surface to create an even base. Apply a coat of primer to increase paint adhesion and coverage. |
6. Mask edges and protect trim | Apply masking tape along baseboards, window and door trim, and any other areas where paint should not be applied. |