Prepare Textured Surfaces For Paint, 25 Things You Should Know
Tackling a textured surface may seem like a daunting task, especially when it comes to preparing it for a fresh coat of paint. Fret not, for we hold the answers to your painting needs! Equipped with our step-by-step guide and expert tips, you’ll undoubtedly master the art of prepping textured surfaces for paint, transforming your space with ease and confidence.
Prepare textured surfaces for paint:
To prepare textured surfaces for paint, start by cleaning the surface to remove dirt and debris. Repair any cracks or holes with a textured patching compound and sand the repaired areas. Apply a primer specifically designed for textured surfaces, and use high-quality latex paint in a flat, eggshell, or satin finish. Use a thick-nap roller or airless paint sprayer for application.

Textured surfaces can present unique challenges when it comes to painting. In the sections below, we’ll delve into the key steps to properly prepare these surfaces for a seamless and lasting paint job. Read on for expert tips and tricks to achieve that perfect finish.
Contents
- 1 Get Textured Surfaces Ready for Paint Application
- 2 Is Painting Over Texture Without Preparation Possible?
- 3 Steps to Prep a Textured Wall for a Paint Job
- 4 Cleaning Techniques for Textured Walls Before Painting
- 5 Importance of Priming Textured Surfaces Prior to Painting
Get Textured Surfaces Ready for Paint Application
Textured surfaces present unique challenges when it comes to painting.
• Clean the Textured Surface
Before you can begin painting, it is essential to start with a clean surface. Dirt, dust, and other debris can cause the paint to adhere poorly, resulting in an uneven finish.
- Remove loose debris: Use a brush or a vacuum cleaner with a brush attachment to remove any loose debris from the textured surface. This step helps to prevent the dust from mixing with the paint or accumulating on the paint roller.
- Clean the surface: For more thorough cleaning, use a mixture of mild soap and water. Using a sponge, gently scrub the textured surface to remove any remaining dirt or grime. Avoid using harsh chemicals, as these may damage the texture or cause paint adhesion issues.
After scrubbing the surface, rinse with clean water, and allow the surface to dry completely. This step is crucial for ensuring proper paint adhesion.
Here is a helpful resource from Purdue University that provides more in-depth information on cleaning surfaces before painting.
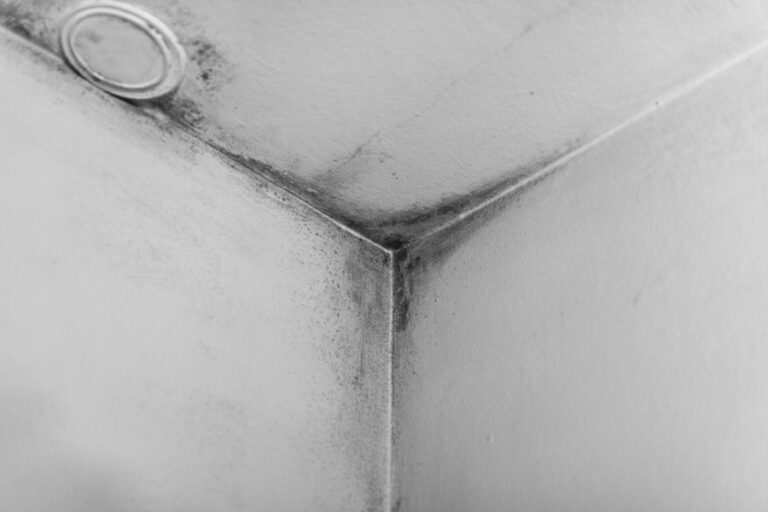
• Repair Damaged Textured Areas
Inspect the textured surface for any damage, such as cracks, holes, or other imperfections. Repairing these areas before painting will result in a smoother, more professional appearance.
- Fill cracks and holes: Use a pre-made textured patching compound or mix your own using a combination of joint compound and texture additive. Apply the compound with a putty knife, making sure to blend the repaired area into the surrounding texture. Allow the compound to dry completely before moving on to the next step.
- Sand repaired areas: Once the patching compound is dry, gently sand the repaired areas to ensure a smooth, even surface. Be careful not to over-sand and damage the surrounding texture.
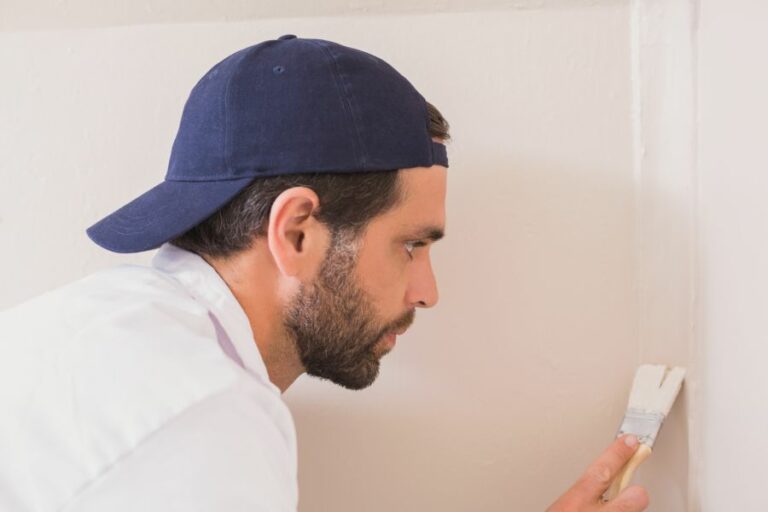
• Prime the Textured Surface
Priming the surface is a critical step in preparing textured surfaces for paint. A high-quality primer not only improves paint adhesion but also helps to seal the surface and bring out the best possible finish.
- Select the right primer: Choose a primer specifically designed for textured surfaces. Look for products labeled as “high-build” or “thick film” primers, as these are specially formulated to fill and cover textured surfaces.
- Apply the primer: Using a brush, roller, or airless sprayer, apply a generous coat of primer to the surface. Make sure to work the primer into all the crevices and valleys of the texture to ensure even coverage.
Allow the primer to dry according to the manufacturer’s instructions before moving on to the final step.
• Choose the Right Paint and Application Method
Selecting the appropriate paint and application method is essential for achieving a successful result on textured surfaces.
- Choose the right paint: Use high-quality latex paint that is suitable for textured surfaces. Flat, eggshell, or satin finishes are typically the best options, as they help to minimize the appearance of surface imperfections.
- Select the appropriate roller: A thick-nap roller (1/2 inch to 3/4 inch) is ideal for painting textured surfaces, as it can effectively fill and cover the surface’s valleys and crevices.
- Consider using a paint sprayer: For large textured surfaces or ceilings, an airless paint sprayer can be an efficient and professional option. Be sure to follow proper safety precautions and the manufacturer’s recommendations for using and cleaning the sprayer.
- Apply the paint: When applying the paint, use long, even strokes or a tight spray pattern, making sure to fill all the texture’s nooks and crannies. Apply a minimum of two coats, allowing sufficient drying time between coats, as per the paint manufacturer’s instructions.
By following these expert recommendations, you can effectively prepare and paint textured surfaces, achieving a smooth, professional result. With a little patience and attention to detail, tackling even the most challenging textured surfaces can be a rewarding and successful project.
Is Painting Over Texture Without Preparation Possible?
Many homeowners find themselves asking: can you paint directly over texture? The short answer is yes, but it’s essential to understand the process and take the necessary steps to ensure a professional finish.
• Pros of Painting Over Textured Surfaces
Painting directly over texture can have several advantages, some of which include:
– Time and Cost-Effectiveness
Textured surfaces can hide minor imperfections and prevent the need for extensive repairs or retexturing. By painting directly over texture, homeowners can save time and money while achieving a fresh, updated look.
– Customizable Appearance
Using paint over textured surfaces allows homeowners to choose from a wide variety of colors and finishes, providing greater flexibility in achieving a desired aesthetic. This can help enhance the overall appeal of a room or space.
– Durability
Painting over textured surfaces can create a durable finish that is resistant to cracks, chips, and general wear and tear. This can contribute to a longer-lasting finished product.
• Cons of Painting Over Textured Surfaces
On the flip side, there are some disadvantages to consider when deciding to paint over texture.
– Difficulty to Remove or Change
Once you’ve painted over the texture, it can become difficult or time-consuming to remove or modify the textured surface. This can impact future renovation projects or influence a homeowner’s desire to update the room’s appearance.
– Imperfections in the Finish
While textured surfaces can help hide minor blemishes, they can also create an uneven painted finish if not prepared and painted correctly. This may result in an unattractive appearance or affect the paint’s durability.
• Preparing Textured Surfaces for Painting
Proper preparation is crucial when painting over textured surfaces. The following steps can help ensure a successful outcome:
– Clean the Surface
Before painting, it is essential to thoroughly clean the textured surface to remove any dirt, grease, or dust that may interfere with proper paint adhesion. Use a soft brush or vacuum attachment to clean the surface gently.
For stubborn stains or grease, use a mild detergent solution and rinse thoroughly with clean water. Allow the surface to dry completely before proceeding.
– Repair Damaged Areas
Inspect the textured surface for signs of damage, such as cracks, peeling paint, or damaged texture. Fill any cracks or holes with an appropriate patching compound, such as Joint Compound, and allow it to dry according to the manufacturer’s instructions.
For peeled paint or damaged texture, you may need to remove the affected area and reapply fresh texture. Once repairs are complete and dry, sand the area smooth to ensure even paint coverage.
– Prime the Surface
Priming the textured surface before painting helps create a uniform base and promotes better paint adhesion. Use a high-quality primer, such as PVA Drywall Primer & Sealer, and apply it with a brush or roller designed for textured surfaces.
Allow the primer to dry according to the manufacturer’s instructions before applying paint.
• Choosing the Right Materials
Selecting the proper materials for the job is crucial for successful results when painting over texture.
– Use High-Quality Paint
Invest in high-quality paint that is designed to adhere well to textured surfaces. This will help ensure a durable and long-lasting finish.
– Choose an Appropriate Finish
Consider the desired level of shine and durability when selecting a paint finish. Gloss and semi-gloss finishes tend to be more durable and easier to clean, while matte and eggshell finishes offer a more subtle appearance.
– Select the Right Application Tools
Invest in quality brushes and rollers specifically designed for textured surfaces. These tools will help ensure an even application and minimize the appearance of brush or roller marks on the finished surface.
• Tips for Painting Over Textured Surfaces
Keep these tips in mind for a successful painting project:
- Work in small sections to maintain a wet edge and prevent visible seams.
- Apply paint with a brush or roller using a dabbing motion to ensure full coverage of the textured surface.
- Use a ladder or extension pole to safely reach higher areas while maintaining even pressure on the brush or roller.
- Allow the first coat of paint to dry according to the manufacturer’s instructions before applying additional coats as needed.
In conclusion, painting directly over textured surfaces is possible and can provide a fresh, updated appearance for your home.
By following proper preparation techniques, using the appropriate materials, and employing helpful tips, you can achieve a professional-looking finish that is both durable and aesthetically pleasing.
Method | Information |
|---|---|
Priming | Apply a primer specifically designed for textured surfaces before painting. This helps the paint adhere better and creates a smoother final result. |
Painting directly | It is possible to paint directly over textured surfaces, but it’s vital to use a thick, high-quality paint. This ensures a more even application and reduces the appearance of the texture beneath. |
Smooth the texture first | If you want a smooth finish, consider sanding or skim coating the textured surface before applying paint. This requires more effort, but it leaves a smooth and uniform appearance. |
Steps to Prep a Textured Wall for a Paint Job
Painting a textured wall can be a challenging task. However, with proper preparation and techniques, you can achieve professional-looking results. In this guide, we’ll walk you through the essential steps in preparing a textured wall for painting.
• 1. Assess the Wall’s Condition
Before starting the preparation process, it’s crucial to assess the wall’s condition. Check for any visible damages, such as cracks, holes, or loose texture. If you encounter any of these issues, it’s essential to address them before painting.
– Repairing Damaged Texture
One recommendation for repairing damaged texture is to use a pre-mixed texture compound. Apply the compound to the wall using a putty knife, following the manufacturer’s instructions.
For larger damages, you might need to use a texture spray to blend the repaired area with the existing texture.
• 2. Clean the Wall Surface
A clean surface ensures that the paint adheres properly to the wall. Begin by removing any cobwebs, dirt, or dust using a broom or vacuum with a brush attachment.
Next, use a damp cloth or sponge to wipe down the wall. In cases of stubborn dirt or grease, a mild detergent and warm water solution can be used. Rinse the wall thoroughly with clean water to remove any residue and allow it to dry completely before proceeding.
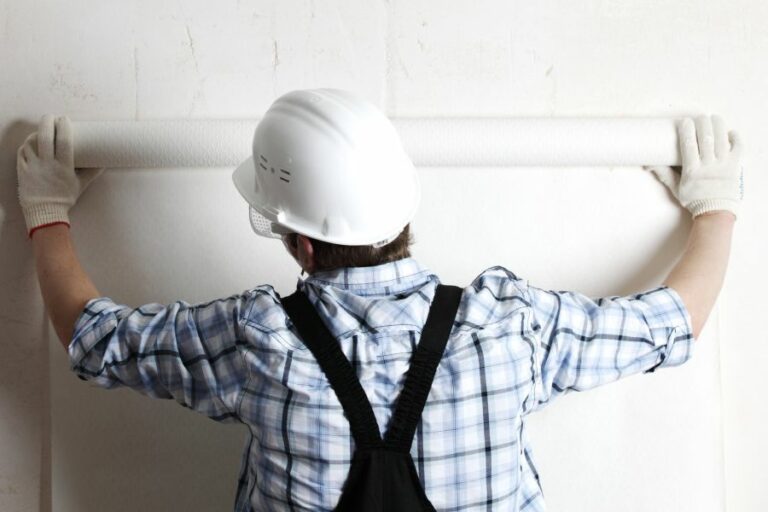
• 3. Protect Surrounding Areas
To prevent paint from getting onto unwanted surfaces, you need to mask and protect the surrounding area.
– Masking the Edges
Use painter’s tape to cover baseboards, trim, and other adjacent areas you don’t want the paint to reach. Make sure to press firmly on the tape’s edges to ensure a secure seal.
– Covering the Floor and Furniture
Place drop cloths or plastic sheeting on the floor to protect it from paint drips and spills. Additionally, move or cover any furniture in the room to avoid accidental paint damage.
• 4. Prime the Wall
Using a primer helps to achieve a smooth and even paint finish while also improving paint adhesion. A high-quality primer is especially important for textured walls, as it can help fill any tiny gaps in the texture.
Choose a primer that is suitable for the type of paint you plan to use. For example, use a latex primer for latex paint or an oil-based primer for oil-based paint.
– Applying the Primer
Start by cutting in the edges using a brush, then use a paint roller to apply the primer to the rest of the wall. Apply enough primer to cover the entire surface evenly, using long, even strokes.
– Drying Time
Allow the primer to dry completely according to the manufacturer’s recommended drying time. This may vary depending on the type of primer and the wall’s texture.
• 5. Sand the Wall (Optional)
Although not always necessary, lightly sanding the wall can help to achieve even smoother results, particularly for heavily textured walls. Use a fine-grit sanding block or pole sander to gently sand the dried primer. Be careful not to remove too much of the texture.
After sanding, wipe down the wall using a damp cloth or sponge to remove any dust or debris. Allow the wall to dry completely before proceeding.
• 6. Apply the Paint
With your textured wall prepped and primed, it’s now time to paint.
– Choosing the Right Paint
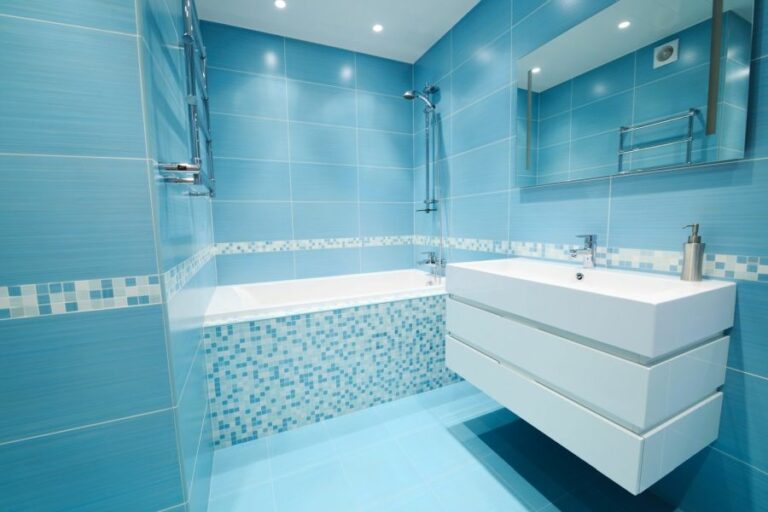
Select high-quality paint that is appropriate for the wall’s surface and the room’s purpose. For example, a satin or semi-gloss finish is recommended for areas prone to moisture, such as bathrooms and kitchens.
– Applying the Paint
Use a brush to cut in the edges, then switch to a roller for the rest of the wall. The nap of your roller is essential when painting a textured surface; a thicker nap can help to ensure proper paint coverage on all parts of the texture.
Apply the paint using long, even strokes, being sure to maintain a wet edge to avoid lap marks. Depending on the paint and the wall’s texture, you may need to apply multiple coats for complete coverage.
– Drying Time and Cleanup
Allow the paint to dry as per the manufacturer’s recommendations. Once the paint is completely dry, carefully remove the painter’s tape and drop cloths.
• Final Thoughts
Preparing a textured wall for painting involves a series of crucial steps, including assessing the wall’s condition, cleaning the surface, priming the wall, and optionally sanding before applying the paint.
By following this comprehensive guide, you can achieve professional-looking results and a rejuvenated, freshly-painted textured wall.
Step | Description |
|---|---|
1. Clean the wall | Begin by removing any dust, dirt, or debris from the surface of the wall using a soft brush or vacuum cleaner. |
2. Repair damages | If needed, repair any cracks or holes in the wall with a pre-mixed patching compound. Allow it to dry completely before proceeding. |
3. Sand the wall | Lightly sand the wall using medium-grit sandpaper. Be cautious not to remove too much texture while smoothing out any imperfections. |
4. Remove dust | Use a damp cloth to wipe down the wall, removing any dust left from the sanding process. Allow the wall to dry completely. |
5. Apply primer | Apply a quality primer to the wall, designed for use on textured surfaces. This will ensure a better bond for the paint to adhere. |
6. Choose the right paint | Select a high-quality paint suitable for textured walls. Thicker paints with high viscosity work best for hiding imperfections in the surface. |
7. Paint the wall | Apply paint to the wall using a roller with a thick nap, designed for textured surfaces. Be sure to apply even pressure and use a brush for cutting in along the edges. |
Cleaning Techniques for Textured Walls Before Painting
• The Importance of Cleaning Textured Walls
Cleaning textured walls before painting is vital to the overall success of your paint job. A clean surface allows the paint to adhere properly, preventing issues such as peeling, bubbling, or an uneven finish.
In addition, removing dirt, grime, and other particles creates a more polished and professional appearance for your freshly painted walls.
• Preparing the Area and Tools
Before starting the cleaning process, it’s essential to prepare the area and gather the necessary materials and tools. Here’s a list of things you’ll need to clean your textured walls effectively:
- Large drop cloth or plastic sheeting
- A vacuum cleaner with a brush attachment
- Ladder or step stool
- Microfiber cloths or soft rags
- Bucket of warm water
- Mild detergent
- White vinegar (optional)
- Soft scrub brush or sponge
- Rubber gloves (optional)
– Protecting the Surroundings
Cover the floor with a large drop cloth or plastic sheeting to protect it from any water or cleaning solution spills. Move any furniture that’s close to the walls, and remove any wall decorations or fixtures.
– Vacuum the Walls
Use a vacuum cleaner with a brush attachment to remove dirt, cobwebs, and dust from your textured walls. Start at the top of the wall, and vacuum horizontally in long strokes, working your way down. If needed, use a ladder or step stool to reach the upper areas of the wall.
This vacuuming process prevents dirt and dust from mixing with your cleaning solution and creating a bigger mess.
• Cleaning the Textured Walls
– Mixing Your Cleaning Solution
Fill a bucket with warm water and add a small amount of mild detergent. Use a solution that’s gentle on your walls and doesn’t leave a residue, which can affect the paint’s adhesion. For more stubborn spots or greasy areas, consider adding white vinegar to your cleaning solution.
– Cleaning the Walls
Dip a soft scrub brush or sponge into the cleaning solution and wring it out, ensuring it’s damp but not overly saturated, as excess water can damage your walls.
Start at the top of the wall, and work your way down using gentle circular motions. Be sure to scrub textured areas thoroughly to remove trapped dirt and grime.
I recommend dividing the wall into sections and cleaning one section at a time to prevent the cleaning solution from drying before you can rinse it off.
If you’re using rubber gloves, they can help protect your hands from the cleaning solution and give you a better grip on the scrub brush or sponge.
– Rinse and Dry the Walls
After finishing each section, use a clean microfiber cloth or soft rag dampened with clean water to rinse the cleaning solution off the wall. Rinse the cloth frequently, and wring it out to avoid introducing more dirt back onto the wall.
After rinsing, use a clean, dry microfiber cloth or soft rag to dry the wall gently. Properly drying the wall prevents streaks and water stains and ensures your walls are ready for painting.
• Final Touches and Inspection
Once you’ve finished cleaning all sections of your textured walls, do a final inspection, and pay close attention to any areas you may have missed or spots that still look dirty. If necessary, repeat the cleaning process for those areas.
When you’re satisfied with your cleaning job, let the walls dry completely before you begin painting. Depending on your walls’ material and the humidity in your home, this drying process can take anywhere from a few hours to a full day.
In conclusion, cleaning your textured walls before painting ensures a smooth, even finish and helps your paint adhere properly. By following the steps outlined above, you can confidently prepare your walls, knowing that your painting project will be a success.
Step | Action |
|---|---|
1 | Start by removing any dust and cobwebs from the textured wall using a vacuum cleaner with a brush attachment, or a broom |
2 | Fill a bucket with warm water and a mild detergent |
3 | Use a nylon bristle brush to scrub the textured wall gently |
4 | Dip the brush in the soapy water and scrub the wall in small sections, working from top to bottom |
5 | After scrubbing each section, rinse the wall with a sponge dipped in clean water to remove any soap residue |
6 | Use a clean, dry towel to gently dab the wall and remove excess water |
7 | Allow the wall to dry completely before painting |
Importance of Priming Textured Surfaces Prior to Painting
Let’s discuss the importance of priming textured surfaces before painting, the benefits it offers, and guidance on how to apply a primer in a correct manner.
A well-applied primer forms the foundation of any paint job, ensuring professional results and long-lasting finishes.
• The Role of Primer in Painting
A primer is a preparatory coating put on surfaces before painting for multiple reasons. It helps the paint adhere better, ensures uniformity in color, and provides durable protection to the surface underneath.
The use of a primer is vital on textured surfaces, as it fills any uneven gaps and creates a smooth base for the paint to bond.
– Increasing Adhesion
Priming textured surfaces before painting not only improves the adhesion of the paint but also prevents issues such as peeling or flaking.
Paint alone might not be enough to get a good grip on the uneven textures, and a primer will help the paint hold on to the surface more effectively.
– Uniform Color and Improved Appearance
A major advantage of using a primer is that it nullifies any color discrepancies that may occur due to the underlying texture.
It ensures that the paint will provide a uniform color and finish by masking the texture beneath. Applying primer also helps to prevent any surface stains from bleeding through the painted coat.
– Enhanced Durability
When it comes to textured surfaces, priming before painting can greatly enhance paint durability. It achieves this by creating a sealant layer that helps protect the surface from moisture, dirt, and other external factors.
Since the primer adheres well to the texture, the paint will have a solid foundation on which to bond, reducing the risk of premature wear or damage.
• Choosing the Right Primer
Selecting the appropriate primer for your textured surface is essential for achieving the best results. There are four main types of primers oil-based, latex-based, shellac-based, and alkyd-based, each with its own set of advantages:
- Oil-based primers are ideal for porous surfaces and provide excellent adhesion and stain-blocking abilities. However, they may take a longer time to dry and emit strong odors.
- Latex-based primers dry quickly and provide good adhesion for most surfaces. They are easy to clean and have fewer odors compared to oil-based primers.
- Shellac-based primers are an excellent choice for stain-blocking and sealing purposes. They are used primarily for heavily stained wood or smoke-damaged walls.
- Alkyd-based primers offer a combination of the benefits provided by oil-based and latex-based primers, making them a versatile choice.
As a general rule, use a primer that shares the same base (oil, latex, etc.) as your paint. Consult your local paint store for expert advice on which primer to use for your specific project needs.
• How to Apply Primer on Textured Surfaces
Follow these steps to prime textured surfaces effectively:
– Step 1: Clean the Surface
Before priming, ensure that the surface is clean and free of dirt, dust, or grease. For textured walls or ceilings, use a vacuum cleaner or a soft brush to remove any loose debris.
– Step 2: Repair Damages
Inspect the textured surface for any damages or imperfections, and repair them using a suitable patching compound. Allow the compound to dry completely before proceeding to the next step.
– Step 3: Apply the Primer
Use a paint roller or a paintbrush to apply the primer evenly over the entire surface. For textured surfaces, it is advisable to use a thick nap roller (3/4 to 1 inch) to ensure proper coverage. Start from the edges and work your way toward the center.
– Step 4: Allow the Primer to Dry
Allow the primer to dry completely, according to the manufacturer’s instructions. Drying time may vary depending on the type of primer and the humidity levels.
– Step 5: Inspect the Surface and Repeat if Necessary
After the primer is dry, inspect the surface for any uneven coverage or remaining stains. If required, apply a second coat of primer to ensure optimal results.
– Step 6: Proceed with Painting
Once the primer is fully dry and you are satisfied with the surface preparation, proceed with the actual painting process.
• In Conclusion
Priming textured surfaces before painting is essential for achieving professional, long-lasting results. It helps in increasing paint adhesion, providing uniform color and appearance, and enhancing durability.
By following the right steps, choosing the correct primer, and properly applying it, you can ensure a high-quality finish that will stand the test of time.