How To Prepare Walls For A Fresh Coat Of Paint, What Pros Say
Are you ready to transform your space with a fresh coat of paint but unsure how to prepare your walls? Fear not! We have the tried-and-true solutions that will help you achieve those professional-quality results. Follow our essential steps for a smooth and successful painting project, and say hello to your beautifully updated space.
How to prepare walls for a fresh coat of paint:>
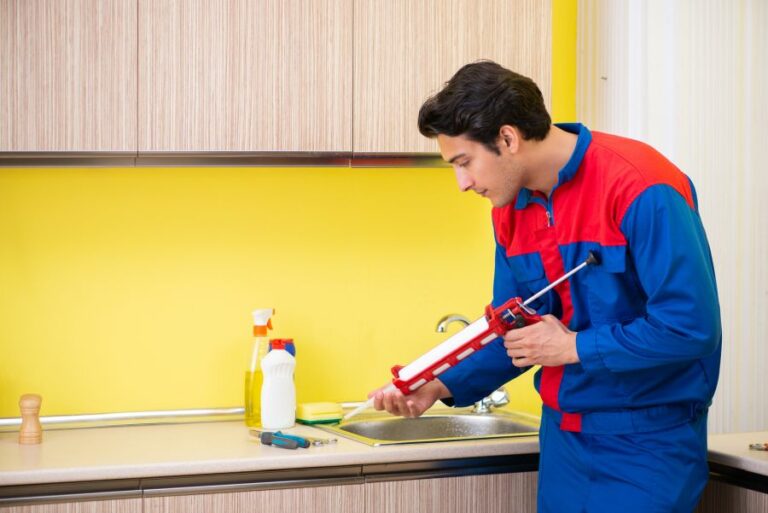
To prepare walls for a fresh coat of paint, inspect for damage and repair holes and cracks with a patching compound. Remove peeling paint using a scraper, wire brush, or sandpaper. Clean the walls with a mild detergent and water solution, then sand them for a smooth surface. Prime the walls with the appropriate primer, and protect surfaces with painter’s tape and drop cloths before painting.

So, you’ve decided to give your walls a fresh coat of paint but are unsure of how to start? Don’t worry! We’ve got you covered with everything you need to know to prepare your walls like a pro. Keep reading for step-by-step guidance, and watch your walls transform before your eyes!
Contents
- 1 Preparing Walls for a Fresh Paint Application
- 2 Wall Preparation Techniques for New Paint Coats
- 3 Importance of Washing Walls Prior to Painting
- 4 Professional Painter’ Wall Prep Strategies
- 5 Methods to Prep and Paint Over Existing Paint
- 6 Pre-Painting Wall Preparation by Painters
- 7 Cleaning Tips for Walls Before Touch-Up Paint
Preparing Walls for a Fresh Paint Application
A fresh coat of paint can transform a room, giving it a new look and feel. In order to achieve a flawless finish, proper preparation is necessary.
• Inspect the Walls for Damage
Before you start, inspect the walls for any signs of damage, such as holes, cracks, or peeling paint.
– Repairing Holes and Cracks
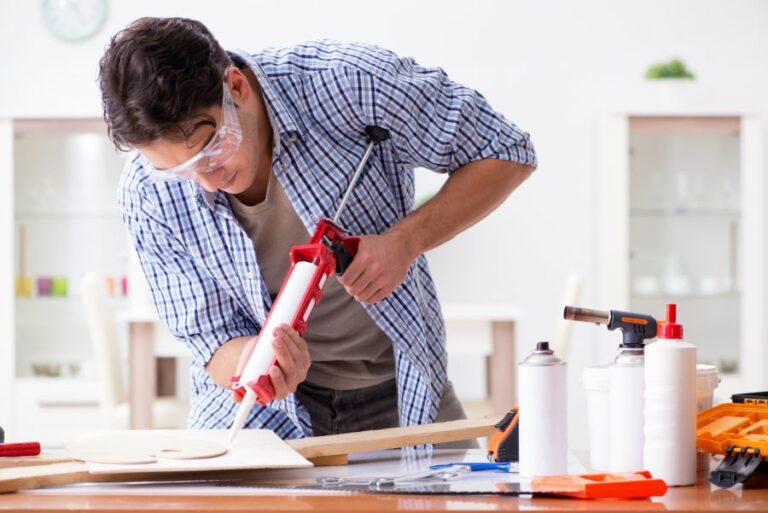
Fill small holes and cracks with a high-quality patching compound. Apply the compound with a putty knife, ensuring a smooth, even application. Once the compound dries, smooth the surface with fine-grit sandpaper.
– Removing Peeling Paint
Start by removing any loose paint with a scraper. For walls with more extensive damage, a wire brush or coarse-grit sandpaper may be necessary to remove the peeling paint. After all loose paint is removed, sand the remaining paint edges smoothly to ensure a proper bonding surface for the new coat.
• Clean the Walls
Dirt, dust, and oils can impede the adhesion of the new coat, so it’s essential to clean the walls thoroughly before painting.
– Dust Removal
Begin by removing any dust or cobwebs from the walls with a duster or clean, dry cloth. Pay special attention to corners and edges where dirt can accumulate.
– Washing the Walls
Using a solution of water and a mild detergent like dish soap, wash the walls with a soft sponge or cloth. Tackle small sections at a time, and don’t overly saturate the walls. Rinse the sponge or cloth frequently to avoid spreading dirt. After washing, give the walls time to air dry completely.
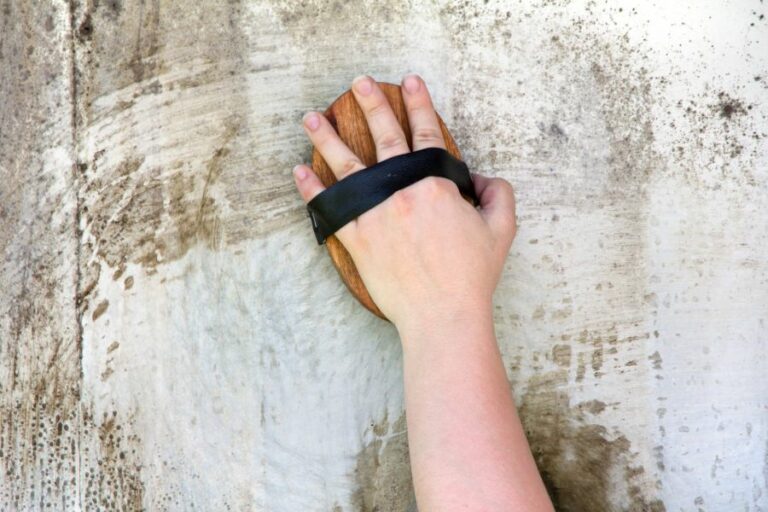
• Sand the Walls for a Smooth Surface
A smooth, uniform surface is key for a professional-looking paint job. Sanding the walls removes surface imperfections, ensures better paint adhesion, and creates a more even finish.
– Choose the Right Sandpaper
The type of sandpaper required depends on the wall’s composition. For drywall, use 150-grit sandpaper, while for plaster walls, a 120-grit sandpaper is ideal. When in doubt, consult the manufacturer’s recommendations on the sandpaper packaging.
– Sanding Technique
To sand the walls, wrap the sandpaper around a sanding block or pole sander (I recommend a pole sander for ease of use). Use even, circular motions, applying light pressure.
Remember to sand along the edges, corners, and baseboards as well. Once finished, use a clean cloth or a vacuum with a brush attachment to remove any sanding dust.
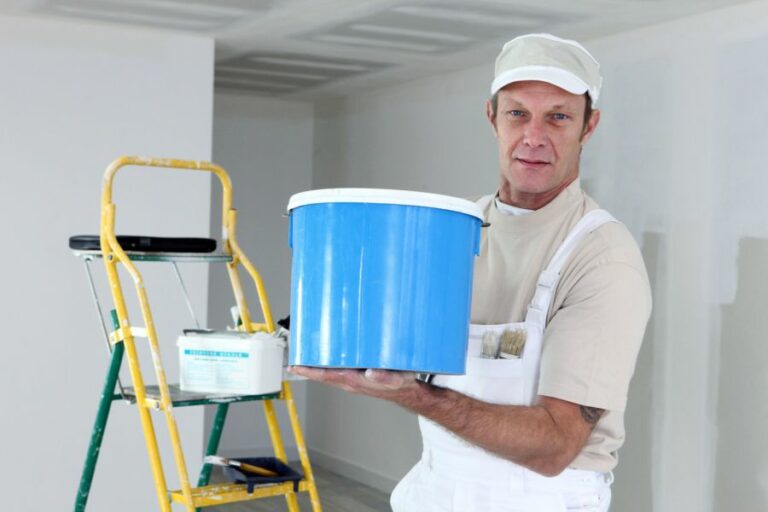
• Prime the Walls
Priming the walls is an essential step to ensure proper paint adhesion and an even finish.
– Choose the Right Primer
The type of primer needed depends on the wall’s composition and the new paint’s color. For most applications, a latex primer is appropriate. However, for certain surfaces like glossy paint or heavy stains, an oil-based primer may be necessary. Check the paint’s label for recommendations.
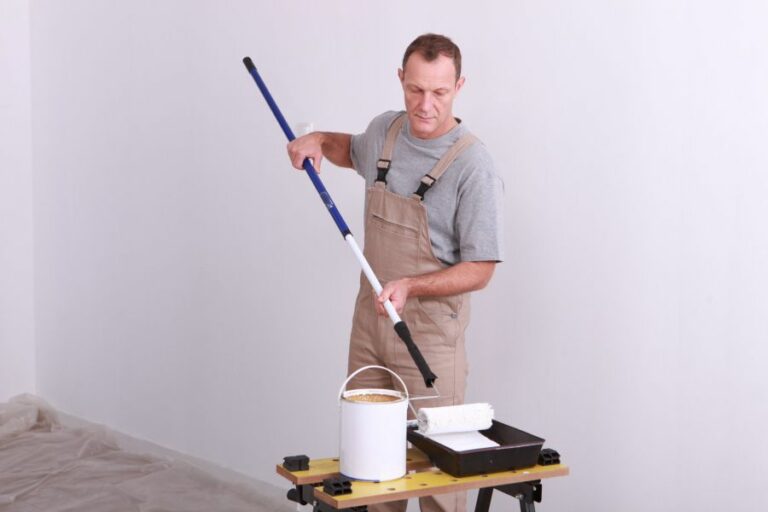
– Applying the Primer
Using a roller or paintbrush, apply the primer to the walls, following the manufacturer’s instructions. Be sure to cover the entire surface, including edges, corners, and baseboards. Allow the primer to dry for the recommended amount of time before moving on to painting.
• Mask and Protect Surfaces
Before applying paint, it’s essential to protect surfaces you don’t want to get paint on, like windows, doors, and floors.
– Masking Windows, Doors, and Trim
Apply painter’s tape along the edges of windows, doors, and trim to ensure a clean, straight line when painting. Press firmly on the tape to prevent paint from seeping underneath.
– Protecting Floors
Place drop cloths or plastic sheeting on the floors to shield them from paint spills and splatters. Secure the edges with painter’s tape to keep them in place during painting.
With your walls now prepared, you’re ready to apply a fresh coat of paint. Following these steps will help ensure a professional, flawless finish. For additional information and resources about paint preparation, visit this helpful guide from This Old House.
Step | Description |
|---|---|
1 | Remove all furniture and decorations from the room and lay down a drop cloth to protect the floor. |
2 | Use a screwdriver to remove all electrical cover plates, light switches, and outlet covers. |
3 | Clean the walls with a sponge and mild detergent solution to remove dirt, grease, and grime. |
4 | Look for any damaged areas on the walls, such as cracks, holes, or peeling paint. Repair these areas with a spackle or a patching compound. |
5 | Once the repairs are dry, sand the entire wall with fine-grit sandpaper to smooth out any rough spots and promote paint adhesion. |
6 | Use a damp cloth to wipe down the walls, removing any dust or debris from sanding. |
7 | Apply painter’s tape to protect any trim, baseboards, or other areas that should not be painted. |
8 | Prime the walls with a suitable primer for the type of paint and wall surface. Let the primer dry according to the manufacturer’s instructions. |
9 | Once the primer is dry, the walls are now prepped and ready for a fresh coat of paint. |
Wall Preparation Techniques for New Paint Coats
A well-prepared wall is essential for achieving professional-looking paint results. In this comprehensive guide, we will discuss the necessary steps for preparing a wall for a new coat of paint, including cleaning, repairing, priming, and masking.
• Cleaning the Wall
First and foremost, it’s important to clean the wall surface thoroughly. Dirt, dust, and grease can interfere with paint adhesion and cause an uneven finish.
1. Remove Furniture and Cover Floors
Before starting the cleaning process, move furniture away from the walls and cover floors with drop cloths to prevent damage and paint spills.
2. Dust the Walls
Using a broom or a vacuum cleaner with a brush attachment, remove any dust or cobwebs from the wall surfaces. This ensures a clean and smooth surface for the paint to adhere to.
3. Wash the Walls
Prepare a solution of warm water and mild detergent (like dish soap), and use a sponge or soft cloth to wash the walls. Focus on areas with visible dirt, stains, or grease marks.
After washing, rinse the walls with clean water to remove any soapy residue. For more stubborn stains, you may want to consider using a specialized cleaning product, such as a degreaser or a stain remover.
It is critical to wait for the walls to dry completely before moving on to the next step. Depending on the humidity level and room temperature, this can take up to 24 hours. You can find more information on cleaning walls from the EPA’s guide on indoor air quality.
• Repairing the Wall
Once the wall is clean and dry, inspect it for any imperfections, such as cracks, holes, or damaged areas. Repair these issues to ensure a smooth and even paint job.
1. Fill Cracks and Holes
Hairline cracks and small holes can be filled using a pre-mixed patching compound or a latex caulk. For larger cracks or holes, use a setting-type joint compound.
Apply these materials using a putty knife or a small trowel, and feather the edges to blend the repair area with the surrounding wall.
2. Repair Damaged Drywall or Plaster
For significant damage, such as water damage or large holes, you may need to cut out the affected area and replace it with a new piece of drywall or plaster. Once the new section has been installed, tape and finish the seams to ensure a seamless repair job.
3. Sand the Repaired Areas
After the patching compound or joint compound has dried, use fine-grit sandpaper (150-220 grit) for sanding the repaired areas, ensuring a smooth and even finish. Be sure to wipe away any sanding dust with a damp cloth when finished.
• Priming the Wall
Priming is an essential step in preparing a wall for a new coat of paint. It helps seal the wall, promotes paint adhesion, and ensures a consistent and even finish.
1. Choose the Right Primer
Select a primer that is compatible with your paint type (water-based, oil-based, etc.) and suited for the surface you are painting (drywall, plaster, wood, etc.).
Some primers are specifically formulated for stain-blocking, mold resistance, or adhesion promotion, so read the label carefully to select the appropriate product.
2. Apply the Primer
Using a brush, roller, or paint sprayer, apply the primer to the wall, following the manufacturer’s instructions and recommended coverage rate. Allow the primer to dry completely before proceeding to the next step.
Drying time can vary from one to three hours, depending on the primer type and environmental conditions.
• Masking and Protecting the Room
Before painting, it’s crucial to protect any surfaces or objects you do not want to paint, such as trim, electrical outlets, and windows.
1. Mask Trim and Fixtures
Use painter’s tape to mask off baseboards, door frames, window sills, electrical outlets, and other fixtures or trim that you do not want to paint. Choose a high-quality painter’s tape to ensure clean and crisp paint lines and easy removal.
2. Cover Furniture and Floors
If you haven’t already done so, cover your furniture with drop cloths or plastic sheeting and move it away from the walls. Also, cover the entire floor with drop cloths to catch any drips or spills during the painting process.
With the wall clean, repaired, primed, and masked, it’s now thoroughly prepared for a fresh coat of paint. Follow these steps carefully to ensure a professional and long-lasting paint job.
Step | Description |
|---|---|
1 | Inspect the wall for any damage, cracks, or holes that may need repair. |
2 | Remove any loose or peeling paint with a paint scraper or sandpaper. |
3 | Use spackling compound to fill any holes or cracks, and allow it to dry completely. |
4 | Lightly sand the repaired areas to create a smooth, even surface. |
5 | Remove any dust or debris from the wall using a vacuum or microfiber cloth. |
6 | Apply painter’s tape to trim, baseboards, and any other surfaces that you do not want to be painted. |
7 | Use a primer to create a better bond for the new paint and to ensure even coverage. |
8 | Allow the primer to dry completely before applying the new paint. |
Importance of Washing Walls Prior to Painting
Maintaining the attractiveness and longevity of your walls is essential, whether in a residential or commercial space.
Painting walls is one of the most popular ways to achieve these goals. However, a common question arises: do I need to wash walls before painting? The answer is a resounding yes.
Washing walls before painting ensures proper adhesion of paint, removal of contaminants, and, ultimately, a high-quality finish.
• Benefits of Washing Walls Before Painting
– Proper Adhesion of Paint
Washing walls before painting promotes the adequate bonding of the new paint layer to the surface (source: Purdue University).
Dirt, dust, and other contaminants may act as a barrier between the paint and the wall, compromising the adhesion and potentially leading to the premature failure of the paint job.
A clean surface allows the paint to stick and creates a uniform look.
– Smooth, High-Quality Finish
A clean wall surface prevents impurities and defects from ruining the final appearance of the paint job.
While some imperfections may seem relatively insignificant before painting, they can become painfully obvious after the application of new paint.
Washing walls before painting ensures that the surface is uniformly smooth and debris-free, resulting in a professional, high-quality finish.
– Improved Coverage and Durability
A clean surface enables the paint to appropriately cover the wall, ensuring that the true color and sheen can show through.
This uniformity supports the lifespan and durability of your paint job. Walls that are not washed before painting may require additional coats of paint, increasing both material costs and labor.
• Best Practices for Washing Walls Before Painting
– Dust Removal
Before washing the walls, it’s crucial to eliminate any loose dust and cobwebs. This task can be easily accomplished using a soft brush or a broom. Starting from the top and working your way downward, make sure to cover all corners and baseboards.
For additional safety, turn off any electrical outlets in the room and cover them with painter’s tape to prevent water damage.
– Preparing the Cleaning Solution
One of the most tried-and-true cleaning solutions is a mixture of mild dishwashing detergent and warm water. The ratio should consist of 3-4 cups of water for every tablespoon of dishwashing liquid.
Avoid using harsh chemicals or abrasive cleaners, as they can damage both the existing and new paint jobs.
– Washing the Walls
Begin washing the walls using a soft, clean sponge or microfiber cloth. Dip the sponge into the cleaning solution, wring out excess water, and proceed gently scrub the walls in small sections.
Make sure to rinse the sponge frequently to avoid reapplying dirt to the wall. Once a section is thoroughly cleaned, wipe the surface with clean water to remove any soap residue.
– Drying and Preparing for Paint
After washing the walls, dry the surface using a soft, clean towel. Drying the surface helps to remove any lingering moisture and ensures that the wall is ready for paint.
Once the walls are completely dry, they are ready to be painted but first, take the necessary steps by masking off any areas that need to be protected, such as baseboards and trim.
• Scenarios That Require Extra Attention
– Smoke and Grease Stains
Heavily stained walls, such as those exposed to cigarette smoke or kitchen grease, may require more intensive cleaning methods. In these situations, a trisodium phosphate (TSP) solution is recommended.
However, be sure to follow the manufacturer’s guidelines and wear appropriate protective gear, as TSP can be hazardous in high concentrations.
– Mold and Mildew
If your walls exhibit signs of mold or mildew, it’s crucial to address this issue before painting. Using a combination of bleach and water is effective in killing mold and mildew on surfaces.
However, you should exercise caution to avoid damage to your existing paint job and ensure appropriate ventilation while using bleach. In severe cases, it may be necessary to call in a professional for appropriate mold remediation.
– Wallpaper Removal
If your walls were previously covered with wallpaper, it is essential to remove any remaining adhesive residue before painting. Failure to do so can cause the newly applied paint to crack or peel. Use a wallpaper remover solution and a putty knife to effectively eliminate any lingering adhesive.
• Conclusion
Washing walls before painting is a crucial step for achieving a high-quality, long-lasting paint job. Adequate preparation, including dust removal, washing with a soap and water solution, and addressing any specific stains and damages, ensures that your wall is ready for a fresh coat of paint.
Take the time to properly clean your walls before painting, and you will be rewarded with vibrant walls that stand the test of time.
Professional Painter’ Wall Prep Strategies
Prepping walls is an essential step isn a painting job, as it directly affects the final outcome. By adequately preparing the surface, professional painters ensure a smooth and long-lasting finish.
• Assessing the Wall Condition
Before starting any painting job, it’s vital to assess the wall’s current state. Look for any signs of damage like cracks, holes, and loose paint. Additionally, determine if there’s any presence of mold or mildew. If any damage is discovered, it must be repaired before moving forward.
The Environmental Protection Agency provides guidelines for mold remediation in schools and commercial buildings, which can be applied to residential settings as well. EPA’s guide for mold remediation can help you address such issues effectively.
• Cleaning the Walls
A clean surface is crucial for the paint to adhere correctly. Start by dusting the walls using a broom or a duster. Next, clean the walls thoroughly using a sponge and a mild detergent solution.
Be sure to focus on high-traffic areas with more dirt and grime, like around light switches and door frames. Allow the walls to dry completely before proceeding to the next step.
• Removing Wallpaper
If the walls have old wallpaper that needs removing, follow these steps:
- Score the wallpaper using a wallpaper scorer or a utility knife.
- Apply a wallpaper removal solution, following the manufacturer’s instructions.
- Scrape off the wallpaper using a scraper, taking care not to damage the wall.
- Clean the walls with a sponge and water to remove any residue.
- Allow the walls to dry properly.
Remember, removing wallpaper can be time-consuming, and in some cases, it may be more practical to hire a professional.
• Repairing Wall Damage
Professional painters attend to all types of wall damage before painting. Here are some common repairs they undertake:
– Filling Holes and Cracks
For small holes and cracks, use a lightweight spackling compound and a putty knife. Apply the compound, filling the holes and smoothing the surface. Allow it to dry, and then sand the surface using fine-grit sandpaper.
For larger cracks or holes, use a joint compound and a wider putty knife. Apply a layer of the joint compound, covering the damaged area. Once dried, sand it smooth using fine-grit sandpaper.
– Repairing Drywall
For more extensive damage, replacing the damaged section of drywall may be necessary. Cut out the damaged section, and install a new piece of drywall of the same thickness.
Tape the seams using a fiberglass mesh or paper joint tape. Apply a layer of joint compound over the seams and allow it to dry. Sand the area to create a smooth surface.
• Sanding the Walls
To achieve a polished finish, professional painters sand the walls before applying paint. Use fine-grit sandpaper or a sanding block, and gently sand the entire wall surface. This process smooths out any previous paint job, helps remove small imperfections, and ensures better paint adherence.
After sanding, wipe the walls using a microfiber cloth or a tack cloth to eliminate any dust particles. This step is essential, as the presence of dust will affect paint adhesion.
• Applying Primer
Primer is a necessary component in prepping walls, and it serves multiple purposes. The primer:
- Provides a consistent base for the paint
- Enhances paint adhesion
- Improves coverage of the paint
- Helps block stains
Choose a primer suitable for the wall surface and the type of paint you’ll be using. Follow the manufacturer’s instructions for proper application. Allow the primer to dry entirely before applying the paint.
• Protecting Surfaces and Fixtures
Before starting the painting process, take time to protect surfaces and fixtures not meant to be painted:
- Remove wall hangings and outlet covers
- Apply painter’s tape to baseboards, door frames, and window frames
- Cover furniture or move it away from the walls
- Lay drop cloths on the floor to protect it from paint splatters
By following these steps, professional painters ensure precisely painted walls with minimal accidental damage.
• Conclusion
Prepping walls is a crucial aspect of a painting job that requires attention to detail and proper technique. By following the steps outlined in this article, you can ensure a smooth, long-lasting, and professional-looking paint job.
In cases of extensive wall damage or large-scale projects, it may be worth hiring a professional to handle the work and guarantee a high-quality result.
Methods to Prep and Paint Over Existing Paint
Painting over old paint can give a fresh new look to your walls and other surfaces. It’s essential to prepare the surface correctly so the new paint adheres well and the final result looks smooth and professional.
Below, we’ll discuss the necessary steps to ensure a successful painting project.
• Assess the Old Paint Condition
First, inspect the old paint to determine its condition. Old paint that’s cracking, peeling, or chalking needs special attention before applying a new coat. Check for these issues carefully, as they can affect the new paint’s adhesion and appearance.
Additionally, identify whether the old paint is oil-based or water-based. You can do this by rubbing a cloth with denatured alcohol over the surface.
If the color comes off onto the cloth, it’s water-based paint; if not, it’s oil-based paint. Knowing the old paint type is crucial when choosing the appropriate new paint and primer.
• Cleaning the Surface
A clean surface is vital for proper paint adhesion. Use a mild detergent and water to clean walls and other painted surfaces to remove dirt, grease, and mildew. If dealing with mildew, a mixture of 3 parts water to 1 part bleach can effectively eliminate it.
Always ensure proper ventilation and wear gloves and eye protection when working with bleach. After cleaning, rinse the surface with clean water and let it dry completely.
– Addressing Chipping and Peeling Paint
If the old paint is chipping or peeling, it needs to be removed to ensure a smooth surface for the new paint. You can use a paint scraper or wire brush to remove any loose paint carefully. Then, use sandpaper (120 to 150 grit) to sand the edges of the remaining paint to create a smooth transition.
This step is essential because a smooth surface prevents the new paint from peeling and promotes even application.
– Repairing Surface Damage
Check the surface for any cracks, holes, or other damage and repair them with appropriate materials. For small cracks and holes, use a lightweight spackling compound, and for larger repairs, use a patching compound or joint compound.
Apply these materials with a putty knife and let them dry according to the manufacturer’s instructions. Once dry, sand the repaired areas smoothly with fine-grit sandpaper (180 to 220 grit) to level them with the rest of the surface.
• Sanding and Priming the Surface
Properly sanding and priming the surface is crucial in order for the new paint to adhere well and look its best.
– Sanding
Sanding the entire surface with fine-grit sandpaper (180 to 220 grit) is necessary to prepare the surface for the new paint. Sanding helps create a smooth surface and promotes better paint adhesion.
Before sanding, use a tack cloth or vacuum to remove any dust from the surface; this ensures a clean surface for sanding. After sanding, use a clean cloth to remove any residual dust.
– Priming
Priming is an essential step, especially when painting over oil-based paint or applying a light color over a dark one. Primer provides a uniform base for the paint, ensuring even coverage and proper adhesion.
Select a primer that’s compatible with the old paint type and the new paint you plan to use. For example, if applying water-based paint over old oil-based paint, use a bonding primer specially designed for this purpose. Follow the manufacturer’s instructions on the primer can for application and drying times.
– Taping and Covering
Before beginning the painting process, take time to tape and cover the areas you don’t want to be painted. Use high-quality painter’s tape to protect baseboards, door frames, and window sills. Cover furniture, floors, and other items with drop cloths or plastic sheeting to prevent paint splatters and spills.
• Painting Over Old Paint
Once the surface is appropriately prepared, you are ready to paint over the old paint. Use high-quality paint and brushes or rollers to ensure a smooth application and professional-looking result.
Apply the paint in thin, even coats, allowing the paint to dry between coats according to the manufacturer’s instructions. In general, two coats of paint should suffice, but additional coats may be necessary depending on the type of paint and the color being applied.
Following these steps will help ensure a successful painting project and a beautiful, long-lasting finish. Remember, thorough preparation is the key to achieving professional results when painting over old paint.
Step | Description |
|---|---|
1 | Clean the surface |
2 | Remove any loose or peeling paint |
3 | Sand the surface |
4 | Fill and repair any holes or imperfections |
5 | Apply a primer |
6 | Paint the surface with the desired paint |
Pre-Painting Wall Preparation by Painters
The simple answer is yes. Professional painters always prep walls before painting. In fact, wall preparation is an essential step in the overall painting process with a significant impact on the final outcome.
• Importance of Wall Prepping
Wall preparation serves multiple purposes. Firstly, it ensures a smooth, even surface for the paint to adhere to. It also uncovers and rectifies any existing surface flaws, such as cracks, holes, or peeling paint, greatly enhancing the finished appearance.
Additionally, proper wall prep enhances the paint’s durability, prolonging its lifespan.
Prepping walls before painting is critical, and here are a few important reasons why:
– Better Paint Adhesion
A clean and well-prepped surface allows the paint to bond more effectively with the wall. Inadequate or skipped wall prep can lead to paint peeling, flaking, or an overall uneven appearance.
– Enhanced Durability
Walls that are properly prepped and primed have a greater resistance to damage from wear and tear, moisture, and other external factors, ensuring long-lasting paint coverage.
– Improved Aesthetics
Prepping walls before painting removes imperfections like nail holes, cracks, and dents, ensuring a seamless, professionally finished look.
• Wall Prepping Methods
Before diving into specific wall-prepping techniques, it is important to mention that preparation methods may vary depending on the wall type and its existing condition. However, here are some common methods used by professional painters:
– Wall Cleaning
Paint does not adhere well to dirt, grease, or other contaminants. Thus, it is necessary to clean the walls before painting. A simple solution of warm water and mild dish soap is often sufficient when applied with a sponge or cloth.
Tougher stains may require specialized cleaning solutions. Remember to rinse the walls with clean water and allow adequate time to dry.
– Repairing Damages
Any pre-existing damage should be repaired before painting. Holes and dents may need filling with drywall compound, while cracks should be patched or caulked. Once repairs are complete and dry, they should be sanded for a smooth finish.
– Sanding the Wall Surface
Sanding is an essential step that helps create a smooth, paint-ready surface. A medium- to fine-grit sandpaper is effective for most interior walls. Sanding also helps remove any leftover traces of dirt or grease, ensuring optimal paint adhesion.
– Priming the Wall
Priming the wall is essential for a professional-looking finish. A good quality primer helps conceal the existing paint color, enhances color vibrancy, and improves overall durability.
Primer is especially important when transitioning from dark to light colors or applying paint to a porous surface, such as bare wood or new drywall.
• Tips for Effective Wall Prepping
While wall prepping might seem like a straightforward task, there are a few key tips to ensure optimal results:
– Use the Right Tools
Invest in quality tools to make the job easier and more efficient. A quality brush or roller, paint scraper, sandpaper, and other necessary tools will enhance your wall-prep experience.
– Protect the Surrounding Area
Take time to lay down drop cloths, cover furniture, and mask off fixtures or trim to prevent damage during wall prep and painting. This extra step will save time and effort during the post-painting clean-up.
– Use Proper Safety Precautions
Always protect yourself during wall preparation. Wear a dust mask, safety glasses, and gloves as needed, and ensure proper ventilation when using chemical cleaners or paint.
– Test Your Paint
Once the walls are prepped, it is wise to test your chosen paint on a discrete area before painting the entire room. This allows you to observe how the paint color and finish appear in your specific lighting situation.
By following the above-mentioned steps and tips, you set yourself up for success in your painting project. Proper wall preparation is essential for a professional-looking finish that will stand the test of time.
Cleaning Tips for Walls Before Touch-Up Paint
A well-maintained home with freshly painted walls can greatly enhance its aesthetic appeal. However, with time, walls can accumulate dust, dirt, and smudges, which can make them appear dirty and dull.
In order to maintain the appearance of your walls, it is important to periodically clean them before touching up the paint.
• Preparing the Cleaning Solution
The first step in the wall-cleaning process is to prepare a suitable cleaning solution. This solution should be mild in nature to avoid damaging the existing paint.
A simple mixture of dish soap and water can be used for this purpose. Fill a bucket with warm water and add a few drops of dish soap to create a soapy solution. If you are dealing with stubborn stains or grease, you can also use a mixture of white vinegar and water at a 1:1 ratio.
Note: When using vinegar, be cautious as it can dull the finish of your paint, so it is recommended to test it on a small hidden area before applying it to the entire wall.
For a more natural alternative, you can also use baking soda and water paste to achieve a similar cleaning effect.
• Preparing the Wall for Cleaning
Before you can start cleaning your walls, there are some important steps that you must follow:
- Remove furniture and wall decorations: Clear the area around the wall you will be cleaning to avoid accidents and damage to your belongings during the cleaning process.
- Lay down a drop cloth: To catch any drips, water, or debris that may fall during cleaning, placing a drop cloth along the base of the wall is essential.
- Dust the walls: Use a duster or a soft-bristled broom to gently brush away any loose dirt, dust, or cobwebs from the wall’s surface. This step will make the subsequent cleaning process more effective.
• Cleaning the Walls
Now that you’ve prepared everything, it’s time to actually clean your walls using a systematic and careful approach.
- Use a sponge or cloth: Dip a clean, non-abrasive sponge or cloth into your prepared cleaning solution and wring it out thoroughly so that it is damp but not overly saturated.
- Start at the top: Begin cleaning from the top of the wall, working your way downwards in circular motions. This prevents dirty water from dripping down and leaving streaks on the lower parts of the wall.
- Tackle stains and smudges: Pay careful attention to particularly dirty areas or stubborn stains, applying gentle pressure and repeating the cleaning process as necessary. Remember to frequently rinse your sponge or cloth in your cleaning solution to avoid spreading dirt across the wall.
- Rinse the walls: Once you’ve cleaned the entire wall, use a clean, damp sponge or cloth to gently rinse away any remaining soap residue. Skipping this step can leave behind a soapy film that will make your paint job look dull and uneven.
- Dry the walls: Finally, use a clean, lint-free cloth or towel to gently pat the walls dry. Avoid using paper towels, as they can leave behind small fibers that will interfere with your paint job.
• Touching Up the Paint
After cleaning your walls thoroughly and allowing them to dry completely, you are now ready to touch up the paint. Begin by prepping the area, which involves taping off any trim and using a drop cloth or newspaper to protect floors and furniture.
Be sure to use the same paint color and sheen as the existing paint on the walls. Apply the paint using a small brush or roller, carefully feathering out the edges to blend with the surrounding painted area. Allow the paint to dry thoroughly before removing any tape and reinstalling wall decorations.
• Conclusion
In conclusion, taking the time to properly clean your walls before touching up the paint is crucial for achieving a seamless and professional finish. By following the steps outlined in this article, you can ensure that your walls look fresh, clean, and well-maintained for years to come.
Step | Description |
|---|---|
1 | Remove dirt and cobwebs using a vacuum cleaner or soft brush. |
2 | Gently wash the walls with a mixture of warm water and mild detergent or dish soap. Be sure to wring out the cloth or sponge to avoid dripping water on the floor. |
3 | Rinse the walls with a clean, damp cloth or sponge to remove any remaining soap residue. |
4 | Allow the walls to dry completely before touching up the paint. Using a fan or dehumidifier can help speed up the drying process. |
5 | Once the walls are dry, use fine-grit sandpaper to lightly sand any rough spots or imperfections in the paint. This will help ensure a smooth, even finish when touching up. |
6 | Wipe the walls with a tack cloth to remove any dust or debris created from sanding. |
7 | Now your walls are clean and ready for touching up the paint. |